Applies to:  Workforce tenants External tenants (learn more)
In this quickstart, you use a sample web app to show you how to sign in users and call Microsoft Graph API in your workforce tenant. The sample app uses the Microsoft Authentication Library to handle authentication.
Before you begin, use the Choose a tenant type selector at the top of this page to select tenant type. Microsoft Entra ID provides two tenant configurations, workforce and external. A workforce tenant configuration is for your employees, internal apps, and other organizational resources. An external tenant is for your customer-facing apps.
Prerequisites
- An Azure account with an active subscription. If you don't already have one, Create an account for free.
- This Azure account must have permissions to manage applications. Any of the following Microsoft Entra roles include the required permissions:
- Application Administrator
- Application Developer
- A workforce tenant. You can use your Default Directory or set up a new tenant.
- Visual Studio Code or another code editor.
- Register a new app in the Microsoft Entra admin center, configured for Accounts in this organizational directory only. Refer to Register an application for more details. Record the following values from the application Overview page for later use:
- Application (client) ID
- Directory (tenant) ID
- Add the following redirect URIs using the Web platform configuration. Refer to How to add a redirect URI in your application for more details.
- Redirect URI:
http://localhost:3000/auth/redirect
- Front-channel logout URL:
https://localhost:5001/signout-callback-oidc
- Add a client secret to your app registration. Do not use client secrets in production apps. Use certificates or federated credentials instead. For more information, see add credentials to your application.
- Node.js
Clone or download sample web application
To obtain the sample application, you can either clone it from GitHub or download it as a .zip file.
Download the .zip file, then extract it to a file path where the length of the name is fewer than 260 characters or clone the repository:
To clone the sample, open a command prompt and navigate to where you wish to create the project, and enter the following command:
git clone https://github.com/Azure-Samples/ms-identity-node.git
Download the .zip file, then extract it to a file path where the length of the name is fewer than 260 characters or clone the repository:
To clone the sample, open a command prompt and navigate to where you wish to create the project, and enter the following command:
git clone https://github.com/Azure-Samples/ms-identity-docs-code-dotnet.git
Download the Python code sample then extract it to a file path where the length of the name is fewer than 260 characters or clone the repository:
To clone the sample, open a command prompt and navigate to where you wish to create the project, and enter the following command:
git clone https://github.com/Azure-Samples/ms-identity-docs-code-python/
For you to sign in users with the sample app, you need to update it with your app and tenant details:
In the ms-identity-node folder, open the App/.env file, then replace the following placeholders:
| Variable |
Description |
Example(s) |
Enter_the_Cloud_Instance_Id_Here |
The Azure cloud instance in which your application is registered |
https://login.microsoftonline.com/ (include the trailing forward-slash) |
Enter_the_Tenant_Info_here |
Tenant ID or Primary domain |
contoso.microsoft.com or aaaabbbb-0000-cccc-1111-dddd2222eeee |
Enter_the_Application_Id_Here |
Client ID of the application you registered |
00001111-aaaa-2222-bbbb-3333cccc4444 |
Enter_the_Client_Secret_Here |
Client secret of the application you registered |
A1b-C2d_E3f.H4i,J5k?L6m!N7o-P8q_R9s.T0u |
Enter_the_Graph_Endpoint_Here |
The Microsoft Graph API cloud instance that your app calls |
https://graph.microsoft.com/ (include the trailing forward-slash) |
Enter_the_Express_Session_Secret_Here |
A random string of characters used to sign the Express session cookie |
A1b-C2d_E3f.H4... |
After you make changes, your file should look similar to the following snippet:
CLOUD_INSTANCE=https://login.microsoftonline.com/
TENANT_ID=aaaabbbb-0000-cccc-1111-dddd2222eeee
CLIENT_ID=00001111-aaaa-2222-bbbb-3333cccc4444
CLIENT_SECRET=A1b-C2d_E3f.H4...

REDIRECT_URI=http://localhost:3000/auth/redirect
POST_LOGOUT_REDIRECT_URI=http://localhost:3000

GRAPH_API_ENDPOINT=https://graph.microsoft.com/

EXPRESS_SESSION_SECRET=6DP6v09eLiW7f1E65B8k
In your IDE, open the project folder, ms-identity-docs-code-dotnet\web-app-aspnet, containing the sample.
Open appsettings.json and replace the file contents with the following snippet;
{
"AzureAd": {
  "Instance": "https://login.microsoftonline.com/",
  "TenantId": "Enter the tenant ID obtained from the Microsoft Entra admin center",
  "ClientId": "Enter the client ID obtained from the Microsoft Entra admin center",
  "ClientCredentials": [
    {
      "SourceType": "StoreWithThumbprint",
      "CertificateStorePath": "CurrentUser/My",
      "CertificateThumbprint": "Enter the certificate thumbprint obtained the Microsoft Entra admin center"
    }
  ],
  "CallbackPath": "/signin-oidc"
},
  "DownstreamApis": {
    "MicrosoftGraph" :{
      "BaseUrl": "https://graph.microsoft.com/v1.0/",
      "RelativePath": "me",
      "Scopes": [
        "user.read"
      ]
   }
  },
  "Logging": {
    "LogLevel": {
      "Default": "Information",
      "Microsoft.AspNetCore": "Warning"
    }
  },
  "AllowedHosts": "*"
}
TenantId - The identifier of the tenant where the application is registered. Replace the text in quotes with the Directory (tenant) ID that was recorded earlier from the overview page of the registered application.ClientId - The identifier of the application, also referred to as the client. Replace the text in quotes with the Application (client) ID value that was recorded earlier from the overview page of the registered application.ClientCertificates - A self-signed certificate is used for authentication in the application. Replace the text of the CertificateThumbprint with the thumbprint of the certificate that was previously recorded.
Open the application you downloaded in an IDE and navigate to root folder of the sample app.
cd flask-web-app
Create an .env file in the root folder of the project using .env.sample.entra-id as a guide.
# The following variables are required for the app to run.
CLIENT_ID=<Enter_your_client_id>
CLIENT_SECRET=<Enter_your_client_secret>
AUTHORITY=<Enter_your_authority_url>
- Set the value of
CLIENT_ID to the Application (client) ID for the registered application, available on the overview page.
- Set the value of
CLIENT_SECRET to the client secret you created in the Certificates & Secrets for the registered application.
- Set the value of
AUTHORITY to a https://login.microsoftonline.com/<TENANT_GUID>. The Directory (tenant) ID is available on the app registration overview page.
The environment variables are referenced in app_config.py, and are kept in a separate .env file to keep them out of source control. The provided .gitignore file prevents the .env file from being checked in.
Run and test sample web app
You've configured your sample app. You can proceed to run and test it.
To start the server, run the following commands from within the project directory:
cd App
npm install
npm start
Go to http://localhost:3000/.
Select Sign in to start the sign-in process.
The first time you sign in, you're prompted to provide your consent to allow the application to sign you in and access your profile. After you're signed in successfully, you'll be redirected back to the application home page.
How the app works
The sample hosts a web server on localhost, port 3000. When a web browser accesses this address, the app renders the home page. Once the user selects Sign in, the app redirects the browser to Microsoft Entra sign-in screen, via the URL generated by the MSAL Node library. After user consents, the browser redirects the user back to the application home page, along with an ID and access token.
In your project directory, use the terminal to enter the following commands:
cd ms-identity-docs-code-dotnet/web-app-aspnet
dotnet run
Copy the https URL that appears in the terminal, for example, https://localhost:5001, and paste it into a browser. We recommend using a private or incognito browser session.
Follow the steps and enter the necessary details to sign in with your Microsoft account. You're requested to provide an email address so a one time passcode can be sent to you. Enter the code when prompted.
The application requests permission to maintain access to data you have given it access to, and to sign you in and read your profile. Select Accept. The following screenshot appears. It indicates that you're signed-in to the application and are viewing your profile details from the Microsoft Graph API.

Sign out from the application
- Find the Sign out link in the top right corner of the page, and select it.
- You're prompted to pick an account to sign out from. Select the account you used to sign in.
- A message appears indicating that you signed out. You can now close the browser window.
Create a virtual environment for the app:
- For Windows, run the following commands:
py -m venv .venv
.venv\scripts\activate
- For macOS/Linux, run the following commands:
python3 -m venv .venv
source .venv/bin/activate
Install the requirements using pip:
pip install -r requirements.txt
Run the app from the command line. Ensure your app is running on the same port as the redirect URI you configured earlier.
flask run --debug --host=localhost --port=5000
Copy the https URL that appears in the terminal, for example, https://localhost:5000, and paste it into a browser. We recommend using a private or incognito browser session.
Follow the steps and enter the necessary details to sign in with your Microsoft account. You're requested to provide an email address and password to sign in.
The application requests permission to maintain access to data you allow access to, and to sign you in and then read your profile, as shown in the screenshot. Select Accept.
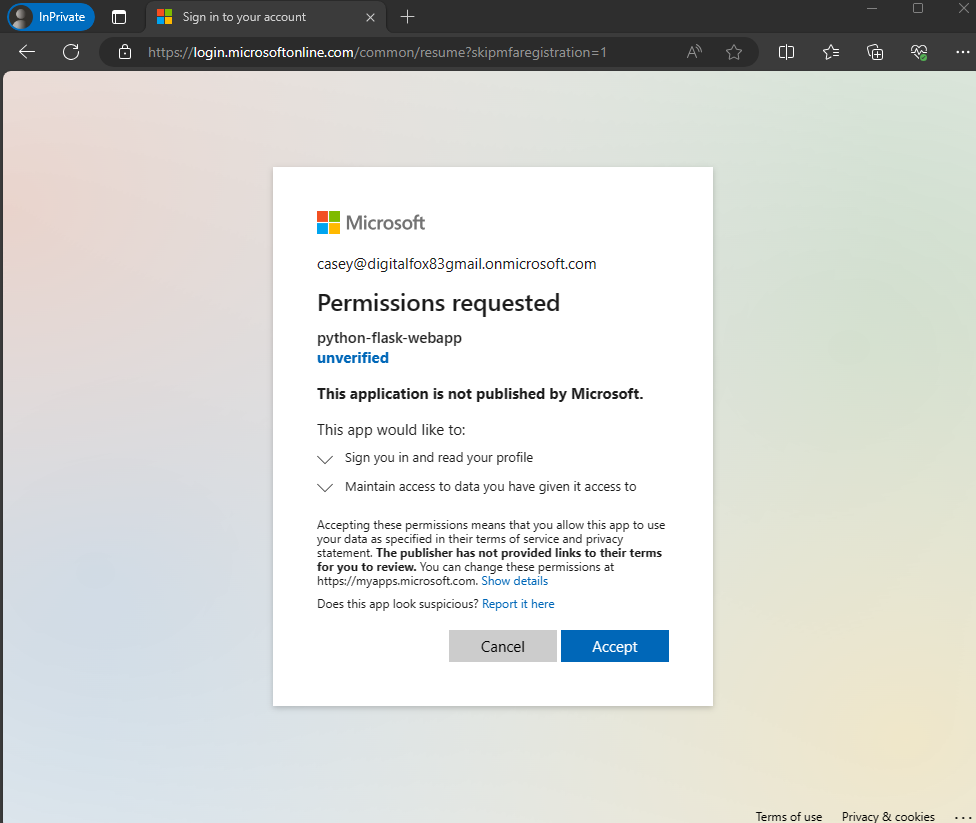
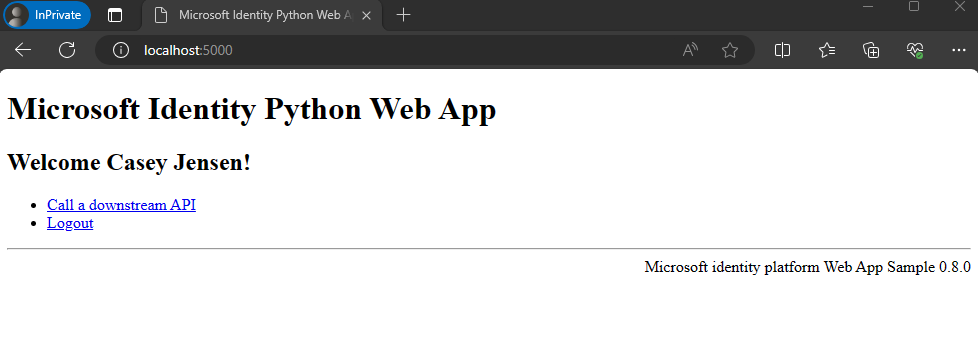
The following screenshot appears, which indicates that you've successfully signed in to the application.
How the app works
The following diagram demonstrates how the sample app works:
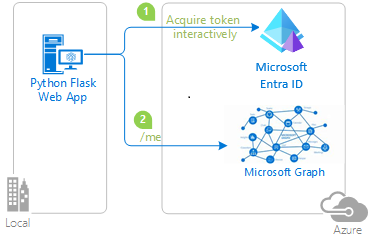
The application uses the identity package to obtain an access token from the Microsoft identity platform. This package is built on top of the Microsoft Authentication Library (MSAL) for Python to simplify authentication and authorization in web apps.
The access token you obtain in the previous step is used as a bearer token to authenticate the user when calling the Microsoft Graph API.
Related content
In this quickstart, you use a sample web app to show you how to sign in users in your external tenant. The sample app uses the Microsoft Authentication Library to handle authentication.
Before you begin, use the Choose a tenant type selector at the top of this page to select tenant type. Microsoft Entra ID provides two tenant configurations, workforce and external. A workforce tenant configuration is for your employees, internal apps, and other organizational resources. An external tenant is for your customer-facing apps.
Prerequisites
- An Azure account with an active subscription. If you don't already have one, Create an account for free.
- This Azure account must have permissions to manage applications. Any of the following Microsoft Entra roles include the required permissions:
- Application Administrator
- Application Developer
- An external tenant. To create one, choose from the following methods:
- A user flow. For more information, refer to create self-service sign-up user flows for apps in external tenants. This user flow can be used for multiple applications.
- Visual Studio Code or another code editor.
Clone or download sample web application
To obtain the sample application, you can either clone it from GitHub or download it as a .zip file:
To clone the sample, open a command prompt and navigate to where you wish to create the project, and enter the following command:
git clone https://github.com/Azure-Samples/ms-identity-ciam-javascript-tutorial.git
Alternatively, download the sample .zip file, then extract it to a file path where the length of the name is fewer than 260 characters.
Install project dependencies
Open a console window, and change to the directory that contains the Node.js sample app:
cd 1-Authentication\5-sign-in-express\App
Run the following commands to install app dependencies:
npm install
To obtain the sample application, you can either clone it from GitHub or download it as a .zip file.
To clone the sample, open a command prompt and navigate to where you wish to create the project, and enter the following command:
git clone https://github.com/Azure-Samples/ms-identity-ciam-dotnet-tutorial.git
Download the .zip file. Extract it to a file path where the length of the name is fewer than 260 characters.
To obtain the sample application, you can either clone it from GitHub or download it as a .zip file.
To clone the sample, open a command prompt and navigate to where you wish to create the project, and enter the following command:
git clone https://github.com/Azure-Samples/ms-identity-docs-code-python.git
Download the .zip file. Extract it to a file path where the length of the name is fewer than 260 characters.
Install project dependencies
Open a console window, and change to the directory that contains the Flask sample web app:
cd django-web-app
Set up virtual environment:
- For Windows, run the following commands:
py -m venv .venv
.venv\scripts\activate
- For macOS/Linux, run the following commands:
python3 -m venv .venv
source .venv/bin/activate
To install app dependencies, run the following commands:
python3 -m pip install -r requirements.txt
To obtain the sample application, you can either clone it from GitHub or download it as a .zip file.
To clone the sample, open a command prompt and navigate to where you wish to create the project, and enter the following command:
git clone https://github.com/Azure-Samples/ms-identity-docs-code-python.git
Download the .zip file. Extract it to a file path where the length of the name is fewer than 260 characters.
Install project dependencies
Open a console window, and change to the directory that contains the Flask sample web app:
cd flask-web-app
Set up virtual environment:
- For Windows, run the following commands:
py -m venv .venv
.venv\scripts\activate
- For macOS/Linux, run the following commands:
python3 -m venv .venv
source .venv/bin/activate
To install app dependencies, run the following commands:
python3 -m pip install -r requirements.txt
For you to sign in users with the sample app, you need to update it with your app and tenant details:
In your code editor, open App\authConfig.js file.
Find the placeholder:
Enter_the_Application_Id_Here and replace it with the Application (client) ID of the app you registered earlier.Enter_the_Tenant_Subdomain_Here and replace it with the Directory (tenant) subdomain. For example, if your tenant primary domain is contoso.onmicrosoft.com, use contoso. If you don't have your tenant name, learn how to read your tenant details.Enter_the_Client_Secret_Here and replace it with the app secret value you copied earlier.
Navigate to the root directory that contains the ASP.NET Core sample app:
cd 1-Authentication\1-sign-in-aspnet-core-mvc
Open the appsettings.json file.
In Authority, find Enter_the_Tenant_Subdomain_Here and replace it with the subdomain of your tenant. For example, if your tenant primary domain is caseyjensen@onmicrosoft.com, the value you should enter is casyjensen.
Find the Enter_the_Application_Id_Here value and replace it with the application ID (clientId) of the app you registered in the Microsoft Entra admin center.
Replace Enter_the_Client_Secret_Here with the client secret value you set up.
Open your project files on Visual Studio Code or the editor you're using.
Create an .env file in the root folder of the project using .env.sample.external-id file as a guide.
In your .env file, provide the following environment variables:
CLIENT_ID which is the Application (client) ID of the app you registered earlier.CLIENT_SECRET which is the app secret value you copied earlier.AUTHORITY which is the URL that identifies a token authority. It should be of the format https://{subdomain}.ciamlogin.com/{subdomain}.onmicrosoft.com. Replace subdomain with the Directory (tenant) subdomain. For example, if your tenant primary domain is contoso.onmicrosoft.com, use contoso. If you don't have your tenant subdomain, learn how to read your tenant details.REDIRECT_URI which should be similar to the redirect URI you registered earlier should match your configuration.
Open your project files on Visual Studio Code or the editor you're using.
Create an .env file in the root folder of the project using .env.sample.external-id file as a guide.
In your .env file, provide the following environment variables:
CLIENT_ID which is the Application (client) ID of the app you registered earlier.CLIENT_SECRET which is the app secret value you copied earlier.AUTHORITY which is the URL that identifies a token authority. It should be of the format https://{subdomain}.ciamlogin.com/{subdomain}.onmicrosoft.com. Replace subdomain with the Directory (tenant) subdomain. For example, if your tenant primary domain is contoso.onmicrosoft.com, use contoso. If you don't have your tenant subdomain, learn how to read your tenant details.
Confirm that the redirect URI is well configured. The redirect URI you registered earlier should match your configuration. This sample by default sets the redirect URI path to /getAToken. This configuration is in the app_config.py file as REDIRECT_PATH.
Run and test sample web app
You can now test the sample Node.js web app. You need to start the Node.js server and access it through your browser at http://localhost:3000.
In your terminal, run the following command:
npm start
Open your browser, then go to http://localhost:3000. You should see the page similar to the following screenshot:
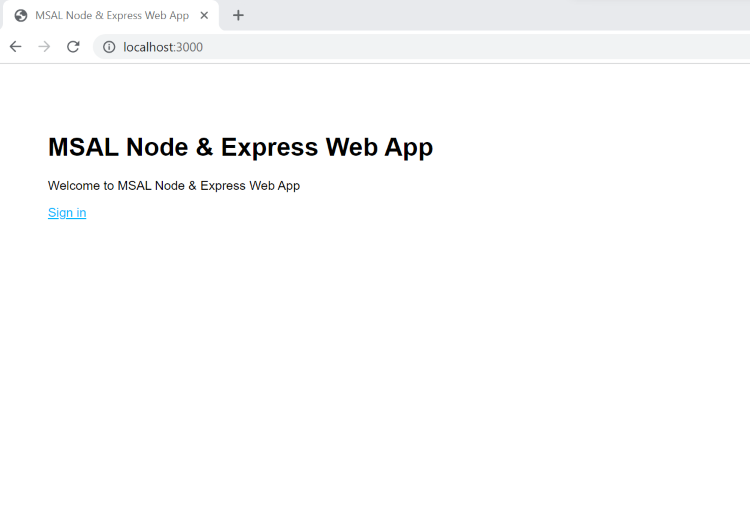
After the page completes loading, select Sign in when prompted.
On the sign-in page, type your Email address, select Next, type your Password, then select Sign in. If you don't have an account, select No account? Create one link, which starts the sign-up flow.
If you choose the sign-up option, after filling in your email, one-time passcode, new password, and more account details, you complete the whole sign-up flow. You see a page similar to the following screenshot. You see a similar page if you choose the sign-in option.
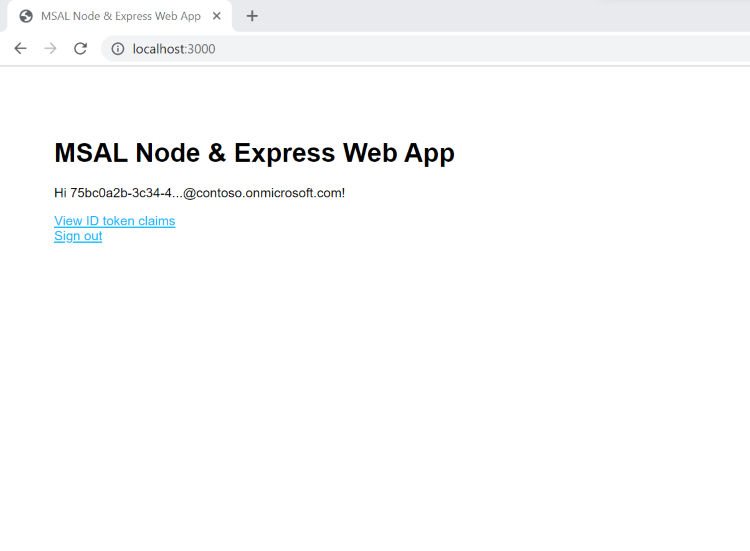
Select Sign out to sign the user out of the web app or select View ID token claims to view ID token claims returned by Microsoft Entra.
How it works
When users select the Sign in link, the app initiates an authentication request and redirects users to Microsoft Entra External ID. On the sign-in or sign-up page that appears, once a user successfully signs in, or creates an account, Microsoft Entra External ID returns an ID token to the app. The app validates the ID token, reads the claims, and returns a secure page to the users.
When the users select the Sign out link, the app clears its session, then redirect the user to Microsoft Entra External ID sign-out endpoint to notify it that the user has signed out.
If you want to build an app similar to the sample you've run, complete the steps in Sign in users in your own Node.js web application article.
From your shell or command line, execute the following commands:
dotnet run
Open your web browser and navigate to https://localhost:7274.
Sign-in with an account registered to the external tenant.
Once signed in the display name is shown next to the Sign out button as shown in the following screenshot.
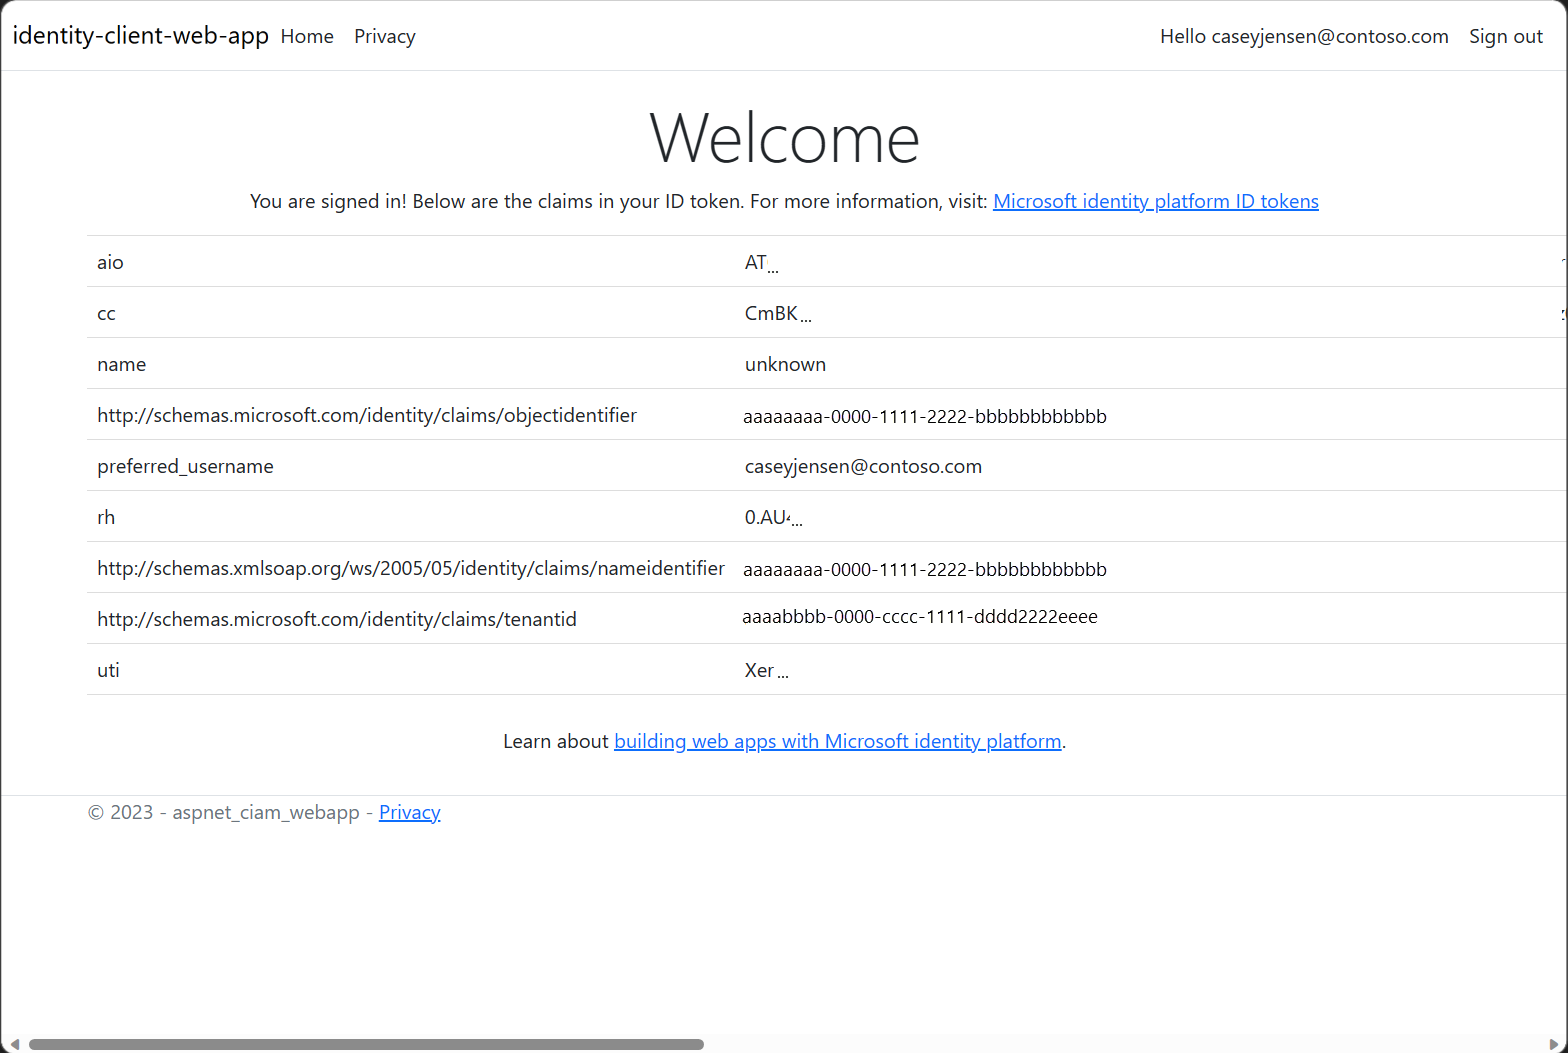
To sign out from the application, select the Sign out button.
Run the app to see the sign-in experience at play.
In your terminal, run the following command:
python manage.py runserver localhost:5000
You can use a port number of your choice.
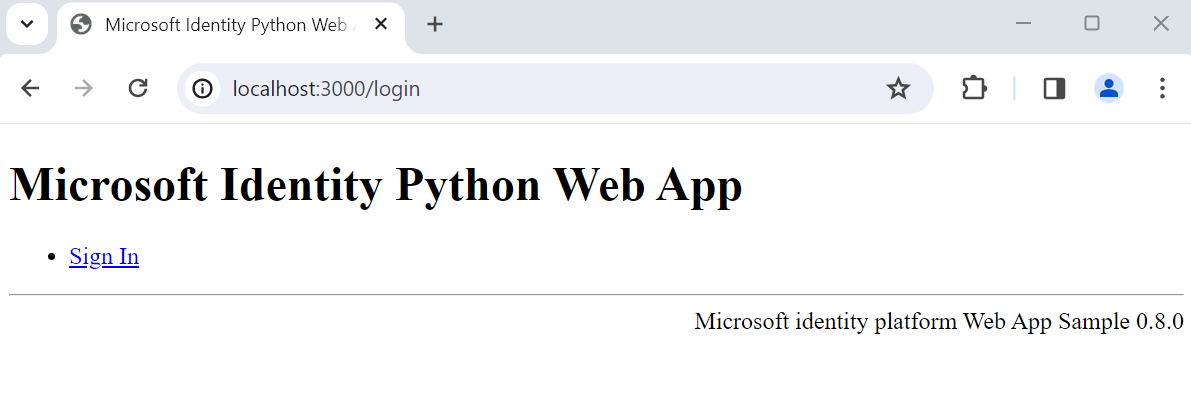
Open your browser, then go to http://localhost:5000. You should see a page similar to the following screenshot:
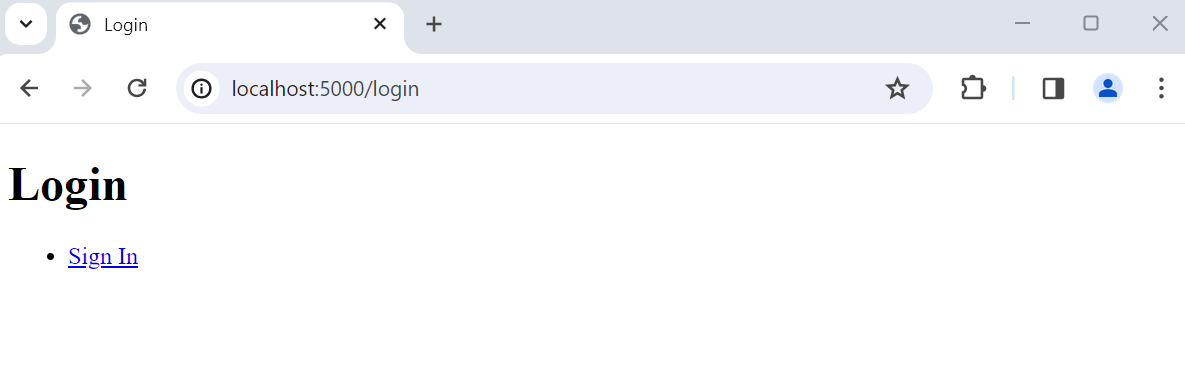
After the page completes loading, select Sign In link. You're prompted to sign in.
On the sign-in page, type your Email address, select Next, type your Password, then select Sign in. If you don't have an account, select No account? Create one link, which starts the sign-up flow.
If you choose the sign-up option, you go through the sign-up flow. Fill in your email, one-time passcode, new password, and more account details to complete the whole sign-up flow.
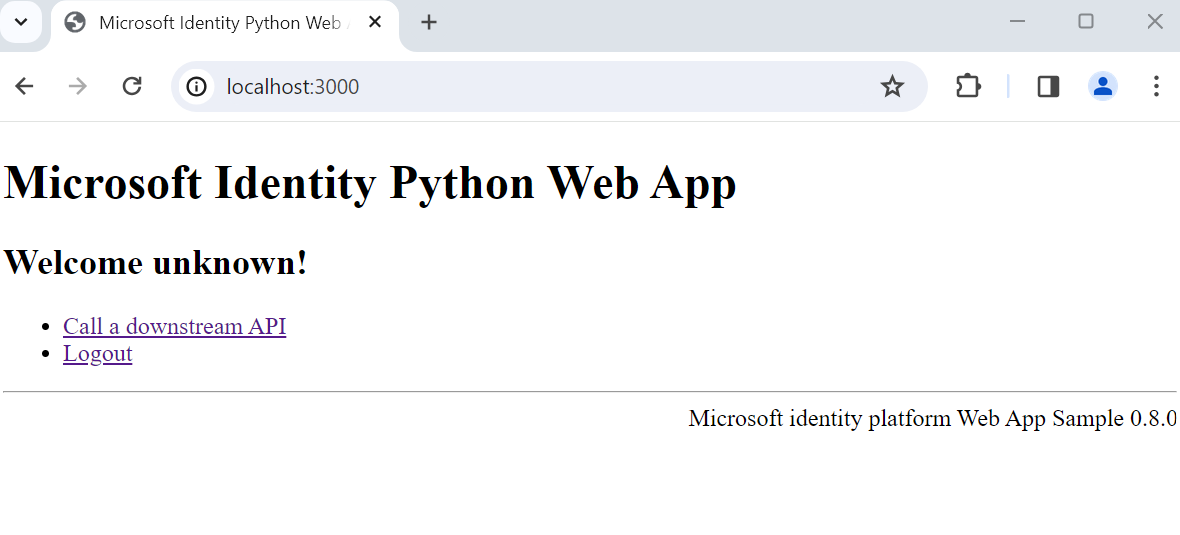
After you sign in or sign up, you're redirected back to the web app. You see a page that looks similar to the following screenshot:
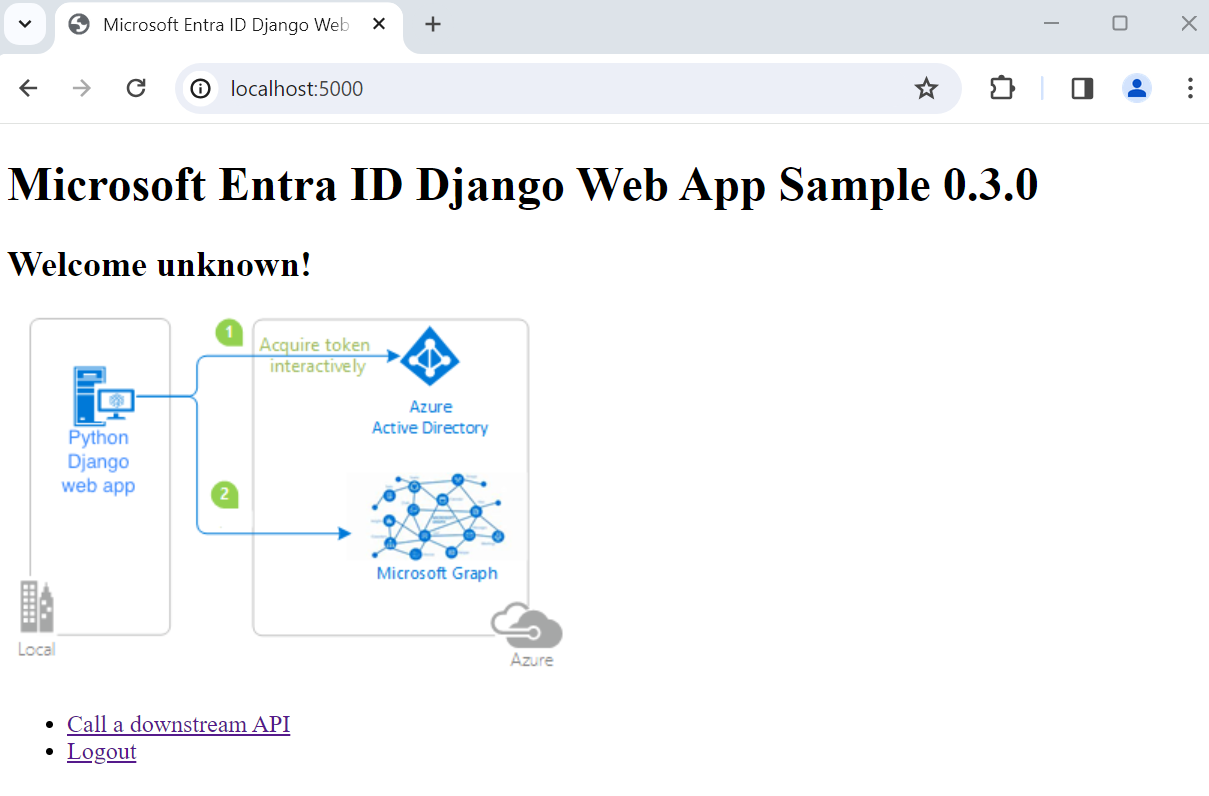
Select Logout to sign the user out of the web app or select Call a downstream API to make a call to a Microsoft Graph endpoint.
How it works
When users select the Sign in link, the app initiates an authentication request and redirects users to Microsoft Entra External ID. A user then signs in or signs up page on the page that appears. After providing in the required credentials and consenting to required scopes, Microsoft Entra External ID redirects the user back to the web app with an authorization code. The web app then uses this authorization code to acquire a token from Microsoft Entra External ID.
When the users select the Logout link, the app clears its session, the redirect the user to Microsoft Entra External ID sign-out endpoint to notify it that the user has signed out. The user is then redirected back to the web app.
Run the app to see the sign-in experience at play.
In your terminal, run the following command:
python3 -m flask run --debug --host=localhost --port=3000
You can use the port of your choice. This should be similar to the port of the redirect URI you registered earlier.
Open your browser, then go to http://localhost:3000. You should see the page similar to the following screenshot:
After the page completes loading, select Sign In link. You're prompted to sign in.
On the sign-in page, type your Email address, select Next, type your Password, then select Sign in. If you don't have an account, select No account? Create one link, which starts the sign-up flow.
If you choose the sign-up option, you'll go through the sign-uo flow. Fill in your email, one-time passcode, new password and more account details to complete the whole sign-up flow.
After you sign in or sign up, you're redirected back to the web app. You'll see a page that looks similar to the following screenshot:
Select Logout to sign the user out of the web app or select Call a downstream API to make a call to a Microsoft Graph endpoint.
How it works
When users select the Sign in link, the app initiates an authentication request and redirects users to Microsoft Entra External ID. A user then signs in or signs up page on the page that appears. After providing in the required credentials and consenting to required scopes, Microsoft Entra External ID redirects the user back to the web app with an authorization code. The web app then uses this authorization code to acquire a token from Microsoft Entra External ID.
When the users select the Logout link, the app clears its session, the redirect the user to Microsoft Entra External ID sign-out endpoint to notify it that the user has signed out. The user is then redirected back to the web app.
Related content
