Note
Access to this page requires authorization. You can try signing in or changing directories.
Access to this page requires authorization. You can try changing directories.
Before publishing your OpenID Connect (OIDC) multitenant application to the Microsoft Entra app gallery, you must validate that your sign-in implementation meets gallery requirements. Validation is a self-service step that confirms your app is ready to publish and generates a Test ID required for submission.
The Microsoft Entra App Validator evaluates your OIDC multitenant sign-in flow against Microsoft Entra app gallery requirements while you sign in to your application.
After validation, you'll have:
- A validation report highlighting required and recommended fixes
- A Test ID required to publish your app to the Microsoft Entra app gallery
Prerequisites
Before starting validation, ensure the following are already true:
- Your app is registered as a multitenant application in Microsoft Entra ID.
- OIDC sign-in is implemented and working correctly.
- Your app is deployed and accessible via a public URL.
- Redirect URIs, scopes, and permissions are configured.
- You can successfully sign in with a Microsoft account.
- You're signed out of any existing sessions in your application.
- A gallery submission ID, create your gallery submission first (see below). This will be required before you submit your validation results.
Important
Validation fails if these prerequisites aren't met. Complete and test your OIDC implementation before attempting validation.
Your gallery submission ID
Before you start validation, create your Microsoft Entra gallery submission and copy its Submission ID. You will need this ID to submit your validation results.
To find your submission ID:
In the Microsoft Entra admin center, start the process to publish your application to the Microsoft Entra gallery.
Select Publish your application. If you already have a draft submission, select Your published applications instead.

Go to the Integration type step.

Copy the value shown under Your Submission ID.
Your submission ID is a GUID. Keep this ID available while you run the validator.
When the validator asks for a submission ID:
- If the submission belongs to the tenant you're signed in to, select it from Pick one of your submissions.
- If the submission belongs to a different tenant, paste the submission ID into the field instead.
If no submissions appear in the list, you can still paste the ID manually.
Important
You can't submit validation results without a valid gallery submission ID.
Install the Microsoft Entra App Validator browser extension
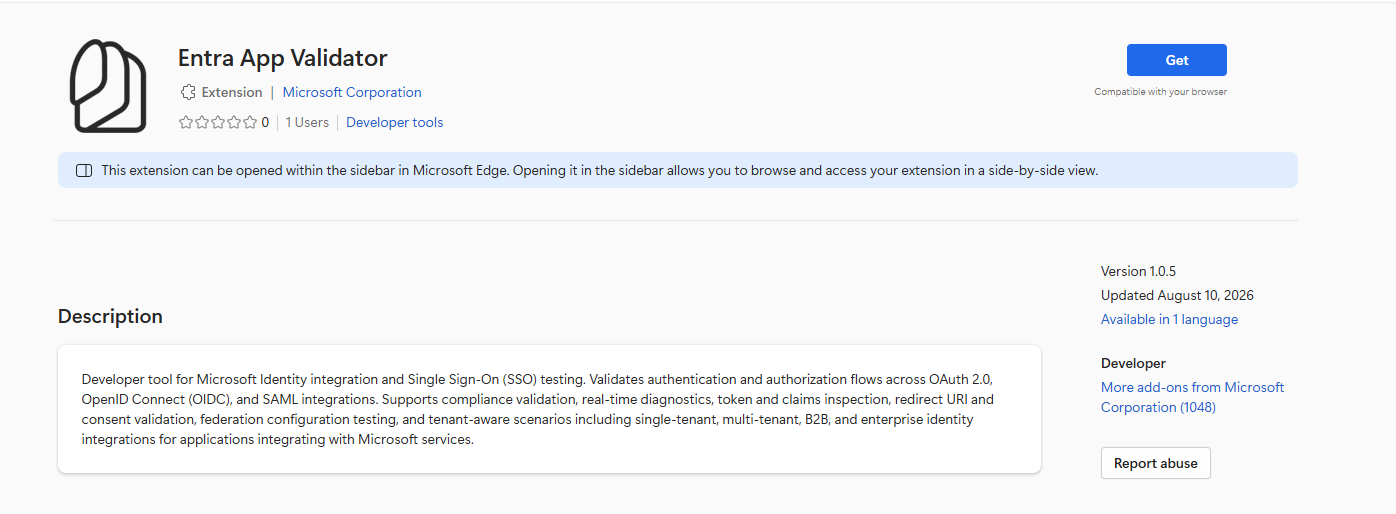
The Microsoft Entra App Validator browser extension is required to perform validation.
- Open Microsoft Edge.
- Go to Get Entra App Validator.
- Select Get to begin installation.
- When prompted, select Add extension.
- Verify that Entra App Validator appears in the Extensions list and is enabled.
Start a new validation session
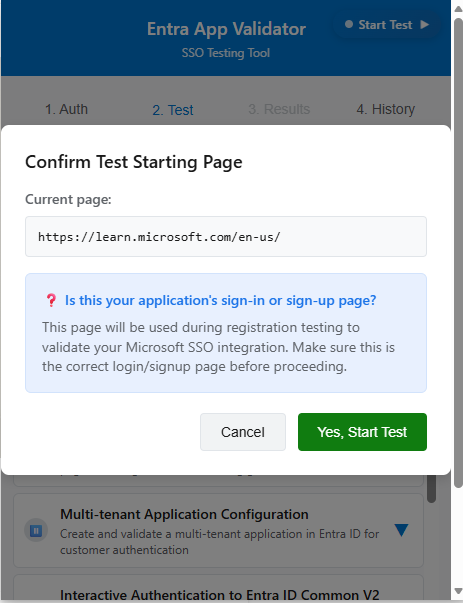
Start a validation session by signing in to the extension and confirming your application's sign-in page as the starting point.
- Open a new browser tab and go to your application's sign-in page. This should be the same page customers use when signing in through Microsoft Entra ID.
- If you're already signed in, sign out completely to ensure a clean validation session.
- Select the Entra App Validator extension icon from the browser toolbar.
- Sign in to the extension using your Microsoft account.
- Select Start test.
- When prompted, confirm the starting page and select Yes, Start test.
The extension initializes the validation session and lists the checks it performs.
Run the OIDC authentication flow
Sign in with a Microsoft account so the validator can capture and evaluate your application's OIDC authentication flow.
- The validator checks that your app exposes a Sign in with Microsoft entry point. This is required for OIDC-based gallery apps.
- When prompted, select Authenticate.
- Complete the Microsoft sign-in process using your Microsoft account.
During authentication, the validator evaluates:
- Microsoft sign-in entry point configuration
- Tenant endpoint usage (
/commonor/organizationsfor multitenant apps) - OIDC v2.0 endpoint compliance
- Required scopes, including
openidandprofile - Authorization request structure and parameters
Tip
The most common validation failures are single-tenant endpoints, missing required scopes, and mismatched redirect URIs. These issues must be fixed before publishing.
Review the validation report
After authentication completes:
- In the Microsoft Entra App Validator extension, select Preview report.
- Review the following sections:
- Tests executed – Validation checks that ran
- Tests passed – Requirements your app met
- Issues identified – Blocking and nonblocking issues
- Authentication data captured – Details from the OIDC flow
- Recommendations – Guidance for resolving issues
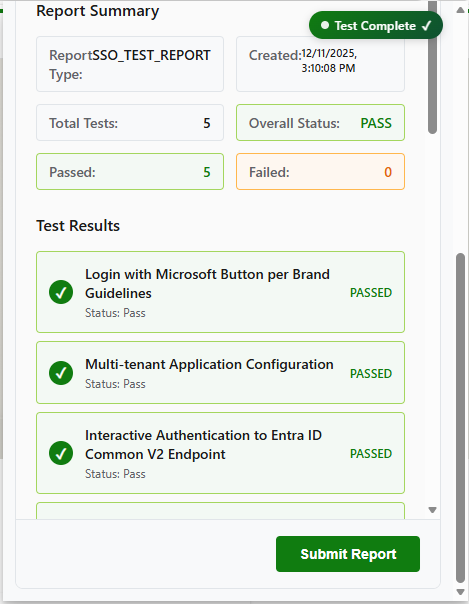
If the report shows blocking issues, resolve them in your app and rerun validation until all required checks pass.
Important
Blocking issues must be resolved before publishing. Nonblocking issues are recommendations and don't prevent submission.
Declare how your app identifies users
Before you can submit, the validator asks which identifier from the token your application uses to match the signed-in user to a user record in its own system. Select all identifier types that your application uses, such as object ID (oid), User Principal Name (UPN), email address, employee ID, on-premises SAM account name, or a named custom claim.
Why this is asked
Matching a user only on a mutable, self-assertable value, such as an email address, can create an account takeover risk. If an attacker obtains an email address that was previously associated with another user and the application relies only on that email address for account matching, the attacker could be matched to the existing application account. To reduce this risk, the validator does not accept a mutable identifier by itself. If your application uses a mutable identifier, select it together with an immutable identifier that your application also uses to identify the user.
If you select Custom claim, you must provide the name of the claim. A named custom claim is sufficient on its own, and no additional identifier is required.
Submit validation and obtain a Test ID
Once your application passes all required validation checks:
- In the validation report, select Submit.
- A unique Test ID is generated as proof of successful validation.
- Save the Test ID. You need it during the gallery publishing process.
Test IDs are time-bound and expire after two weeks.
Important
Without a valid Test ID, you can't proceed with Microsoft Entra app gallery publishing.
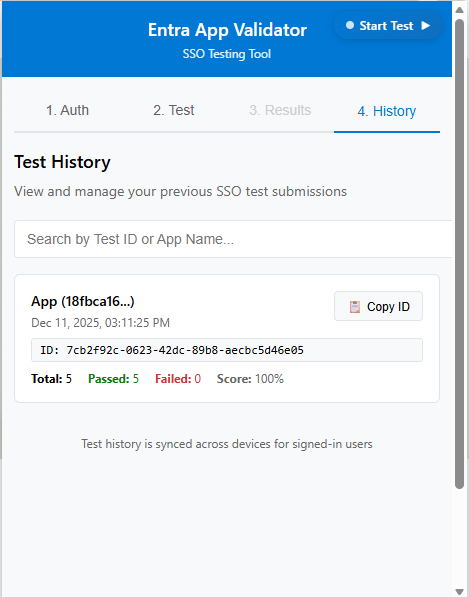
With validation complete and a Test ID generated, you're ready to proceed with publishing your app to the Microsoft Entra app gallery. If validation fails, review the report, resolve blocking issues, and rerun validation before continuing.