Note
Access to this page requires authorization. You can try signing in or changing directories.
Access to this page requires authorization. You can try changing directories.
This article describes the steps you need to perform in both G Suite and Microsoft Entra ID to configure automatic user provisioning. When configured, Microsoft Entra ID automatically provisions and deprovisions users and groups to G Suite using the Microsoft Entra provisioning service. For important details on what this service does, how it works, and frequently asked questions, see Automate user provisioning and deprovisioning to SaaS applications with Microsoft Entra ID.
Note
This article describes a connector built on top of the Microsoft Entra user Provisioning Service. For important details on what this service does, how it works, and frequently asked questions, see Automate user provisioning and deprovisioning to SaaS applications with Microsoft Entra ID.
Capabilities supported
- Create users in G Suite
- Remove users in G Suite when they don't require access anymore (note: removing a user from the sync scope doesn't result in deletion of the object in GSuite)
- Keep user attributes synchronized between Microsoft Entra ID and G Suite
- Provision groups and group memberships in G Suite
- Single sign-on to G Suite (recommended)
Prerequisites
The scenario outlined in this article assumes that you already have the following prerequisites:
- A Microsoft Entra user account with an active subscription. If you don't already have one, you can Create an account for free.
- One of the following roles:
- A G Suite tenant
- A user account on a G Suite with Admin permissions.
Step 1: Plan your provisioning deployment
- Learn about how the provisioning service works.
- Determine who is in scope for provisioning.
- Determine what data to map between Microsoft Entra ID and G Suite.
Step 2: Configure G Suite to support provisioning with Microsoft Entra ID
Before configuring G Suite for automatic user provisioning with Microsoft Entra ID, you need to enable SCIM provisioning on G Suite.
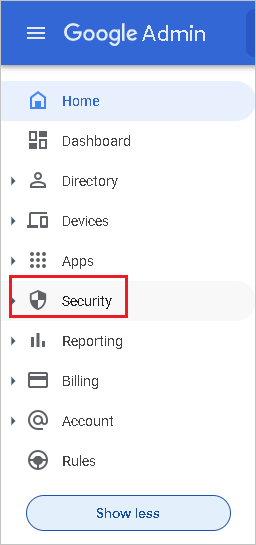
Sign in to the G Suite Admin console with your administrator account, then select Main menu and then select Security. If you don't see it, it might be hidden under the Show More menu.

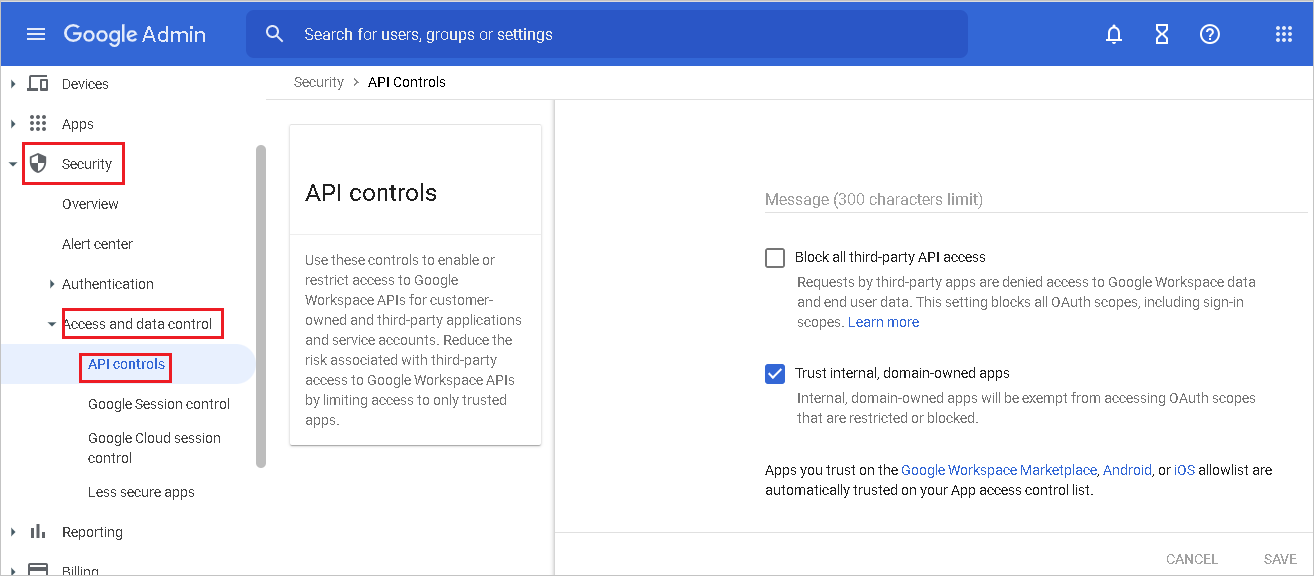
Navigate to Security -> Access and data control -> API Controls .Select the check box Trust internal,domain-owned apps and then select SAVE
Important
For every user that you intend to provision to G Suite, their user name in Microsoft Entra ID must be tied to a custom domain. For example, user names that look like bob@contoso.onmicrosoft.com aren't accepted by G Suite. On the other hand, bob@contoso.com is accepted. You can change an existing user's domain by following the instructions here.
Once you add and verify your desired custom domains with Microsoft Entra ID, you must verify them again with G Suite. To verify domains in G Suite, refer to the following steps:
In the G Suite Admin Console, navigate to Account -> Domains -> Manage Domains.

In the Manage Domain page, select Add a domain.

In the Add Domain page, type in the name of the domain that you want to add.
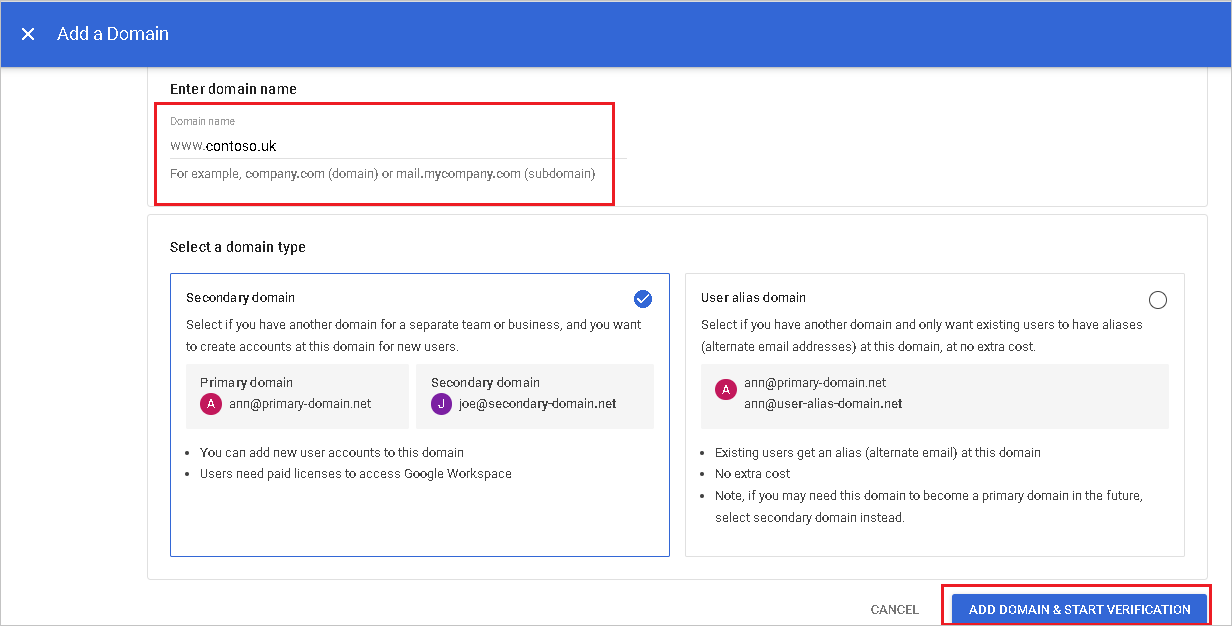
Select ADD DOMAIN & START VERIFICATION. Then follow the steps to verify that you own the domain name. For comprehensive instructions on how to verify your domain with Google, see Verify your site ownership.
Repeat the preceding steps for any more domains that you intend to add to G Suite.
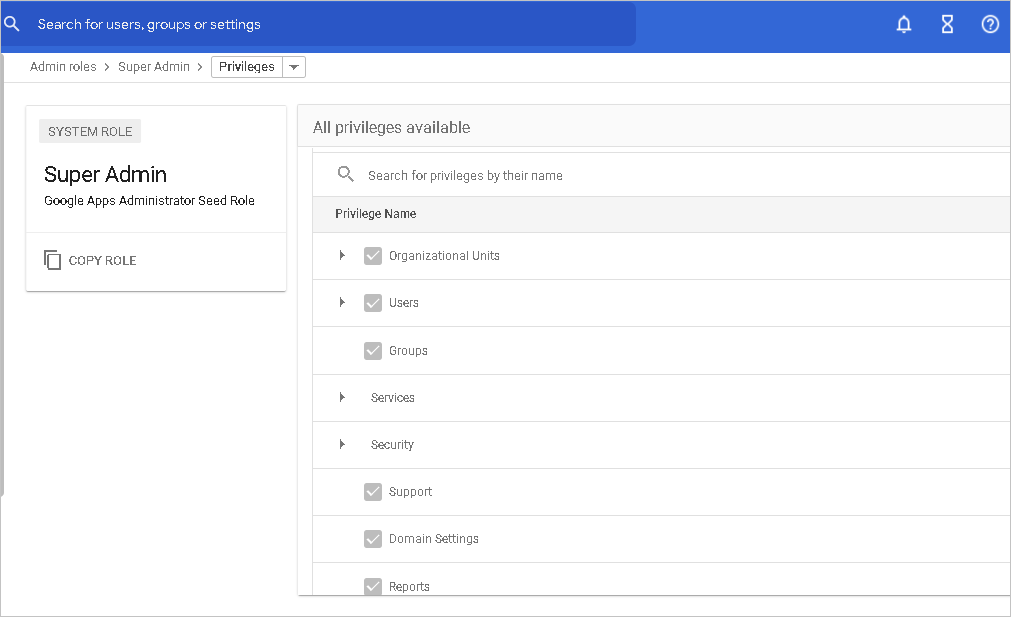
Next, determine which admin account you want to use to manage user provisioning in G Suite. Navigate to Account->Admin roles.
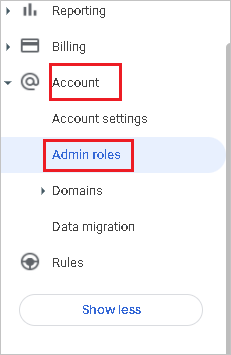
For the Admin role of that account, edit the Privileges for that role. Make sure to enable all Admin API Privileges so that this account can be used for provisioning.
Step 3: Add G Suite from the Microsoft Entra application gallery
Add G Suite from the Microsoft Entra application gallery to start managing provisioning to G Suite. If you have previously setup G Suite for SSO, you can use the same application. However, we recommend that you create a separate app when testing out the integration initially. Learn more about adding an application from the gallery here.
Step 4: Define who is in scope for provisioning
The Microsoft Entra provisioning service allows you to scope who is provisioned based on assignment to the application, or based on attributes of the user or group. If you choose to scope who is provisioned to your app based on assignment, you can use the steps to assign users and groups to the application. If you choose to scope who is provisioned based solely on attributes of the user or group, you can use a scoping filter.
Start small. Test with a small set of users and groups before rolling out to everyone. When scope for provisioning is set to assigned users and groups, you can control this by assigning one or two users or groups to the app. When scope is set to all users and groups, you can specify an attribute based scoping filter.
If you need extra roles, you can update the application manifest to add new roles.
Step 5: Configure automatic user provisioning to G Suite
This section guides you through the steps to configure the Microsoft Entra provisioning service to create, update, and disable users and/or groups in TestApp based on user and/or group assignments in Microsoft Entra ID.
Note
To learn more about the G Suite Directory API endpoint, refer to the Directory API reference documentation.
To configure automatic user provisioning for G Suite in Microsoft Entra ID:
Sign in to the Microsoft Entra admin center as at least a Cloud Application Administrator.
Browse to Entra ID > Enterprise apps.
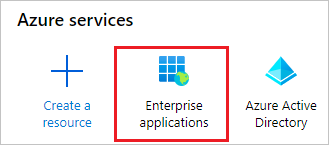
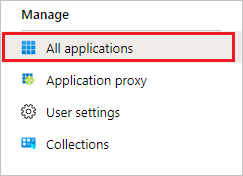
In the applications list, select G Suite.

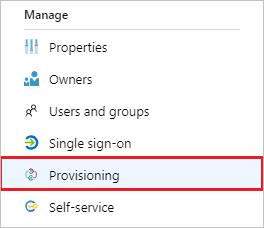
Select the Provisioning tab. Select Get started.
Set the Provisioning Mode to Automatic.

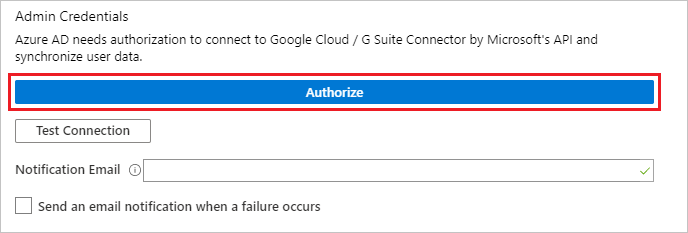
Under the Admin Credentials section, select Authorize. You're redirected to a Google authorization dialog box in a new browser window.
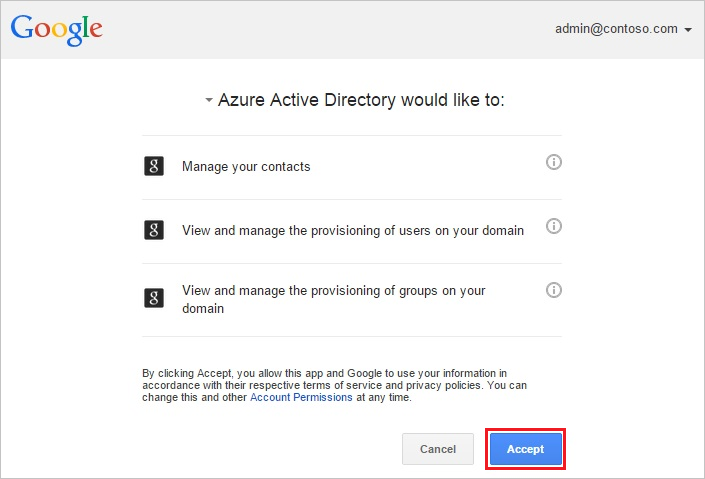
Confirm that you want to give Microsoft Entra permissions to make changes to your G Suite tenant. Select Accept.
Select Test Connection to ensure Microsoft Entra ID can connect to G Suite. If the connection fails, ensure your G Suite account has Admin permissions and try again. Then try the Authorize step again.
In the Notification Email field, enter the email address of a person or group who should receive the provisioning error notifications and select the Send an email notification when a failure occurs check box.

Select Save.
Under the Mappings section, select Provision Microsoft Entra users.
Review the user attributes that are synchronized from Microsoft Entra ID to G Suite in the Attribute-Mapping section. Select the Save button to commit any changes.
Note
GSuite Provisioning currently only supports the use of primaryEmail as the matching attribute.
| Attribute | Type |
|---|---|
| primaryEmail | String |
| relations.[type eq "manager"].value | String |
| name.familyName | String |
| name.givenName | String |
| suspended | String |
| externalIds.[type eq "custom"].value | String |
| externalIds.[type eq "organization"].value | String |
| addresses.[type eq "work"].country | String |
| addresses.[type eq "work"].streetAddress | String |
| addresses.[type eq "work"].region | String |
| addresses.[type eq "work"].locality | String |
| addresses.[type eq "work"].postalCode | String |
| emails.[type eq "work"].address | String |
| organizations.[type eq "work"].department | String |
| organizations.[type eq "work"].title | String |
| phoneNumbers.[type eq "work"].value | String |
| phoneNumbers.[type eq "mobile"].value | String |
| phoneNumbers.[type eq "work_fax"].value | String |
| emails.[type eq "work"].address | String |
| organizations.[type eq "work"].department | String |
| organizations.[type eq "work"].title | String |
| addresses.[type eq "home"].country | String |
| addresses.[type eq "home"].formatted | String |
| addresses.[type eq "home"].locality | String |
| addresses.[type eq "home"].postalCode | String |
| addresses.[type eq "home"].region | String |
| addresses.[type eq "home"].streetAddress | String |
| addresses.[type eq "other"].country | String |
| addresses.[type eq "other"].formatted | String |
| addresses.[type eq "other"].locality | String |
| addresses.[type eq "other"].postalCode | String |
| addresses.[type eq "other"].region | String |
| addresses.[type eq "other"].streetAddress | String |
| addresses.[type eq "work"].formatted | String |
| changePasswordAtNextLogin | String |
| emails.[type eq "home"].address | String |
| emails.[type eq "other"].address | String |
| externalIds.[type eq "account"].value | String |
| externalIds.[type eq "custom"].customType | String |
| externalIds.[type eq "customer"].value | String |
| externalIds.[type eq "login_id"].value | String |
| externalIds.[type eq "network"].value | String |
| gender.type | String |
| GeneratedImmutableId | String |
| Identifier | String |
| ims.[type eq "home"].protocol | String |
| ims.[type eq "other"].protocol | String |
| ims.[type eq "work"].protocol | String |
| includeInGlobalAddressList | String |
| ipWhitelisted | String |
| organizations.[type eq "school"].costCenter | String |
| organizations.[type eq "school"].department | String |
| organizations.[type eq "school"].domain | String |
| organizations.[type eq "school"].fullTimeEquivalent | String |
| organizations.[type eq "school"].location | String |
| organizations.[type eq "school"].name | String |
| organizations.[type eq "school"].symbol | String |
| organizations.[type eq "school"].title | String |
| organizations.[type eq "work"].costCenter | String |
| organizations.[type eq "work"].domain | String |
| organizations.[type eq "work"].fullTimeEquivalent | String |
| organizations.[type eq "work"].location | String |
| organizations.[type eq "work"].name | String |
| organizations.[type eq "work"].symbol | String |
| OrgUnitPath | String |
| phoneNumbers.[type eq "home"].value | String |
| phoneNumbers.[type eq "other"].value | String |
| websites.[type eq "home"].value | String |
| websites.[type eq "other"].value | String |
| websites.[type eq "work"].value | String |
Under the Mappings section, select Provision Microsoft Entra groups.
Review the group attributes that are synchronized from Microsoft Entra ID to G Suite in the Attribute-Mapping section. The attributes selected as Matching properties are used to match the groups in G Suite for update operations. Select the Save button to commit any changes.
Attribute Type email String Members String name String description String To configure scoping filters, refer to the following instructions provided in the Scoping filter article.
To enable the Microsoft Entra provisioning service for G Suite, change the Provisioning Status to On in the Settings section.

Define the users and/or groups that you would like to provision to G Suite by choosing the desired values in Scope in the Settings section.

When you're ready to provision, select Save.

This operation starts the initial synchronization cycle of all users and groups defined in Scope in the Settings section. The initial cycle takes longer to perform than subsequent cycles, which occur approximately every 40 minutes as long as the Microsoft Entra provisioning service is running.
Note
If the users already have an existing personal/consumer account using the email address of the Microsoft Entra user, then it might cause some issue which could be resolved by using the Google Transfer Tool prior to performing the directory sync.
Step 6: Monitor your deployment
Once you configure provisioning, use the following resources to monitor your deployment:
- Use the provisioning logs to determine which users are provisioned successfully or unsuccessfully
- Check the progress bar to see the status of the provisioning cycle and how close it's to completion
- If the provisioning configuration seems to be in an unhealthy state, the application goes into quarantine. Learn more about quarantine states the application provisioning quarantine status article.
Troubleshooting Tips
- Removing a user from the sync scope disables them in GSuite but won't result in deletion of the user in G Suite
Just-in-time (JIT) application access with PIM for groups
With PIM for Groups, you can provide just-in-time access to groups in Google Cloud / Google Workspace and reduce the number of users that have permanent access to privileged groups in Google Cloud / Google Workspace.
Configure your enterprise application for SSO and provisioning
- Add Google Cloud / Google Workspace to your tenant, configure it for provisioning as described in this article, and start provisioning.
- Configure single sign-on for Google Cloud / Google Workspace.
- Create a group that provides all users access to the application.
- Assign the group to the Google Cloud / Google Workspace application.
- Assign your test user as a direct member of the group created in the previous step, or provide them access to the group through an access package. This group can be used for persistent, nonadmin access in Google Cloud / Google Workspace.
Enable PIM for groups
- Create a second group in Microsoft Entra ID. This group provides access to admin permissions in Google Cloud / Google Workspace.
- Bring the group under management in Microsoft Entra PIM.
- Assign your test user as eligible for the group in PIM with the role set to member.
- Assign the second group to the Google Cloud / Google Workspace application.
- Use on-demand provisioning to create the group in Google Cloud / Google Workspace.
- Sign-in to Google Cloud / Google Workspace and assign the second group the necessary permissions to perform admin tasks.
Now any end user that was made eligible for the group in PIM can get JIT access to the group in Google Cloud / Google Workspace by activating their group membership. When their assignment expires, the user is removed from the group in Google Cloud / Google Workspace. During the next incremental cycle, the provisioning service attempts to remove the user from the group again. This might result in an error in the provisioning logs. This error is expected because the group membership was already removed. The error message can be ignored.
- How long does it take to have a user provisioned to the application?
- When a user is added to a group in Microsoft Entra ID outside of activating their group membership using Microsoft Entra ID Privileged Identity Management (PIM):
- The group membership is provisioned in the application during the next synchronization cycle. The synchronization cycle runs every 40 minutes.
- When a user activates their group membership in Microsoft Entra ID PIM:
- The group membership is provisioned in 2 – 10 minutes. When there's a high rate of requests at one time, requests are throttled at a rate of five requests per 10 seconds.
- For the first five users within a 10-second period activating their group membership for a specific application, group membership is provisioned in the application within 2-10 minutes.
- For the sixth user and beyond within a 10-second period activating their group membership for a specific application, group membership is provisioned to the application in the next synchronization cycle. The synchronization cycle runs every 40 minutes. The throttling limits are per enterprise application.
- When a user is added to a group in Microsoft Entra ID outside of activating their group membership using Microsoft Entra ID Privileged Identity Management (PIM):
- If the user is unable to access the necessary group in Google Cloud / Google Workspace, review the PIM logs, and provisioning logs to ensure that the group membership was updated successfully. Depending on how the target application is architected, it might take more time for the group membership to take effect in the application.
- You can create alerts for failures using Azure Monitor.
Change log
- 10/17/2020 - Added support for more G Suite user and group attributes.
- 10/17/2020 - Updated G Suite target attribute names to match what is defined here.
- 10/17/2020 - Updated default attribute mappings.
More resources
- Managing user account provisioning for Enterprise Apps
- What is application access and single sign-on with Microsoft Entra ID?