Note
Access to this page requires authorization. You can try signing in or changing directories.
Access to this page requires authorization. You can try changing directories.
In this article, you learn how to integrate WebSphere Liberty with Microsoft Entra ID. When you integrate WebSphere Liberty with Microsoft Entra ID, you can:
- Use Microsoft Entra ID to control who can access WebSphere Liberty.
- Enable your users to be automatically signed in to WebSphere Liberty with their Microsoft Entra accounts.
- Manage your accounts in one central location: the Azure portal.
Prerequisites
The scenario outlined in this article assumes that you already have the following prerequisites:
- A Microsoft Entra user account with an active subscription. If you don't already have one, you can Create an account for free.
- One of the following roles:
- WebSphere Liberty single sign-on (SSO) enabled subscription.
Add WebSphere Liberty from the gallery
To configure the integration of WebSphere Liberty into Microsoft Entra ID, you need to add WebSphere Liberty from the gallery to your list of managed SaaS apps.
Sign in to the Microsoft Entra admin center as at least a Cloud Application Administrator.
Browse to Entra ID > Enterprise apps > New application.
In the Add from the gallery section, enter WebSphere Liberty in the search box.
Select WebSphere Liberty in the results panel and then add the app. Wait a few seconds while the app is added to your tenant.
Configure Microsoft Entra SSO
Follow these steps to enable Microsoft Entra SSO in the Microsoft Entra admin center.
Sign in to the Microsoft Entra admin center as at least a Cloud Application Administrator.
Browse to Entra ID > Enterprise apps > WebSphere Liberty > Single sign-on.
Perform the following steps in the below section:
Select Go to application.
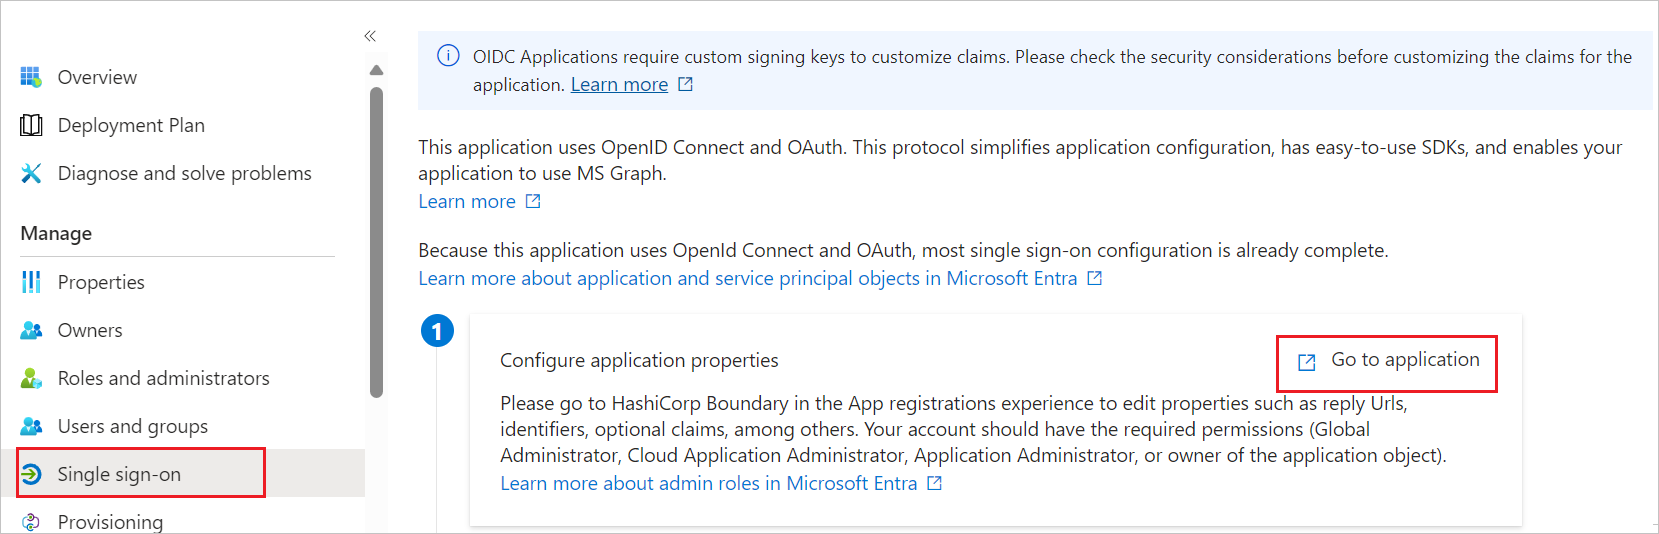
Copy Application (client) ID and use it later in the WebSphere Liberty side configuration.
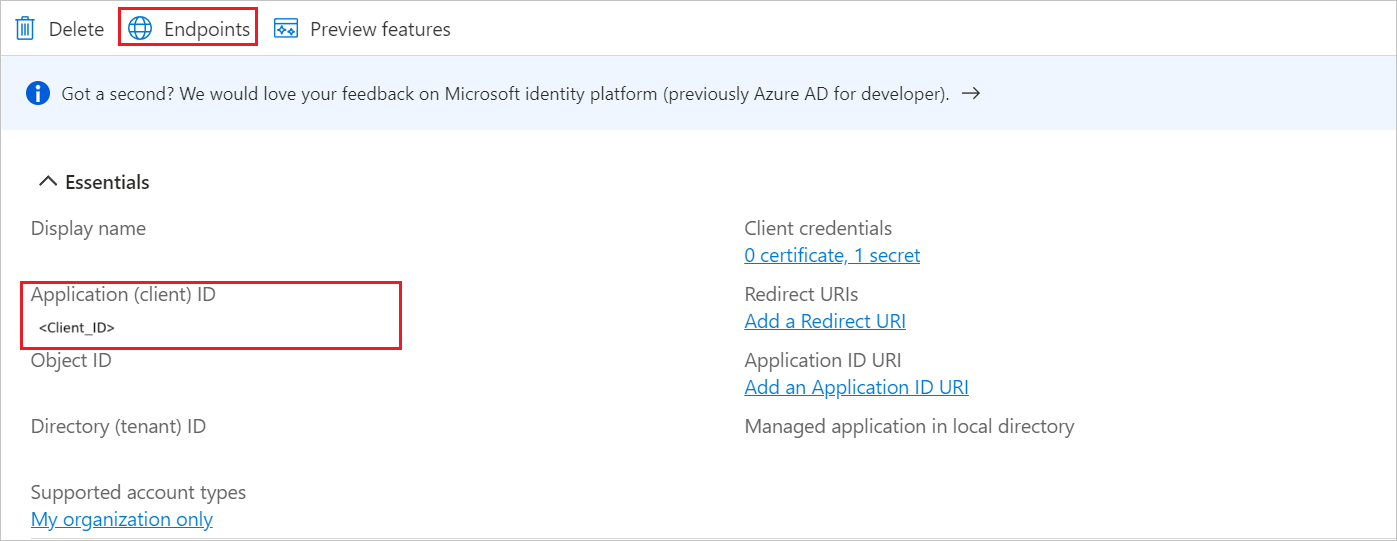
Under Endpoints tab, copy OpenID Connect metadata document link and use it later in the WebSphere Liberty side configuration.

Navigate to Authentication tab on the left menu and perform the following steps:
In the Redirect URIs textbox, type a URL using the following pattern:
https://<HOST_NAME>:<SSL_PORT>/oidcclient/redirect/<ClientID>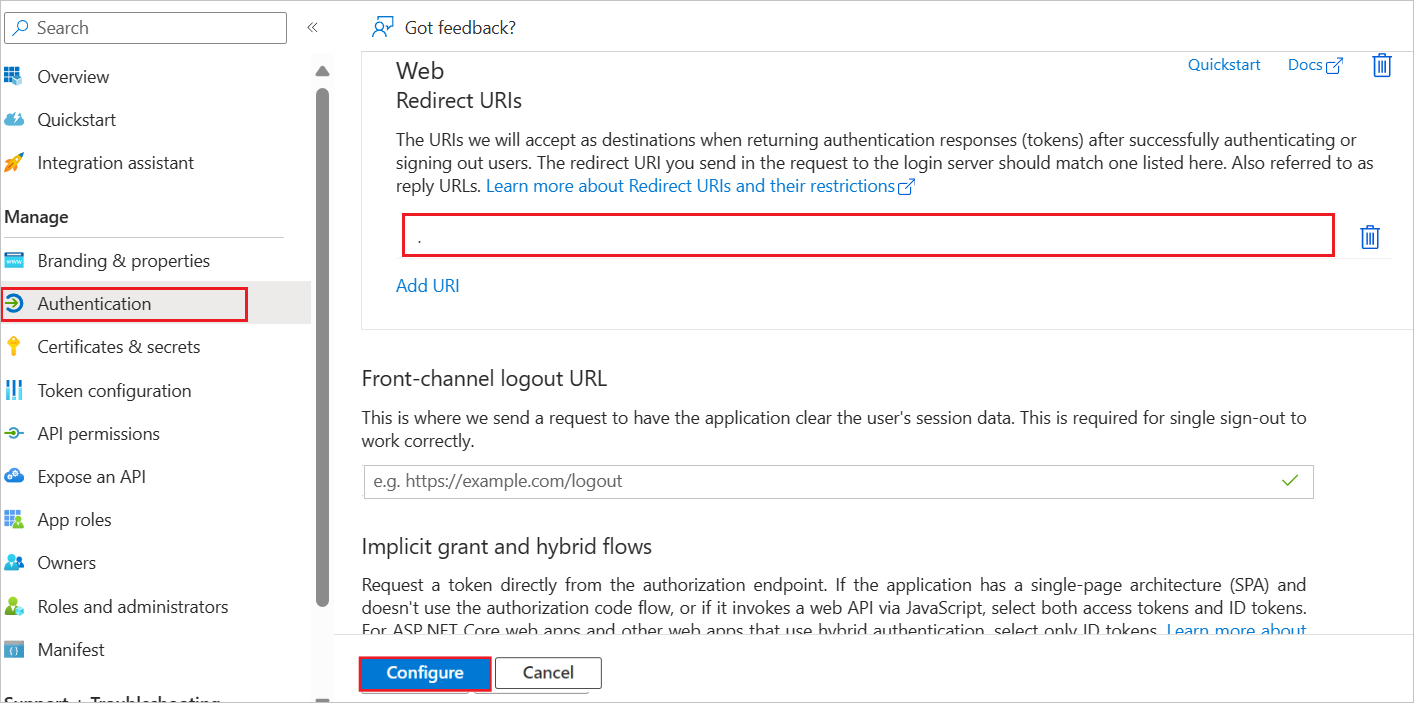
Select Configure button.
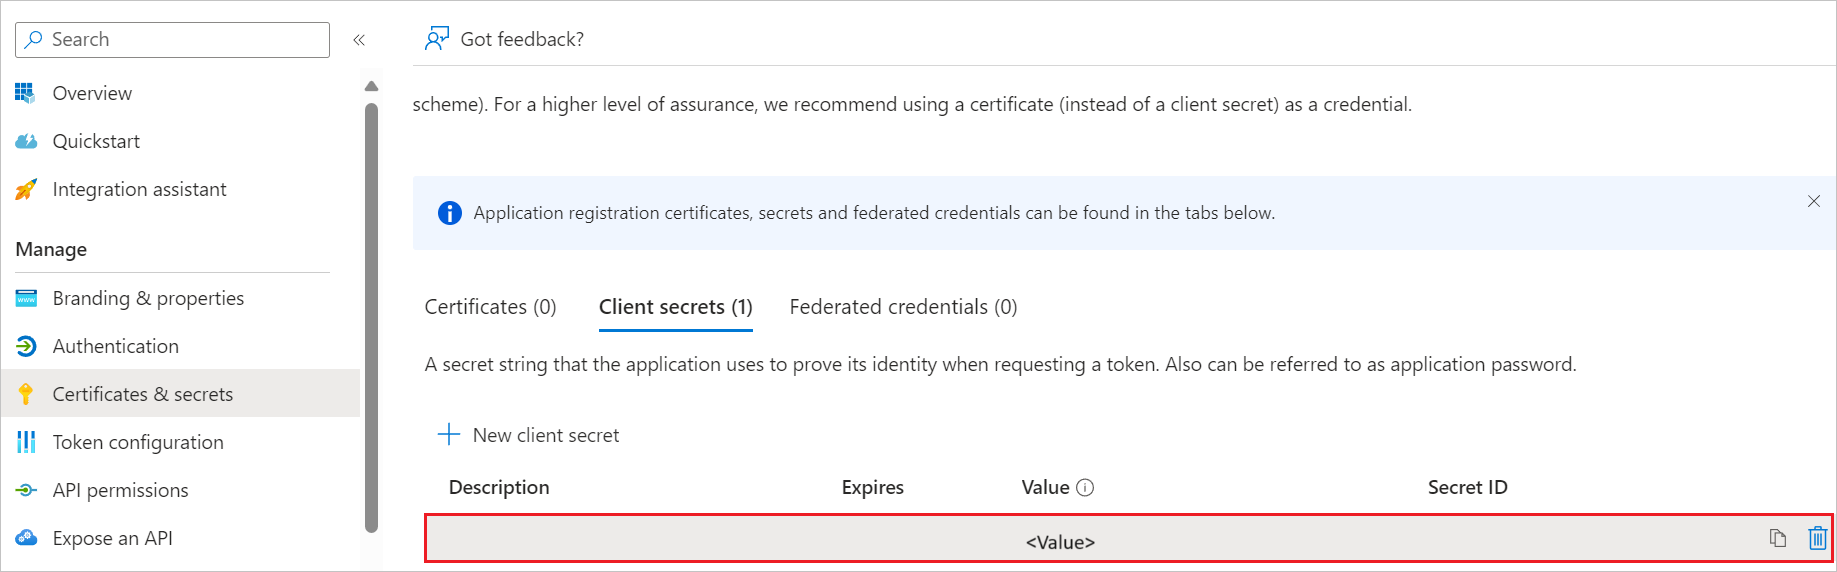
Navigate to Certificates & secrets on the left menu and perform the following steps:
Go to Client secrets tab and select +New client secret.
Enter a valid Description in the textbox and select Expires days from the drop-down as per your requirement and select Add.
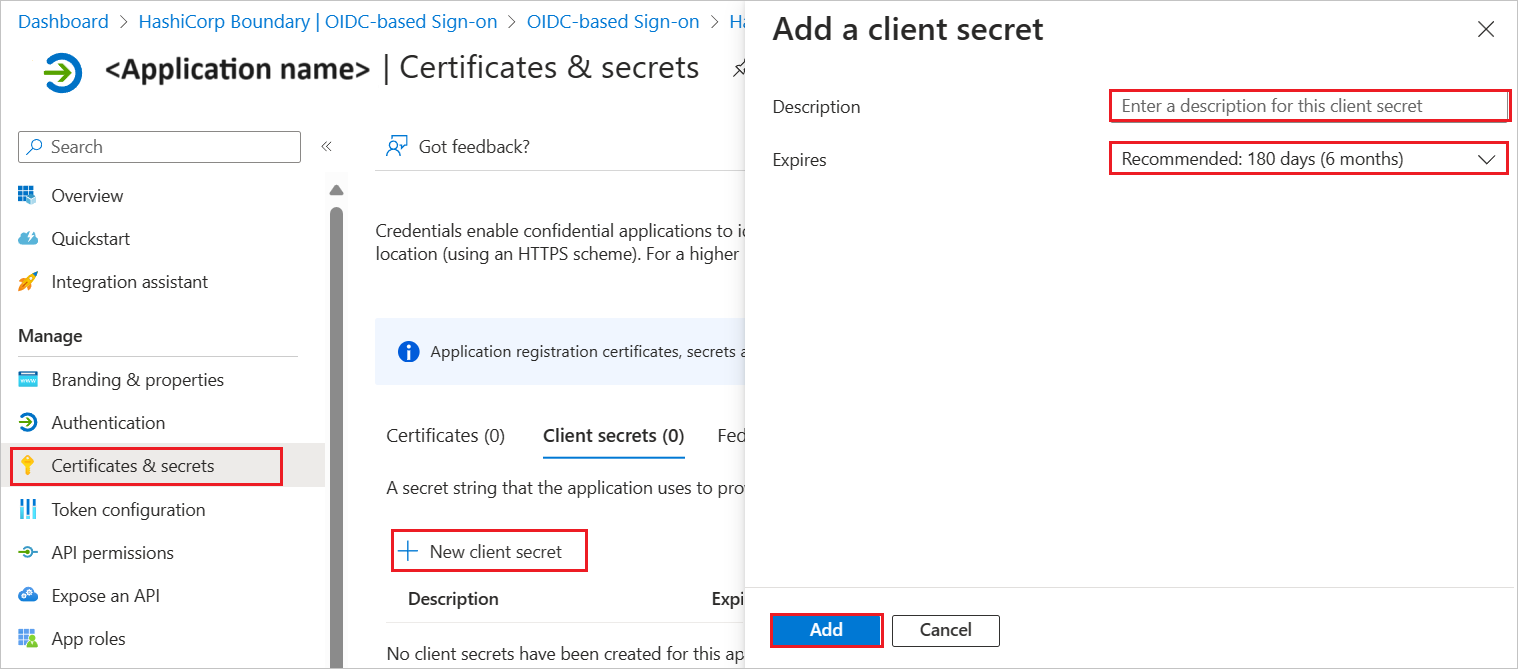
Once you add a client secret, Value is generated. Copy the value and use it later in the WebSphere Liberty side configuration.
Create and assign Microsoft Entra test user
Follow the guidelines in the create and assign a user account quickstart to create a test user account called B.Simon.
Configure WebSphere Liberty SSO
To complete the OAuth/OIDC federation setup on WebSphere Liberty side, you need to send the copied values like Tenant ID, Application ID, and Client Secret from Entra to WebSphere Liberty support team. They set this setting to have the OIDC connection set properly on both sides.