Note
Access to this page requires authorization. You can try signing in or changing directories.
Access to this page requires authorization. You can try changing directories.
This article describes the steps you need to perform in both Zscaler User Provisioning and Microsoft Entra ID to configure automatic user provisioning. When configured, Microsoft Entra ID automatically provisions and deprovisions users to Zscaler User Provisioning using the Microsoft Entra provisioning service. For important details on what this service does, how it works, and frequently asked questions, see Automate user provisioning and deprovisioning to SaaS applications with Microsoft Entra ID.
Capabilities supported
- Create users in Zscaler Provisioning
- Remove users in Zscaler Provisioning when they don't require access anymore
- Keep user attributes synchronized between Microsoft Entra ID and Zscaler Provisioning
- Provision groups and group memberships in Zscaler.
- Single sign-on to Zscaler (recommended).
Prerequisites
The scenario outlined in this article assumes that you already have the following prerequisites:
- A Microsoft Entra tenant
- One of the following roles: Application Administrator, Cloud Application Administrator, or Application Owner.
- A user account in Zscaler User Provisioning with Admin permissions.
- You need to create and assign the app role to the users and groups for Zscaler Zidentity, which is explained later in the tutorial.
Note
If the Zscaler Zidentity is already installed and configured through app registration, complete this prerequisite step before enabling SCIM provisioning. Customers performing the integration for both Authentication and SCIM for the first time do not need to execute this script and can proceed directly to Step 3.
Step 1: Plan your provisioning deployment
- Learn about how the provisioning service works.
- Determine who's in scope for provisioning.
- Determine what data to map between Microsoft Entra ID and Zscaler User Provisioning.
Step 2: Configure Zscaler Provisioning to support provisioning with Microsoft Entra ID
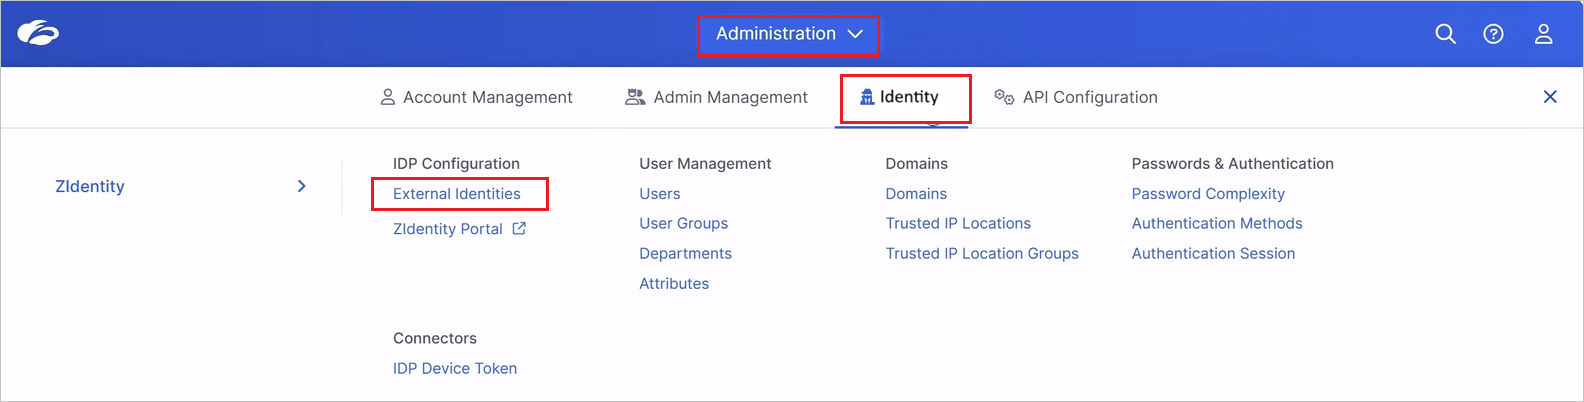
Sign in into the Zscaler with admin credentials. Go to Administration -> Identity -> IDP Configuration -> External Identities as shown below.
Go to the Provisioning tab and perform the below steps:
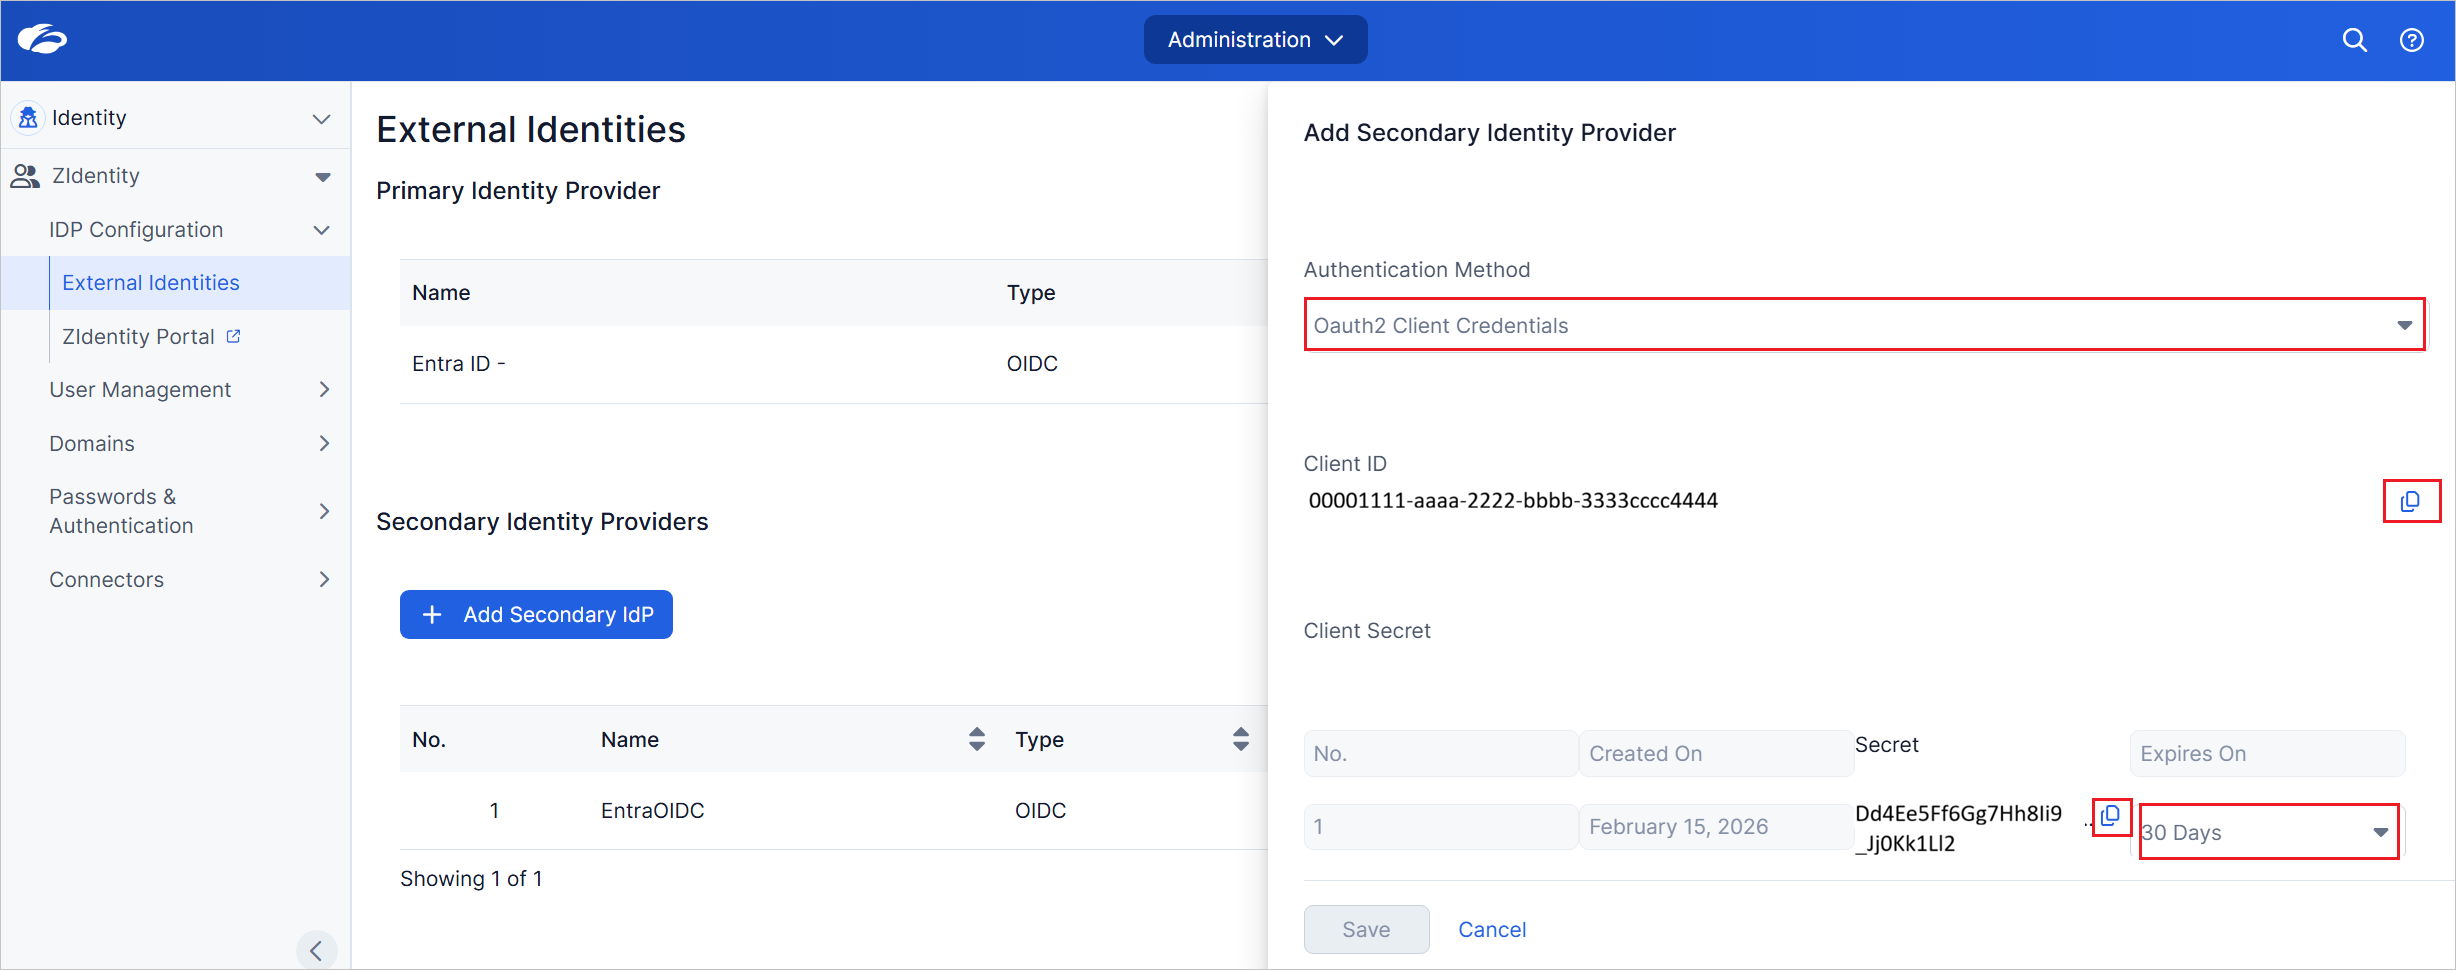
a. Enable the SCIM Provisioning toggle.
b. Select Authentication Method as Oauth2 Client Credentials from the dropdown.
c. Copy the Client ID and Client Secret to use it later.
d. Select Expires On from the dropdown.
Step 3: Add Zscaler Provisioning from the Microsoft Entra application gallery
Add Zscaler from the Microsoft Entra application gallery to start managing provisioning to Zscaler. If you have previously setup Zscaler for SSO, you can use the same application. However, we recommend that you create a separate app when testing out the integration initially. Learn more about adding an application from the gallery.
Step 4: Define who is in scope for provisioning
The Microsoft Entra provisioning service allows you to scope who is provisioned based on assignment to the application, or based on attributes of the user or group. If you choose to scope who is provisioned to your app based on assignment, you can use the steps to assign users and groups to the application. If you choose to scope who is provisioned based solely on attributes of the user or group, you can use a scoping filter.
Start small. Test with a small set of users and groups before rolling out to everyone. When scope for provisioning is set to assigned users and groups, you can control this by assigning one or two users or groups to the app. When scope is set to all users and groups, you can specify an attribute based scoping filter.
If you need extra roles, you can update the application manifest to add new roles.
Step 5: Configure automatic user provisioning to Zscaler Provisioning
This section guides you through the steps to configure the Microsoft Entra provisioning service to create, update, and disable users in Zscaler Provisioning based on user assignments in Microsoft Entra ID.
To configure automatic user provisioning for Zscaler Provisioning in Microsoft Entra ID
Sign in to the Microsoft Entra admin center as at least an app owner or a Cloud Application Administrator.
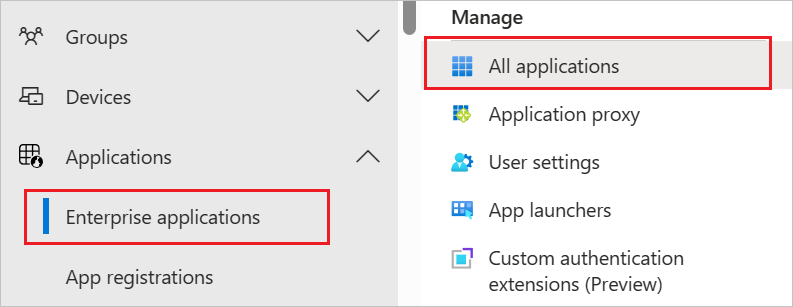
Browse to Entra ID > Enterprise apps
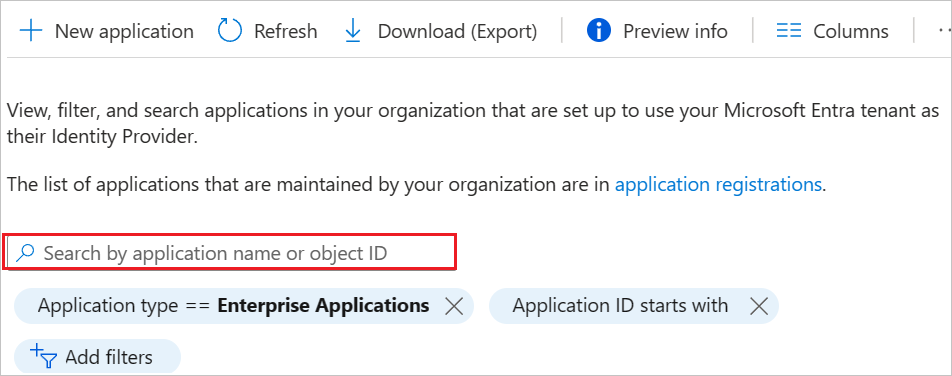
In the applications list, select Zscaler.
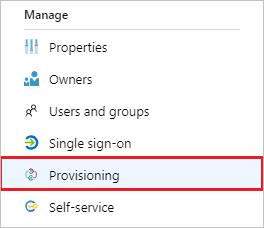
Select the Provisioning tab.
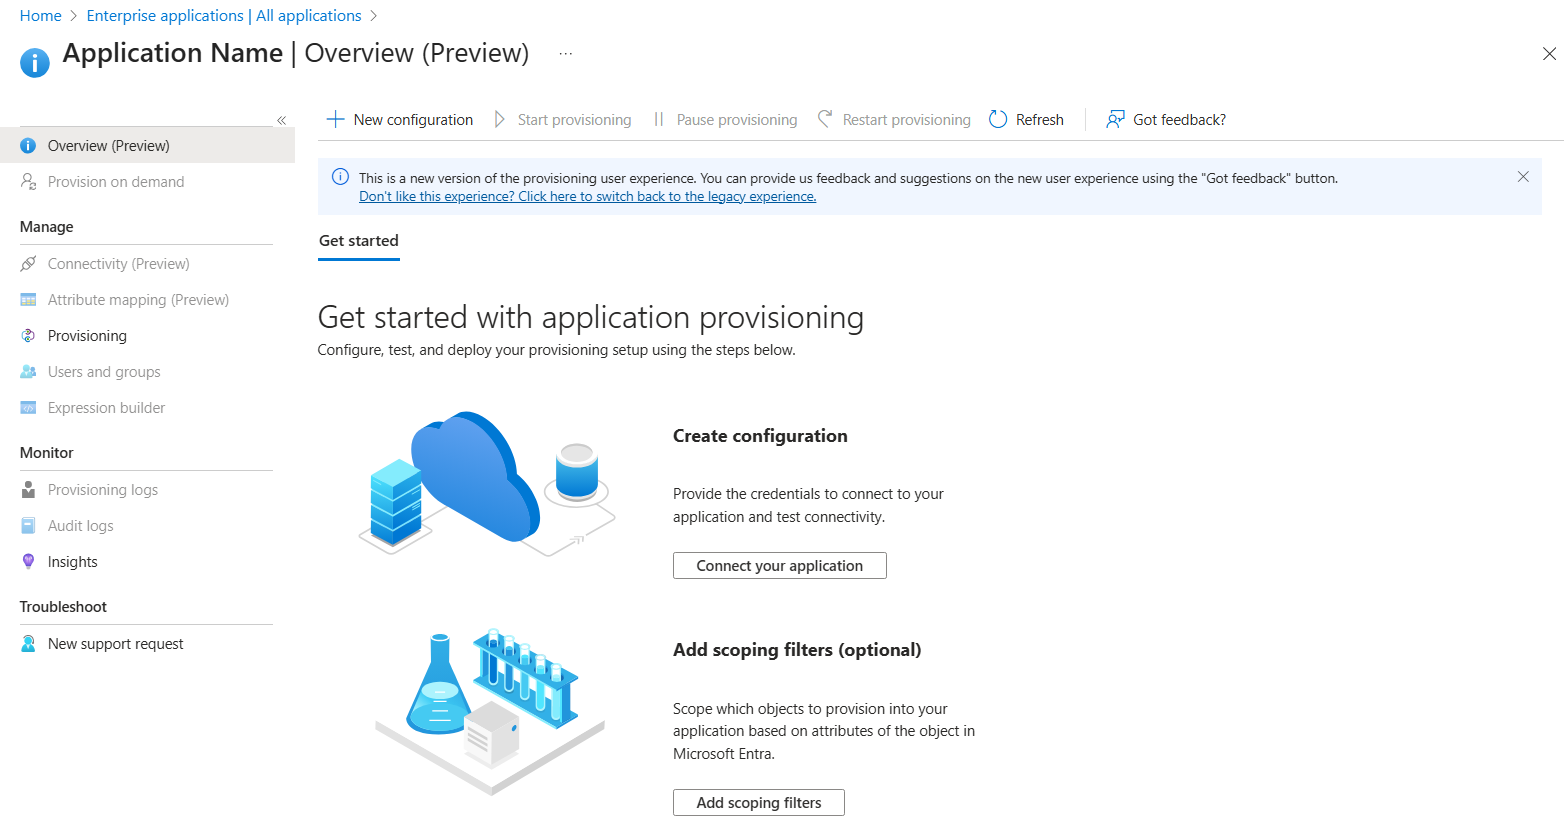
Select + New configuration.
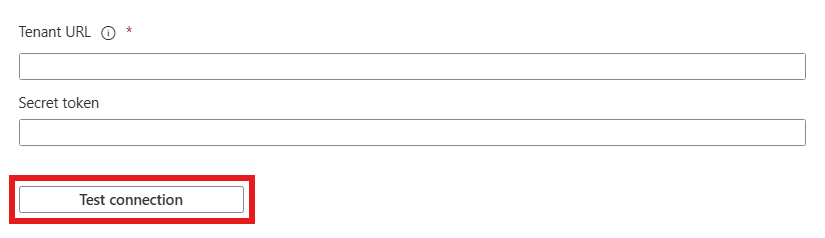
In the Tenant URL field, enter your Zscaler Tenant URL and Secret Token. Select Test Connection to ensure Microsoft Entra ID can connect to Zscaler. If the connection fails, ensure your Zscaler account has Admin permissions and try again.
Select Create to create your configuration.
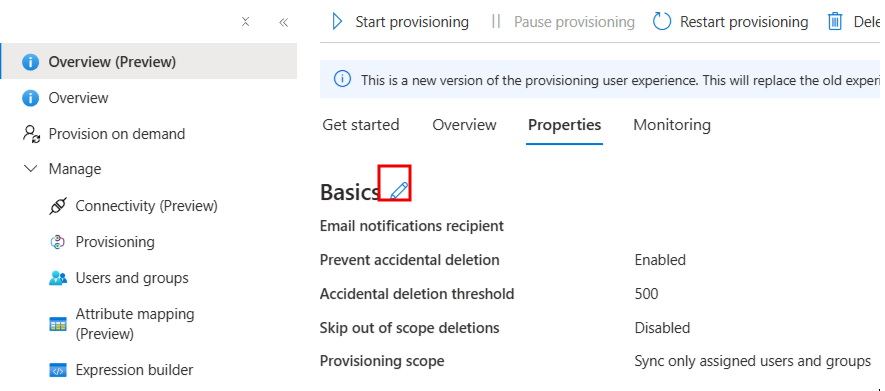
Select Properties in the Overview page.
Select the Edit icon to edit the properties. Enable notification emails and provide an email to receive quarantine notifications. Enable Accidental deletions prevention. Select Apply to save the changes.
Select Attribute Mapping in the left panel and select users.
Review the user attributes that are synchronized from Microsoft Entra ID to Zscaler in the Attribute-Mapping section. The attributes selected as Matching properties are used to match the user accounts in Zscaler for update operations. If you choose to change the matching target attribute, you need to ensure that the Zscaler API supports filtering users based on that attribute. Select the Save button to commit any changes.
Attribute Type Supported for filtering Required by Zscaler displayName String ✓ ✓ primaryEmail String ✓ Select groups.
Review the group attributes that are synchronized from Microsoft Entra ID to Zscaler in the Attribute-Mapping section. The attributes selected as Matching properties are used to match the groups in Zscaler for update operations. Select the Save button to commit any changes.
Attribute Type Supported for filtering Required by Zscaler displayName String ✓ ✓ members Reference externalId String ✓ To configure scoping filters, refer to the instructions provided in the Scoping filter article.
When you're ready to provision, select Start Provisioning from the Overview page.
Step 6: Monitor your deployment
Once you configure provisioning, use the following resources to monitor your deployment:
- Use the provisioning logs to determine which users are provisioned successfully or unsuccessfully
- Check the progress bar to see the status of the provisioning cycle and how close it's to completion
- If the provisioning configuration seems to be in an unhealthy state, the application goes into quarantine. Learn more about quarantine states the application provisioning quarantine status article.
Additional resources
- Managing user account provisioning for Enterprise Apps
- What is application access and single sign-on with Microsoft Entra ID?
- Script for Create and Assign App role for users and groups - AppRoleMove.ps1