Non-accepted domain report in the new Exchange admin center in Exchange Online
The Non-accepted domain report in the new Exchange admin center (new EAC) displays information about messages from your on-premises email organization where the sender's domain isn't configured as an accepted domain in your Microsoft 365 organization.
Microsoft 365 might throttle these messages if we have data to prove that the intent of these messages is malicious. Therefore, it's important for you to understand what's happening and to fix the issue.
Note
By default, the report shows data for the last 7 days. If the report is empty, try changing the date range.
For permissions that are required to use this report, see Permissions required to view mail flow reports.
In the new EAC at https://admin.exchange.microsoft.com, select Reports > Mail flow > Non-accepted domain report. Or, to go directly to the Non-accepted domain report page, use https://admin.exchange.microsoft.com/#/reports/nonaccepteddomain.
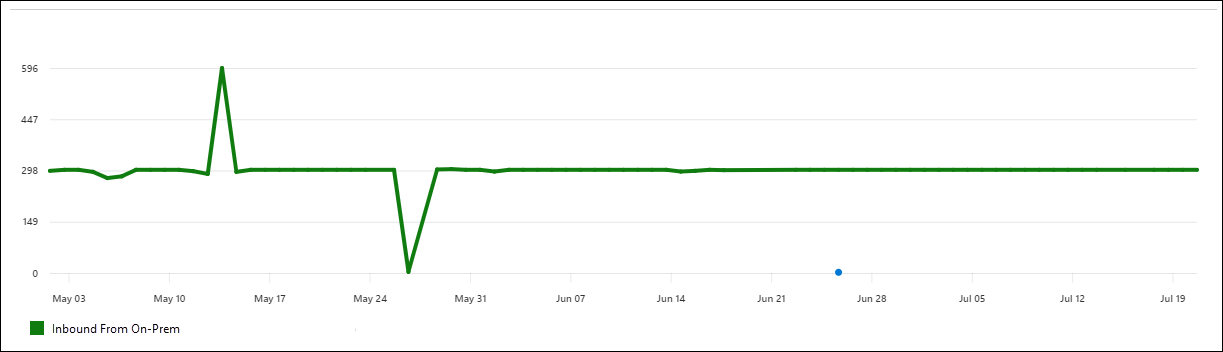
On Non-accepted domain report page, the overview section contains a chart that shows the number of messages sent per connector:
The Non-Accepted domain details section contains the following information:
- Date
- Inbound connector name
- Sender domain
- Count
- Sample messages: This field contains the internet message IDs (also known as the Client IDs) of a sample of the original messages. This value is stored in the Message-ID header field in the message header and is constant for the lifetime of the message.
Click on the column headers to sort by those categories.
![]()
![]()
To change the list from normal to compact spacing, select Change view ![]() , and then select Compact list
, and then select Compact list ![]() .
.
Use the Search ![]() box to filter the results by connector name.
box to filter the results by connector name.
Use the 7 days box to filter the results by date. The following values are available in the dropdown list:
- 7 days
- 30 days
- 90 days
- Custom start date. You can specify a start date up to 90 days old.
For more advanced filters that you can also save and use later, select Filter ![]() , and then select New filter
, and then select New filter ![]() . In the Custom filter flyout that opens, enter the following information:
. In the Custom filter flyout that opens, enter the following information:
Name your filter: Enter a unique name.
Add a filter clause by entering the following information:
- Field: Select from the following values:
- Date
- Inbound connector
- Sender domain
- Count
- Sample messages.
- Operator: Select starts with or is.
- Value: Enter the value you want to search for.
You can select Add new clause and repeat the previous step as many times as needed. Multiple clauses use AND logic (<Clause1> AND <Clause2>...).
To remove a filter clause, select Remove clause
 next to the entry.
When you're finished in the Custom filter flyout, select Save. The new filter is automatically loaded, and the filtered results are shown on the Non-accepted domain report page. This result is the same as selecting Filter
 and then selecting the existing filter from the list.
To unload an existing filter and return to the default information that's shown on the Non-accepted domain report page, select Filter
 > Clear all filters
  .
.- Field: Select from the following values:
Use Export ![]() to export the displayed results to a .csv file.
to export the displayed results to a .csv file.
Use Request report ![]() to generate a non-accepted domain report with up to one million rows of data.
to generate a non-accepted domain report with up to one million rows of data.
See also
For more information about other mail flow reports, see Mail flow reports in the new EAC.