Note
Access to this page requires authorization. You can try signing in or changing directories.
Access to this page requires authorization. You can try changing directories.
The Monitor hub gives Fabric administrators one place to monitor the health, capacity unit (CU) consumption, and throttling of every capacity in the tenant. From the Manage capacities page, you can spot capacities that are at risk, drill into a capacity's utilization and activity metrics, take action such as pausing or resizing a capacity, and review active issues.
Important
Monitor capacity in the Monitor hub is currently in preview. See the Supplemental Terms of Use for Microsoft Azure Previews for legal terms that apply to Azure features that are in beta, preview, or otherwise not yet released into general availability.
Prerequisites
- A Microsoft Fabric capacity in your tenant.
- Fabric administrator or capacity administrator permissions to view capacity details and take management actions.
Open capacity monitoring
Start from the Fabric portal and open the capacity monitoring view in the Monitor hub.
- Sign in to the Fabric portal.
- In the left navigation pane, select Monitor.
- Select Capacities.
The Manage capacities page opens and shows all capacities for your tenant.
View capacity health across your tenant
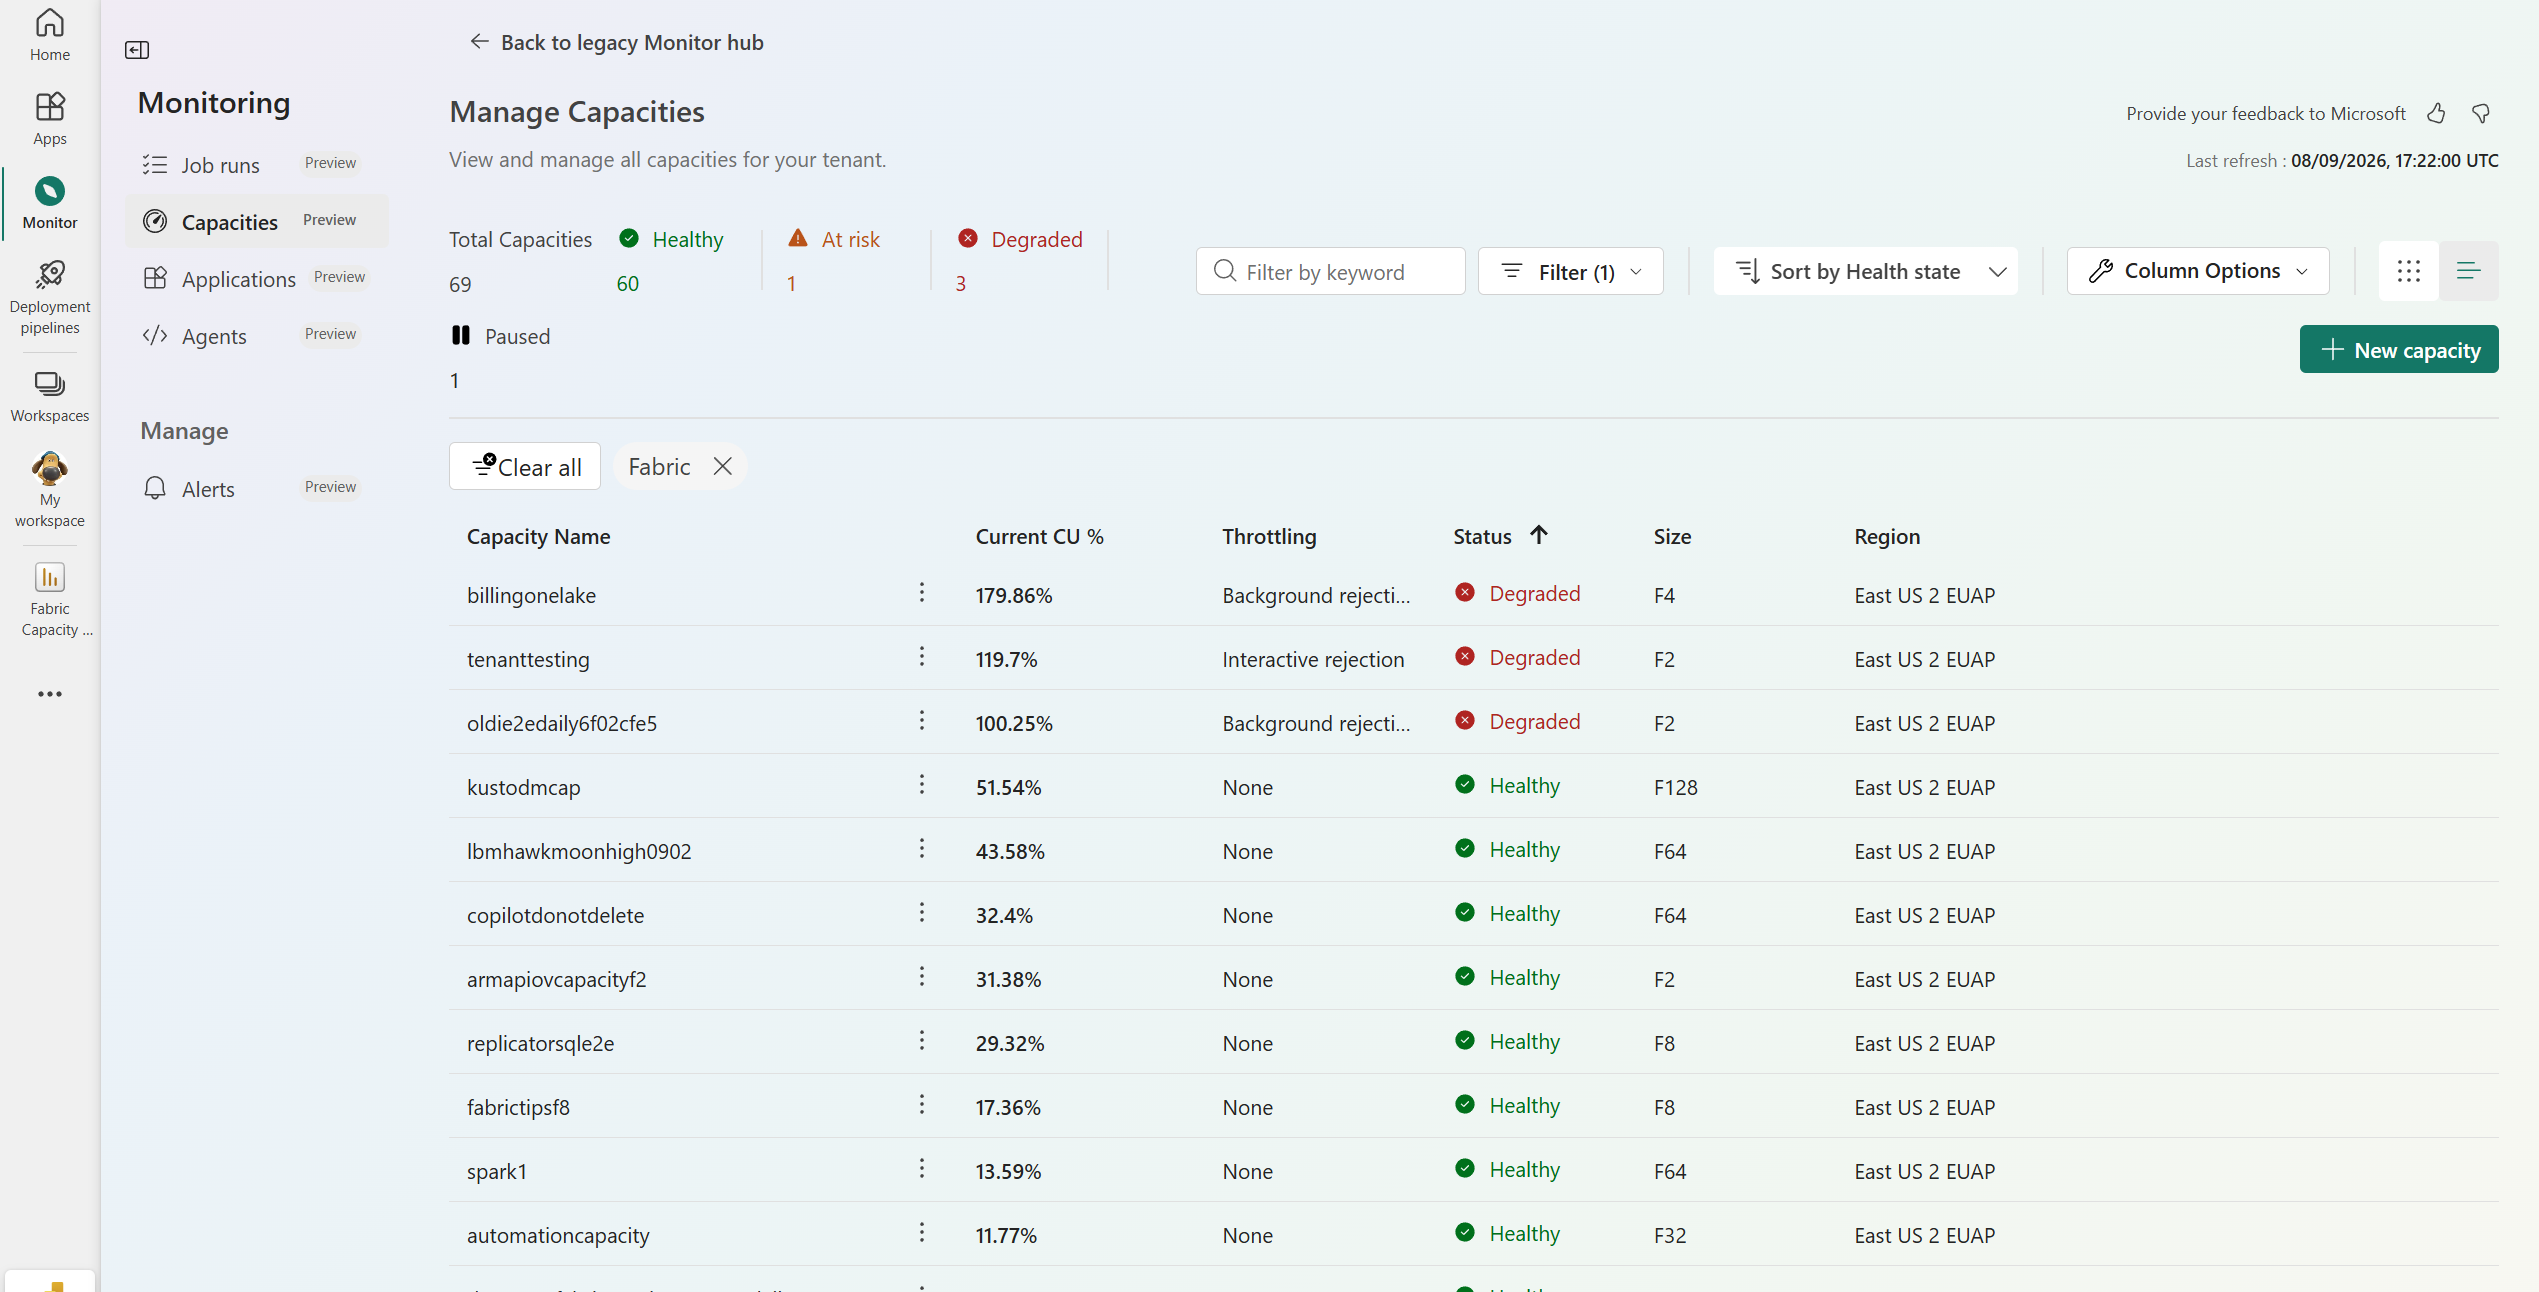
The Manage capacities page summarizes the health of every capacity. Health tiles at the top show the total number of capacities and how many are Healthy, At risk, Degraded, or Paused.
To find and organize capacities, use the following controls:
- Use Filter by keyword to filter the list by the text you type.
- Select the Filter menu to narrow the list by capacity properties.
- Select Sort by health state to order capacities by health.
- Select Column options to choose which columns appear in table view.
Switch between two layouts with the view toggle:
Grid view shows each capacity as a tile with its health status, Current CU %, and Throttling.
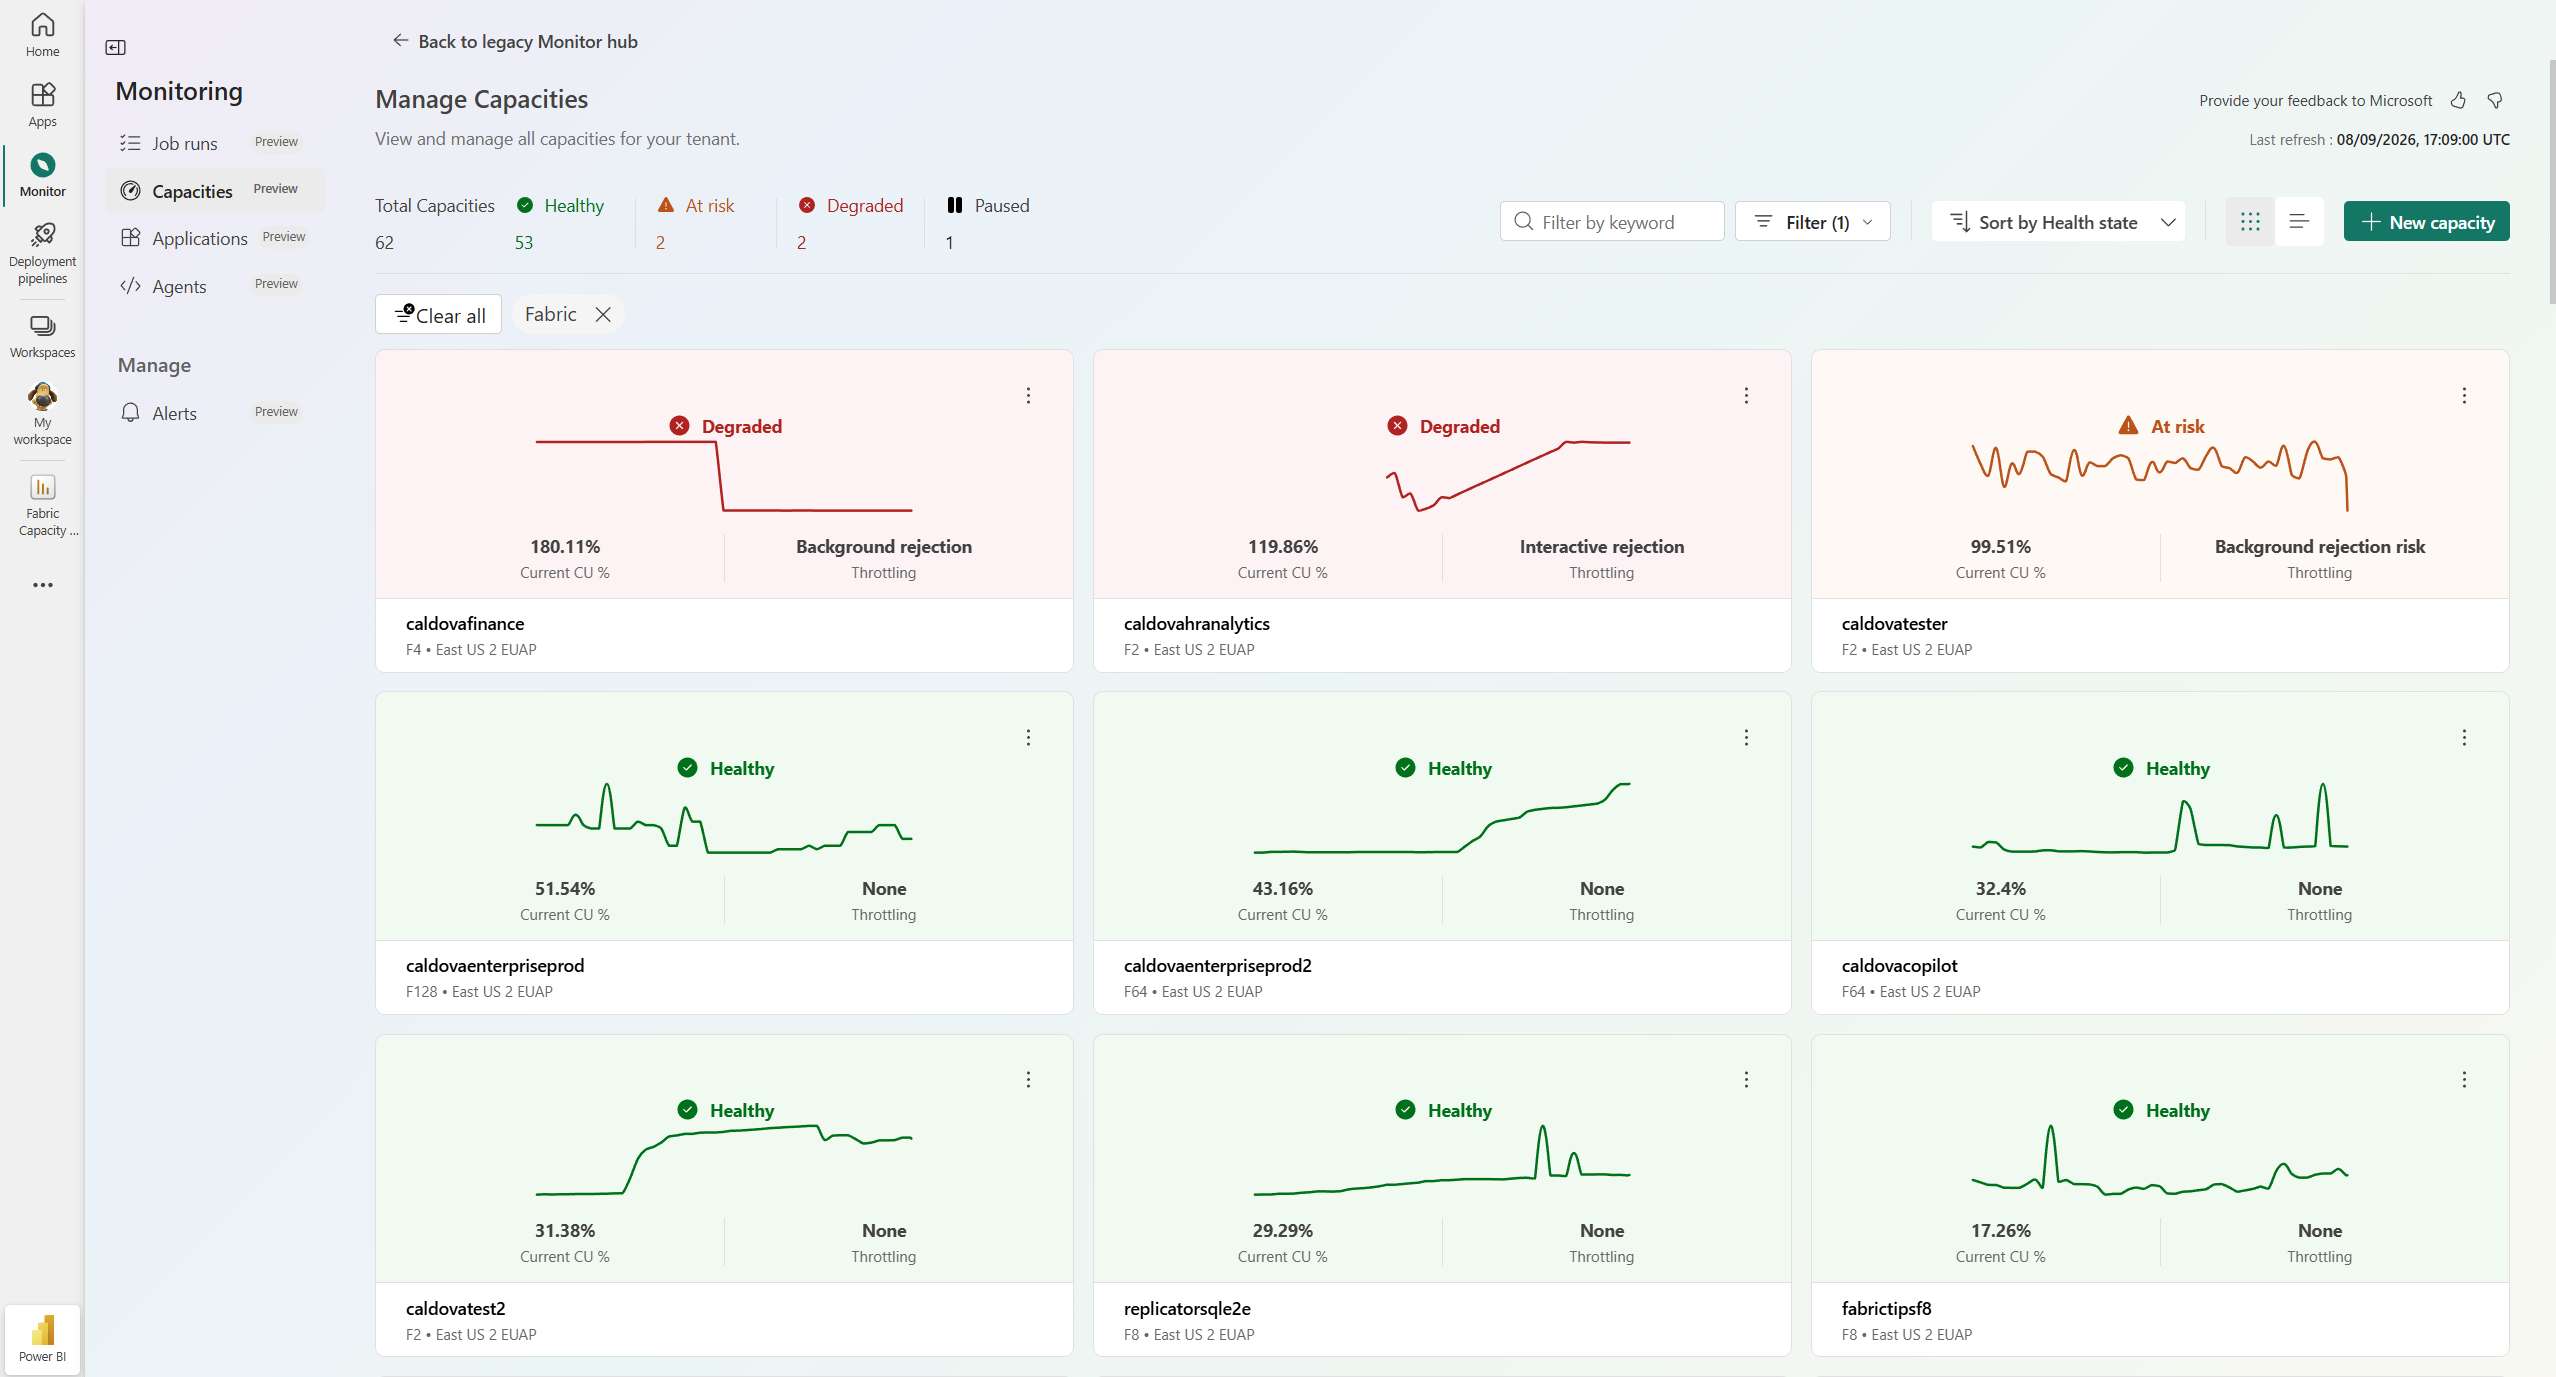
Table view shows a list with the columns Capacity Name, Current CU %, Throttling, Status, Size, and Region.
Create a new capacity
- Sign in to the Fabric portal.
- In the left navigation pane, select Monitor.
- Select Capacities.
- Select New capacity.
- On the New capacity page, select a capacity type, and then enter the following information:
- Capacity type - Select the type of capacity you want to create.
- Capacity name - Enter a name for your capacity.
- Subscription - Select the Azure subscription you want to use for the capacity.
- Resource group - Select the Azure resource group you want to use for the capacity.
- Region - Select the region where you want to create the capacity.
- Capacity size - Select the number of capacity units to assign to the capacity.
- Capacity admins - Select the admins for the new capacity.
- Expand Additional settings to configure other settings if available, such as tags.
- Select Apply.
View details for a capacity
On the Manage capacities page, select a capacity name to open its details page. The details page shows identifying information for the capacity: SKU, Region, ID, Service admins, and the number of Assigned workspaces.
Metric cards summarize the capacity's current state:
- Utilization shows total compute usage, split into interactive and background usage.
- Current throttling shows whether the capacity is throttled.
- Current activity shows interactive delay, interactive rejection, and background rejection rates.
- Carry forward CUs shows the capacity units carried forward.
- Surge protection shows the background rejection and recovery thresholds. Select Configure to adjust them.
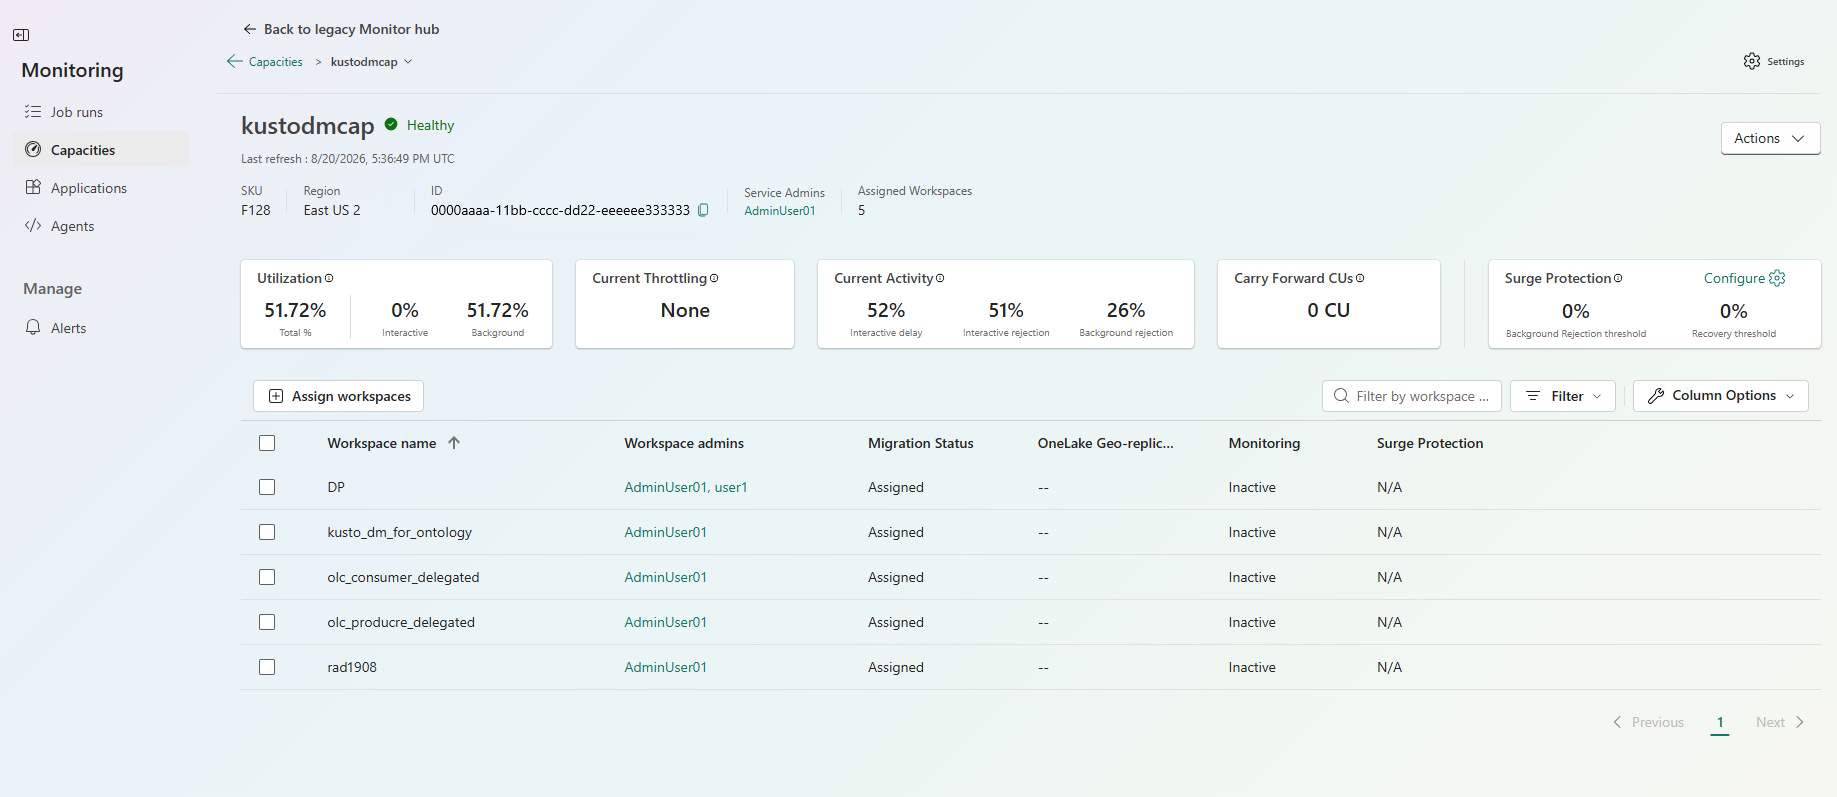
The list of workspaces that are assigned to the capacity shows details about each workspace, including the Workspace admins, Migration status, OneLake geo-replication, Monitoring, and Surge protection state. Select Assign workspaces to add workspaces to the capacity.
Take action on a capacity
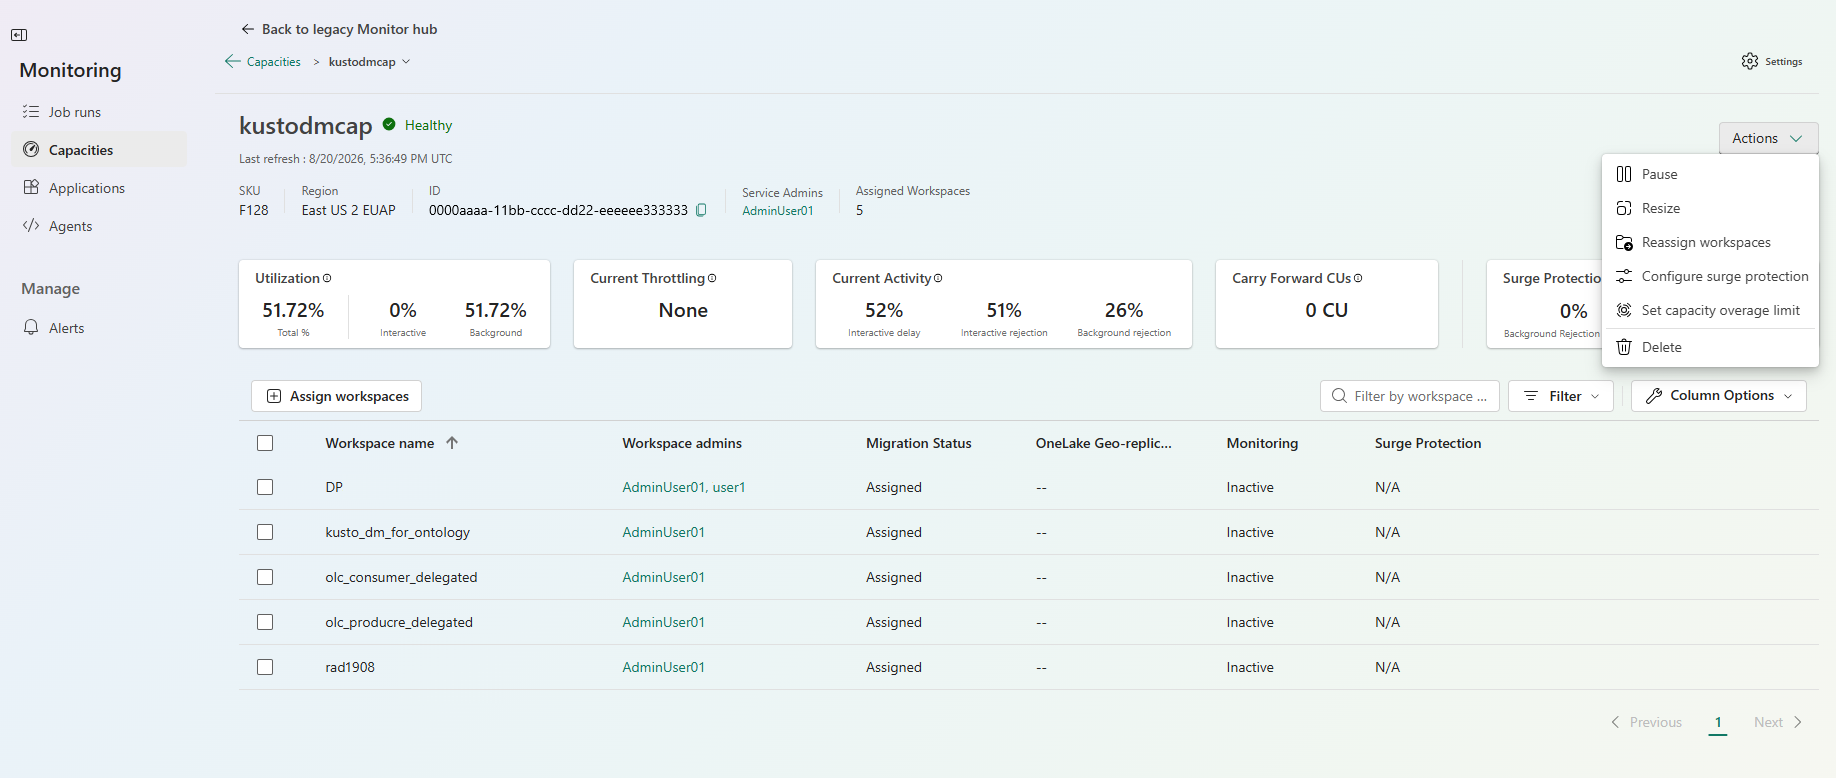
On a capacity's details page, select Actions to manage the capacity. The following actions are available:
- Pause pauses the capacity.
- Resize changes the capacity SKU. To resize a capacity, you need Azure subscription owner permissions.
- Reassign workspaces moves workspaces to another capacity.
- Configure surge protection sets the background rejection and recovery thresholds.
- Set capacity overage limit limits how much overage the capacity can accrue.
- Delete deletes the capacity.