Note
Access to this page requires authorization. You can try signing in or changing directories.
Access to this page requires authorization. You can try changing directories.
In this tutorial, learn how to explore the data in your lakehouse with a notebook.
Prerequisites
To get started, you need the following prerequisites:
- A Microsoft Fabric tenant account with an active subscription. Create an account for free.
- Read the Lakehouse overview.
Open or create a notebook from a lakehouse
To explore your lakehouse data, you can add the lakehouse to an existing notebook or create a new notebook from the lakehouse.
Open a lakehouse from an existing notebook
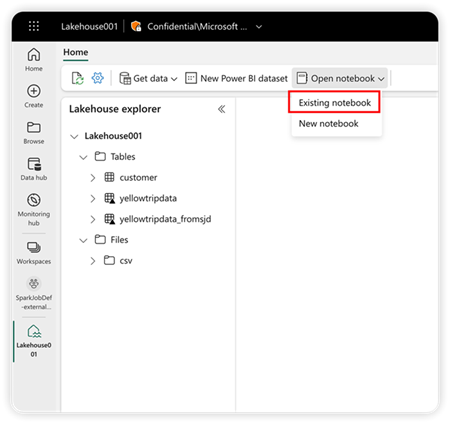
Select the notebook from the notebook list and then select Add. The notebook opens with your current lakehouse added to the notebook.
Open a lakehouse from a new notebook
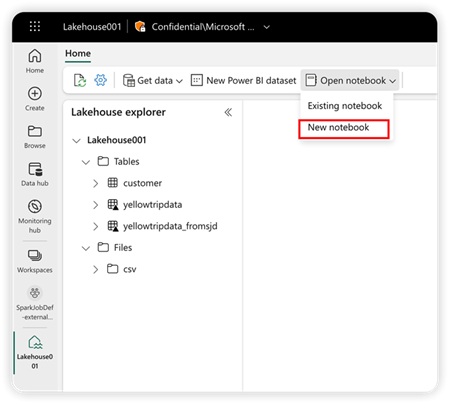
You can create a new notebook in the same workspace and the current lakehouse appears in that notebook.
Switch lakehouses and set a default
You can add multiple lakehouses to the same notebook. By switching the available lakehouse in the left panel, you can explore the structure and the data from different lakehouses.
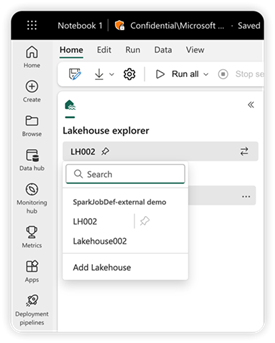
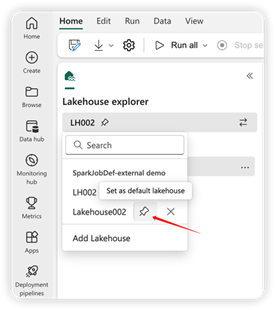
In the lakehouse list, the pin icon next to the name of a lakehouse indicates that it's the default lakehouse in your current notebook. In the notebook code, if only a relative path is provided to access the data from the Microsoft Fabric OneLake, then the default lakehouse is served as the root folder at run time.
To switch to a different default lakehouse, move the pin icon.
Note
The default lakehouse decide which Hive metastore to use when running the notebook with Spark SQL.if multiple lakehouse are added into the notebook, make sure when Spark SQL is used, the target lakehouse and the current default lakehouse are from the same workspace.
Add or remove a lakehouse
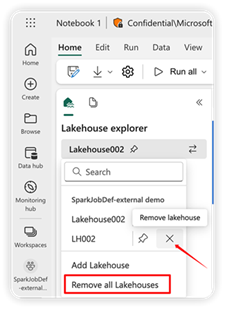
Selecting the X icon next to a lakehouse name removes it from the notebook, but the lakehouse item still exists in the workspace.
To remove all the lakehouses from the notebook, click "Remove all Lakehouses" in the lakehouse list.
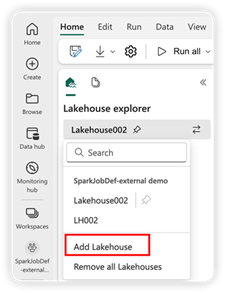
Select Add lakehouse to add more lakehouses to the notebook. You can either add an existing one or create a new one.
Explore the lakehouse data
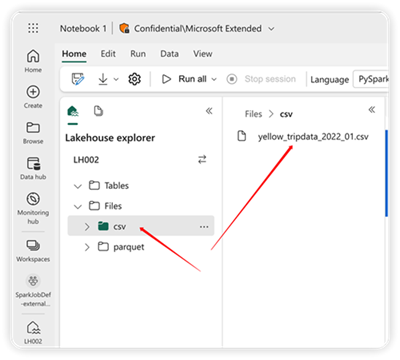
The structure of the Lakehouse shown in the Notebook is the same as the one in the Lakehouse view. For the detail please check Lakehouse overview. When you select a file or folder, the content area shows the details of the selected item.
Note
The notebook will be created under your current workspace.