Note
Access to this page requires authorization. You can try signing in or changing directories.
Access to this page requires authorization. You can try changing directories.
This article describes the change data capture (CDC) capability in Copy job and how to use it.
What is change data capture (CDC) in Copy job
Change data capture (CDC) in Copy job is a powerful capability in Fabric Data Factory that enables efficient and automated replication of changed data including inserted, updated, and deleted records from a source to a destination. This ensures your destination data stays up to date without manual effort, improving efficiency in data integration while reducing the load on your source system.
Key benefits of CDC in Copy job
- Zero manual intervention: Automatically captures incremental changes (inserts, updates, deletes) directly from the source.
- Automatic replication: Keeps destination data continuously synchronized with source changes.
- Optimized performance: Processes only changed data, reducing processing time and minimizing load on the source.
- Smarter incremental copy: Automatically detects CDC-enabled source tables and allows you to select either CDC-based or watermark-based incremental copy for each table.
How it works: CDC-based vs. Watermark-based incremental copy
- CDC-based incremental copy: If your source database has CDC enabled, Copy job automatically captures and replicates inserts, updates, and deletes to the destination, applying the exact changes.
- Watermark-based incremental copy: If CDC isn't enabled on your source database, Copy job detects changes by comparing an incremental column (e.g., timestamp or ID) against the last run, then appends or merges the changed data to the destination based on your configuration.
Supported connectors
Currently, CDC in Copy job supports the following source and destination data stores. We're adding more and please stay tuned.
Supported source store:
- Azure SQL DB
- On-premises SQL Server
- Azure SQL Managed Instance
Supported destination store:
- Azure SQL DB
- On-premises SQL Server
- Azure SQL Managed Instance
How to get started:
Complete the following steps to create a new Copy job to ingest data from Azure SQL DB via CDC to another Azure SQL DB:
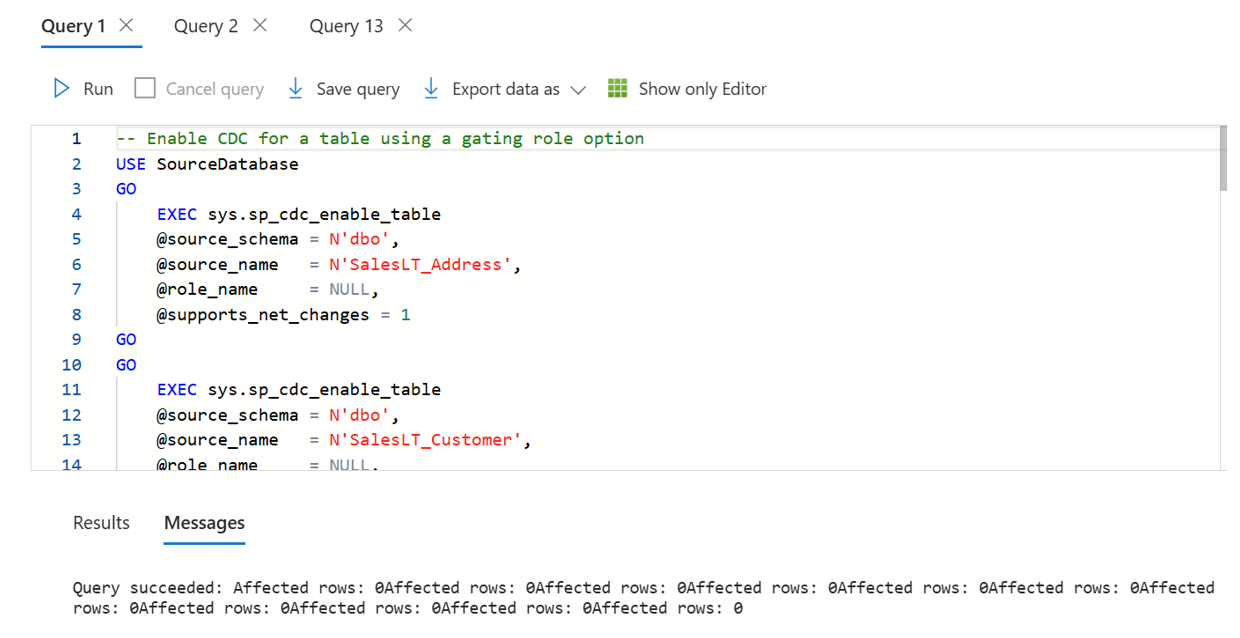
Ensure that change data capture (CDC) is enabled on your database and tables in the supported source store. In this case, it's Azure SQL DB.
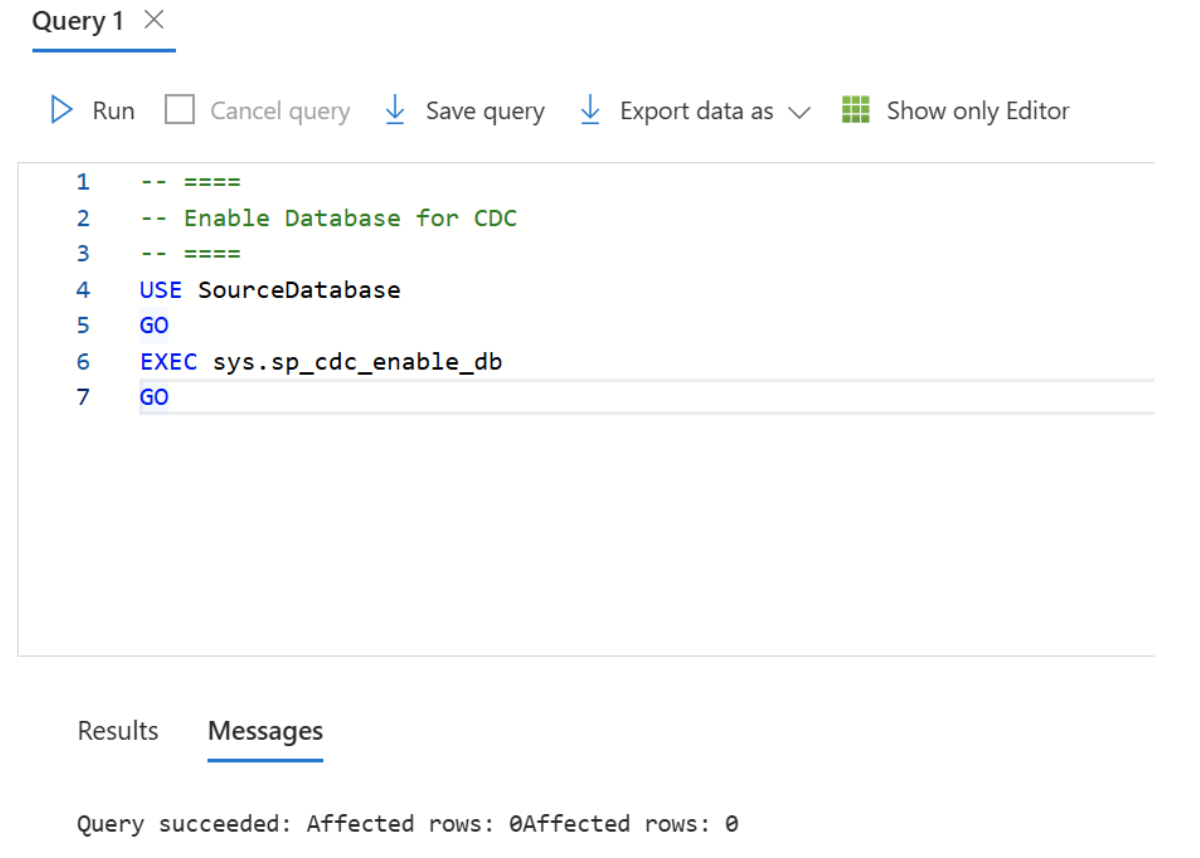
Note
- We suggest you enable CDC for all the tables mentioned above.
- Be sure supports_net_changes is enabled.
- All of the columns in the source table must be identified as captured columns as default.
Learn more in Enable and Disable change data capture - SQL Server | Microsoft Learn.
Select + New Item, choose the Copy job icon, name your Copy job, and click Create.

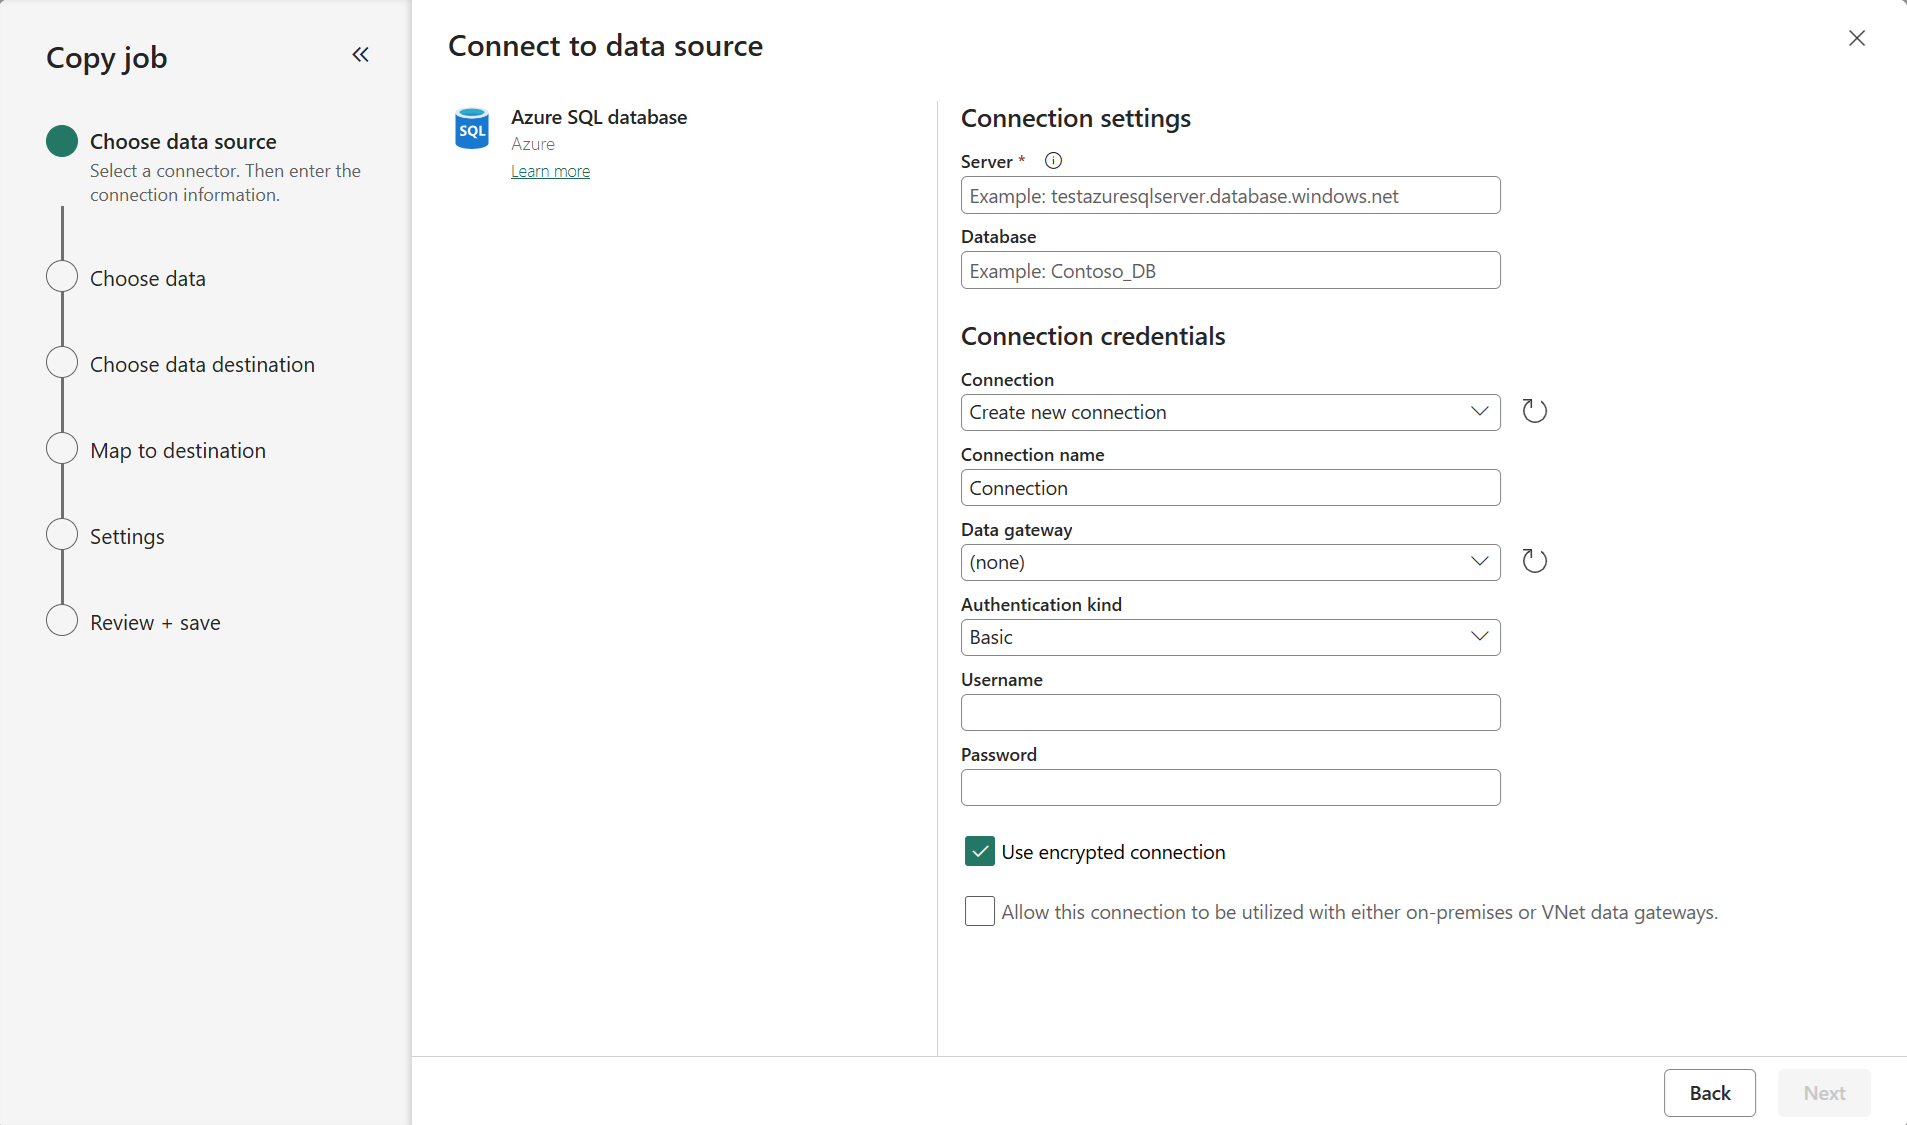
Choose the data stores to copy data from. In this example, choose Azure SQL DB.

Enter your server path and credentials to connect to Azure SQL DB. You can copy data securely within a VNET environment using on-premises or VNET gateway.
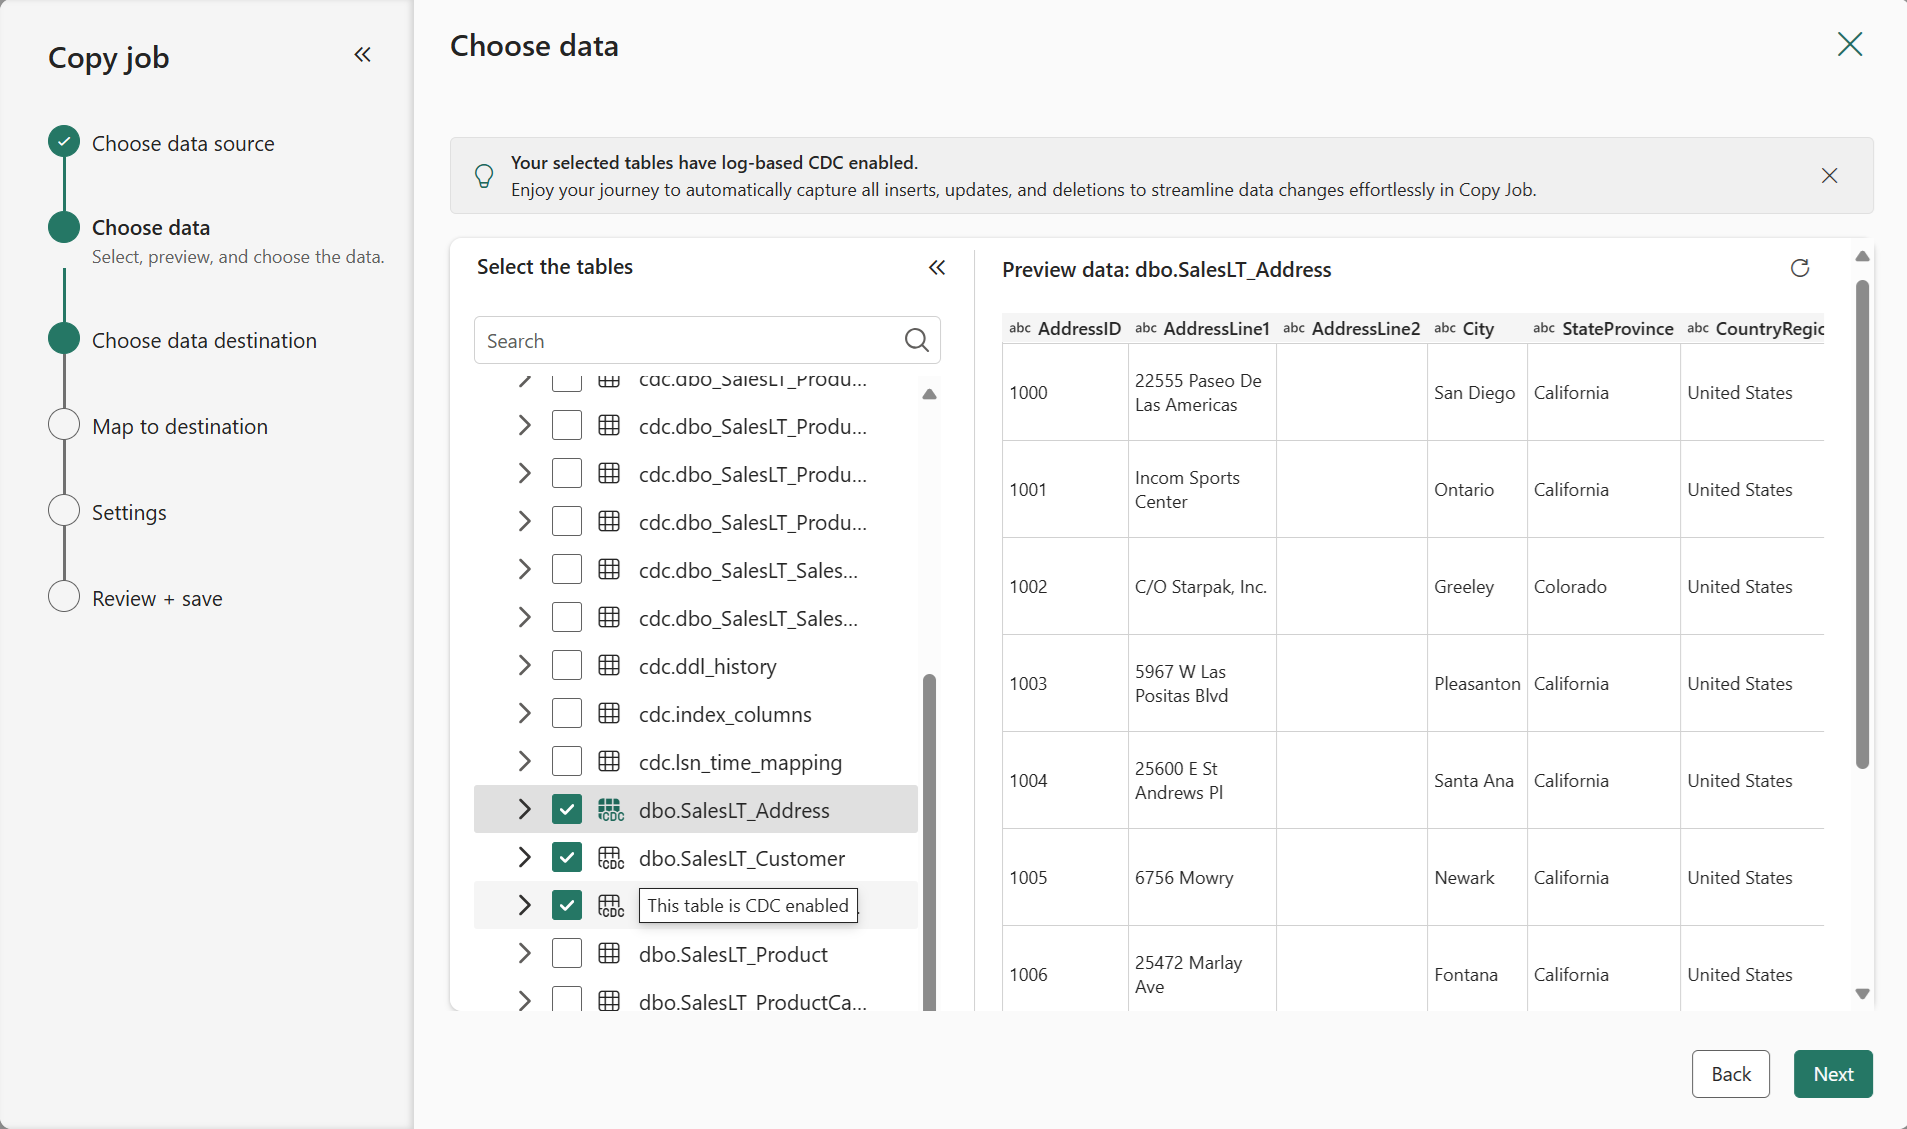
You should have clear visibility of which source tables have CDC enabled. Select the tables with CDC enabled to copy.
Tables with CDC enabled:

Tables without CDC enabled:

Select your destination store. In this example, choose another Azure SQL DB.

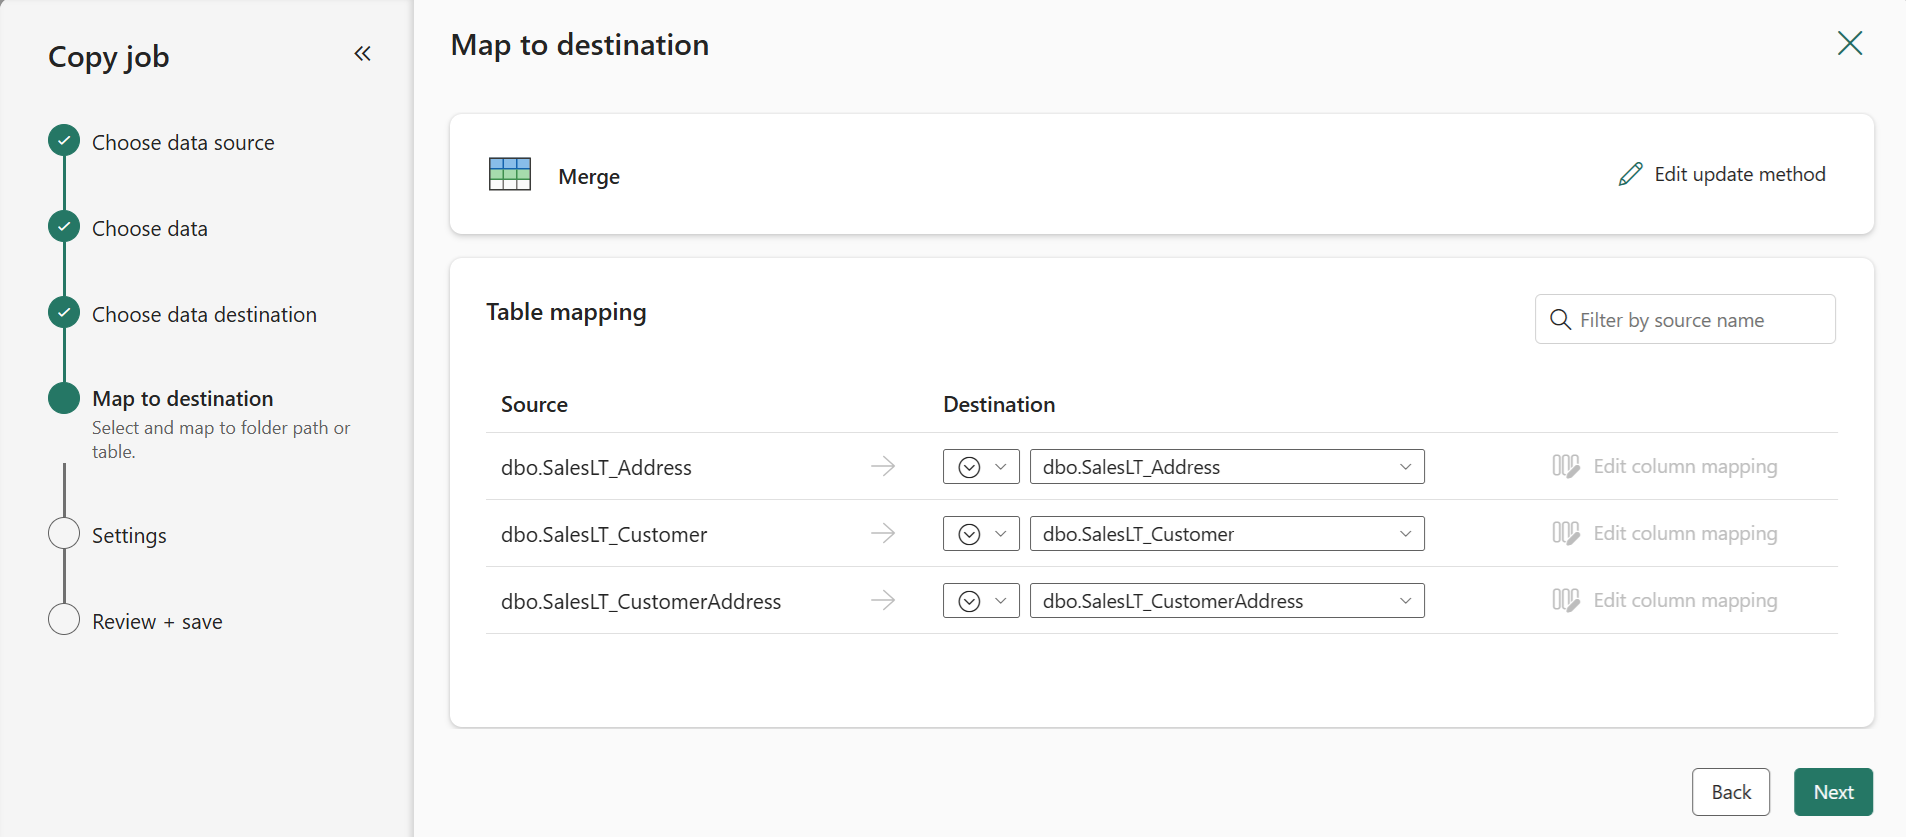
The default Update method should be set to Merge, and the required key columns will match the primary key defined in the source store by default.
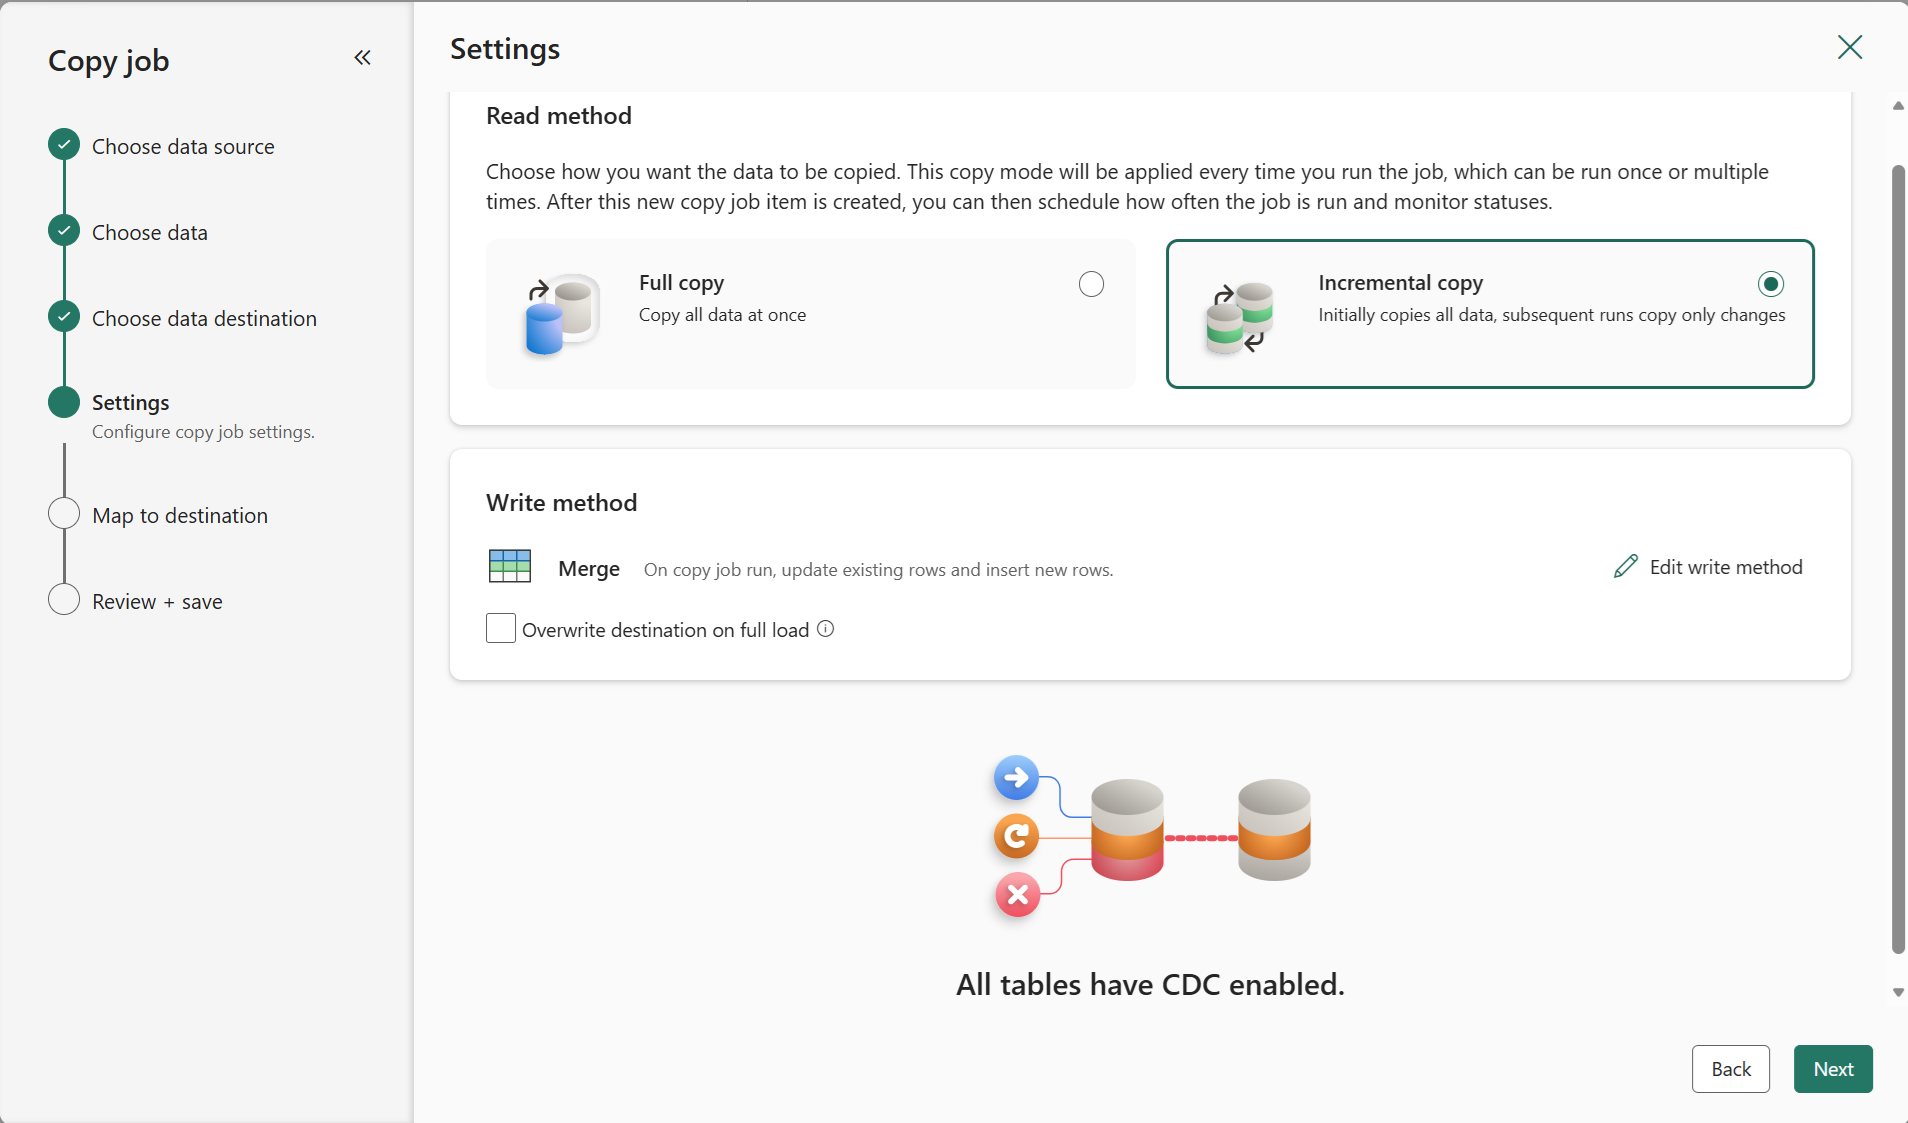
Select Incremental copy and you'll see no Incremental column for each table is required to be input to track changes.
Note
Copy Job initially performs a full load and subsequently carries out incremental copies in subsequent runs via CDC.
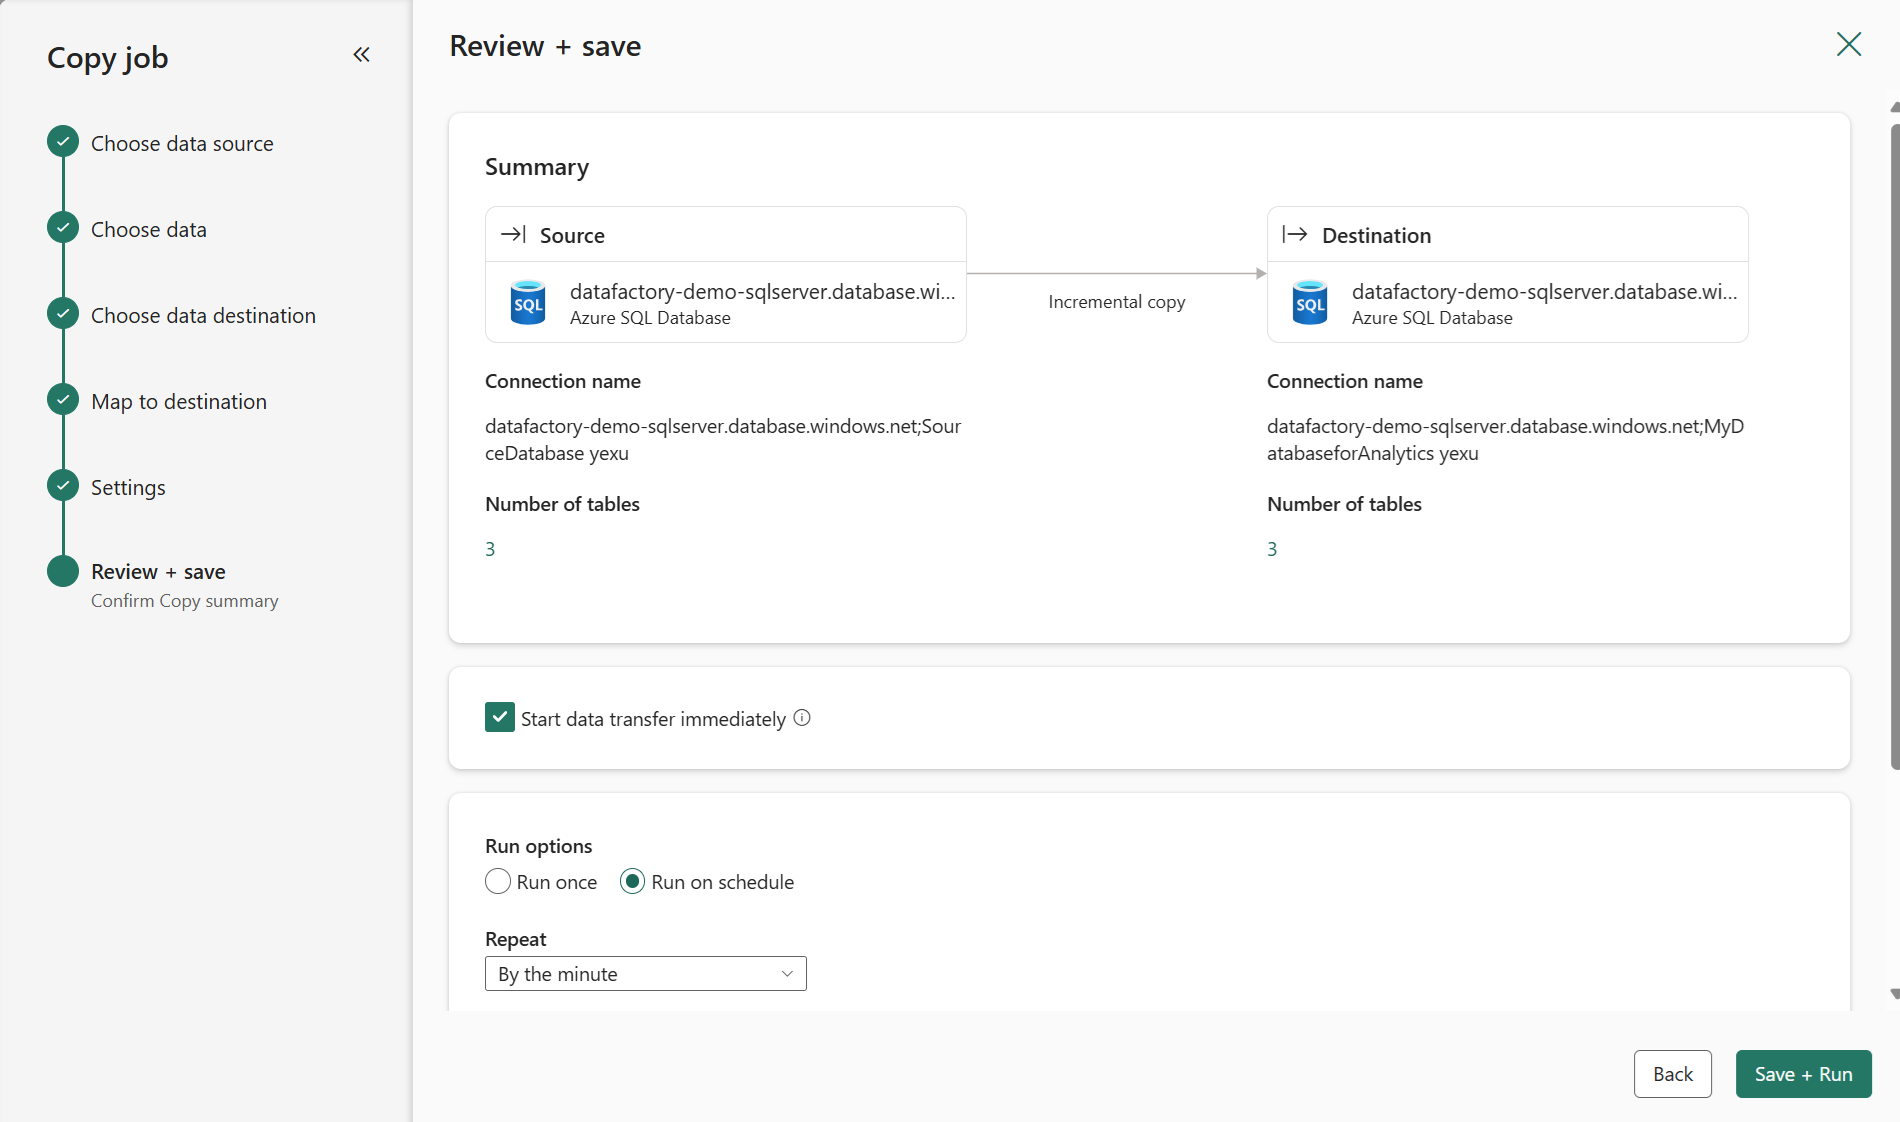
Review the job summary, set the run option to on schedule, and click Save + Run.
Note
Please ensure that your CDC log retention period is longer than the interval between scheduled runs; otherwise, the changed data captured by CDC might be lost if not processed within the retention period.
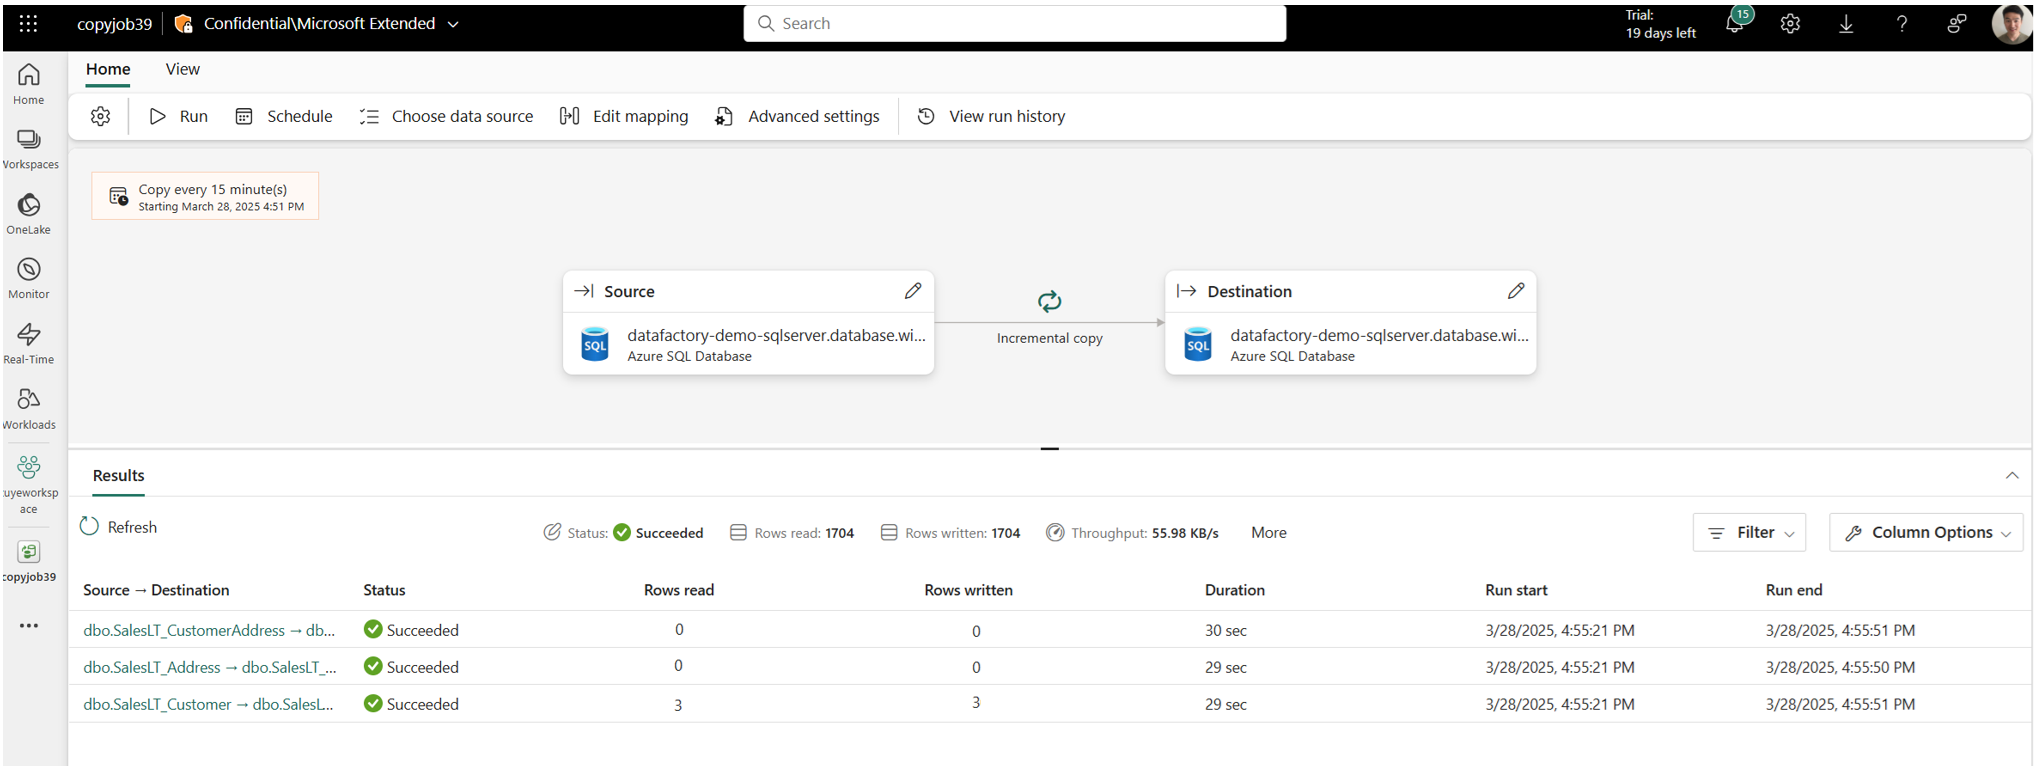
Your copy job will start immediately. The first run will copy an initial full snapshot.

Update your source tables by inserting, updating, or deleting rows.
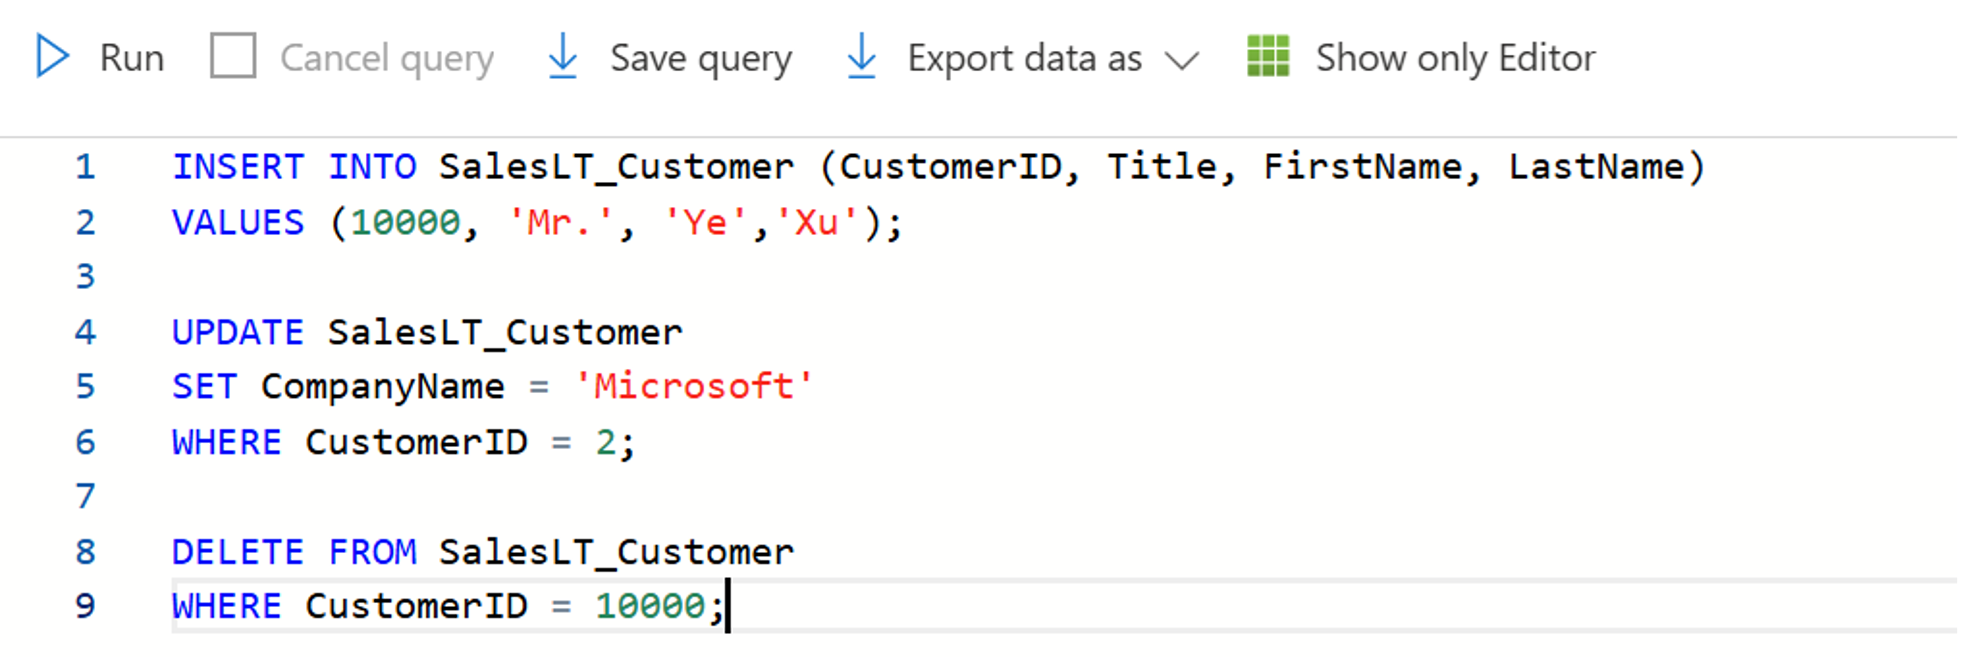
Run the Copy job again to capture and replicate all changes, including inserted, updated, and deleted rows, to the destination.
Known limitations
- When both CDC-enabled and non-CDC-enabled source tables are selected in a Copy Job, it treats all tables as watermark-based incremental copy.
- When CDC-enabled source tables are selected, column mapping and temp DB can't be configured.
- Custom capture instances aren't supported; only the default capture instance is supported.
- SCD2 isn't supported for CDC-enabled source datastore yet.
- DDL isn't supported yet in Copy job.