Note
Access to this page requires authorization. You can try signing in or changing directories.
Access to this page requires authorization. You can try changing directories.
You can complete this module in about 15 minutes. In this final part of the tutorial, you create a pipeline that orchestrates the Copy job and (optionally) the dataflow you built in Modules 1 and 2, send an email notification when all jobs complete, and schedule the pipeline to run automatically.
Prerequisites
- Module 1 of this tutorial series: Ingest data with a Copy job
- Module 2 of this tutorial series: Transform data with a dataflow
Create a pipeline
First, create a pipeline to orchestrate the Copy job you already built.
From your workspace, select + New item, then search for and choose Pipeline.
Provide a pipeline name. Then select Create.

Add your Copy job activity
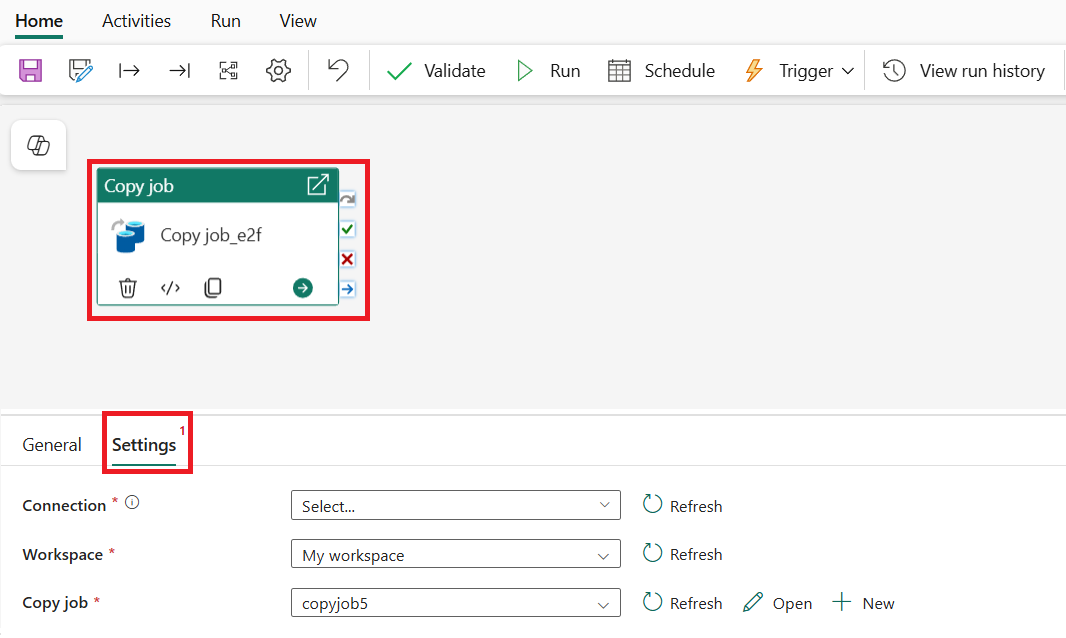
On the pipeline canvas, select the Activities tab, Copy data, then Add copy job activity.

Select the copy job activity on the pipeline canvas, then select the Settings tab below the canvas.
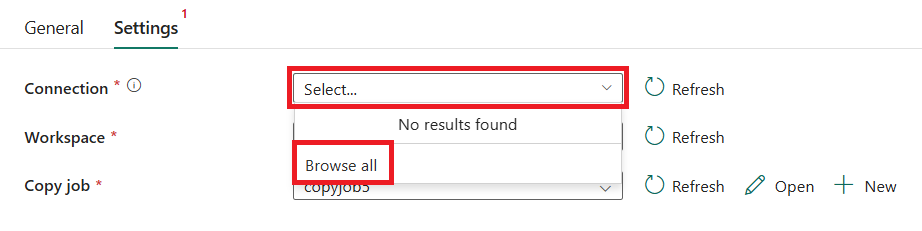
Select the Connection dropdown and select Browse all.
Select Copy job under New sources.
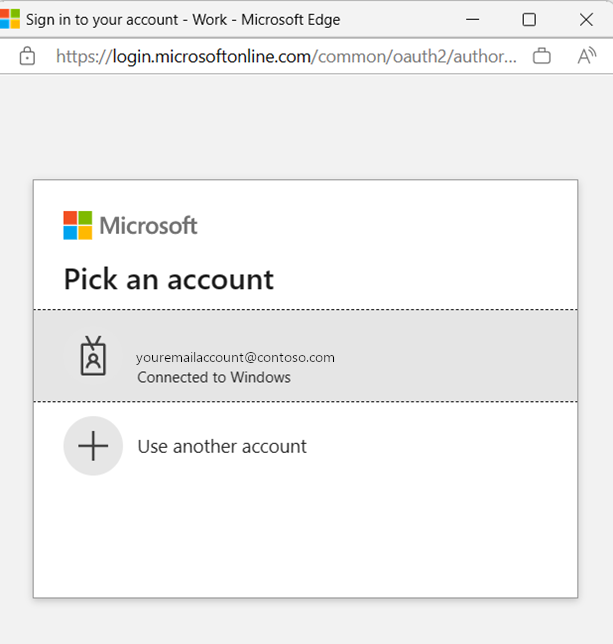
On the Connect data source page, select Sign in to authenticate the connection.

Follow the prompts to sign in to your organizational account.
Select Connect to complete the connection setup.
For Workspace, select the workspace you created your Copy job in for Module 1.
For Copy job, select the Copy job you created in Module 1.


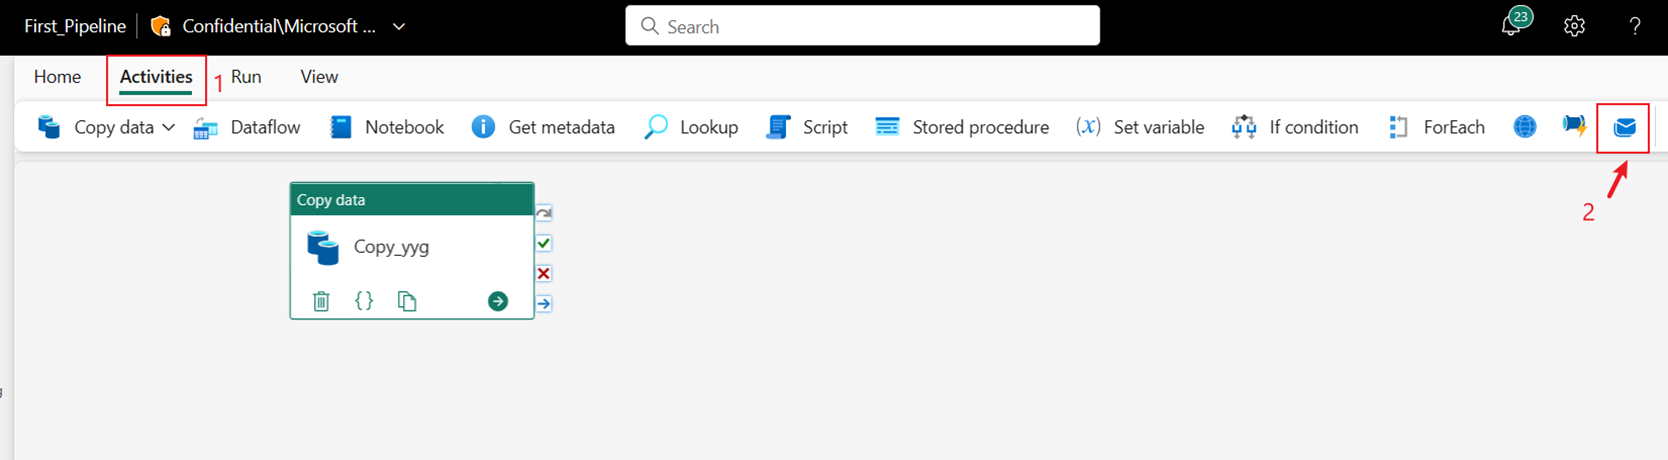
Add an Office 365 Outlook activity
Select the Activities tab in the pipeline editor and find the Office 365 Email activity.
Select the new Office 365 Email activity and select its Settings tab.
Select the Connection dropdown list, and then select Browse all.
Select Office 365 Email.
Select Sign in to connect your Office 365 account.
Note
The service doesn't currently support personal email. You must use an enterprise email address.
Select Connect.
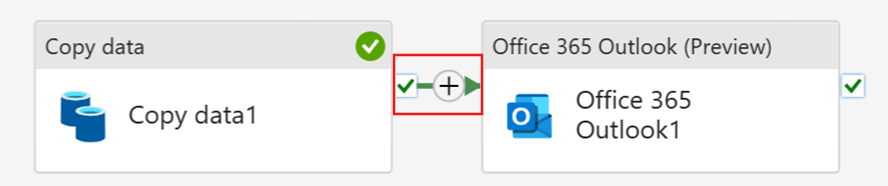
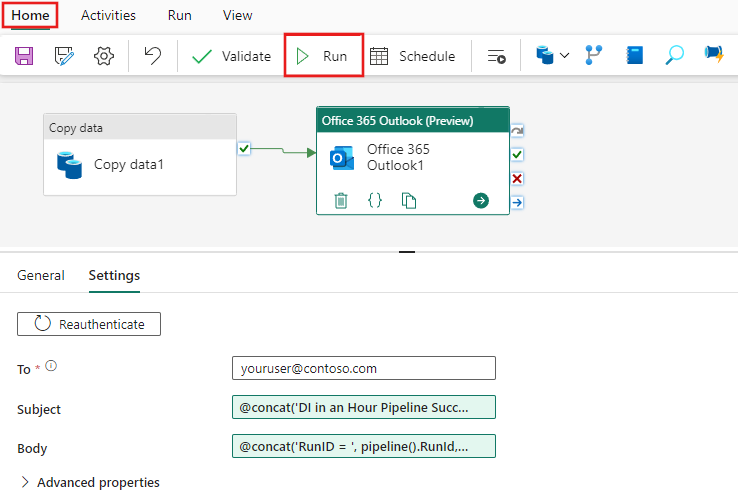
Select and drag the On success path (a green checkbox on the top right side of the activity in the pipeline canvas) from your Copy job activity to your new Office 365 Email activity.
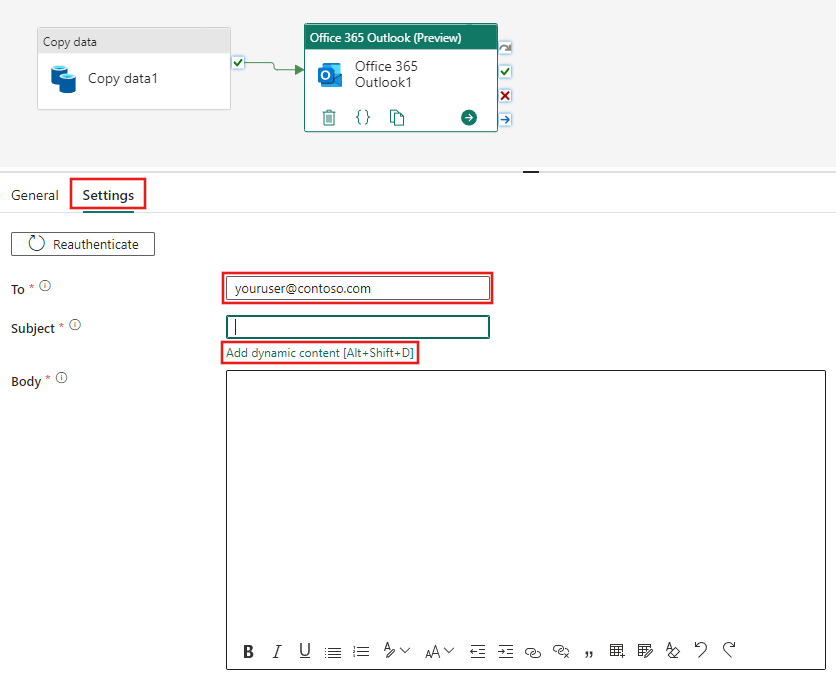
Select the Office 365 Email activity from the pipeline canvas, then select the Settings tab of the property area below the canvas to configure the email.
- Enter your email address in the To section. If you want to use several addresses, use ; to separate them.
- For the Subject, select the field so that the Add dynamic content option appears, and then select it to display the pipeline expression builder canvas.
The Pipeline expression builder dialog appears. Enter the following expression, then select OK:
@concat('DI in an Hour Pipeline Succeeded with Pipeline Run Id', pipeline().RunId)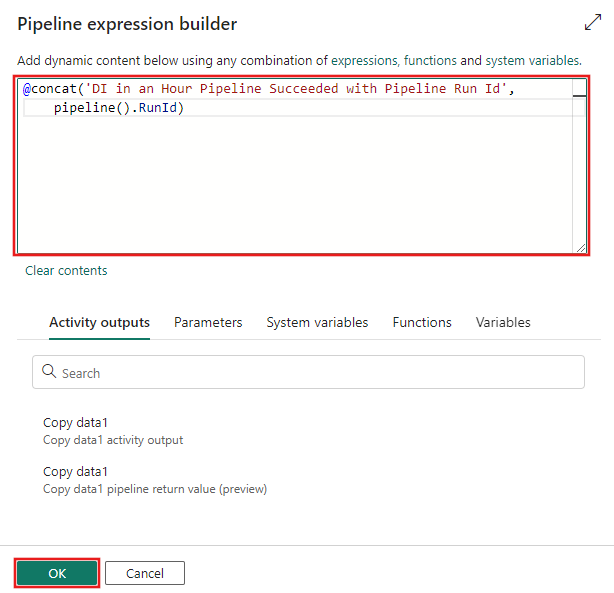
For the Body, select the text field and choose the View in expression builder option when it appears below the text area. Add the following expression again (with your own copy job activity name) in the Pipeline expression builder dialog that appears, then select OK:
@concat('RunID = ', pipeline().RunId, ' ; ', 'Files written: ', activity('Copy job_1').output.value[0].output.filesWritten, ' ; ','Throughput: ', activity('Copy job_1').output.value[0].output.throughput,' ; ','Time to copy: ', activity('Copy job_1').output.executionDuration,' ; ','Time in queue: ', activity('Copy job_1').output.durationInQueue)Important
Replace Copy job_1 with the name of your own pipeline copy job activity.
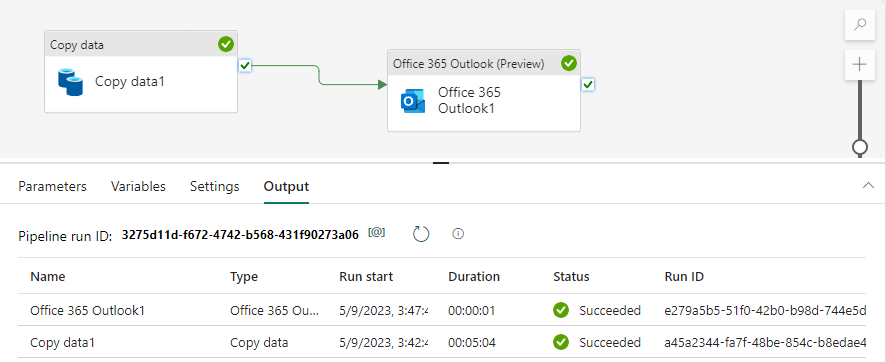
Finally select the Home tab at the top of the pipeline editor, and choose Run. Then select Save and run again on the confirmation dialog to execute these activities.
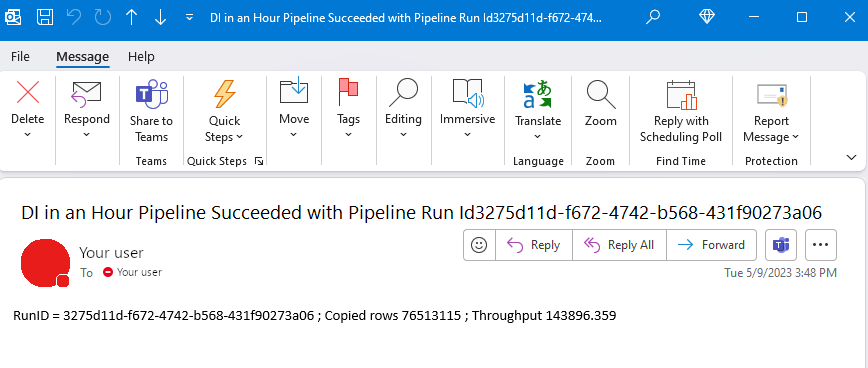
After the pipeline runs successfully, check your email to find the confirmation email sent from the pipeline.
(Optional) Add a Dataflow activity to the pipeline
You can also add the dataflow you created in Module 2: Create a dataflow in Data Factory into the pipeline.
Hover over the green line connecting the copy job activity and the Office 365 Email activity on your pipeline canvas, and select the + button to insert a new activity.
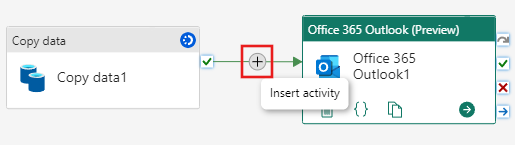
Choose Dataflow from the menu that appears.
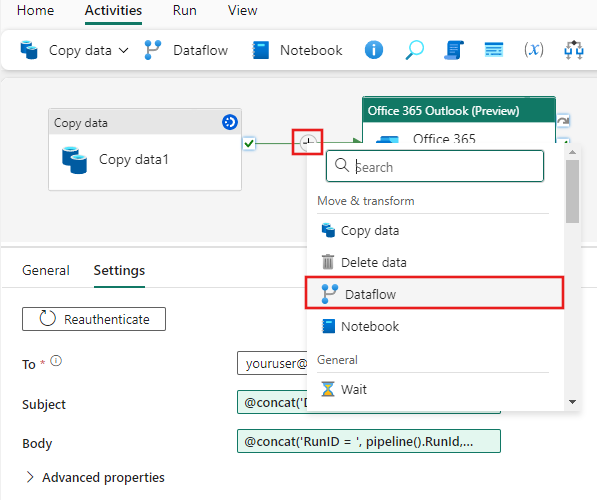
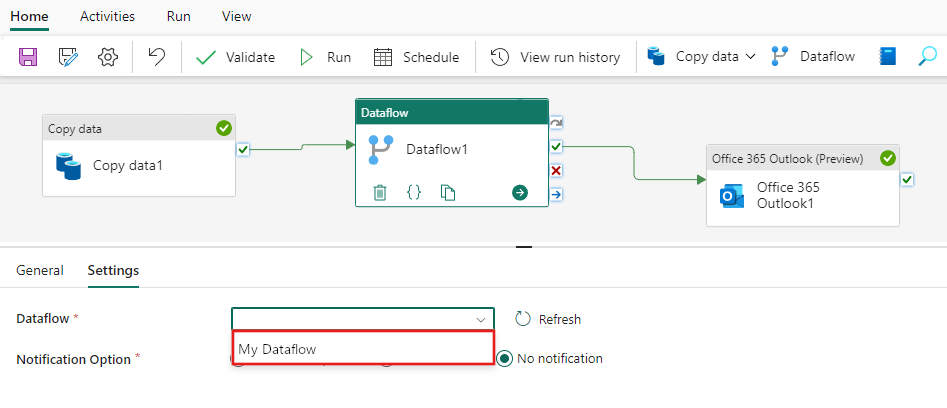
The newly created Dataflow activity is inserted between the copy job activity and the Office 365 Email activity, and selected automatically, showing its properties in the area below the canvas. Select the Settings tab on the properties area, and then select your dataflow created in Module 2: Create a dataflow in Data Factory.
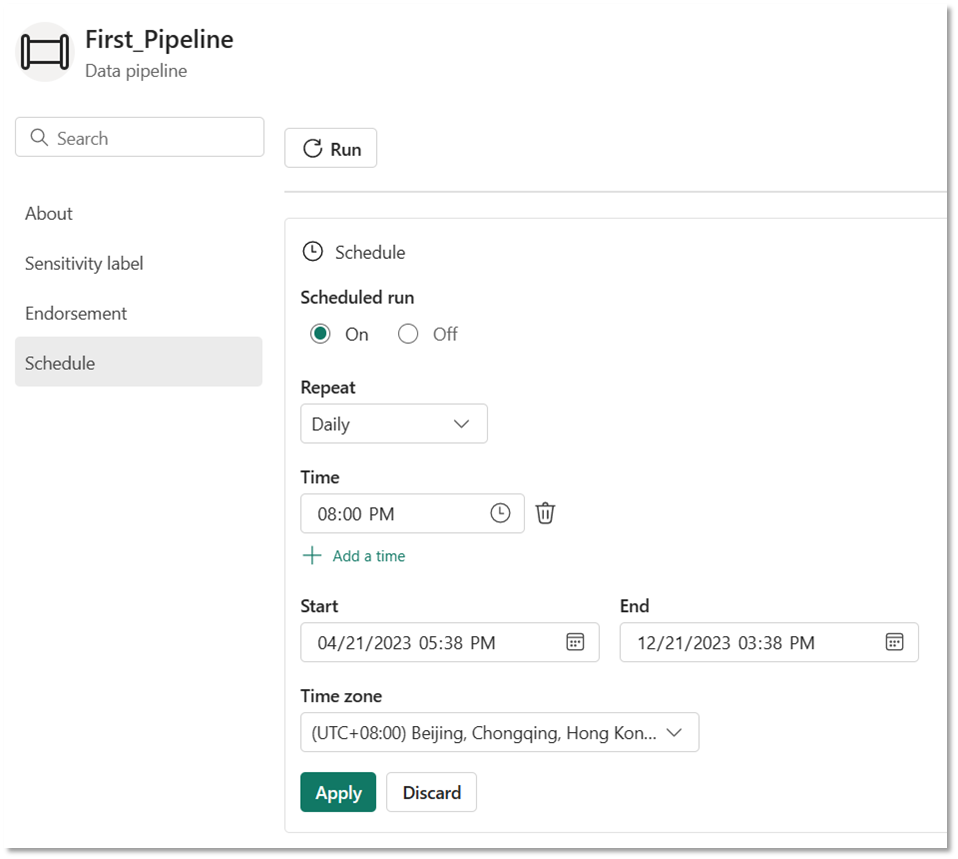
Schedule pipeline execution
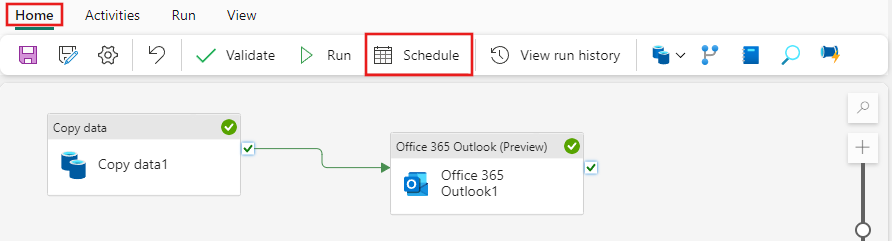
Once you finish developing and testing your pipeline, you can schedule it to execute automatically.
On the Home tab of the pipeline editor window, select Schedule.
Select + Add schedule
Configure the schedule as required. The example here schedules the pipeline to execute daily at 8:00 PM for a year.