Note
Access to this page requires authorization. You can try signing in or changing directories.
Access to this page requires authorization. You can try changing directories.
In this tutorial, you'll create a data pipeline that incrementally copies new and changed files only, from Lakehouse to Lakehouse. It uses Filter by last modified to determine which files to copy.
After you complete the steps here, Data Factory will scan all the files in the source store, apply the file filter by Filter by last modified, and copy to the destination store only files that are new or have been updated since last time.
Prerequisites
- Lakehouse. You use the Lakehouse as the destination data store. If you don't have it, see Create a Lakehouse for steps to create one. Create a folder named source and a folder named destination.
Configure a data pipeline for incremental copy
Step 1: Create a pipeline
Navigate to Power BI.
Select the Power BI icon in the bottom left of the screen, then select Data factory to open homepage of Data Factory.
Navigate to your Microsoft Fabric workspace.
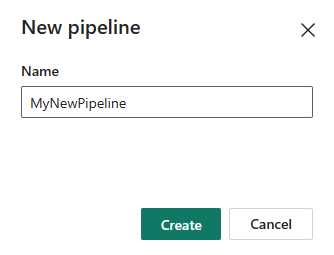
Select Data pipeline and then input a pipeline name to create a new pipeline.


Step 2: Configure a copy activity for incremental copy
Add a copy activity to the canvas.
In Source tab, select your Lakehouse as the connection, and select Files as the Root folder. In File path, select source as the folder. Specify Binary as your File format.

In Destination tab, select your Lakehouse as the connection, and select Files as the Root folder. In File path, select destination as the folder. Specify Binary as your File format.

Step 3: Set the time interval for incremental copy
Assume that you want to incrementally copy new or changed files in your source folder every five minutes:
Select the Schedule button on the top menu. In the pop-up pane, turn on your schedule run, select By the minute in Repeat and set the interval to 5 minutes. Then specify the Start date and time and End date and time to confirm the time span that you want this schedule to be executed. Then select Apply.


Go to your copy activity source. In Filter by last modified under Advanced, specify the Start time using Add dynamic content. Enter
@formatDateTime(addMinutes(pipeline().TriggerTime, -5), 'yyyy-MM-dd HH:mm:ss')in the opened pipeline expression builder.
Select Run. Now your copy activity can copy the new added or changed files in your source in every next five minutes to your destination folder until the specified end time.
When you select different Repeat, the following table shows different dynamic content that you need to specify in Start time. When choose Daily and Weekly, you can only set a single time for the use of the corresponding dynamic content.
Repeat Dynamic content By the minute @formatDateTime(addMinutes(pipeline().TriggerTime, -<your set repeat minute>), 'yyyy-MM-dd HH:mm:ss')Hourly @formatDateTime(addHours(pipeline().TriggerTime, -<your set repeat hour>), 'yyyy-MM-ddTHH:mm:ss')Daily @formatDateTime(addDays(pipeline().TriggerTime, -1), 'yyyy-MM-ddTHH:mm:ss')Weekly @formatDateTime(addDays(pipeline().TriggerTime, -7), 'yyyy-MM-ddTHH:mm:ss')
Related content
Next, advance to learn more about how to incrementally load data from Data Warehouse to Lakehouse.