Note
Access to this page requires authorization. You can try signing in or changing directories.
Access to this page requires authorization. You can try changing directories.
Applies to: ✅ Warehouse in Microsoft Fabric
In this article, you learn how to use the Copy job activity in Data Factory pipelines.
- Pipelines offer an alternative to using the COPY command through a graphical user interface.
- A pipeline is a logical grouping of activities that together perform a data ingestion task.
- Pipelines allow you to manage all extract, transform, and load (ETL) activities in one place, instead of managing each one individually.
Note
Some features from Azure Data Factory aren't available in Microsoft Fabric. However, the concepts are interchangeable. You can learn more about Azure Data Factory and pipelines in Pipelines and activities in Azure Data Factory and Azure Synapse Analytics. For a quickstart, see Quickstart: Create your first pipeline to copy data.
Create a copy job
To create a new copy job, follow these steps.
In your workspace home screen, select the + New item button. In the Get data section, select Copy job.
In the New copy job dialog, enter a name for your new pipeline and select Create. The new Copy job window opens.
Choose your data source from the OneLake catalog.
In the Choose data page, preview the selected dataset. After you review the data, select Next.
On the Choose data destination page, select your desired warehouse in the OneLake catalog.
The Choose copy job mode page allows you to configure how you want the data to be copied: a full copy, or incremental copies that perform only subsequent copies when the source data changes.
For now, select Full copy. For other data sources and scenarios, you can incrementally load data as the data source is updated.
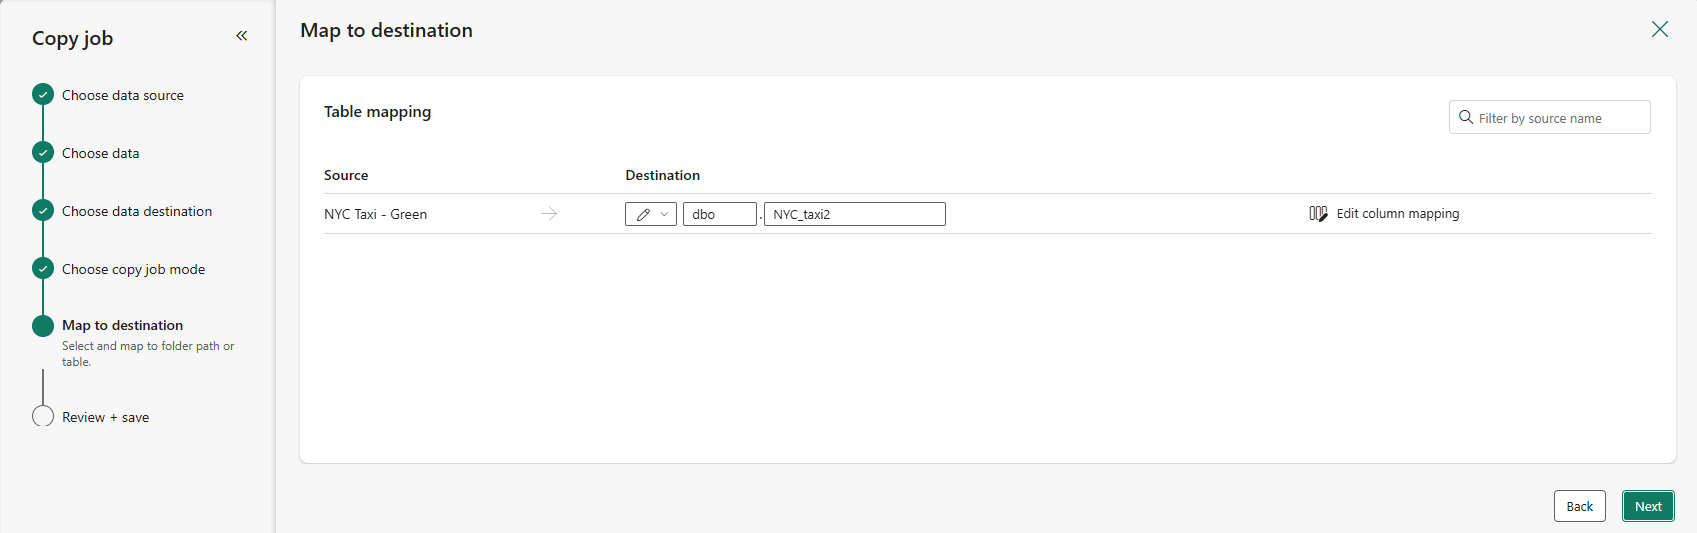
You can adjust the Destination tables with the name of your desired destination schema and table name. Provide schema and table names that match your desired naming convention. When you're done making changes, select Next.
Optionally, to modify the column mappings, select Edit column mapping. You can map source column names to new names, data types, or skip source column columns.
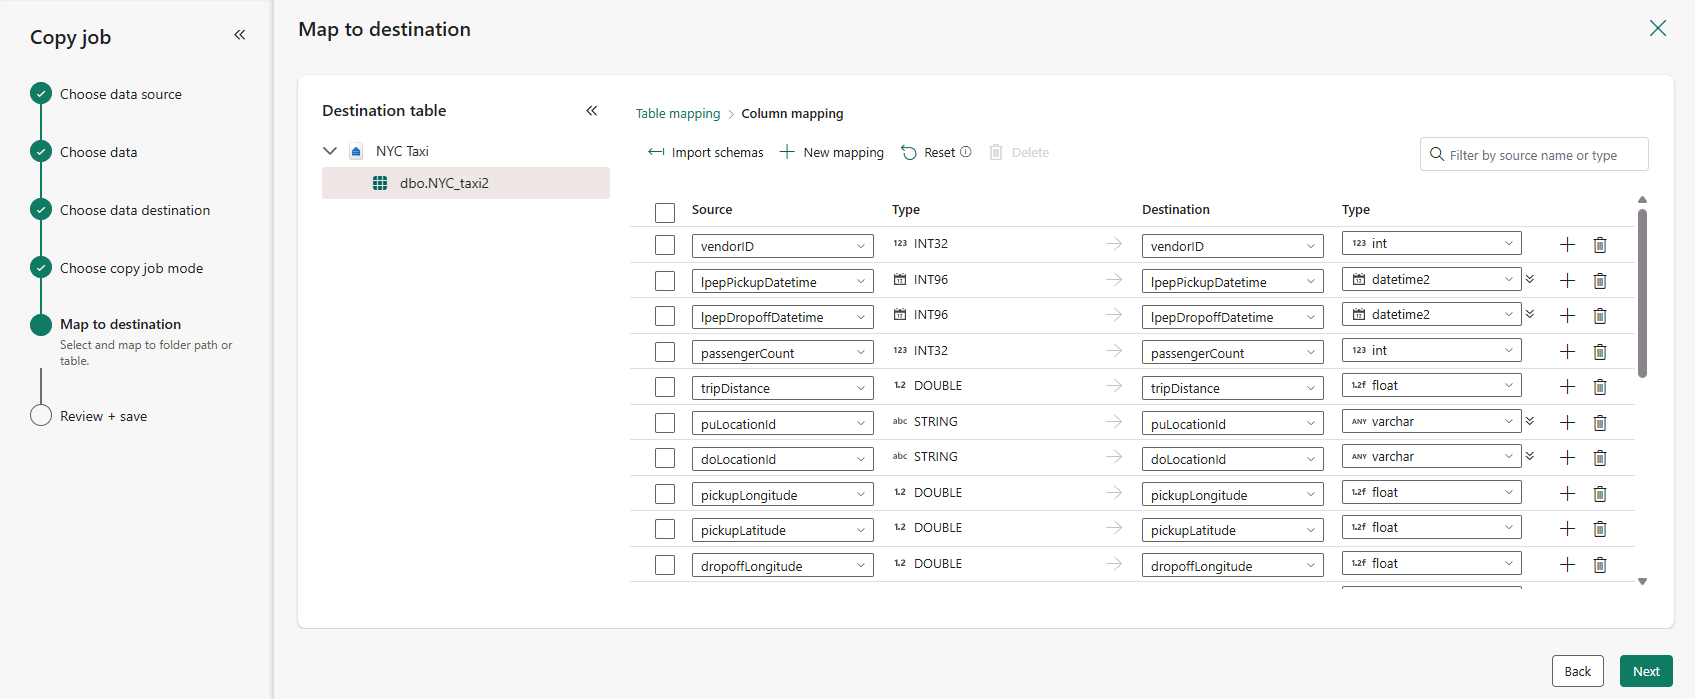
When you're done reviewing column mappings, select Next.
The Review + save page is a summary of the new Copy job.
Review the summary and options, then select Save + Run.
You're directed to the pipeline canvas area, where a new Copy job activity with its Source and Destination is already configured for you. If you selected Start data transfer immediately on the previous page, the copy job starts as soon as it's ready to run.
You can monitor the status of your pipeline in the Results pane.
After a few seconds, your pipeline finishes successfully. When you navigate back to your warehouse, you can select your table to preview the data and confirm that the copy operation concluded.


Next step
Data ingestion options
Other ways to ingest data into your warehouse include: