Note
Access to this page requires authorization. You can try signing in or changing directories.
Access to this page requires authorization. You can try changing directories.
Create a semantic view in your lakehouse to define tables, relationships, and metrics. This article shows how to edit or upload YAML files and organize the view folder.
If you're deciding whether to use a semantic view or author a Power BI semantic model directly, see Semantic view or semantic model?
Important
This feature is in preview.
Prerequisites
- A Fabric workspace with a lakehouse.
- Write permission on that lakehouse. To publish, you also need the Contributor role or higher in the workspace.
Before creating a view, check the workspace restrictions for publishing.
Create a view with the starter file
The New semantic view command is available on the Lakehouse view, not the SQL analytics endpoint tab. It creates the folder structure and adds a commented starter file you can fill in.
For supported YAML syntax, see Semantic view YAML syntax reference.
Open your lakehouse and ensure you are on the Lakehouse view.
On the ribbon, select New semantic view. After the
Semantic Viewsfolder exists, you can also right-click it in the Explorer pane and select New semantic view.
Enter a name for the view in Semantic view name, then select Create.


The command creates Context/Semantic Views/<view-name>/ and adds a starter .yaml file. For example, a view named sales starts with sales_semantic_view.yaml. If a view folder with that name already exists, the command fails and doesn't change the existing folder.

The folder name is the view name and the name of the generated semantic model. Each YAML file still needs a name value, but Fabric doesn't use it.
Fill in name and at least one dataset in the starter file. For example, this minimal definition exposes an existing dbo.sales table:
version: 0.2.0.dev0
name: sales
datasets:
  - name: sales
    source: dbo.sales
Uncomment and complete the relationship blocks for any relationships your metrics need, then add the metric definitions. Don't leave unfilled keys in the definition. For examples, see Semantic view YAML syntax reference.

Upload existing YAML files
If you already have YAML files for a view, upload them into the view folder instead of using the starter file. Uploaded files are saved automatically.
If you created the view with New semantic view, replace or delete the starter YAML file when your uploaded files provide the complete definition. Publishing includes every .yaml file in the view folder, so an incomplete or conflicting starter can cause publishing to fail.
To create the folder structure manually, create a folder named exactly Semantic Views under Context, then create a subfolder for your view inside it. The view subfolder name becomes the view name and the name of the generated semantic model.
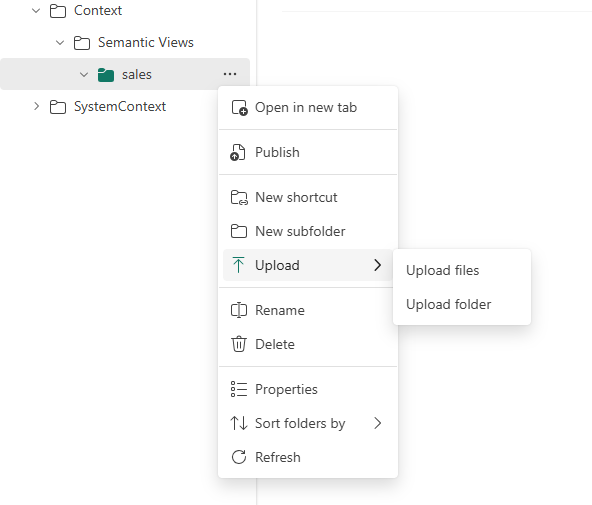
In the Explorer pane, right-click the view folder under
Context/Semantic Views.Select Upload > Upload files, then choose your files.
Edit and save
Under Context/Semantic Views/<view-name>/, open a .yaml file, edit its definitions or descriptions, then select Save. Don't edit the generated output in SystemContext.
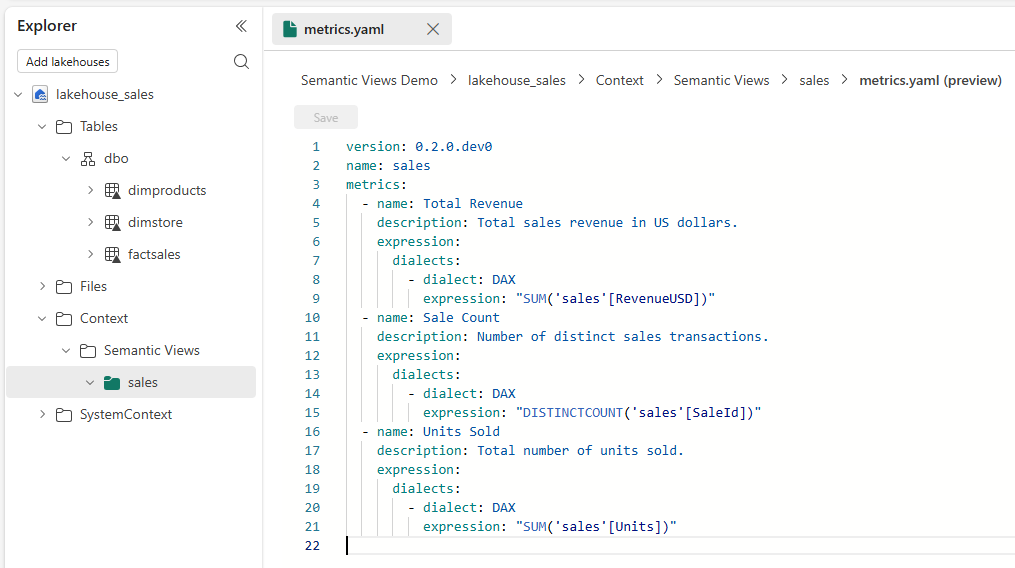
Saving writes the file only. It doesn't validate the definition or update the generated semantic model. To do that, publish the view.
Organize the view folder
How you arrange files inside the view folder determines what you can share through a OneLake shortcut, because shortcuts work at the folder level.
When splitting a definition across files, follow the validation rules.
Keep schema and metrics together
New semantic view starts with one file. You can split the definition into multiple files in the same folder, as shown in the following example. A shortcut to the folder shares schema and metrics together.
Context/
  Semantic Views/
    sales/
      schema.yaml
      metrics-revenue.yaml
      metrics-profitability.yaml
Separate schema from metrics
Use subfolders when you want to shortcut schema and metrics independently. Combine a shortcut to shared metrics with local dataset and relationship definitions.
Context/
  Semantic Views/
    sales/
      schema/
        schema.yaml
      metrics/
        metrics-revenue.yaml
        metrics-profitability.yaml
Subfolders don't create separate views. For shortcut setup, local data requirements, and updates to shared definitions, see Reuse a view in another lakehouse.
Folder rules
Keep these constraints in mind as you create and organize views:
- A view folder must be a direct child of
Context/Semantic Views. Subfolders aren't independently publishable views, but can contain shortcuts to other views' definitions. See Combine semantic views. - Each folder directly under
Semantic Viewsis an independent view. Sibling views aren't automatically merged; include their definitions through shortcuts to combine them. - All
.yamlfiles inside a view folder, including subfolders and shortcut content, are merged into that one view when you publish. File order doesn't matter. - A semantic view supports up to 20
.yamlfiles in total, including files in subfolders and shortcut content. - Files with other extensions, including
.yml, are ignored without warnings and don't count toward the YAML file limit. - Folder names are case-sensitive in OneLake, but semantic model names aren't. If two view folders differ only by case, such as
Salesandsales, you can publish only one of them. - You can't rename or delete the
Semantic Viewsfolder in the Fabric portal. You can rename or delete it through OneLake file explorer and the APIs, which breaks the views it contains.
For file-count and size limits, see Size and file limits. For rename and delete behavior, see Considerations and limitations.
Delete a semantic view
Deleting a semantic view requires separate cleanup of its source folder, generated semantic model, and generated output. Before deleting the model, identify connected reports and agents and coordinate with their owners. Deleting the model breaks those connections; republishing the view creates a new model and doesn't restore them.
- In the lakehouse Explorer pane, delete the specific view folder under
Context/Semantic Views, such asContext/Semantic Views/sales. Don't delete the parentSemantic Viewsfolder or other views. - In the workspace, delete the generated semantic model for that view, such as
sales. Deleting the source folder alone doesn't delete the model. - If another view remains in the same lakehouse, publish that view to trigger cleanup of the deleted view's generated output. Publishing also updates the remaining view's model, so review its saved definitions before publishing.
- Under
SystemContext/Semantic Views, verify that the deleted view's generated folder, such asSystemContext/Semantic Views/sales, is gone.
Important
In this preview, generated-output cleanup runs only when a view in the same lakehouse is published. There is no background cleanup. If you delete the last view and no subsequent publish occurs, its generated output remains in SystemContext. Don't treat deletion of the source folder or model alone as removal of metadata exposed through SystemContext.