Note
Access to this page requires authorization. You can try signing in or changing directories.
Access to this page requires authorization. You can try changing directories.
In this tutorial step, you download the Adventure Works sample data from GitHub and load it into a lakehouse. If you already have a lakehouse with data (for example, from your own organization), you can skip this step.
The dataset contains tables in Parquet format. The tables represent various entities in the fictional bicycle manufacturing company, such as customers, products, orders, and vendors. In later tutorial steps, you use this data to build and query a graph that reveals how these entities connect. For example, you can discover which customers purchased which products, or which vendors supply specific product categories.
Download the sample data
Go to the graph in Microsoft Fabric GQL example datasets on GitHub.
Select the adventureworks_docs_sample.zip file and download it to your local machine.
Tip
To download a file from GitHub, select the file, and then select the Download raw file icon.
Extract the downloaded adventureworks_docs_sample.zip file to a folder on your local machine.
Tip
In File Explorer, right-click the zip file and select Extract All, then choose a destination folder.
Create a lakehouse
If you don't already have a lakehouse, create one to store the sample data:
- In Microsoft Fabric, select the workspace where you want to create the lakehouse.
- Select + New item.
- Select Store data > Lakehouse.
- Enter a name (for example, "AdventureWorksLakehouse"), clear the Lakehouse schemas option, and select Create.
For more detailed instructions, see Create a lakehouse.
Upload the sample data to the lakehouse
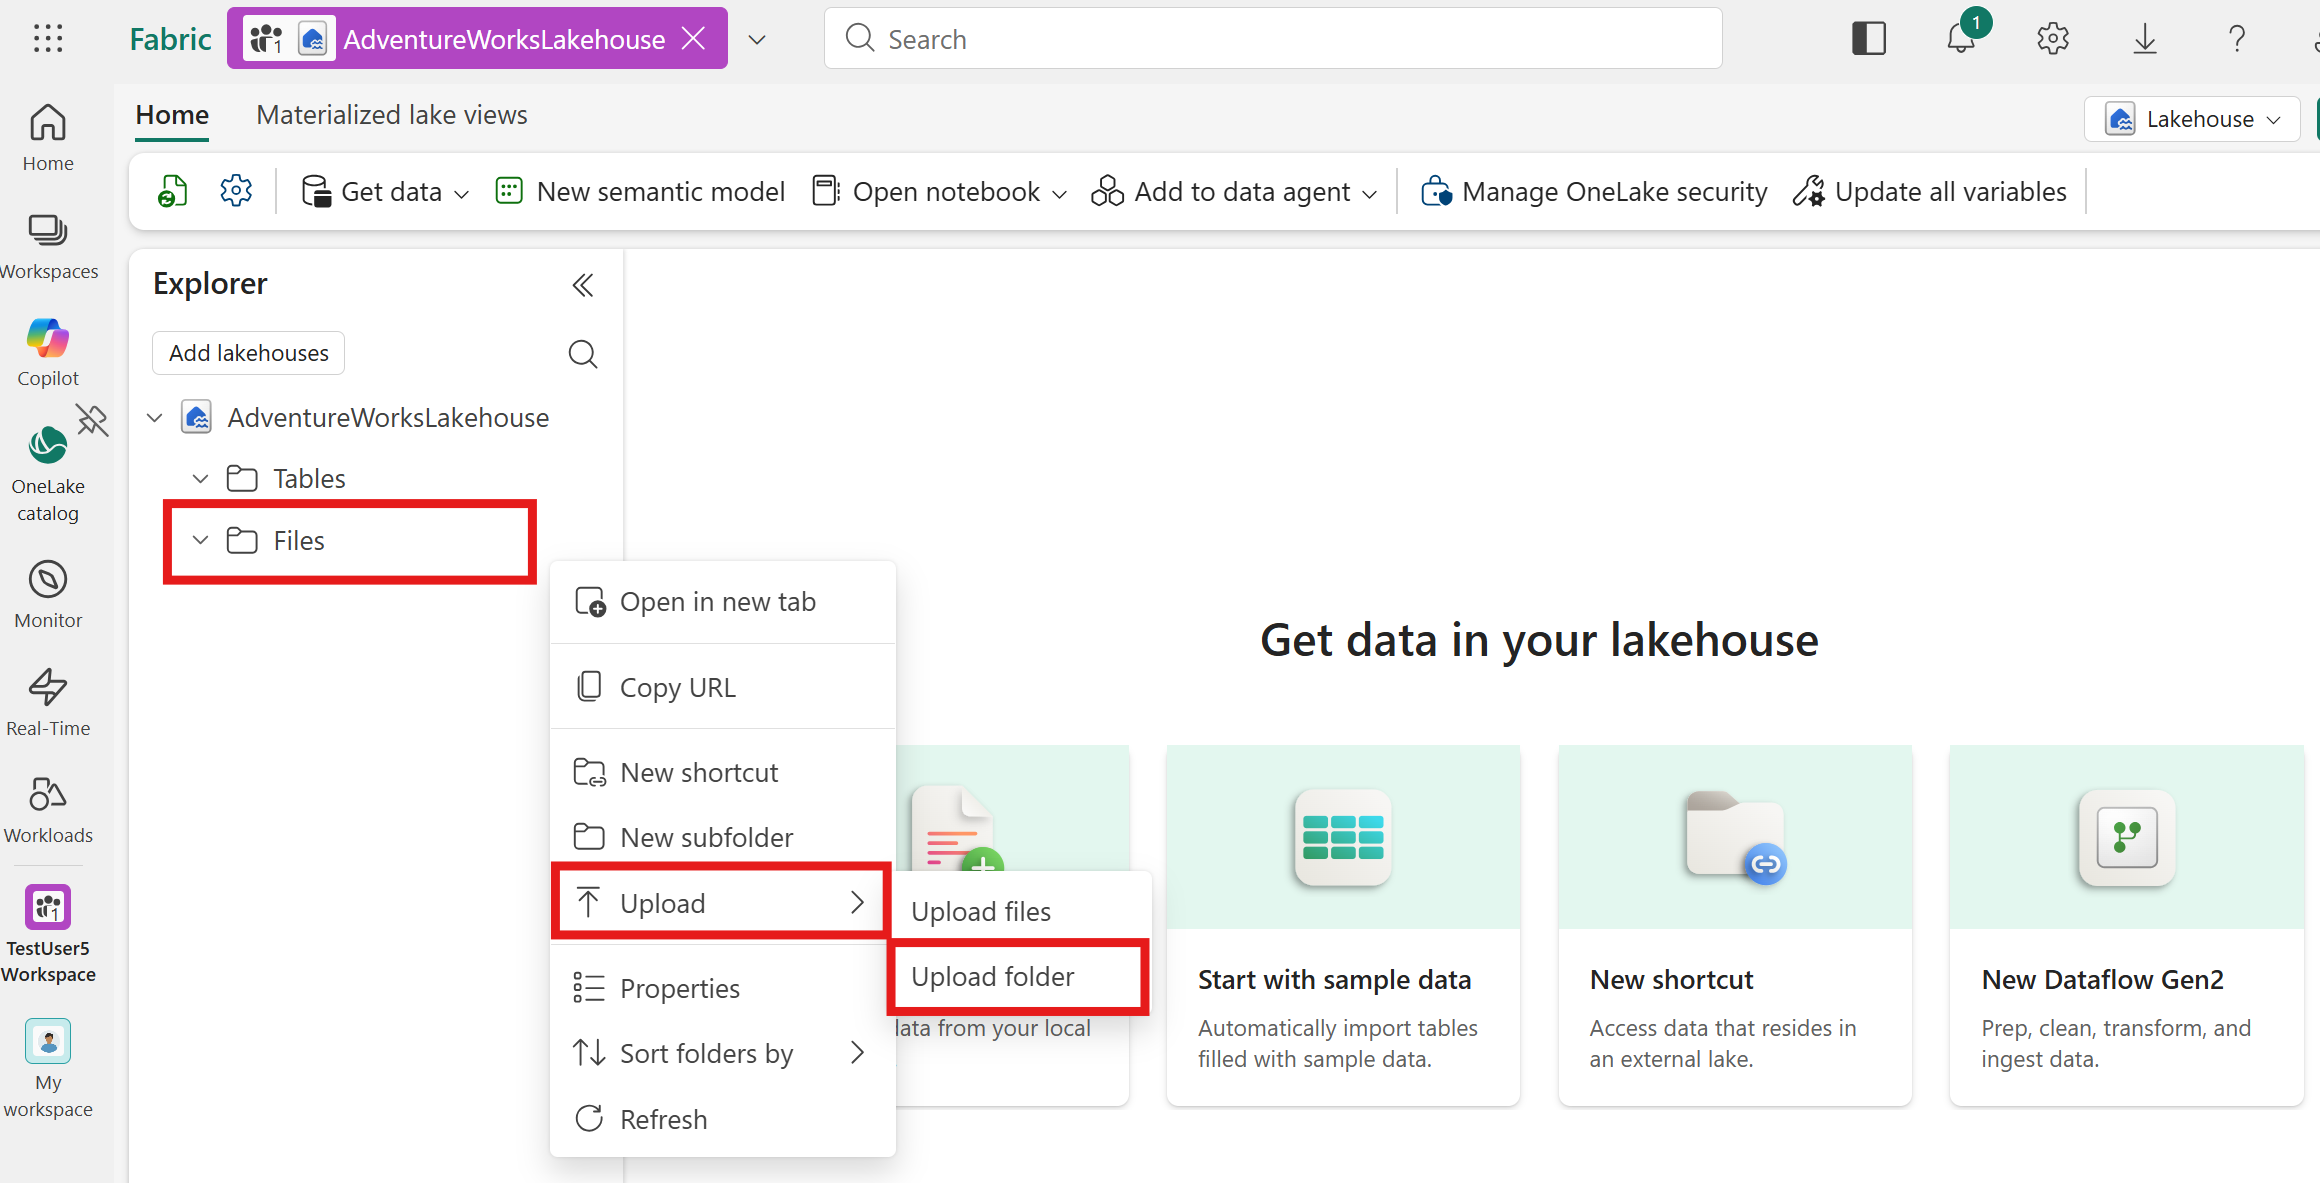
In your lakehouse Explorer, hover over Files. Select the triple ellipsis (...) that appears, and then select Upload > Upload folder.
Note
You can't upload an entire folder by using Upload files.
In the Upload folder dialog, browse to where you extracted the folder and select it. Then select Upload.
A pop-up window might appear asking you to confirm the number of files to upload. Select Upload in that pop-up, and then select Upload in the Upload folder dialog.
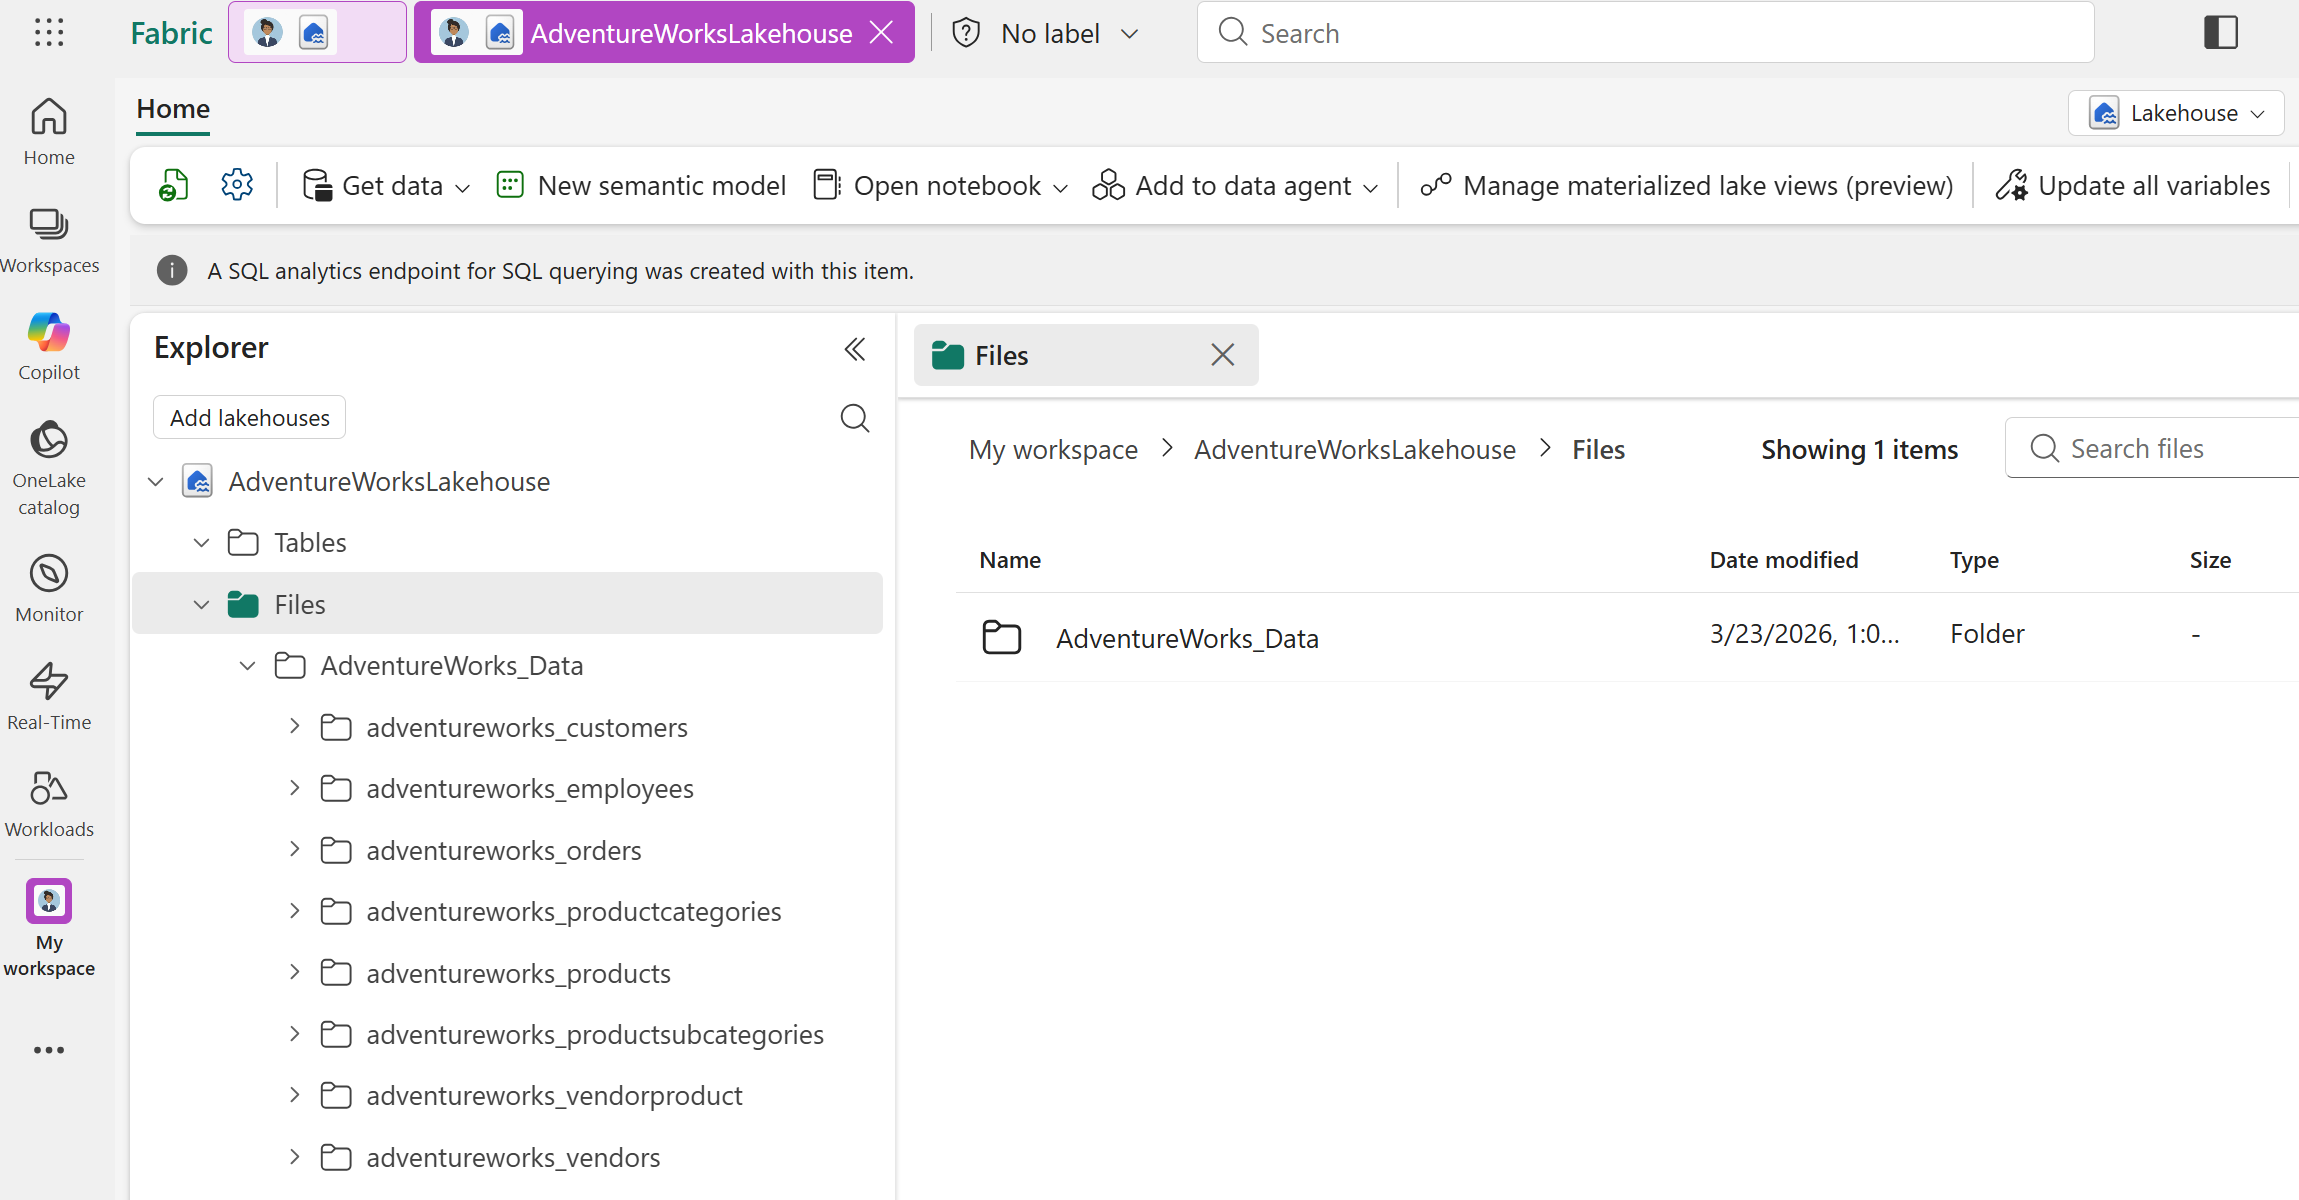
Your lakehouse should now contain the uploaded AdventureWorks_Data folder with the data files.


Load the data into tables
After you upload the files, load them into tables. Tables are the source data from a lakehouse that you use to create node types and edge types in your graph model.
For each subfolder in the uploaded AdventureWorks_Data folder, follow these steps to load the data into tables:
Drag and drop the subfolder (for example, adventureworks_customers) from the Files section to the Tables section in the lakehouse Explorer.
In the Load folder to new table dialog, enter a table name (the default is the folder name), set the file type to parquet, and then select Load.
After you load all the tables, your Lakehouse Explorer shows eight tables. The lakehouse in your workspace is now ready with the Adventure Works sample data. In the next step, you create a graph that uses this data.
