Note
Access to this page requires authorization. You can try signing in or changing directories.
Access to this page requires authorization. You can try changing directories.
In your planning sheet, you might occasionally need to perform calculations with row values. Formula rows let you calculate values based on other rows in the report. Define formulas by referencing existing rows and applying functions.
Important
This feature is in preview.
The planning sheet has an intuitive formula editor where you enter the row formula. The Excel-like engine supports multiple functions (logical, mathematical, and more) and provides features such as autocomplete, syntax help, and multi-line editing to simplify formula creation and troubleshooting.
This article explains how to insert formula rows and configure their properties.
Insert a formula row
Select the row underneath the space where you want to insert the new row. The new row will be inserted above the selected row.
Go to Planning > Insert Row and then select Formula, or select the row gripper and select Insert > Formula.
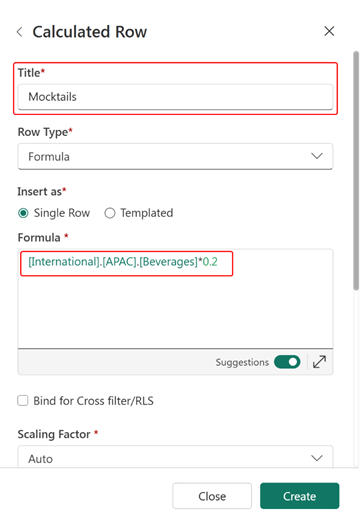
In the Calculated Row pane, enter a title and define the formula, then select Create to insert the row.
Note
The Create option is only enabled after a valid formula is entered.
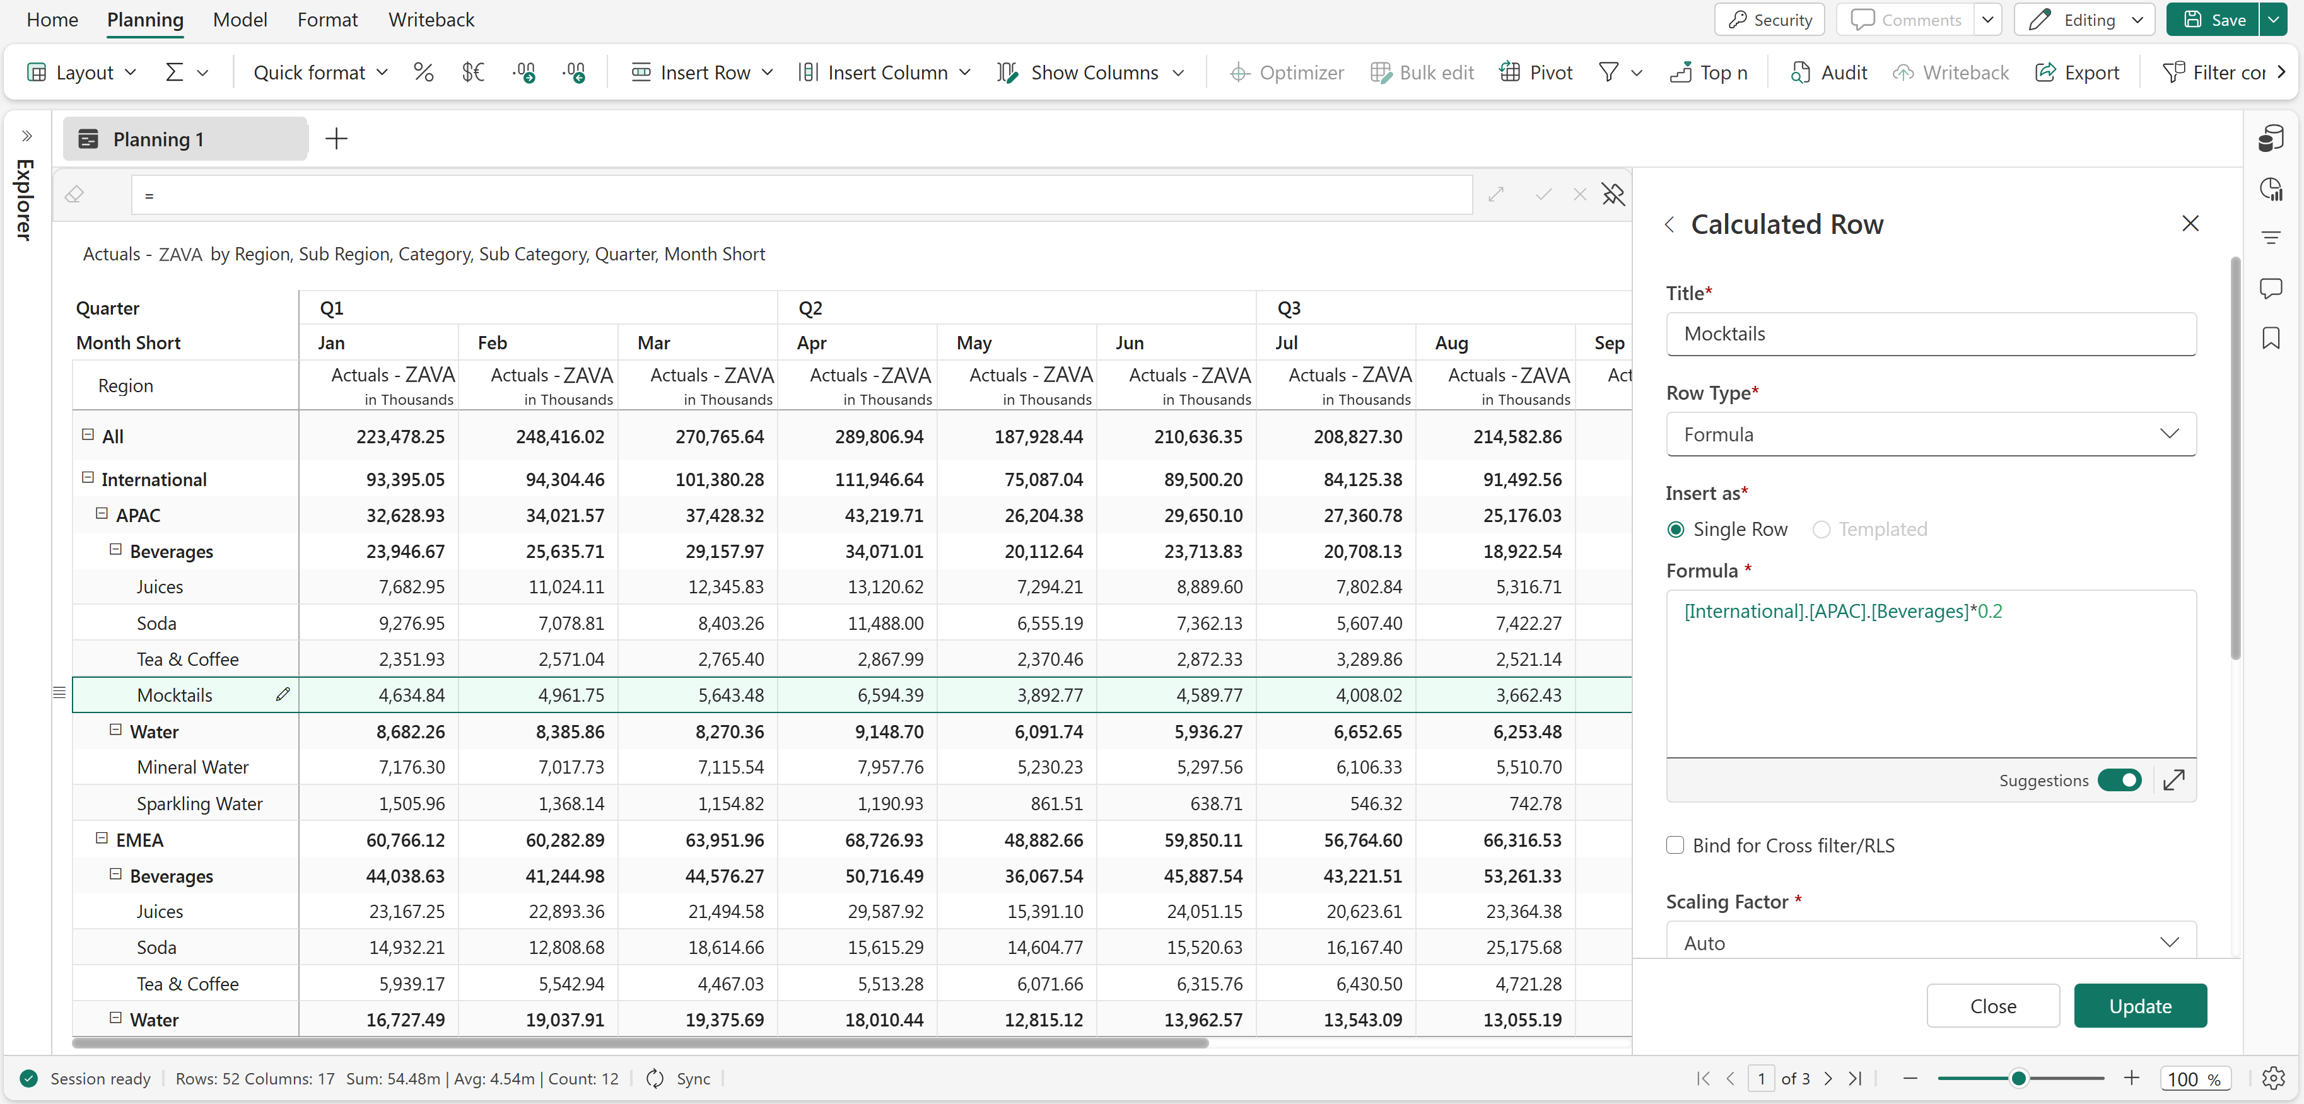
Parent rows can also be created as calculated rows. To edit or further configure the calculated row, select the edit icon on the row.
Formula editor
The formula editor provides features to help you create and manage formulas efficiently:
Functions tab: View the list of available functions.
Autocomplete (IntelliSense): Enable the Suggestions toggle to see function and reference suggestions as you type.
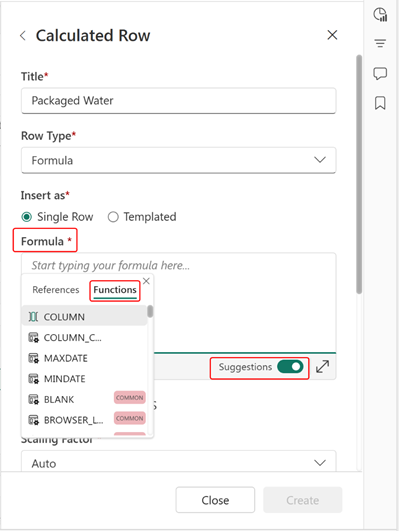
Syntax help: View function syntax, arguments, and examples for better understandability and quick reference.
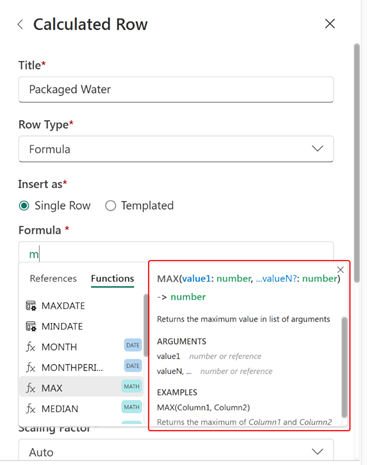
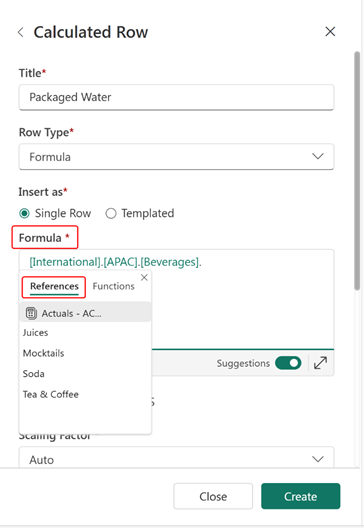
References: Insert references to existing rows using any of the following options.
Select a row directly from the report while the cursor is in the formula editor.
Use the References tab to search and select values based on hierarchy.
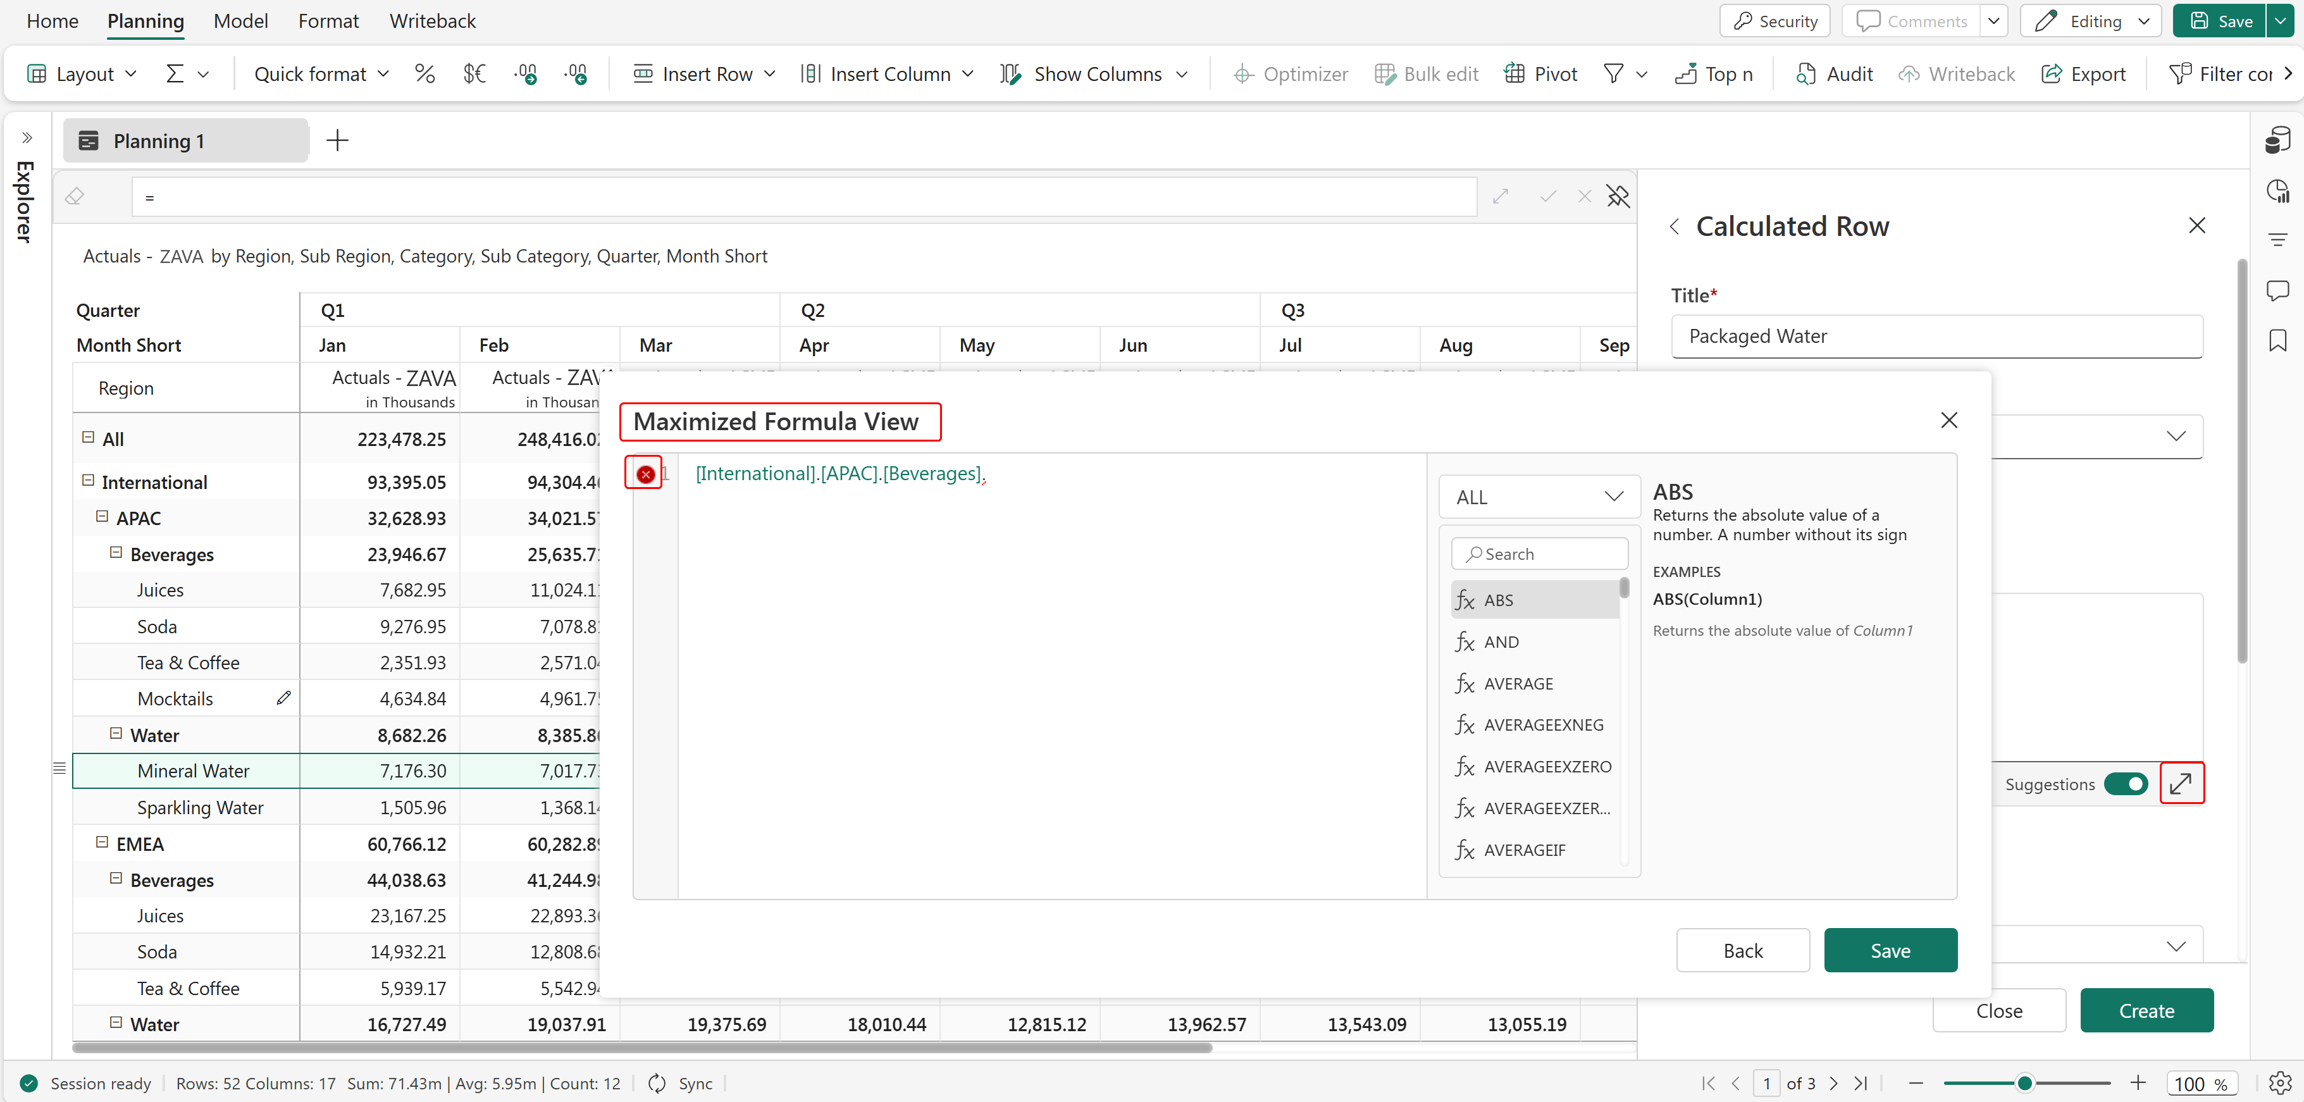
Expanded editor: Use the expand option to open the Maximized Formula View with line numbers and detailed error messages for easier debugging.
Configure formula row properties
You can configure common properties of calculated rows by specifying Row Type, Insert As, Scaling Factor, and Include in total. For more information, see Row properties.
In addition to the row properties, you can also configure the following settings for calculated rows:
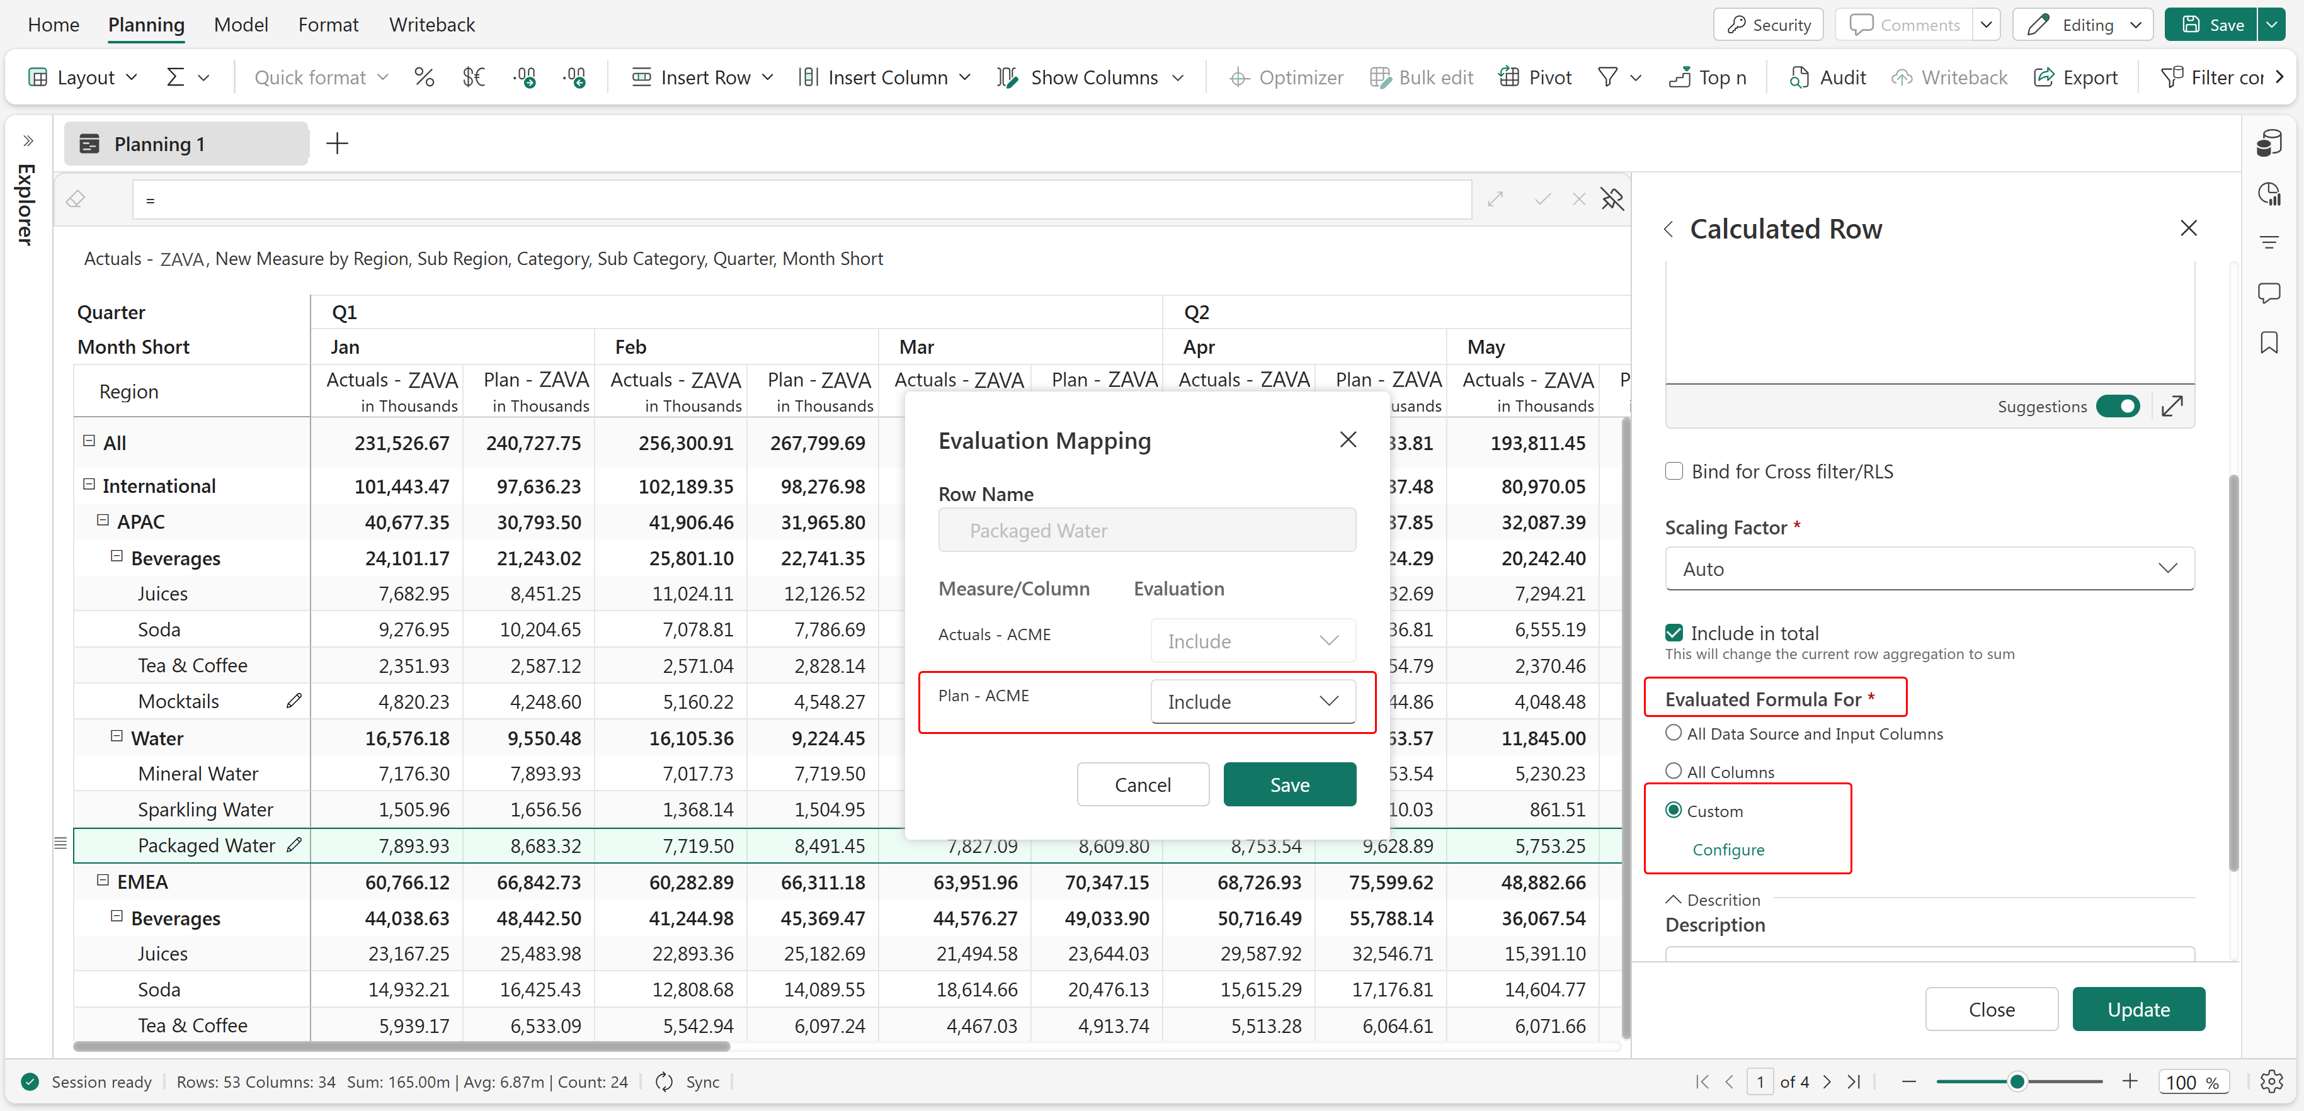
Evaluated Formula For: When a formula row intersects with a formula column, you can control how the column formula is applied.
- All Data Source and Input Columns: Applies the formula to all relevant columns, including measures assigned to Values (AC), data input columns, and forecast columns.
- All Columns: Applies the formula across all columns in the report, regardless of the type.
- Custom: Allows you to selectively include or exclude column formulas. To configure, select Custom > Configure > Include/Exclude > Save.
In the following example, the Plan - ACME column is included for the Packaged Water row.
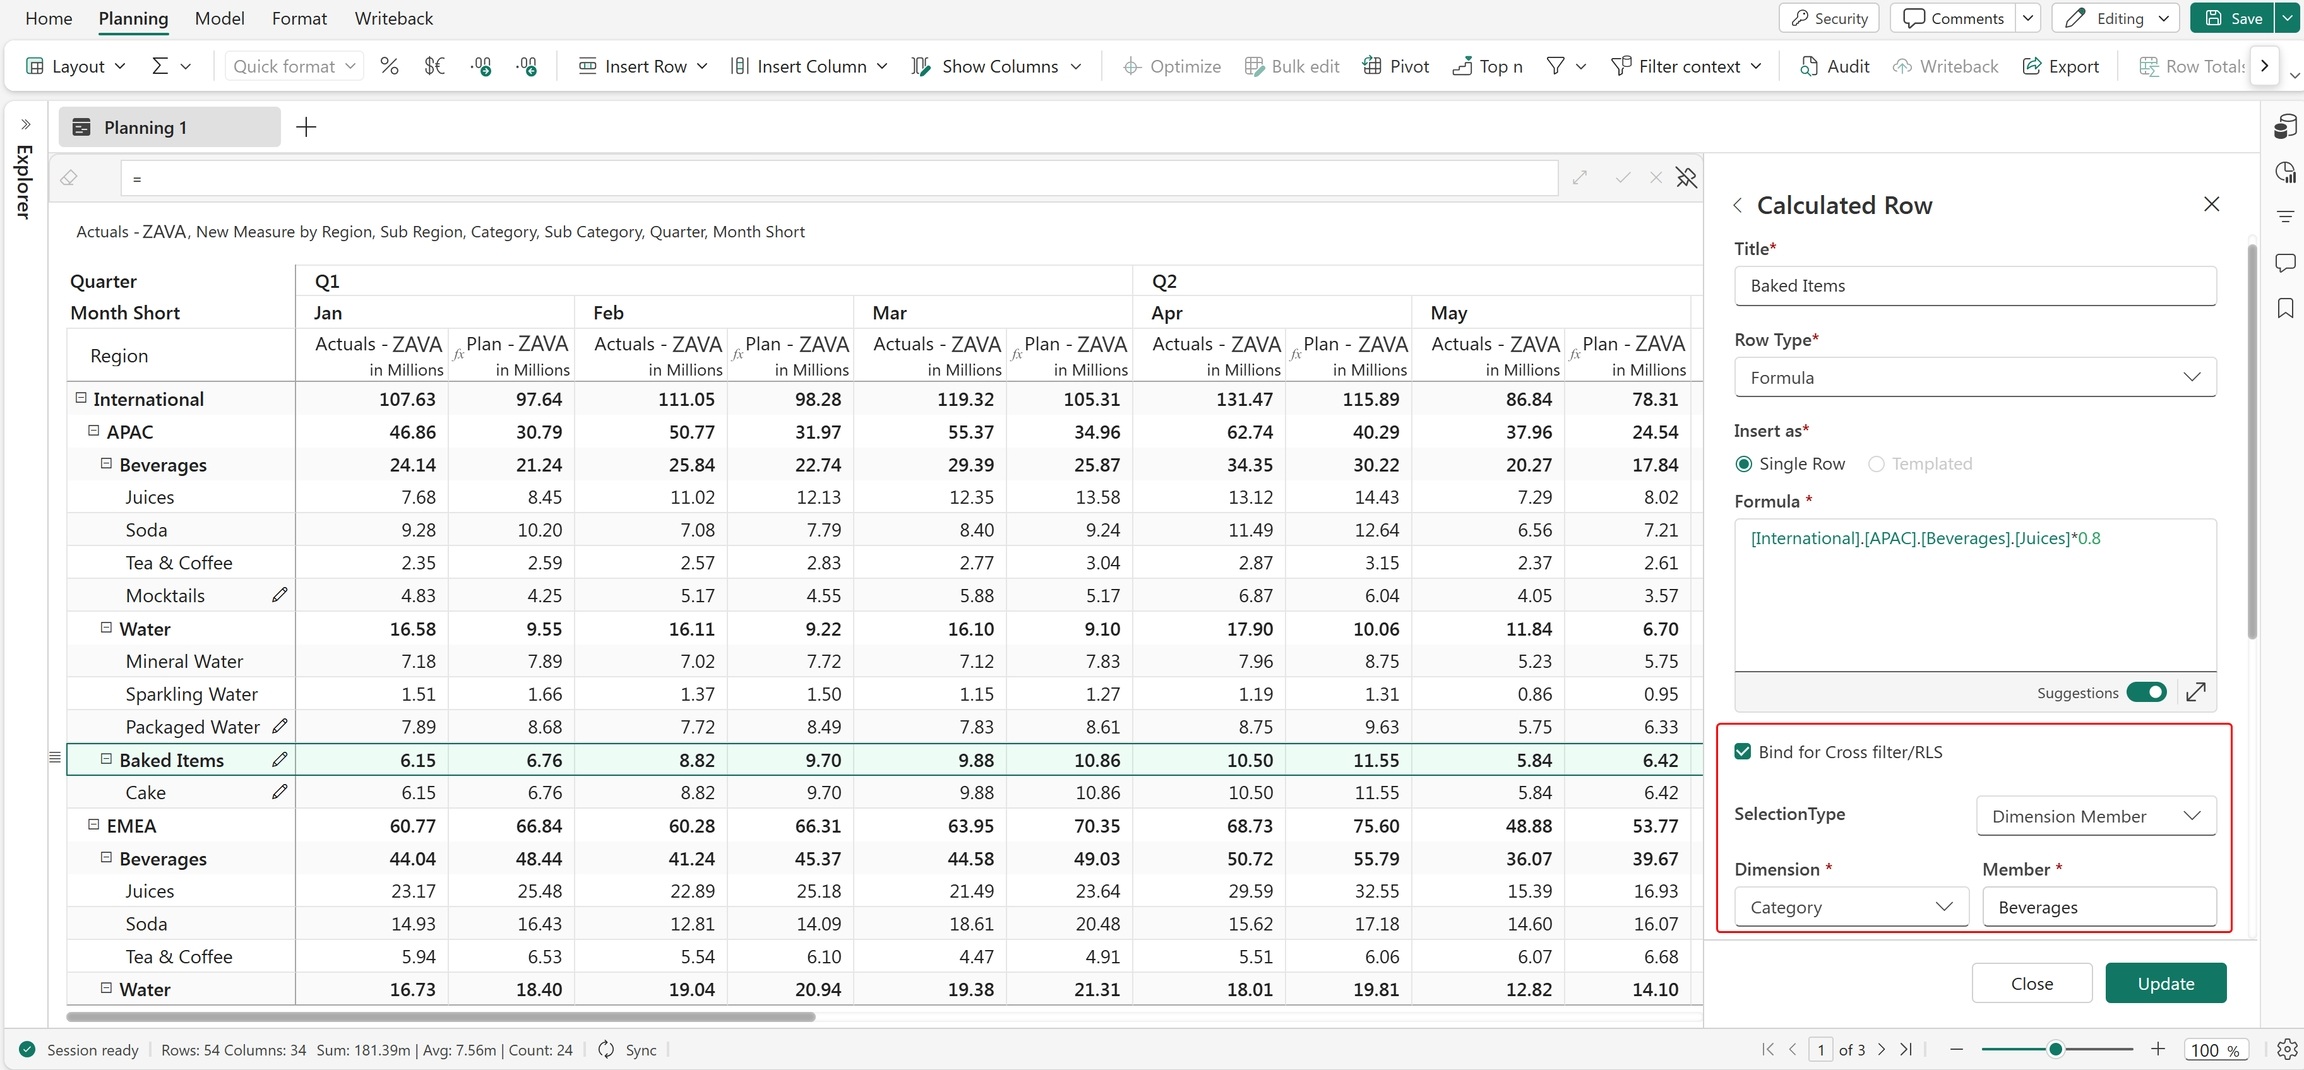
Bind for cross filter/RLS: Enable this option to ensure that cross-filter selections and row-level security (RLS) rules are applied to calculated rows.
Bind using a row: Select Selection Type as Row and choose a reference row to restrict visibility based on its data. In the following example, the Mocktails row references the Juices row. After binding, the Mocktails row is visible only to users with access to Juices data.

Bind using a dimension member: Select Selection Type as Dimension Member and choose a dimension to control access. In the following example, the Baked Items category is bound to the Beverages category. As a result, Baked Items is visible only to users with access to Beverages.
Adding a description: Optionally add a description to provide context for the formula.

Note
The Custom option in Evaluated Formula For is enabled only when applicable columns or measures are available for evaluation.
View and manage formulas
Select a cell in the calculated row to preview the applied formula in the formula bar.
Use the row gripper to edit or delete the row as needed.
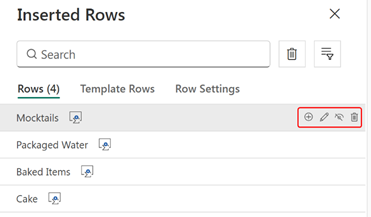
Alternatively, go to Insert Row > Manage Rows > Rows, hover over the created row, and choose the appropriate action through icons.