Note
Access to this page requires authorization. You can try signing in or changing directories.
Access to this page requires authorization. You can try changing directories.
In plan (preview), you can manage rows inserted in a visual, such as calculated rows, static rows, template rows, or data input rows, using the Manage Rows option.
Important
This feature is in preview.
This article explains how to manage inserted rows using options such as search, filter, show, and hide.
Manage an inserted row
You can manage inserted rows (such as static and calculated rows) with the Manage Rows option. You see a list of inserted rows, and each row type (calculated, aggregated, data input, and template) is identified with icons.
To manage an inserted row:
Go to Planning > Insert Row > Manage Rows > Rows or Template Rows.
The Inserted Rows side pane opens. Hover over a row to view the available management options.
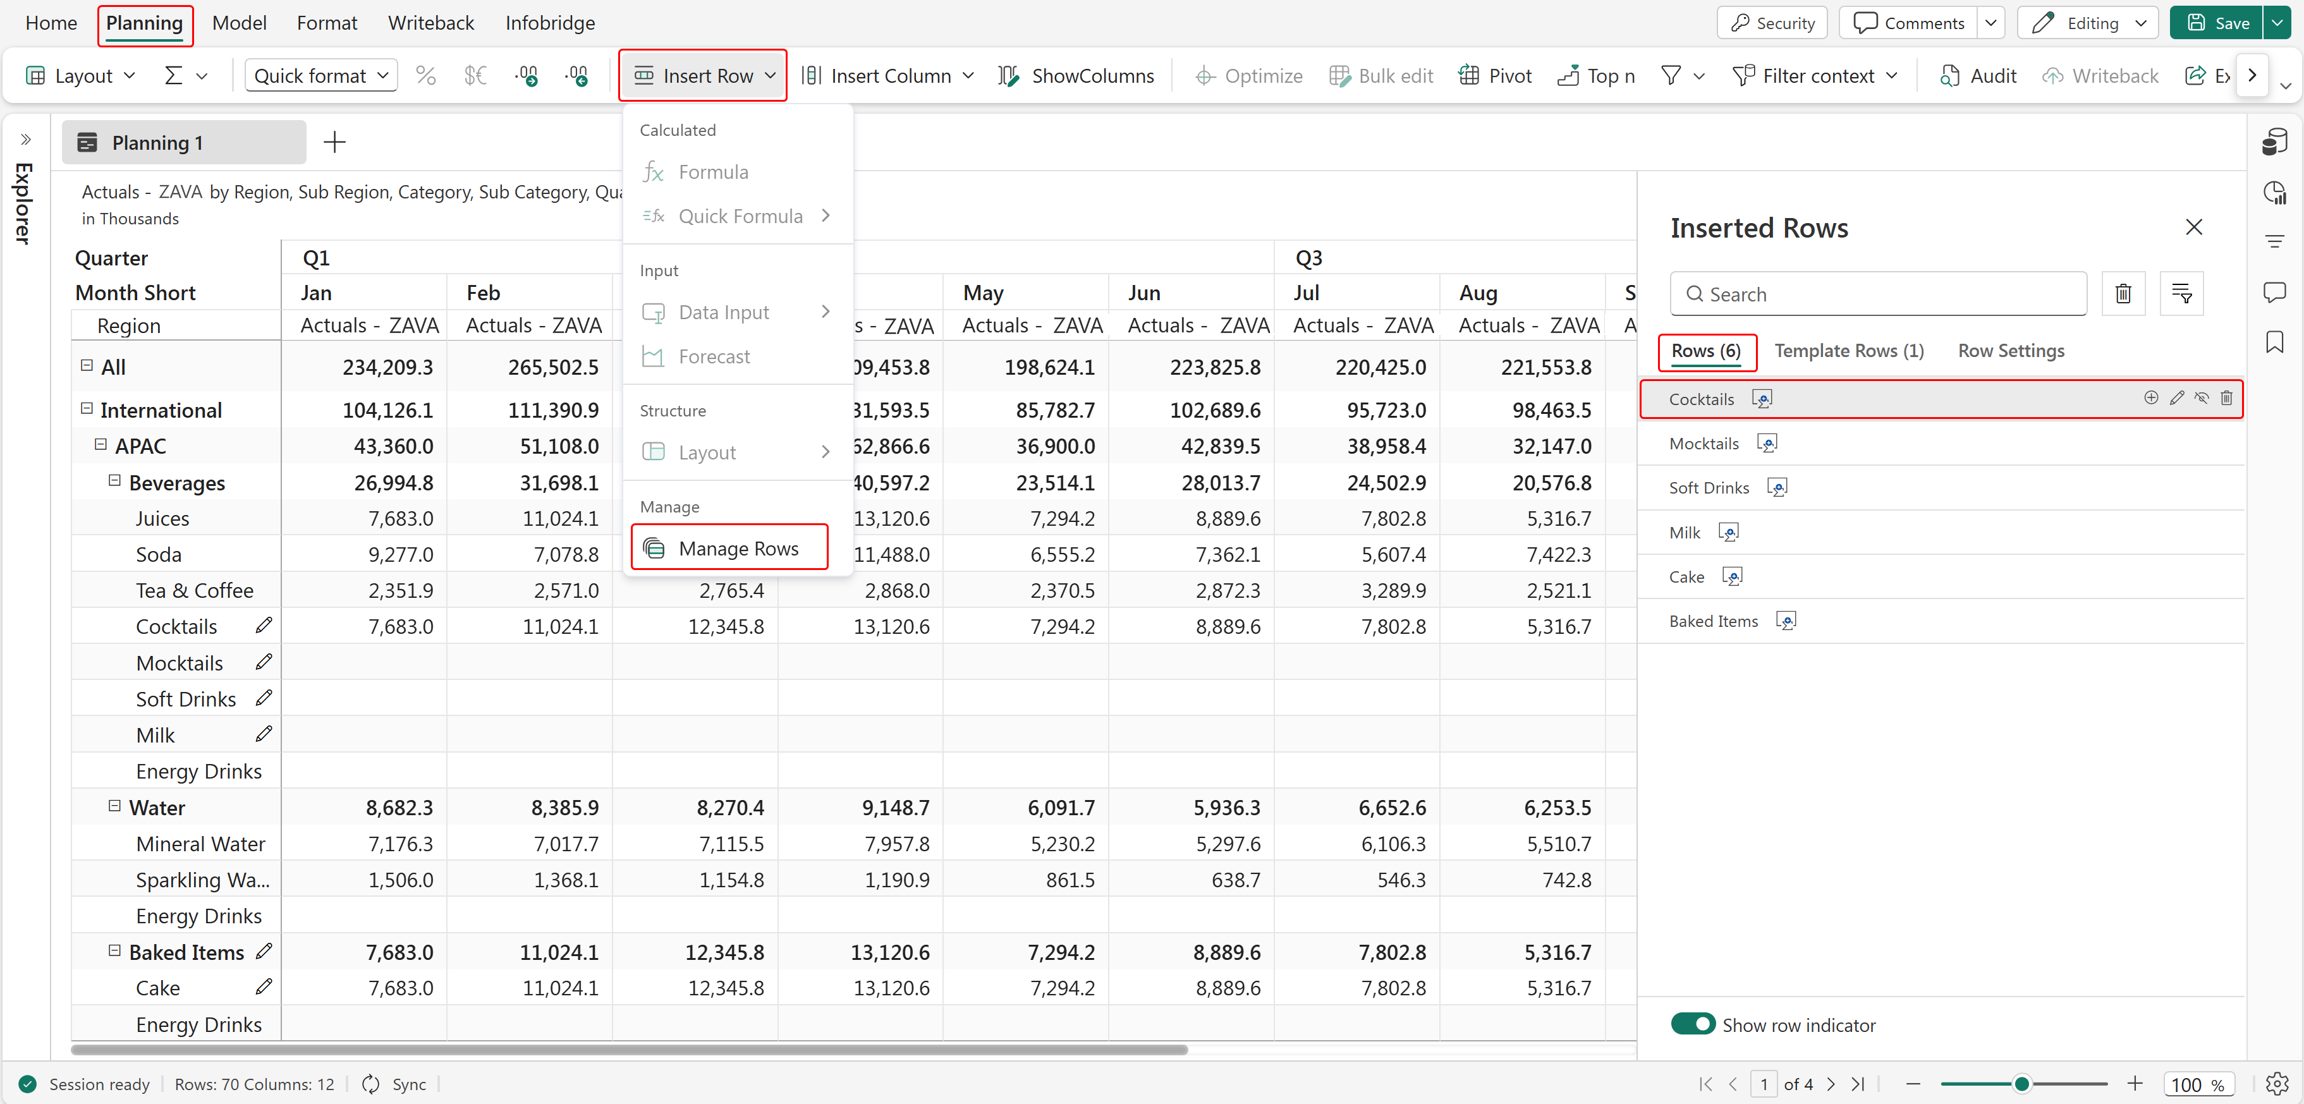
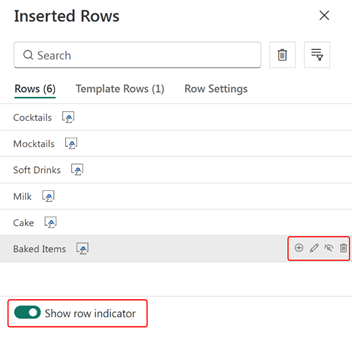
Available actions
Add rows: Add child rows or sibling rows at the same hierarchy level directly from the Manage Rows pane.
Edit: Modify formulas or other row properties.
Show or hide rows: Temporarily hide inserted rows.
Delete: Permanently remove inserted rows.
Show row indicator toggle: Show or hide the pencil icon displayed next to inserted rows.
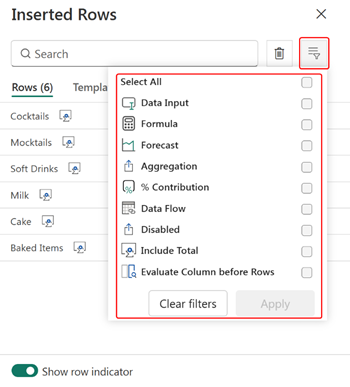
Search and filter: Search for a particular row category or filter rows based on the type.
Row settings
The Manage Rows pane includes a Row Settings tab that allows you to configure settings for inserted rows.
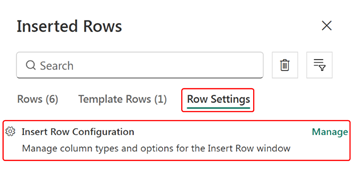
Insert Row Configuration
Use Insert Row Configuration to control the types of rows that can be inserted. You can define category-based rules for bulk row insertion.
The following options are available: