Note
Access to this page requires authorization. You can try signing in or changing directories.
Access to this page requires authorization. You can try changing directories.
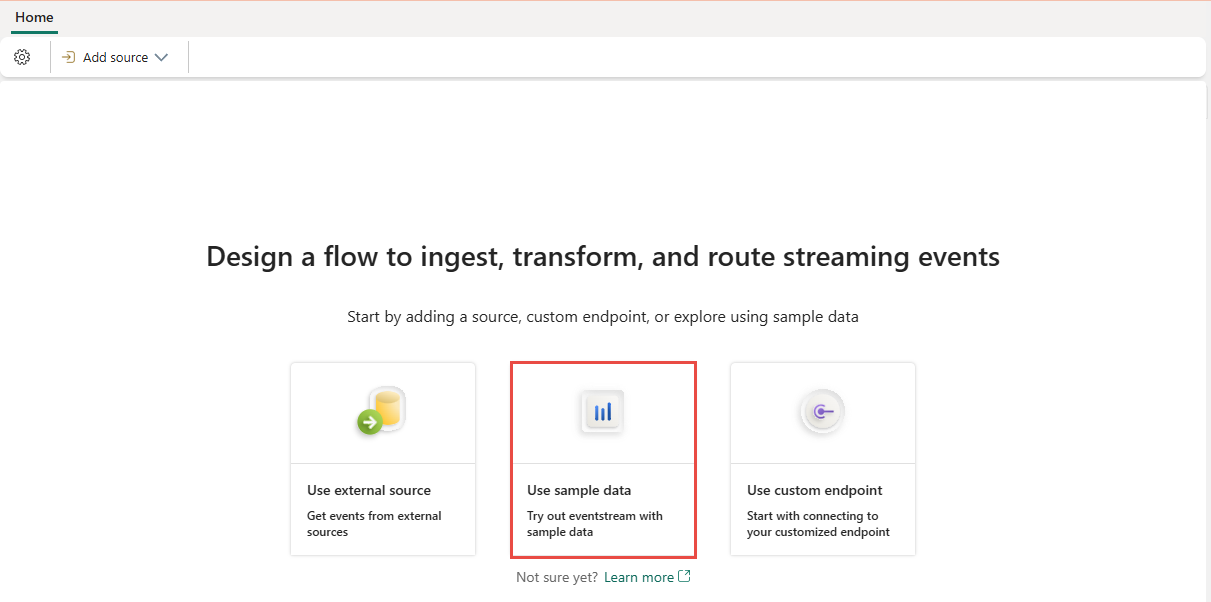
To get a better understanding of how a Microsoft Fabric eventstream works, you can use sample data and send the data to the eventstream. This article shows you how to add the sample data source to an eventstream.
Note
Enhanced capabilities are enabled by default when you create eventstreams. If you have eventstreams that you created via standard capabilities, those eventstreams will continue to work. You can still edit and use them as usual. We recommend that you create a new eventstream to replace standard eventstreams so that you can take advantage of additional capabilities and benefits of enhanced eventstreams.
Prerequisites
- Access to a workspace in the Fabric capacity license mode or trial license mode with Contributor or higher permissions.
- An eventstream. If you don't have an eventstream, create one.
Add sample data as a source
On the get-started page, select Use sample data.
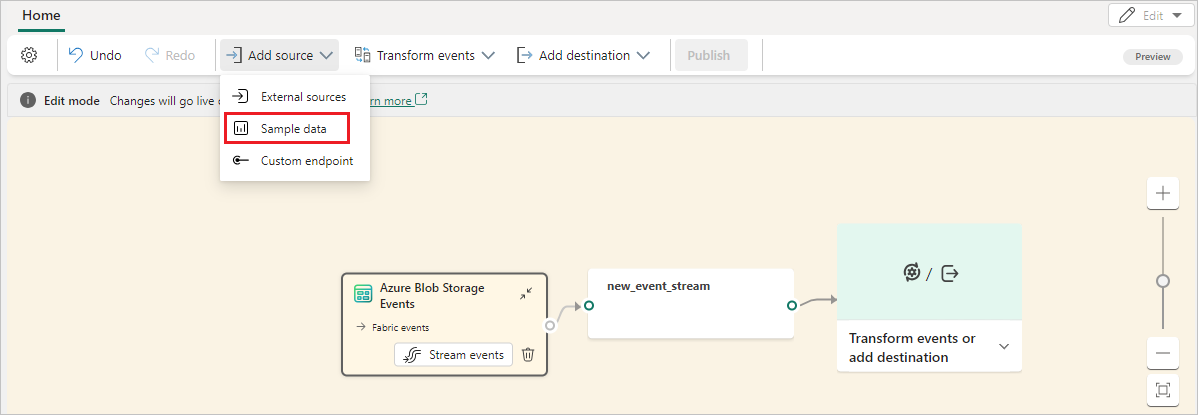
Or, if you already have a published eventstream and want to add sample data as a source, switch to Edit mode. On the ribbon, select Add source > Sample data.
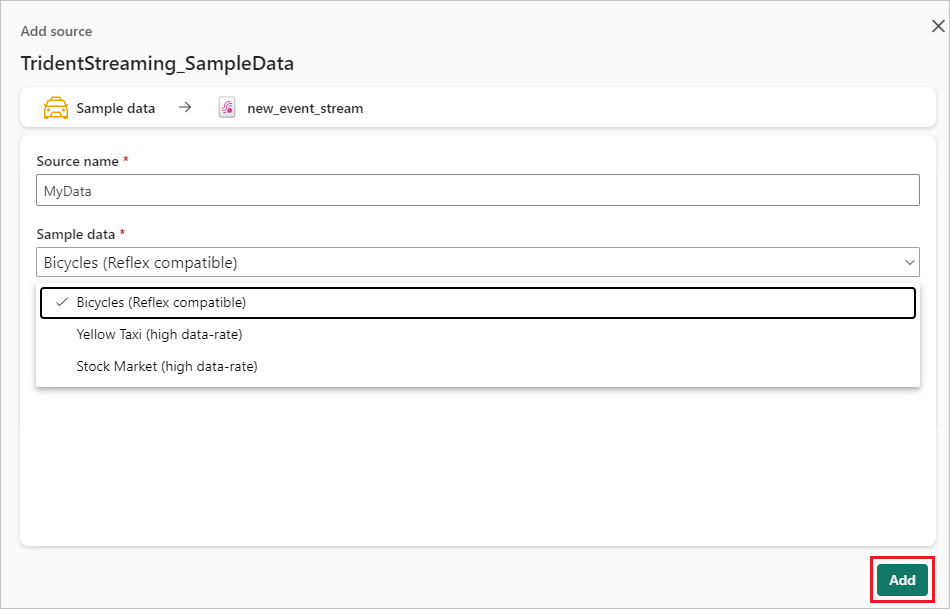
On the Sample data pane, enter a Source name value. In the Sample data box, select the source data that you want, and then select Add. You have these options for sample data:
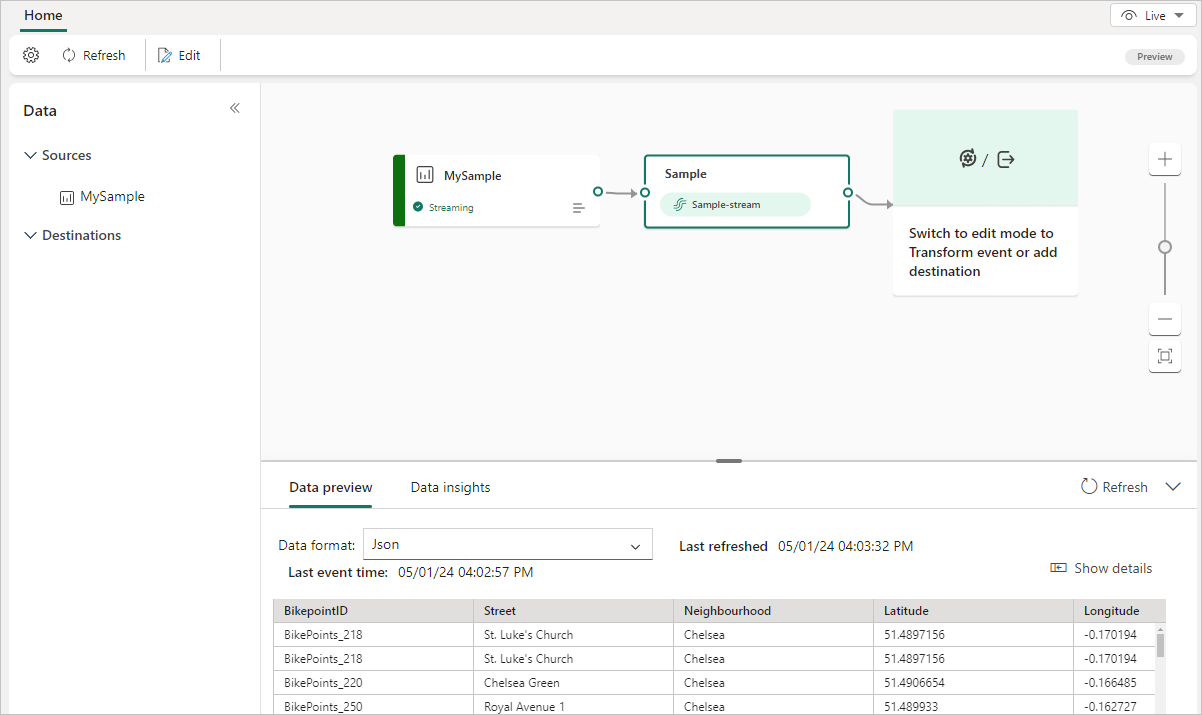
- Bicycles: Sample data for bicycles with a preset schema that includes fields such as BikepointID, Street, Neighborhood, and Latitude.
- Yellow Taxi: Sample taxi data with a preset schema that includes fields such as pickup time, drop-off time, distance, and total fee.
- Stock Market: Sample data for a stock exchange with preset schema columns such as time, symbol, price, and volume.
- Buses: Sample data for buses with a preset schema that includes fields such as Timestamp, TripId, StationNumber, SchedulTime, and Properties.
- S&P 500 companies stocks: Sample data for Standard & Poor’s 500 Index historical stock prices with a preset schema that includes fields such as Date, Open, High, Low, Close, Adjusted Close, Volume, and Ticker.
- Semantic Model Logs: Sample data for semantic model operation logs with a preset schema that includes fields such as Timestamp, OperationName, ItemId, ItemKind, ItemName, WorkspaceId, WorkspaceName, and CapacityId.
After you create the sample data source, confirm that the source is added to your eventstream on the canvas in Edit mode. To implement this newly added sample data, select Publish.
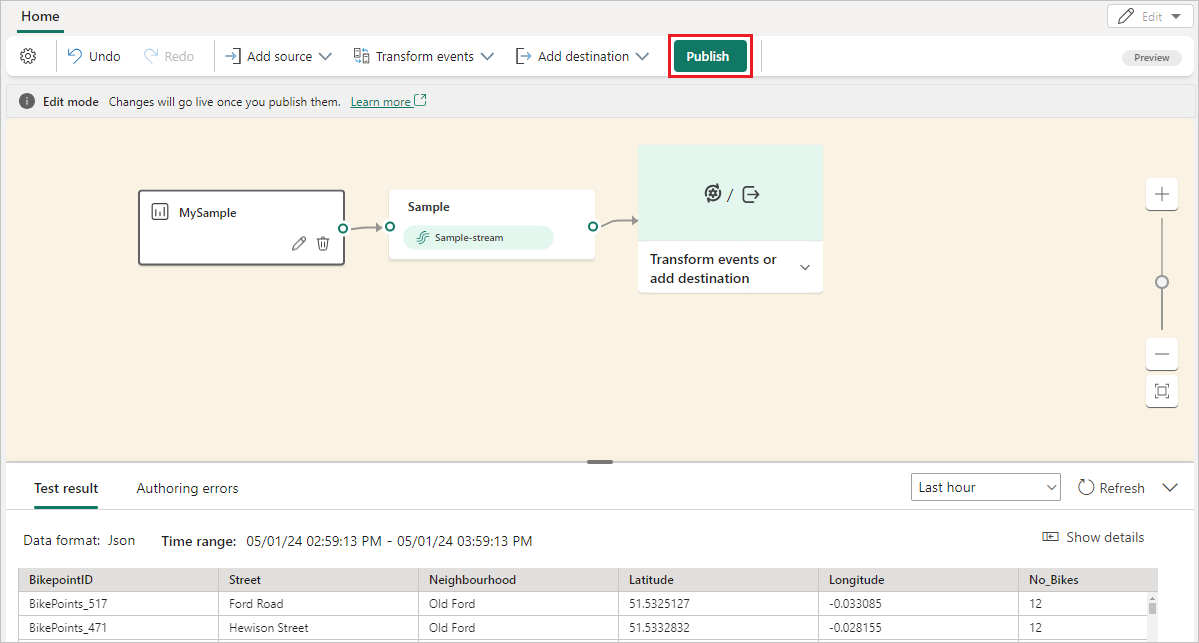
After publishing succeeds, the sample data is available for visualization in Live view.

Related content
- For a list of supported sources, see Add and manage an event source in an eventstream.