Note
Access to this page requires authorization. You can try signing in or changing directories.
Access to this page requires authorization. You can try changing directories.
This document provides experience-specific guidance for recovering your Fabric data in the event of a regional disaster.
Sample scenario
Many guidance sections in this document use the following sample scenario for purposes of explanation and illustration. Refer back to this scenario as necessary.
Let's say you have a capacity C1 in region A that has a workspace W1. If you've turned on disaster recovery for capacity C1, OneLake data is replicated to a backup in region B. If region A faces disruptions, the Fabric service in C1 fails over to region B.
Note
This recovery guidance applies only when the primary region has an Azure‑paired secondary region and Fabric is supported in the paired region.
The following image illustrates this scenario. The box on the left shows the disrupted region. The box in the middle represents the continued availability of the data after failover, and the box on the right shows the fully covered situation after the customer acts to restore their services to full function.
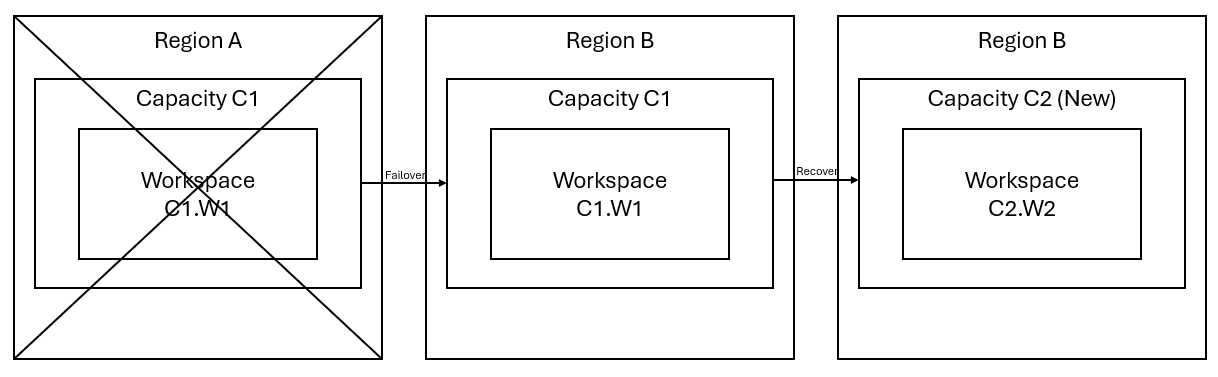
Here's the general recovery plan:
Create a new Fabric capacity C2 in a new region.
Create a new W2 workspace in C2, including its corresponding items with same names as in C1.W1.
Copy data from the disrupted C1.W1 to C2.W2.
Follow the dedicated instructions for each component to restore items to their full function.
This recovery plan assumes that the tenant home region remains operational. If the tenant home region experiences an outage, the steps outlined in this document are contingent on its recovery, which must be first initiated and completed by Microsoft.
Experience-specific recovery plans
The following sections provide step-by-step guides for each Fabric experience to help customers through the recovery process.
Data Engineering
This guide walks you through the recovery procedures for the Data Engineering experience. It covers lakehouses, notebooks, and Spark job definitions.
Lakehouse
Lakehouses from the original region remain unavailable to customers. To recover a lakehouse, customers can re-create it in workspace C2.W2. We recommend two approaches for recovering lakehouses:
Approach 1: Using custom script to copy Lakehouse Delta tables and files
Customers can recreate lakehouses by using a custom Scala script.
Create the lakehouse (for example, LH1) in the newly created workspace C2.W2.
Create a new notebook in the workspace C2.W2.
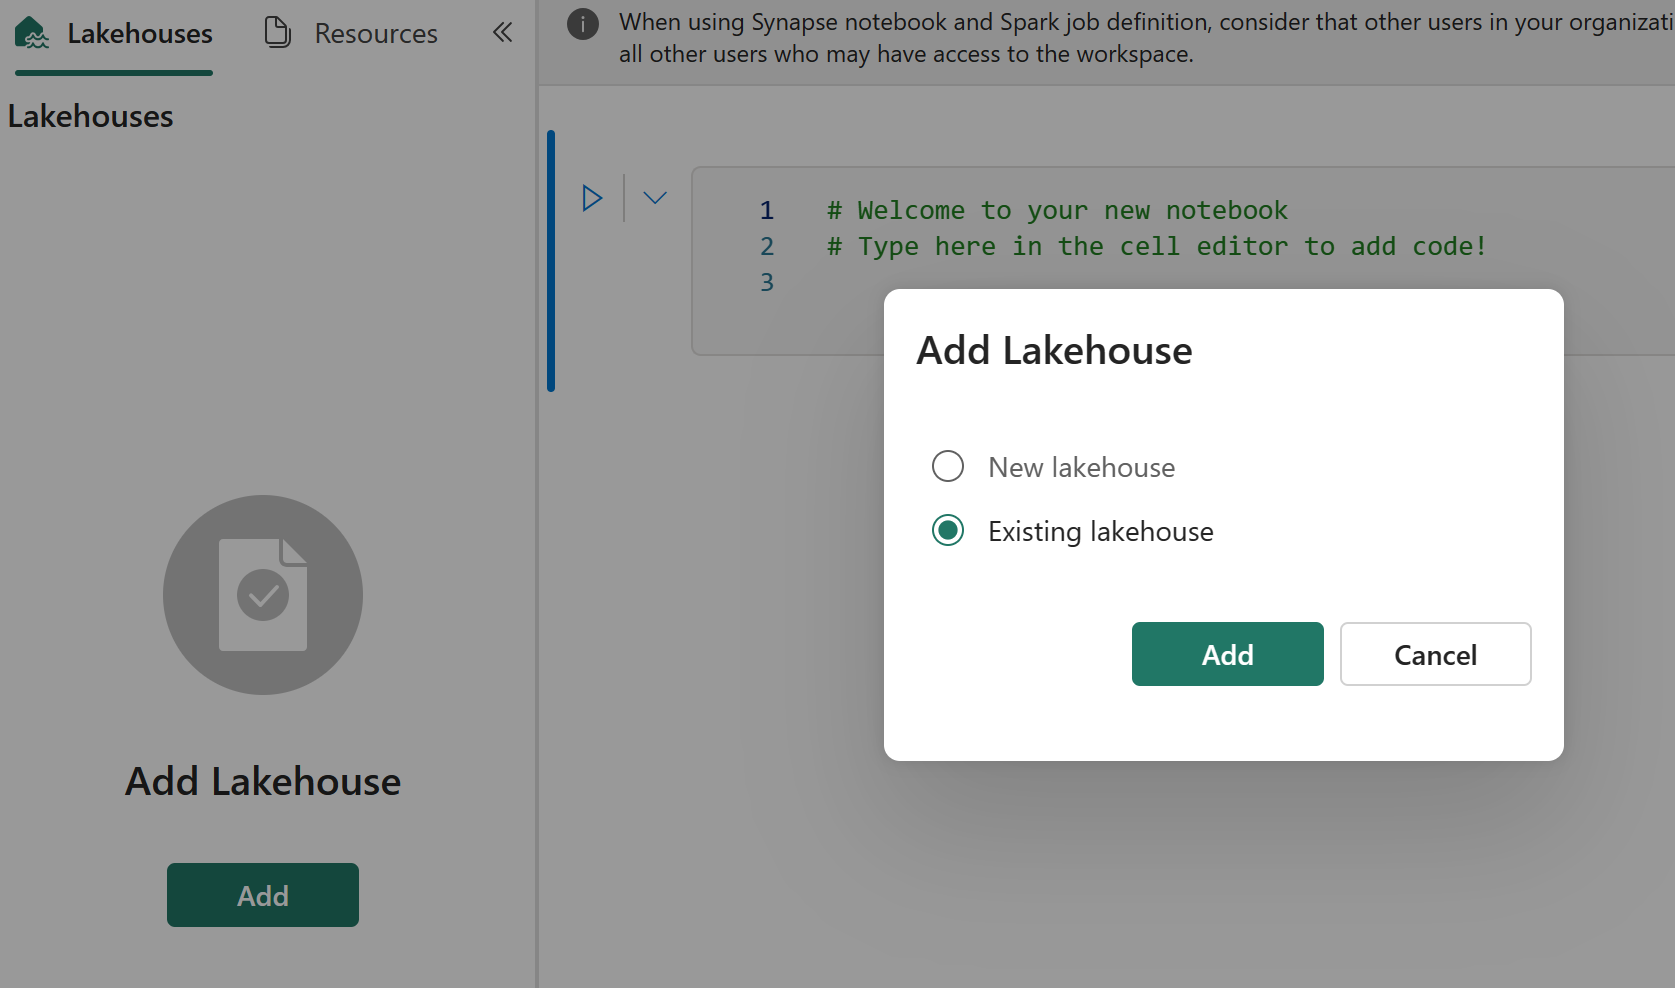
To recover the tables and files from the original lakehouse, refer to the data with OneLake paths such as abfss (see Connecting to Microsoft OneLake). You can use the following code example (see Introduction to Microsoft Spark Utilities) in the notebook to get the ABFS paths of files and tables from the original lakehouse. (Replace C1.W1 with the actual workspace name)
notebookutils.fs.ls('abfs[s]://<C1.W1>@onelake.dfs.fabric.microsoft.com/<item>.<itemtype>/<Tables>/<fileName>')Use the following code example to copy tables and files to the newly created lakehouse.
For Delta tables, you need to copy table one at a time to recover in the new lakehouse. In the case of Lakehouse files, you can copy the complete file structure with all the underlying folders with a single execution.
Reach out to the support team for the timestamp of failover required in the script.
%%spark
val source="abfs path to original Lakehouse file or table directory"
val destination="abfs path to new Lakehouse file or table directory"
val timestamp= //timestamp provided by Support

notebookutils.fs.cp(source, destination, true)

val filesToDelete = notebookutils.fs.ls(s"$source/_delta_log")
    .filter{sf => sf.isFile && sf.modifyTime > timestamp}

for(fileToDelete <- filesToDelete) {
    val destFileToDelete = s"$destination/_delta_log/${fileToDelete.name}"
    println(s"Deleting file $destFileToDelete")
    notebookutils.fs.rm(destFileToDelete, false)
}

notebookutils.fs.write(s"$destination/_delta_log/_last_checkpoint", "", true)
Once you run the script, the tables appear in the new lakehouse.
Approach 2: Use Azure Storage Explorer to copy files and tables
To recover only specific Lakehouse files or tables from the original lakehouse, use Azure Storage Explorer. Refer to Integrate OneLake with Azure Storage Explorer for detailed steps. For large data sizes, use Approach 1.
Note
The two approaches described above recover both the metadata and data for Delta-formatted tables, because the metadata is co-located and stored with the data in OneLake. For non-Delta formatted tables (for example, CSV, Parquet, etc.) that are created using Spark Data Definition Language (DDL) scripts/commands, the user is responsible for maintaining and re-running the Spark DDL scripts/commands to recover them.
Recovering Fabric materialized lake views
Materialized Lake Views from the original region remain unavailable to customers after failover. Refresh schedules, and execution history aren't replicated to the secondary region. To recover them, complete the following steps after you've recovered your Lakehouse data.
- Recover the Lakehouse tables by using Approach 1 or Approach 2 described above. Copy only the source tables.
- Recover the notebooks that contain your MLV definitions. Refer to the Notebook section for recovery steps.
- Run the recovered notebooks to recreate the MLVs in the new Lakehouse. For information about creating MLVs, see Create a Materialized Lake View. If MLVs were also copied in the earlier step, run CREATE OR REPLACE while recreating them.
- Recreate the MLV refresh schedules manually in the new workspace. Schedule history and execution metrics aren't recoverable.
- If your MLVs feed semantic models or reports, verify and update the Lakehouse ID and dataset ID references as needed. Reconnect reports to the updated semantic model and validate data freshness.
Tip
To minimize code changes when running notebooks post-failover, use the same workspace and Lakehouse names in the new region (especially when using the Workspace or Lakehouse name in the naming conventions). The refresh schedules, execution history, and operational metrics start fresh in the recovered region. Plan for a baseline period when establishing new monitoring thresholds.
Notebook
Notebooks from the primary region remain unavailable to customers and the code in notebooks aren't replicated to the secondary region. To recover Notebook code in the new region, there are two approaches to recovering Notebook code content.
Approach 1: User-managed redundancy with Git integration (in public preview)
The best way to make this easy and quick is to use Fabric Git integration, then synchronize your notebook with your ADO repo. After the service fails over to another region, you can use the repo to rebuild the notebook in the new workspace you created.
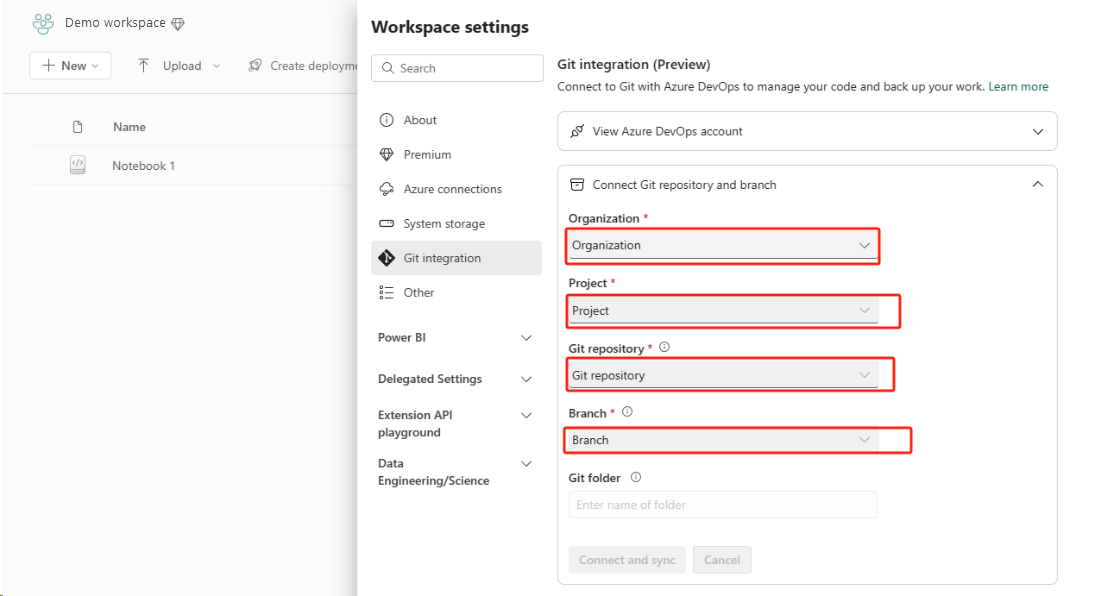
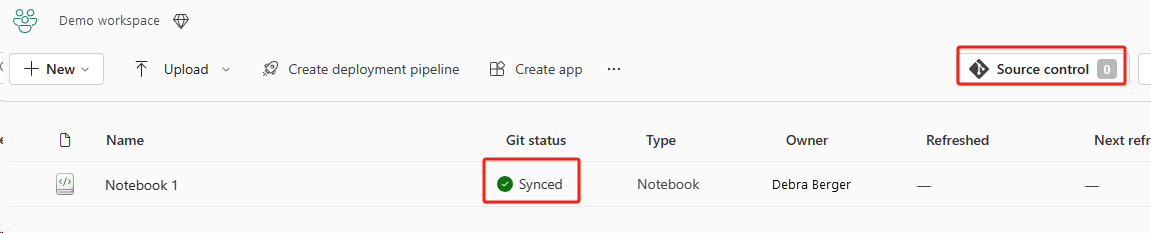
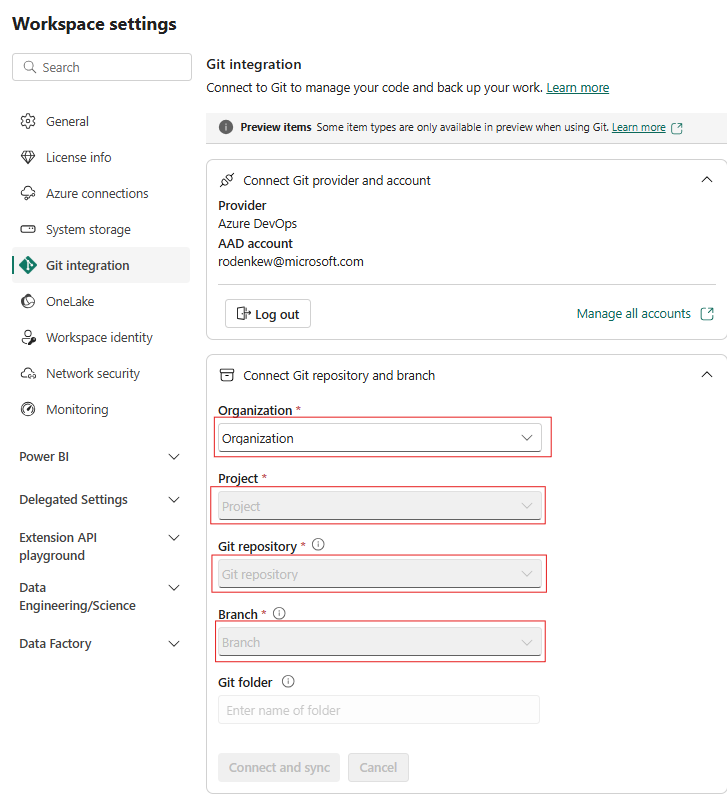
Configure Git Integration for your workspace and select Connect and sync with ADO repo.
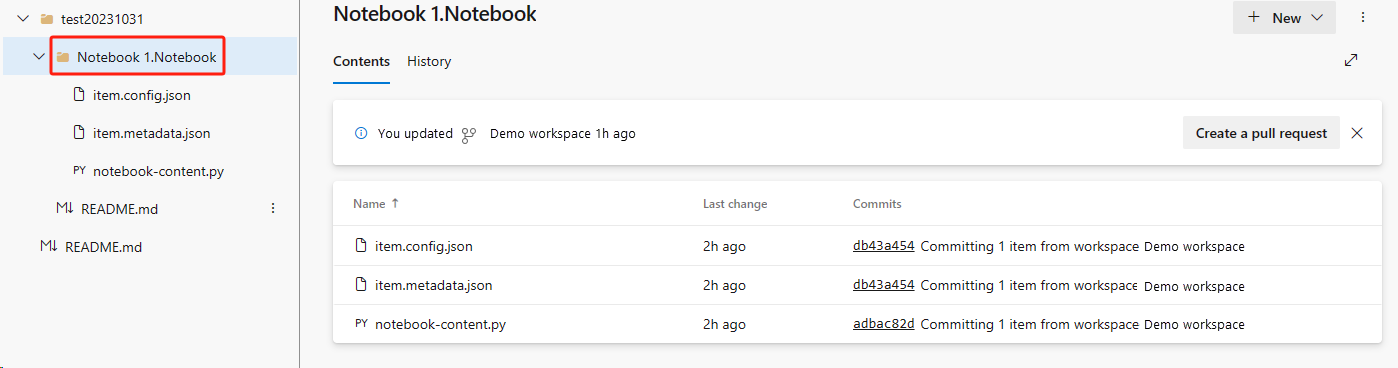
The following image shows the synced notebook.
Recover the notebook from the ADO repo.
In the newly created workspace, connect to your Azure ADO repo again.
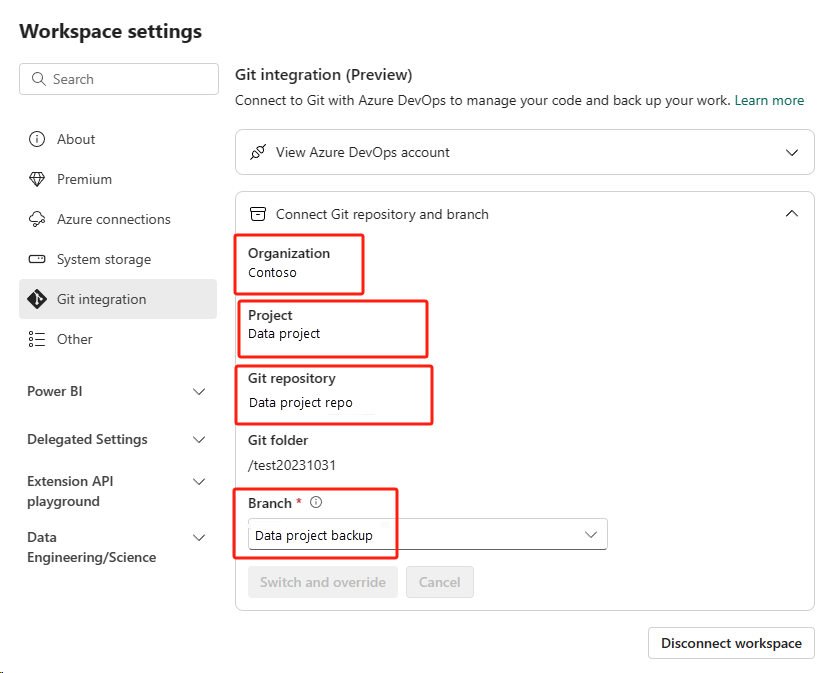
Select the Source control button. Then select the relevant branch of the repo. Then select Update all. The original notebook appears.

If the original notebook has a default lakehouse, users can refer to the Lakehouse section to recover the lakehouse and then connect the newly recovered lakehouse to the newly recovered notebook.
The Git integration doesn't support syncing files, folders, or notebook snapshots in the notebook resource explorer.
If the original notebook has files in the notebook resource explorer:
Be sure to save files or folders to a local disk or to some other place.
Re-upload the file from your local disk or cloud drives to the recovered notebook.
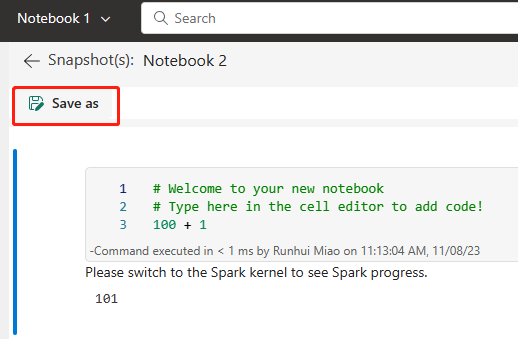
If the original notebook has a notebook snapshot, also save the notebook snapshot to your own version control system or local disk.
For more information about Git integration, see Introduction to Git integration.
Approach 2: Manual approach to backing up code content
If you don't take the Git integration approach, you can save the latest version of your code, files in the resource explorer, and notebook snapshot in a version control system such as Git, and manually recover the notebook content after a disaster:
Use the "Import notebook" feature to import the notebook code you want to recover.
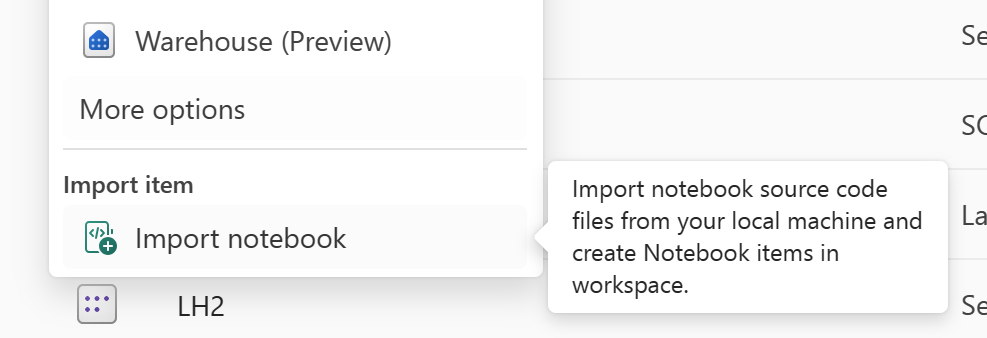
After import, go to your desired workspace (for example, "C2.W2") to access it.
If the original notebook has a default lakehouse, refer to the Lakehouse section. Then connect the newly recovered lakehouse (that has the same content as the original default lakehouse) to the newly recovered notebook.
If the original notebook has files or folders in the resource explorer, re-upload the files or folders saved in the user's version control system.
Spark Job Definition
Spark job definitions (SJD) from the primary region remain unavailable to customers, and the main definition file and reference file in the notebook will be replicated to the secondary region via OneLake. If you want to recover the SJD in the new region, you can follow the manual steps described below to recover the SJD. Historical runs of the SJD won't be recovered.
You can recover the SJD items by copying the code from the original region by using Azure Storage Explorer and manually reconnecting Lakehouse references after the disaster.
Create a new SJD item (for example, SJD1) in the new workspace C2.W2, with the same settings and configurations as the original SJD item (for example, language, environment, etc.).
Use Azure Storage Explorer to copy Libs, Mains, and Snapshots from the original SJD item to the new SJD item.

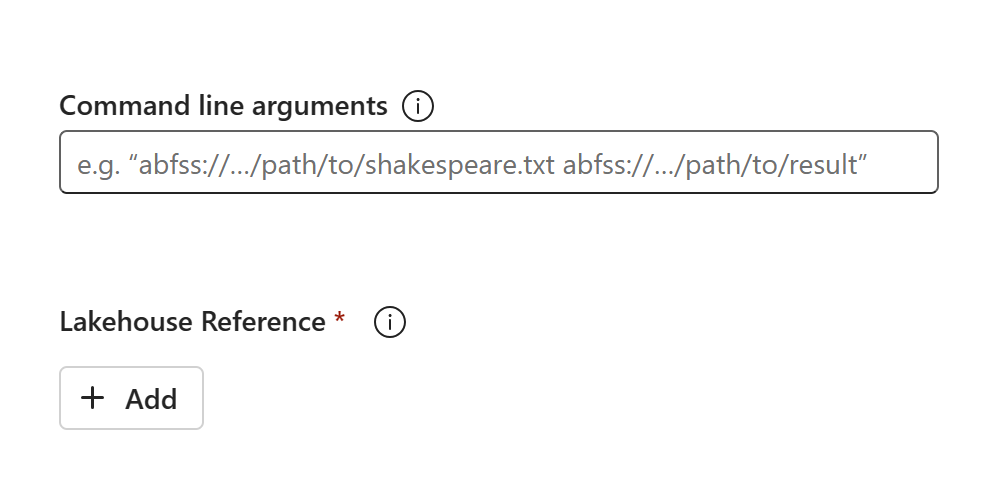
The code content will appear in the newly created SJD. You'll need to manually add the newly recovered Lakehouse reference to the job (Refer to the Lakehouse recovery steps). Users will need to reenter the original command line arguments manually.
Now you can run or schedule your newly recovered SJD.
For details about Azure Storage Explorer, see Integrate OneLake with Azure Storage Explorer.
Data Science
This guide walks you through the recovery procedures for the Data Science experience. It covers ML models and experiments.
ML Model and Experiment
Data Science items from the primary region remain unavailable to customers, and the content and metadata in ML models and experiments won't be replicated to the secondary region. To fully recover them in the new region, save the code content in a version control system (such as Git), and manually rerun the code content after the disaster.
Recover the notebook. Refer to the Notebook recovery steps.
Configuration, historically run metrics, and metadata won't be replicated to the paired region. You'll have to rerun each version of your data science code to fully recover ML models and experiments after the disaster.
Data Warehouse
This guide walks you through the recovery procedures for the Data Warehouse experience. It covers warehouses.
Warehouse
Warehouses from the original region remain unavailable to customers. To recover warehouses, use the following two steps.
Create a new interim lakehouse in workspace C2.W2 for the data you'll copy over from the original warehouse.
Populate the warehouse's Delta tables by leveraging the warehouse Explorer and the T-SQL capabilities (see Tables in data warehousing in Microsoft Fabric).
Note
It's recommended that you keep your Warehouse code (schema, table, view, stored procedure, function definitions, and security codes) versioned and saved in a safe location (such as Git) according to your development practices.
Data ingestion via Lakehouse and T-SQL code
In newly created workspace C2.W2:
Create an interim lakehouse "LH2" in C2.W2.
Recover the Delta tables in the interim lakehouse from the original warehouse by following the Lakehouse recovery steps.
Create a new warehouse "WH2" in C2.W2.
Connect the interim lakehouse in your warehouse explorer.
Depending on how you're going to deploy table definitions prior to data import, the actual T-SQL used for imports can vary. You can use INSERT INTO, SELECT INTO or CREATE TABLE AS SELECT approach to recover Warehouse tables from lakehouses. Further in the example, we would be using INSERT INTO flavor. (If you use the code below, replace samples with actual table and column names)
USE WH1

INSERT INTO [dbo].[aggregate_sale_by_date_city]([Date],[City],[StateProvince],[SalesTerritory],[SumOfTotalExcludingTax],[SumOfTaxAmount],[SumOfTotalIncludingTax], [SumOfProfit])

SELECT [Date],[City],[StateProvince],[SalesTerritory],[SumOfTotalExcludingTax],[SumOfTaxAmount],[SumOfTotalIncludingTax], [SumOfProfit]
FROM  [LH11].[dbo].[aggregate_sale_by_date_city]
GO
Lastly, change the connection string in applications using your Fabric warehouse.
Note
For customers who need cross-regional disaster recovery and fully automated business continuity, we recommend keeping two Fabric Warehouse setups in separate Fabric regions and maintaining code and data parity by doing regular deployments and data ingestion to both sites.
Mirrored database
Mirrored databases from the primary region remain unavailable to customers and the settings aren't replicated to the secondary region. To recover it in the event of a regional failure, you need to recreate your mirrored database in another workspace from a different region.
Data Factory
Data Factory items from the primary region remain unavailable to customers and the settings and configuration in pipelines or dataflow gen2 items won't be replicated to the secondary region. To recover these items in the event of a regional failure, you'll need to recreate your Data Integration items in another workspace from a different region. The following sections outline the details.
Dataflows Gen2
If you want to recover a Dataflow Gen2 item in the new region, you need to export a PQT file to a version control system such as Git and then manually recover the Dataflow Gen2 content after the disaster.
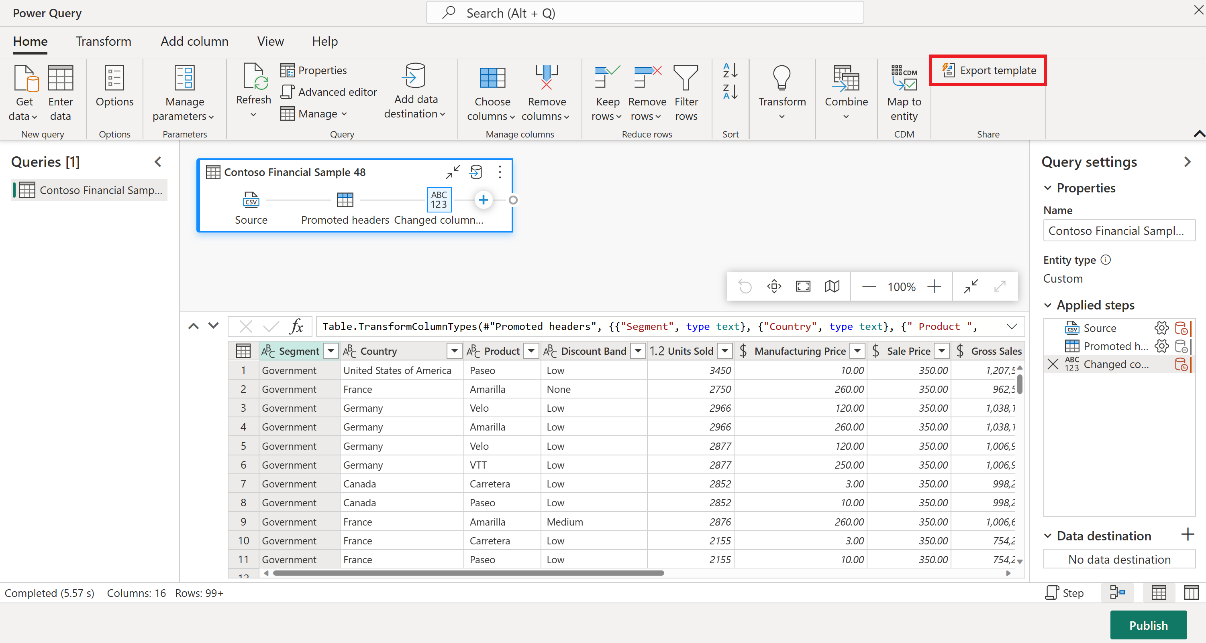
From your Dataflow Gen2 item, in the Home tab of the Power Query editor, select Export template.
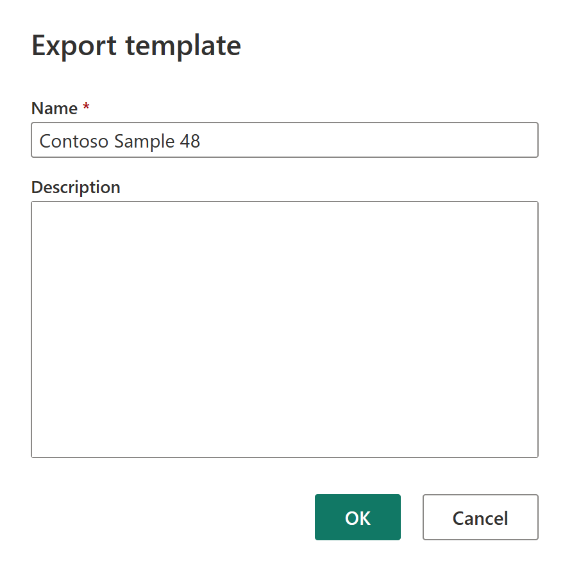
In the Export template dialog, enter a name (mandatory) and description (optional) for this template. When done, select OK.
After the disaster, create a new Dataflow Gen2 item in the new workspace "C2.W2".
From the current view pane of the Power Query editor, select Import from a Power Query template.
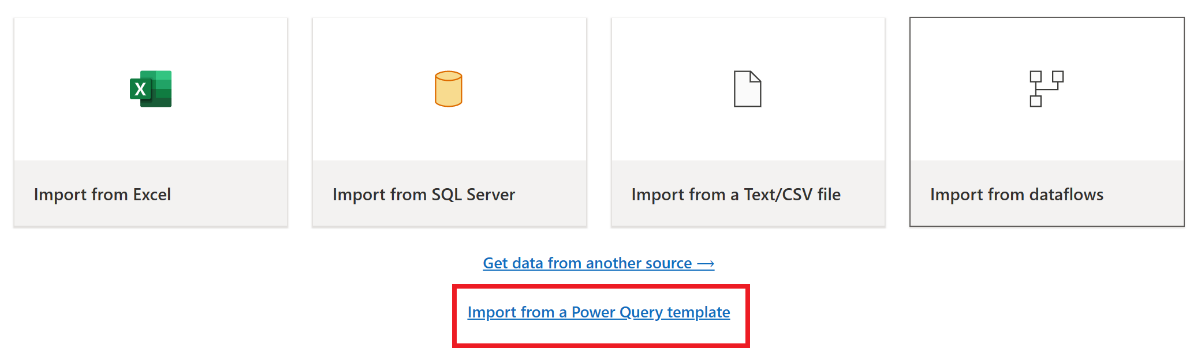
In the Open dialog, browse to your default downloads folder and select the .pqt file you saved in the previous steps. Then select Open.
The template is then imported into your new Dataflow Gen2 item.
Dataflows Save As feature is not supported in the event of disaster recovery.
Pipelines
Customers can't access pipelines in the event of regional disaster, and the configurations aren't replicated to the paired region. We recommend building your critical pipelines in multiple workspaces across different regions.
Copy Job
CopyJob users must undertake proactive measures to protect against a regional disaster. The following approach ensures that, after a regional disaster, a user's CopyJobs remain available.
User-managed redundancy with Git integration (in public preview)
The best way to make this process easy and quick is to use Fabric Git integration, then synchronize your CopyJob with your ADO repo. After the service fails over to another region, you can use the repository to rebuild the CopyJob in the new workspace you created.
Configure your workspace's Git Integration and select connect and sync with ADO repo.
The following image shows the synced CopyJob.
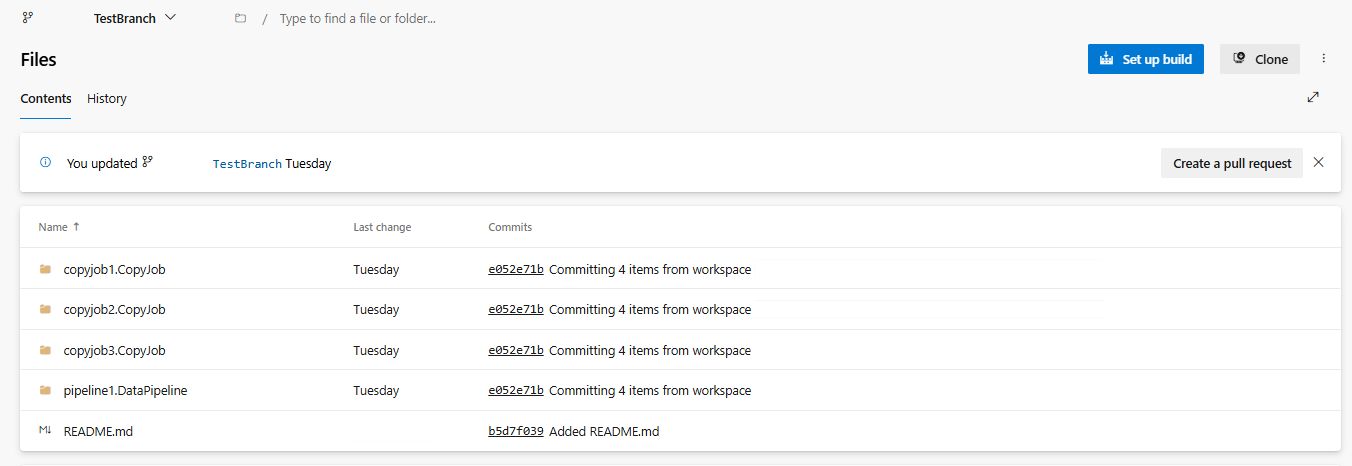
Recover the CopyJob from the ADO repo.
In the newly created workspace, connect and sync to your Azure ADO repo again. All Fabric items in this repository are automatically downloaded to your new Workspace.
If the original CopyJob uses a Lakehouse, users can refer to the Lakehouse section to recover the Lakehouse and then connect the newly recovered CopyJob to the newly recovered Lakehouse.
For more information about Git integration, see Introduction to Git integration.
Apache Airflow Job
Apache Airflow Job in Fabric users must undertake proactive measures to protect against a regional disaster.
We recommend managing redundancy with Fabric Git integration. First, synchronize your Airflow Job with your ADO repo. If the service fails over to another region, you can use the repository to rebuild the Airflow Job in the new workspace you created.
Here are the steps to achieve this:
Configure your workspace's Git Integration and select "connect and sync" with the ADO repo.
After that, you will see your Airflow job has been synced to your ADO repo.
If you need to recover the Airflow job from the ADO repo, create a new workspace, connect, and sync to your Azure ADO repo again. All Fabric items, including Airflow, in this repository will be automatically downloaded to your new workspace.
Real-Time Intelligence
This guide walks you through the recovery procedures for the Real-Time Intelligence experience. It covers KQL databases/querysets and eventstreams.
Graph Model/Queryset
Graph Model and Graph Queryset items from the primary region remain unavailable to customers, and these items aren't replicated to the secondary region. To recover, create or use a capacity in a different region and recreate the Graph Model and Graph Queryset items there.
Create or use an existing Fabric capacity in a different region that isn't affected by the disaster.
Create a new workspace or use an existing workspace in that capacity.
Recreate the Graph Model item in the secondary workspace (referenced in step 2). Reconfigure the model definition, including nodes, edges, etc., to match the original Graph Model.
If the original lakehouse is in the failing region, recover it first by following the Lakehouse section.
Connect a lakehouse as the OneLake data source for the newly created Graph Model item. Use the recovered lakehouse if it was in the failing region, or reconnect to the existing lakehouse if it remains available.
Reconfigure any data loading schedules or connections for the Graph Model in the new workspace.
Recreate the Graph Queryset item in the secondary workspace. Manually reenter the queries and any saved query configurations from the original Graph Queryset.
KQL Database/Queryset
KQL database/queryset users must undertake proactive measures to protect against a regional disaster. The following approach ensures that, in the event of a regional disaster, data in your KQL databases querysets remains safe and accessible.
Use the following steps to guarantee an effective disaster recovery solution for KQL databases and querysets.
Establish independent KQL databases: Configure two or more independent KQL databases/querysets on dedicated Fabric capacities. These should be set up across two different Azure regions (preferably Azure-paired regions) to maximize resilience.
Replicate management activities: Any management action taken in one KQL database should be mirrored in the other. This ensures that both databases remain in sync. Key activities to replicate include:
Tables: Make sure that the table structures and schema definitions are consistent across the databases.
Mapping: Duplicate any required mappings. Make sure that data sources and destinations align correctly.
Policies: Make sure that both databases have similar data retention, access, and other relevant policies.
Manage authentication and authorization: For each replica, set up the required permissions. Make sure that proper authorization levels are established, granting access to the required personnel while maintaining security standards.
Parallel data ingestion: To keep the data consistent and ready in multiple regions, load the same dataset into each KQL database at the same time as you ingest it.
Eventstream
An eventstream is a centralized place in the Fabric platform for capturing, transforming, and routing real-time events to various destinations (for example, lakehouses, KQL databases/querysets) with a no-code experience. So long as the destinations are supported by disaster recovery, eventstreams won't lose data. Therefore, customers should use the disaster recovery capabilities of those destination systems to guarantee data availability.
Customers can also achieve geo-redundancy by deploying identical Eventstream workloads in multiple Azure regions as part of a multi-site active/active strategy. With a multi-site active/active approach, customers can access their workload in any of the deployed regions. This approach is the most complex and costly approach to disaster recovery, but it can reduce the recovery time to near zero in most situations. To be fully geo-redundant, customers can
Create replicas of their data sources in different regions.
Create Eventstream items in corresponding regions.
Connect these new items to the identical data sources.
Add identical destinations for each eventstream in different regions.
Map
Map items from the primary region remain unavailable to customers and the Map items aren't replicated to the secondary region.
If you want to recover a Map item when a disaster happens, set up Fabric Git integration, and synchronize your Map item with your Git repo.
During the recovery, after the new region/capacity in Fabric is set up, you can use the repo to rebuild the Map item in the new workspace you created. Since the new workspace is empty, Git sync gets the contents from the repo into the empty workspace. This step brings the Map item back to life.
Note
If the original Map item has a lakehouse or KQL queryset configured, refer to the Lakehouse section and the KQL queryset section to recover them first. After those dependencies are taken care of, connect the newly recovered lakehouse and queryset to the newly recovered Map item.
Ontology
Ontology users must take proactive steps to prepare for regional disaster recovery. The approach described below ensures that, following a regional disaster, your Ontology remains recoverable and can be restored quickly.
The simplest and fastest way to enable recovery is to use Fabric Git integration and synchronize your Ontology with an Azure DevOps (ADO) repository. If the service fails over to another region, you can use this repository to rebuild the Ontology in a newly created workspace.
Ontology items in the primary region are not available to customers after a regional disaster, and Ontology items are not replicated to the secondary region.
To recover an Ontology item during a disaster, configure Fabric Git integration, and synchronize the Ontology item with your ADO repository ahead of time.
During recovery, once the new region and capacity in Fabric are set up, you can use the repository to rebuild the Ontology item in a new workspace. Because the new workspace is empty, Git sync pulls the contents from the repository into the workspace, effectively restoring the Ontology item.
Note
If the original Ontology item has a lakehouse configured, refer to the Lakehouse section to recover the lakehouse first. After those dependencies are taken care of, connect the newly recovered lakehouse to the newly recovered Ontology item.
Transactional database
This guide describes the recovery procedures for the transactional database experience.
SQL database
To protect against a regional failure, users of SQL databases can take proactive measures to periodically export their data and use the exported data to recreate the database in a new workspace when needed.
This can be achieved by using the SqlPackage CLI tool that provides database portability and facilitates database deployments.
- Use the SqlPackage tool to export the database to a
.bacpacfile. See Export a database with SqlPackage for more details. - Store the
.bacpacfile in a secure location that is in a different region than the database. Examples include storing the.bacpacfile in a Lakehouse that is in a different region, using a geo-redundant Azure Storage Account, or using another secure storage medium that is in a different region. - If the SQL database and region are unavailable, you can use the
.bacpacfile with SqlPackage to recreate the database in a workspace in a new region – Workspace C2.W2 in Region B as described in the scenario above. Follow the steps detailed in Import a database with SqlPackage to recreate the database with your.bacpacfile.
The recreated database is an independent database from the original database and reflects the state of the data at the time of the export operation.
Failback considerations
The recreated database is an independent database. Data added to the recreated database would not be reflected in the original database. If you plan to failback to the original database when the home region becomes available, you will need to consider manually reconciling data from the recreated database to the original database.
Platform
Platform refers to the underlying shared services and architecture that apply to all workloads. This section walks you through the recovery procedures for shared experiences. It covers variable libraries.
Variable library
Microsoft Fabric Variable libraries enable developers to customize and share item configurations within a workspace, streamlining content lifecycle management. From a disaster recovery standpoint, variable library users must proactively protect against a regional disaster. This can be done through Fabric Git integration, which ensures that after a regional disaster, a user's Variable library remains available. To recover a variable library, we recommend the following:
Use Fabric Git integration to synchronize your Variable library with your ADO repo. In case of disaster, you can use the repository to rebuild the Variable library in the new workspace you created. Use the following steps:
In the newly created workspace, connect and sync to your Azure ADO repo again.
All Fabric items in this repository are automatically downloaded to your new Workspace.
After syncing your items from Git, open your Variable Libraries in the new workspace and manually select the desired active value set.
Customer-managed keys for Fabric workspaces
You can use customer-managed keys (CMK) stored in Azure Key Vault to add an additional layer of encryption on top of Microsoft-managed keys for data at rest. In the event that Fabric becomes inaccessible or inoperable in a region, its components will fail over to a backup instance. During failover, the CMK feature supports read-only operations. As long as the Azure Key Vault service remains healthy and permissions to the vault are intact, Fabric will continue to connect to your key and allow you to read data normally. This means the following operations aren't supported during failover: enabling and disabling the workspace CMK setting and updating the key.