Project Acoustics Unity Baking - Probe Placement
This article describes the Probe Placement step of the Project Acoustics Unity workflow.
Calculate and review listener probe locations
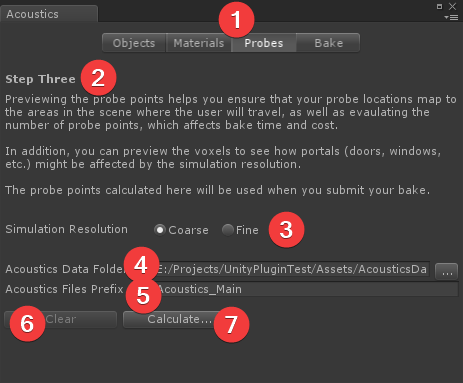
After you assign the materials, switch to the Probes tab. Select Calculate to place listener probe points for simulation.
What the "Calculate" button does
The Calculate button uses your selected acoustic scene geometry to prepare your scene for simulation:
- It takes the geometry from the scene meshes and calculates a voxel volume. The voxel volume is a volume of your entire scene comprised of small cubic "voxels." Voxel size is determined by the simulation frequency, which is controlled by the Simulation Resolution setting. Each voxel is marked either as "open air" or containing scene geometry. If a voxel contains geometry, the voxel is tagged with the absorption coefficient of the material that's assigned to that geometry.
- It uses the navigation meshes to place listener probe points. The algorithm balances the competing concerns of spatial coverage and simulation time and file size. It aims to ensure that narrow corridors and small spaces always have some coverage. Typical probe point counts range from 100 for small scenes to a few thousand for large scenes.
Depending on the size of your scene and the speed of your machine, this initial calculation can take several minutes.
Review voxel and probe placement
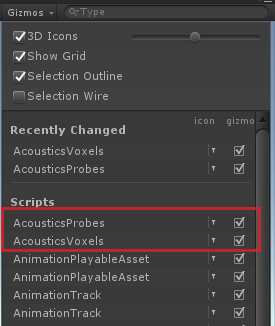
Preview both the voxel data and probe point locations to make sure you're ready to bake your scene. An incomplete navigation mesh or missing or extra acoustic geometry is usually easily visible in the preview. Enable or disable voxel and probe placement by using the Gizmos menu.
Voxels that contain acoustic geometry are shown as green cubes. Explore your scene, and verify that everything that should be geometry has voxels. The scene camera has to be within about 5 meters of the object for the voxels to show.
If you compare voxels created with coarse resolution versus fine resolution, you'll see that the coarse voxels are twice as large.
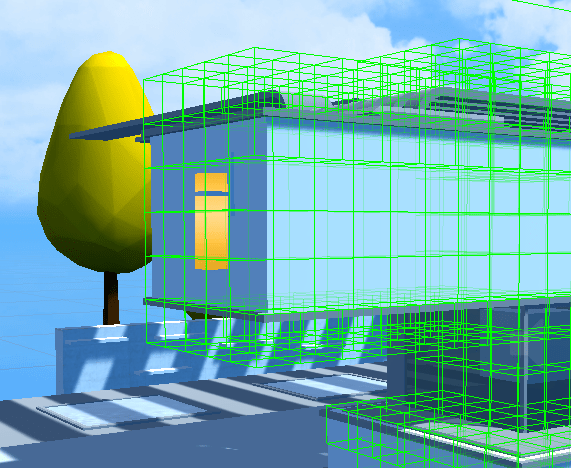
Simulation results are interpolated between listener probe point locations at runtime. Check that there are probe points near any places where the player is expected go in the scene.

Probes Tab Reference
- The Probes button brings up this tab.
- A brief description of what you can do on this tab.
- Use these options to control the simulation resolution. Coarse is faster, but fine is more accurate. For more details, see the FAQ.
- Specifies where to put acoustics data files. Select the "..." button to access a folder picker. The default location is Assets/AcousticsData. An Editor subfolder is also created at this location. For more information, see Data files added by the bake process.
- The prefix that's specified here is used to name the data files for this scene. The default is "Acoustics_[Scene Name]".
- After the probes are calculated, the controls that we just described are disabled. Select the Clear button to erase the calculations and enable the controls so you can recalculate with new settings.
- Select Calculate to voxelize the scene and calculate probe point locations. Calculation is done locally on your machine. It must be done before doing a bake.
In this version of Project Acoustics, probes can't be placed manually. Use the automated process on the Probes tab.