Setting up a remote test PC
Why set up a remote test PC?
There are a variety of reasons you might choose to test your PC game on a remote test PC, including the following:
- Your primary development PC is running a version of the Windows Client OS earlier than the Windows May 10, 2019 Update. Because a game that uses Gaming Runtime can only run on a client that is running the Windows May 10, 2019 Update or later, you must test by using a remote test PC (or a partition running on your development PC).
- You need to test the game on a PC that has a specific hardware configuration that doesn't match your development PC. For example, you may want to test by using a remote PC in a test lab where devices with a variety of video cards are available.
Enable developer mode on your target PC
Open Settings.
Enter Developer in the search field. From the options displayed, select Use developer features.
Select Developer mode. A dialog box appears, saying that the system is adding some features. Before moving beyond this step, wait for this process to finish.
Software requirements
To test your Gaming Runtime-enabled title running on a remote test PC, it must have the following installed:
- Windows 10 (May 10, 2019 Update or later) client operating system (64-bit)
- Gaming Runtime Services (GRTS)
- Visual Studio Remote Tools
If your title is using MicrosoftGame.config to install framework dependencies, these need to be sideloaded onto machines configured to use the developer sandbox. For more information, see Framework package dependencies.
Note
Only install the exact versions that are specified in MicrosoftGame.config. Installing versions you do not specify can mask errors during development or cause unexpected problems after publishing to retail.
Gaming Runtime Services
GRTS must also be installed on the test PC.
How to determine if GRTS is already installed
If you are unsure whether your test PC already has GRTS installed, run the following Windows PowerShell command:
Get-AppxPackage Microsoft.GamingServices
Installing the Gaming Runtime Services
Install GRTS by using one of the methods described as follows. After you've installed GRTS, Windows Update automatically keeps your test PC up to date with the latest version of the services that are available from the Microsoft Store.
Using the Microsoft Game Development Kit (GDK) installer
Open the GDK installer.
Go to the Select the features you want to install page as shown in the following figure.
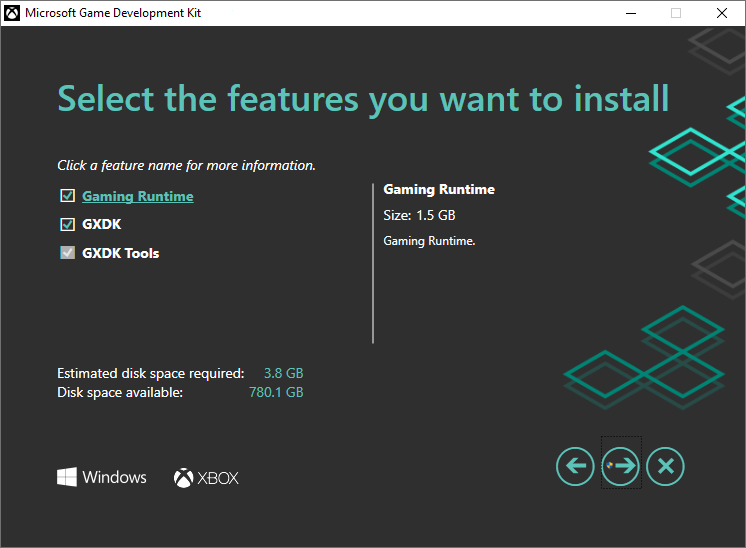
Select Gaming Runtime Dependencies. You can also cancel the selections for other components.
Continue through the rest of the installation process until you get to the Installation Complete page.
GRTS is now installed and running.
Manual installation
Go to the GamingServices.appxbundle package, which is located by default at the following path:
C:\Program Files (x86)\Microsoft GDK\build_number\GRDK\redistNote
In the previous example path, build_number represents the build that's installed on your system (for example, 190700).
Copy GamingServices.appxbundle to the test PC.
On the test PC, run the following command:
Add-AppxPackage <PathToGamingServices.appxbundle>
GRTS is now installed and running.