Stores and sales (Legacy Economy)
Important
Economy v1 APIs are in maintenance mode and will not be receiving any new features, only bug fixes. The v1 APIs will be maintained for the foreseeable future. See the Economy v2 Overview to learn more about the next version of PlayFab Economy!
In PlayFab, Stores are built upon Catalogs and Currencies. Your primary catalog should define all of the items in your game and assign them prices in the currencies that you've created.
Stores should define subsets of the items in your catalog, and make them available for purchase at specific prices that can be different than the catalog prices.
A store allows you to single out a specific set of items, and make them available at specific prices for a set time period.
This tutorial illustrates the best practices for defining stores based on virtual currency and real money.
Requirements
- Familiarity with the PlayFab Game Manager.
- You must have defined one or more Virtual Currencies. The latter example in this tutorial uses:
- SP (Silver Pieces)
- GP (Gold Pieces).
- You must have a primary catalog with one or more items defined.
- The first example uses multiple item/bundles, similar to the ones described in the Drop Tables tutorial.
- The second example in this tutorial uses small, medium, and large health potions.
Best practices
Catalog prices should be fixed long-term - they define the real price of an item.
Stores should be temporary, being added and removed according to your LiveOps strategies.
Note
Expect to get most of your revenue by cycling stores, and transitioning items in and out of active stores.
General information about stores and catalog pricing
- Pricing: The prices defined in the catalog should be defined as the regular price of an item. Stores allow you to define a temporary sale price for an item, utilizing the common retail tactic. Alternately, stores can provide a temporary price for an item that isn't normally available for sale at all.
- Zero Cost: If the cost of an item in a particular currency is unset (null) or zero, it can't be purchased using that currency for both catalogs and stores. Zero cost allows you to make items available for exclusively free currencies, or exclusively premium currencies, by leaving the entries for the other currencies blank or by resetting them to zero.
- Real Money: The RM currency is available in all catalogs and stores. RM is a restricted currency key that indicates real money transactions only. You should only charge RM for items of significant value, or bundles/containers with premium currency.
- Prices are Either/Or: If two prices are defined on an item, the item can be purchased for one or the other. It isn't possible to require two currencies for a single item.
Defining a real money store
In your Game Manager:
- Navigate to your Title.
- Select Economy from your menu on the left.
- On the Catalogs tab, select your primary catalog and select Stores.
- Select the New Store button.
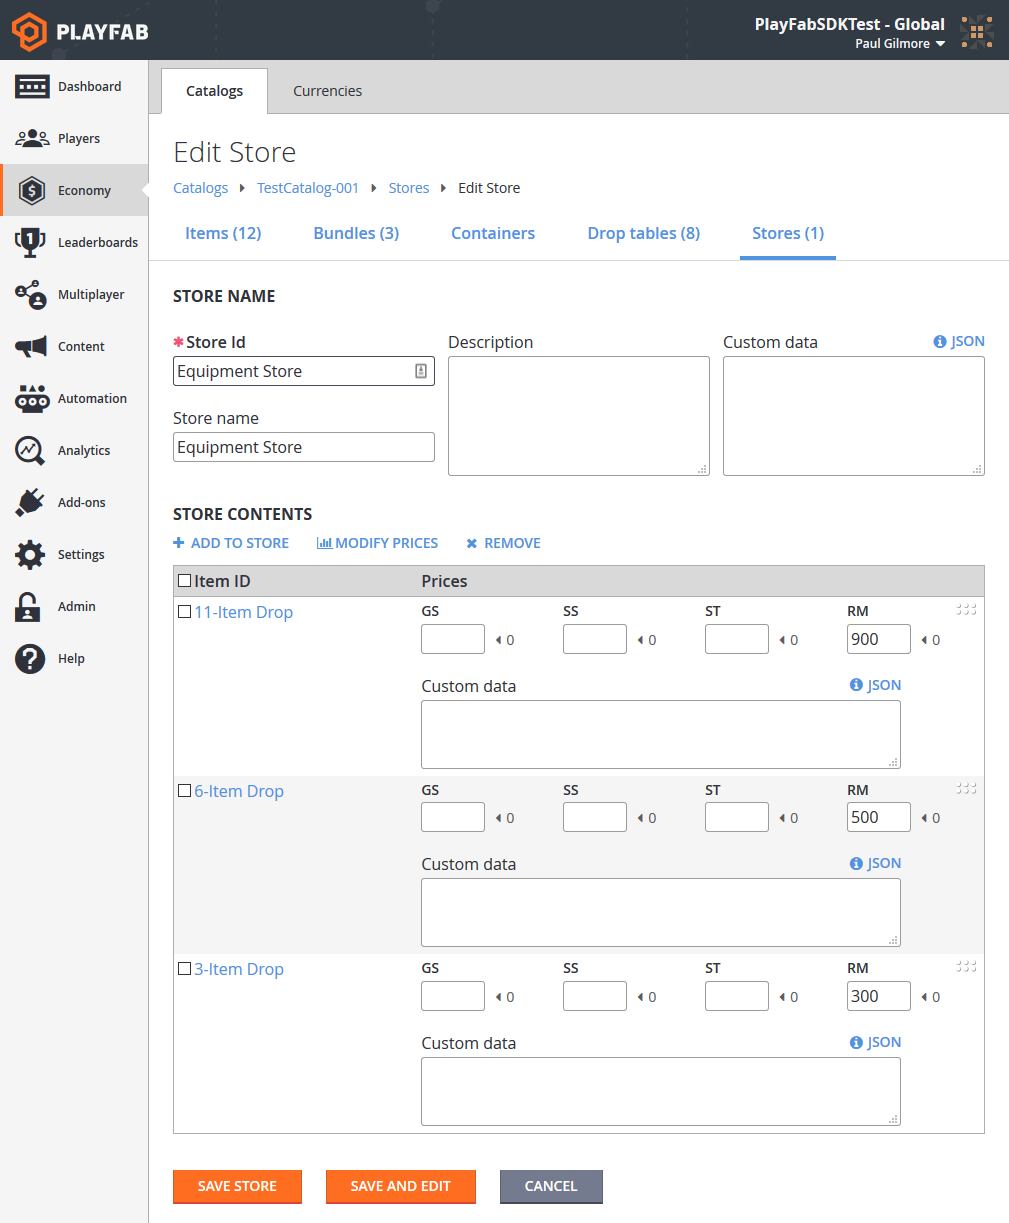
In the Drop Tables example, we created an 11-item drop bundle. For this example, we'll make three similar bundles available in a real money store.
Note
Any item can be sold for real money, but it is a best practice to make only specific valuable items or bundles directly available.
The screenshot provided below shows a complete new Store, containing three Item Bundles available for Real Money.
The specifics for completing real money purchases are covered in our advanced tutorial, non-receipt payment processing.
Best practices for real money stores
How you use real money is largely dependent on the specific design of your game. Direct purchase of in-game items is valid, but less common.
More typically, your game should allow purchase of a premium virtual currency using real money. You can cycle multiple stores with different ratios of premium currency to real money.
Tip
The primary takeaway is - make sure your players can always give you money.
Defining a virtual-currency store
Let's get into the gritty details and code for purchasing in-game items with virtual currency.
The initial steps are nearly identical to the preceding example:
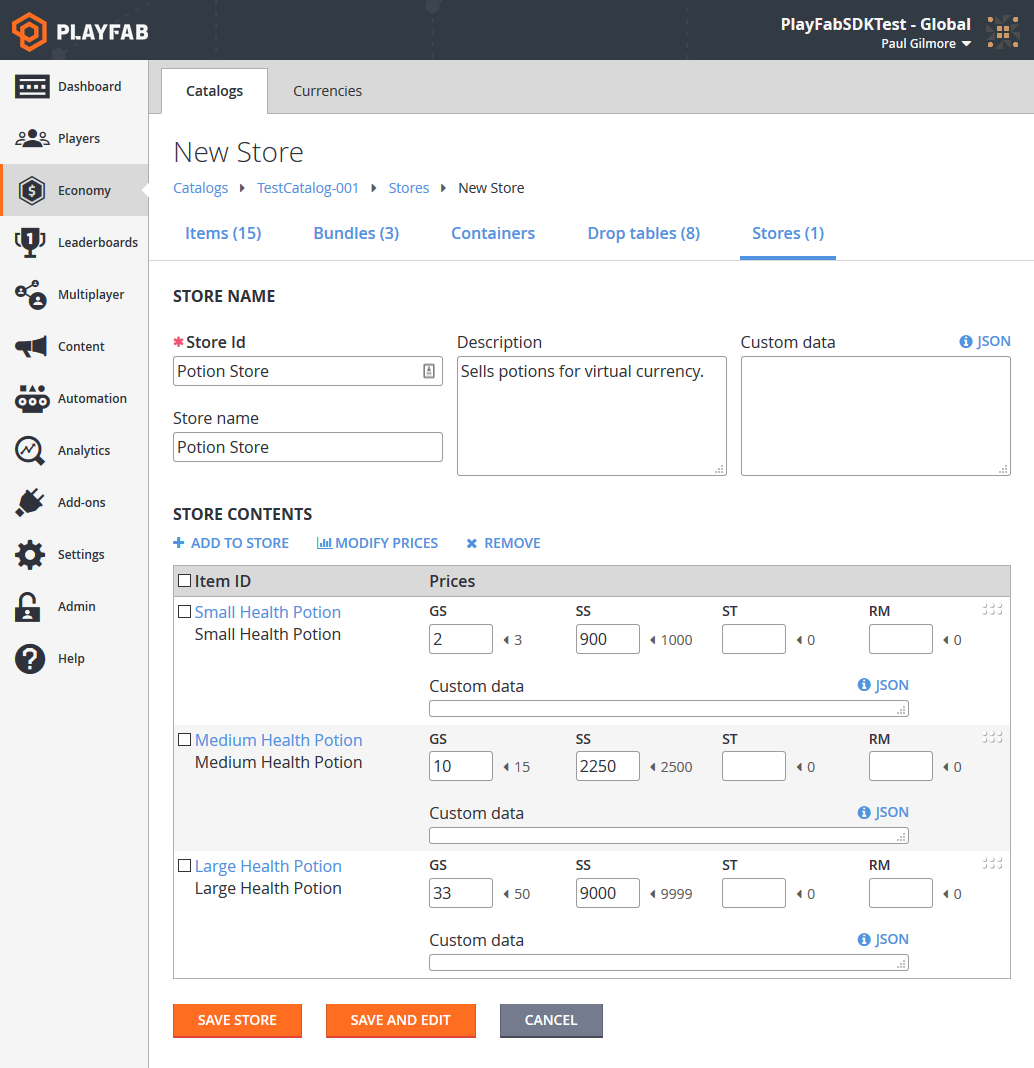
- Create three new items: Small, Medium, and Large Health Potions with free Currency price, and a premium Currency price.
- Create a new store with the items on sale.
Purchasing multiple items in a single purchase
To purchase a single item for virtual currency, use the PurchaseItem method, as described in our Stores quickstart. This tutorial covers purchasing multiple items in a single purchase.
Your first step in this process should be to get the store, and display it to the user.
void GetVcStore()
{
    var primaryCatalogName = "TestCatalog-001"; // In your game, this should just be a constant matching your primary catalog
    var storeId = "Potion Store"; // In your game, this should be a constant for a permanent store, or retrieved from titleData for a time-sensitive store
    var request = new GetStoreItemsRequest
    {
        CatalogVersion = primaryCatalogName,
        StoreId = storeId
    };
    PlayFabClientAPI.GetStoreItems(request, LogSuccess, LogFailure);
}
The LogSuccess callback in this example receives a GetStoreItemsResult that contains a full description of all the items in the store, their store prices, and any metadata contained in the store itself.
Best practices for displaying stores
Games with stores should call and cache their primary catalog using the GetCatalogItems method. You can display both the catalog price and the store price, along with a 10% OFF or similar bonus decoration beside items for sale.
Tip
Players are more likely to buy items on sale, especially if the sale is a limited-time offer.
At this point, it's the responsibility of your GUI code to present the user with the opportunity to select which items they wish to buy and how many.
- Between your game and PlayFab, the remaining steps are several separate API calls, but you can make the sequence of multiple calls invisible to the player.
- Collect all information about the purchase up front, and make the full sequence of calls after all player input is collected.
void DefinePurchase()
{
    var primaryCatalogName = "TestCatalog-001"; // In your game, this should just be a constant matching your primary catalog.
    var storeId = "Potion Store"; // At this point in the process, it's just maintaining the same storeId used above.
    var request = new StartPurchaseRequest
    {
        CatalogVersion = primaryCatalogName,
        StoreId = storeId,
        Items = new List<ItemPurchaseRequest> {
             // The presence of these lines are based on the results from GetStoreItems, and user selection - Yours will be more generic.
            new ItemPurchaseRequest { ItemId = "Small Health Potion", Quantity = 20,},
            new ItemPurchaseRequest { ItemId = "Medium Health Potion", Quantity = 100,},
            new ItemPurchaseRequest { ItemId = "Large Health Potion", Quantity = 2,},
        }
    };
    PlayFabClientAPI.StartPurchase(request, result => { Debug.Log("Purchase started: " + result.OrderId); }, LogFailure);
}
During the item selection process, you must allow the user to select which currency they wish to spend for these items. In this example, all items have costs in SP and GP, which means the user has a choice of which currency to spend.
Note
The result from the StartPurchase API in the code example above, contains a list of PaymentOptions. Each payment option contains the Currency, Price, and ProviderName that can be used to make the purchase.
Restrictions
Only one virtual currency is allowed in a single purchase. All selected items must be purchasable with a single currency.
The currency must be specified in the call, which is important when there are multiple possible currencies. The sequence will fail if there are items in the request without corresponding costs in the selected currency.
The ProviderName must also be specified in the call. For real money purchases, the provider name is who is used to fund the purchase, such as Facebook, PayPal, or Steam. For VC purchases, it will be a string based on your title ID. The ProviderName can be obtained from the PaymentOptions field of the StartPurchaseResult as described in the previous Note.
Tip
For VC purchases, the ProviderName for your title is a string constructed from the word "Title" concatenated with the decimal equivalent of your hexadecimal TitleId. For example, "Title123456".
Best practices for displaying store items
Avoid confusion for your player by ensuring that all items in a store have consistent options.
Real money items should be in a separate store from premium VC items, and again separate from free VC items. If a single store allows multiple currencies, then all items in that store should consistently use the same set of multiple currencies. Create as many stores as you need to provide a smooth customer experience.
void DefinePaymentCurrency(string orderId, string currencyKey, string providerName)
{
    var request =new PayForPurchaseRequest {
        OrderId = orderId, // orderId comes from StartPurchase above.
        Currency = currencyKey, // User defines which currency they wish to use to pay for this purchase (all items must have a defined/non-zero cost in this currency).
        ProviderName = providerName // providerName comes from the PaymentOptions in the result from StartPurchase above.
    };
    PlayFabClientAPI.PayForPurchase(request, LogSuccess, LogFailure);
}
Finally, once the purchase is fully defined, you can complete the process, as shown below.
// Unity/C#
void FinishPurchase(string orderId)
{
    var request = new ConfirmPurchaseRequest { OrderId = orderId };
    PlayFabClientAPI.ConfirmPurchase(request, LogSuccess, LogFailure);
}
Best practices for handling API failure results
Any single API call can fail for many reasons. Wireless devices such as phones can often have intermittent connectivity, and any internet call can fail due to random latency.
Each call should check for multiple failure conditions. You should abort if the response shows the request is invalid (for example, unable to buy multiple items with a single currency). There could be issues with your store design.
If the response indicates a connectivity failure, you can try again with an exponential back-off delay.
Conclusion
Stores are a great mechanism for encouraging your players to purchase items.
Stores work with any kind of virtual currency. Stores can also work with real money through an alternate set of API methods.
- You can set up a single-item purchase with VC via PurchaseItem.
- You can set up a multiple-item purchase with real money or VC via the sequence:
For more information on real money purchases, see Non-Receipt Payment Processing.
For advanced store usage, see Custom Stores for Player Segments tutorial.
Feedback
Coming soon: Throughout 2024 we will be phasing out GitHub Issues as the feedback mechanism for content and replacing it with a new feedback system. For more information see: https://aka.ms/ContentUserFeedback.
Submit and view feedback for