Note
Access to this page requires authorization. You can try signing in or changing directories.
Access to this page requires authorization. You can try changing directories.
Important
Azure Intelligent Recommendations Retirement and Migration Plan
Azure Intelligent Recommendations will be retired on March 31, 2026.
We're retiring the product due to changes in strategy and focus with the onset of the copilot era. Currently, there are no equivalent services available within the Microsoft stack, so we can't offer a migration plan to a similar service.
Next steps:
- Identify or build an alternative.
- Migrate all your traffic to the chosen alternative.
- Stop calling the Recommendations endpoint before the shutdown date.
- Delete all service endpoints, modeling, and IR accounts in the Azure portal before the shutdown date.
We'll continue to monitor and maintain Azure Intelligent Recommendations during the retirement period. After the product is retired, we'll keep the service data for three months before deleting it.
This article shows you how to set up your Azure Data Lake Storage account to work with Intelligent Recommendations.
To grant Intelligent Recommendations access to your Data Lake Storage account, first navigate to the account, and then set access permissions.
Set up a container, root folder, and log folder
To select the container and folders that Intelligent Recommendations use:
Sign in to Azure portal and select the Storage section.
Choose the subscription and storage account your business use for sharing data with Intelligent Recommendations, and then select Containers.
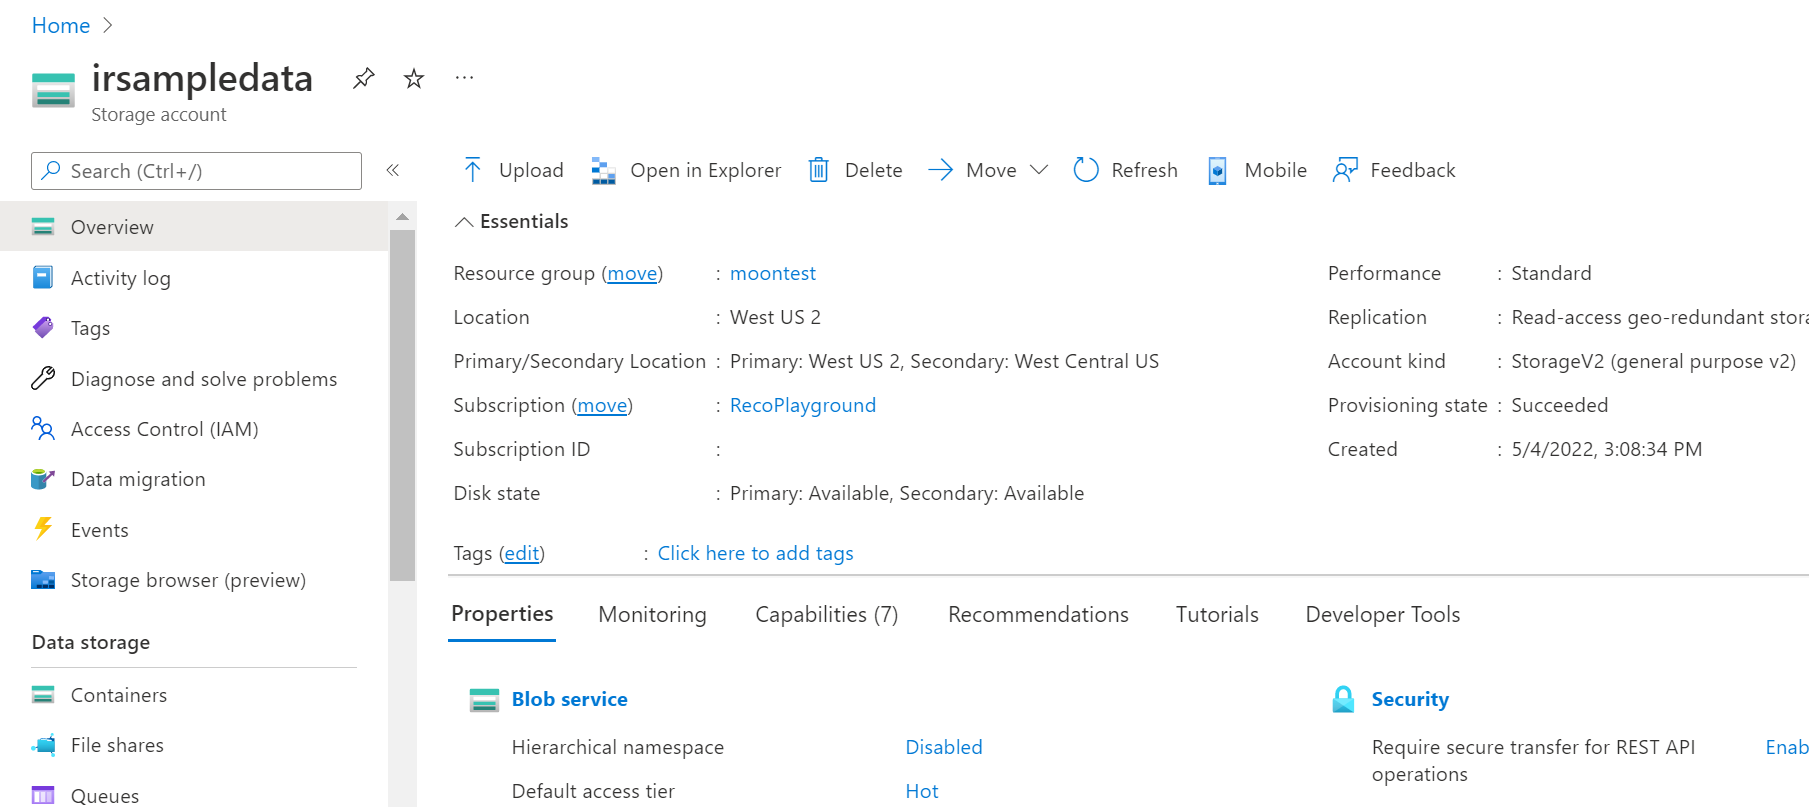
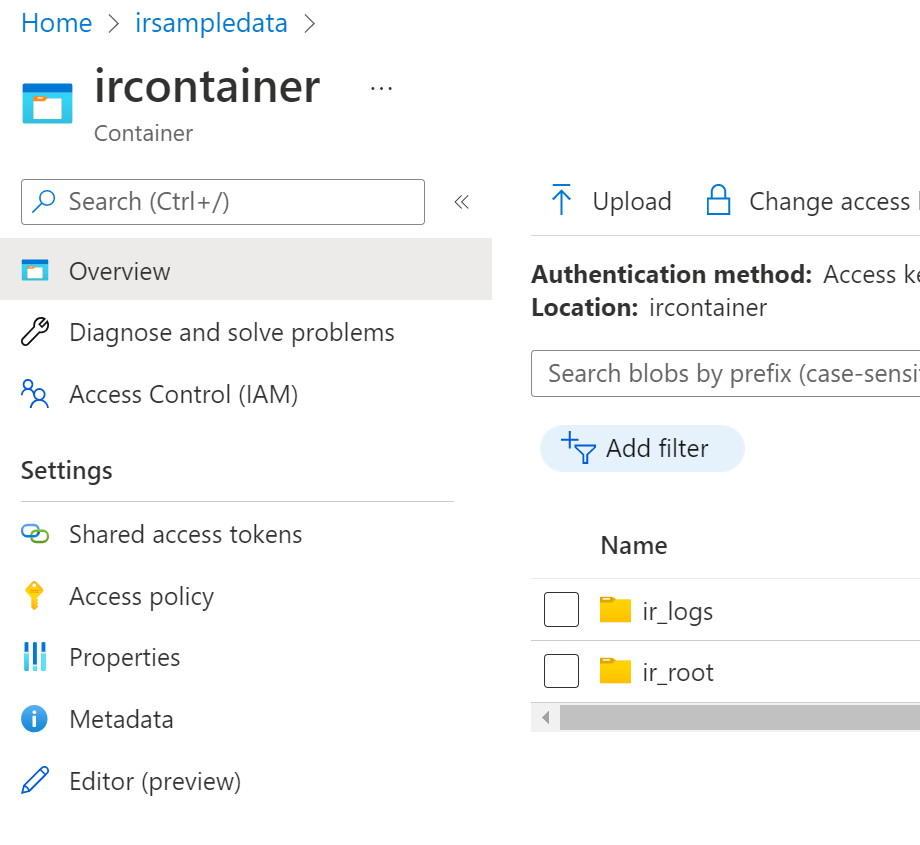
Create or choose an existing container, and then create or select a root folder.
Note
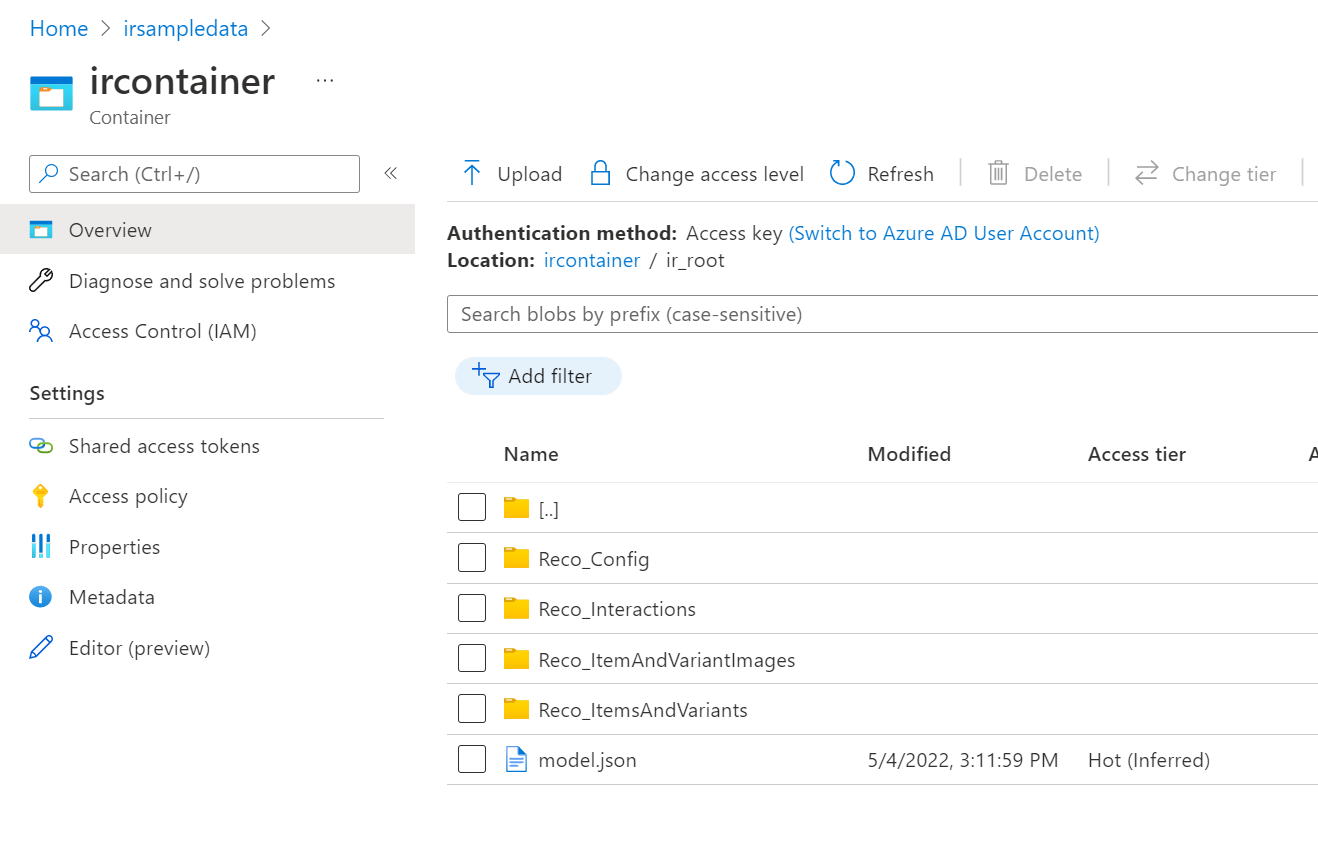
The names of the root and log folders and containers won't impact service, but must match when providing the paths during the setup of the Intelligent Recommendations account. In the example, note that we're using ircontainer as the name of our container, ir_root as the name of our root folder, and ir_logs as the name of the logs folder.
Check the names and structure of the subfolders in the ir_root folder.
Set up security for the container
To configure security for your container, you must grant access to Intelligent Recommendations to read\write data by using either system assigned or user assigned managed identities. To learn more about what types of Managed Identities are available and which one works for your business scenario, see the Managed Identity Types Guide
Managed Identities can be configured in two ways:
- System Assigned Identity - A system assigned managed identity is restricted to one per resource and is tied to the lifecycle of this resource.
- User Assigned Identity - User assigned managed identities enable Azure resources to authenticate to cloud services (for example, Azure Key Vault) without storing credentials in code.
Before continuing, make sure you have your subscription Id and Storage account that your business will use for sharing data with Intelligent Recommendations.
System assigned managed identity approach
To set up security with the system assigned managed identity:
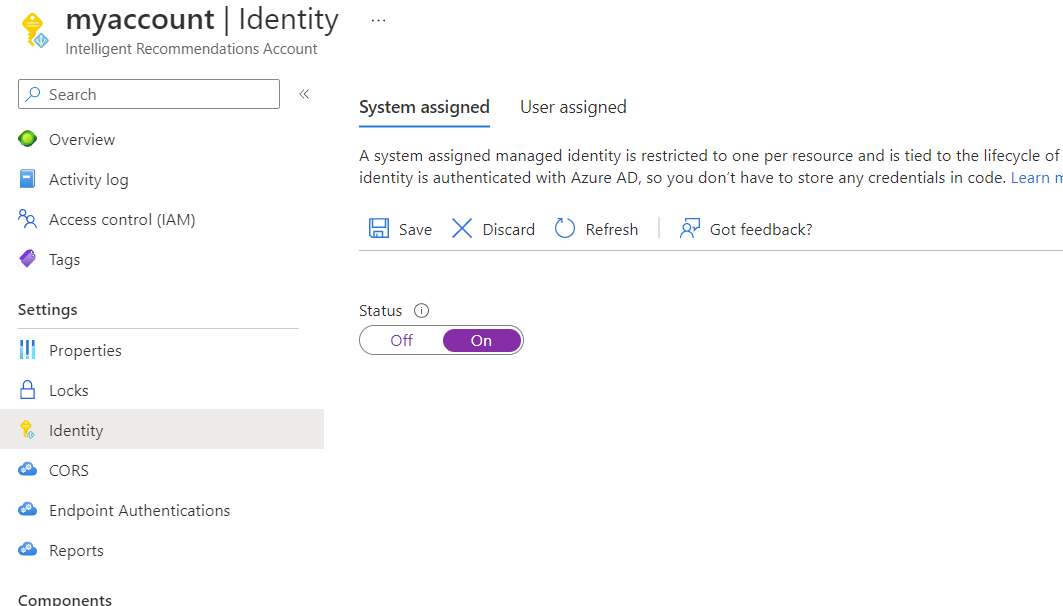
- Open your Intelligent Recommendations account.
- On the left pane, select Identity.
- Under the System assigned tab, turn Status to ON and select Save.
- Return to your storage account and select Containers in the left navigation pane and select your ircontainer (or whatever name you have given your container).
- On the left pane, select Access Control (IAM).
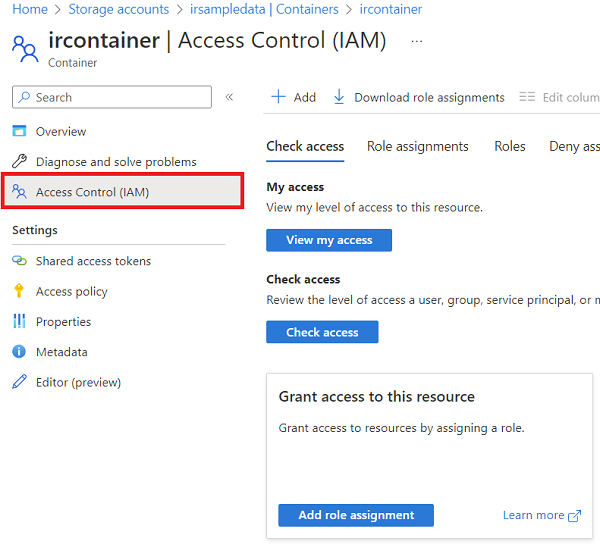
To allow the Intelligent Recommendations service to read the logs data, follow the given steps to assign the Storage Blob Data Reader, then repeat steps 1-6 again for the Storage Blob Data Contributor permissions:
- Under Grant access to this resource, select Add role assignment.
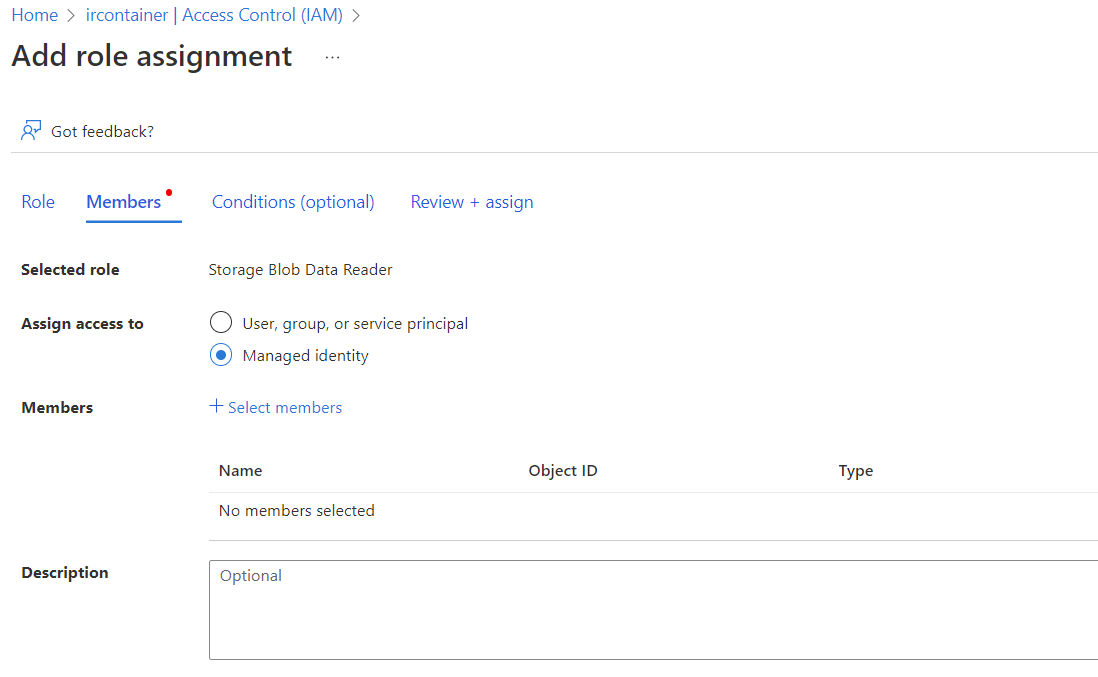
- In Role, select Storage Blob Data Reader, then select next.
- On the next screen, under the Assign access to section, select Managed identity, then select + Select members.
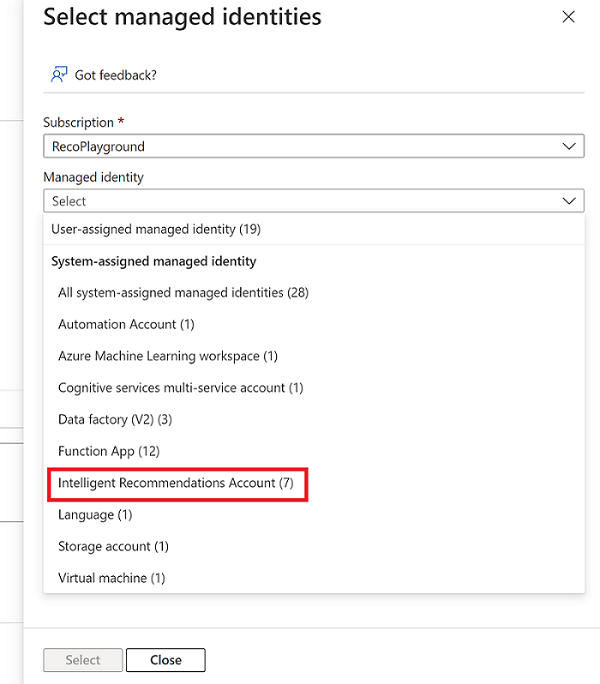
- Under Managed identity, select Intelligent Recommendations Account category.
- Next, you see a list of Intelligent Recommendations Accounts. Choose the relevant account that has access to this storage account, then select Select.
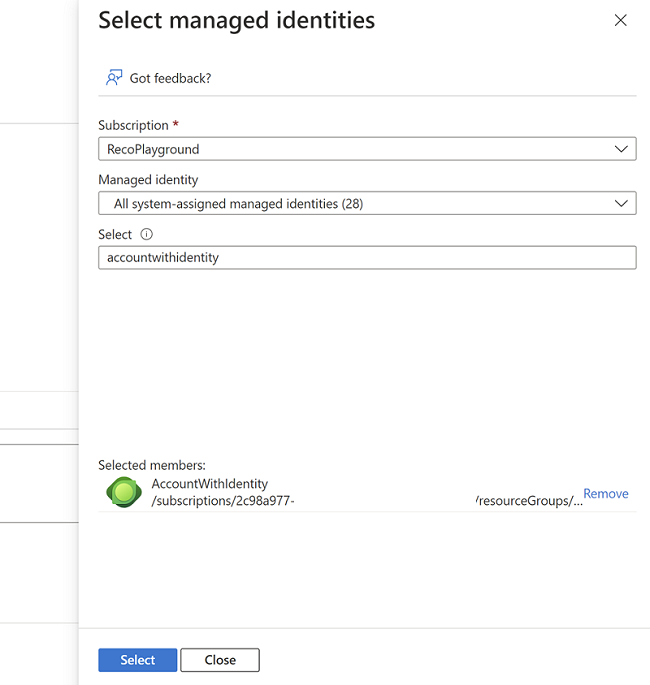
- Finalize your decision by selecting the "Review + Assign" button. Repeat these steps to set up the Storage Blob Data Contributor as well.
User assigned managed identity approach
If your business has multiple accounts that need read/write access to data in the same container, grant permissions to a user assigned managed identity and relate it to multiple Intelligent Recommendations accounts.
Note
Before continuing you'll need to have already created a user-assigned managed identity. If you do not already have one, follow the steps outlined in the user-assigned managed identities guide.
The prerequisites to creating a user managed identity include:
- Subscription: Choose the subscription to create the user-assigned managed identity under.
- Resource group: Choose a resource group to create the user-assigned managed identity in, or select Create new to create a new resource group.
- Region: Choose a region to deploy the user-assigned managed identity, for example, West US.
- Name: Enter a name for your user-assigned managed identity. Note that only alphanumeric characters (0-9, a-z, and A-Z) and the hyphen (-) are supported.
Copy the User-assigned managed identity that you created and want to use. If you don't have one, see the note on how to create your user-assigned managed identity.
From your storage account, select Containers in the left navigation pane, and find your ircontainer (or whichever container contains your data contract).
On the left pane, select Access Control (IAM).
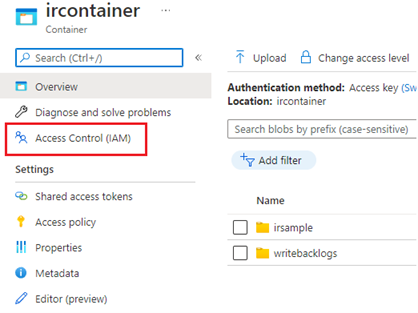
To allow the Intelligent Recommendations service to read the logs data, you need to add both the Storage Blob Data Reader and the Storage Blob Data Contributor permissions.
- Under Grant access to this resource, select Add role assignment.
- In Role, select Storage Blob Data Reader.
- Under Assign access to, select Managed identity, then select + Select members.
- Select User assigned managed identity.
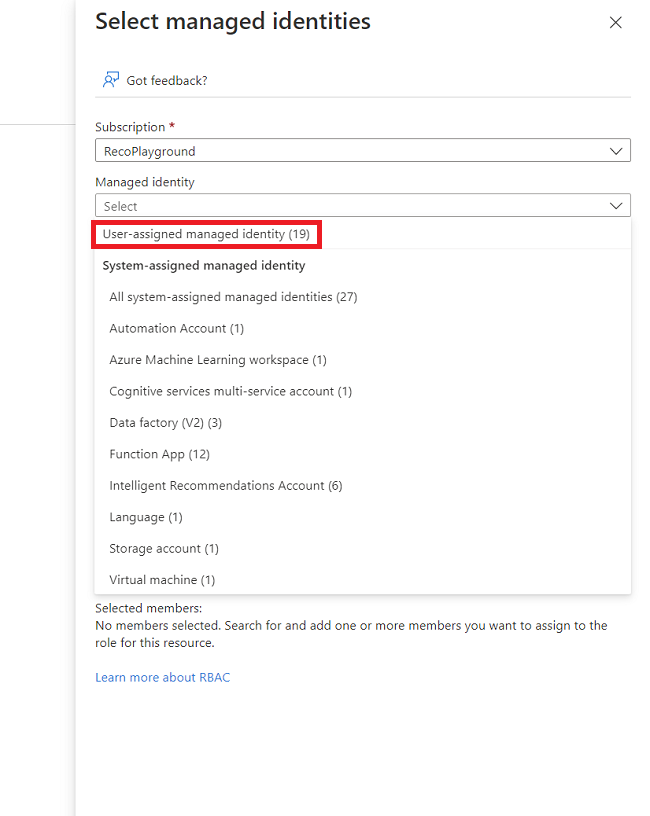
- Choose the user assigned managed identities that is related to the IR account(s) that you want to grant permissions to, and then select Select.
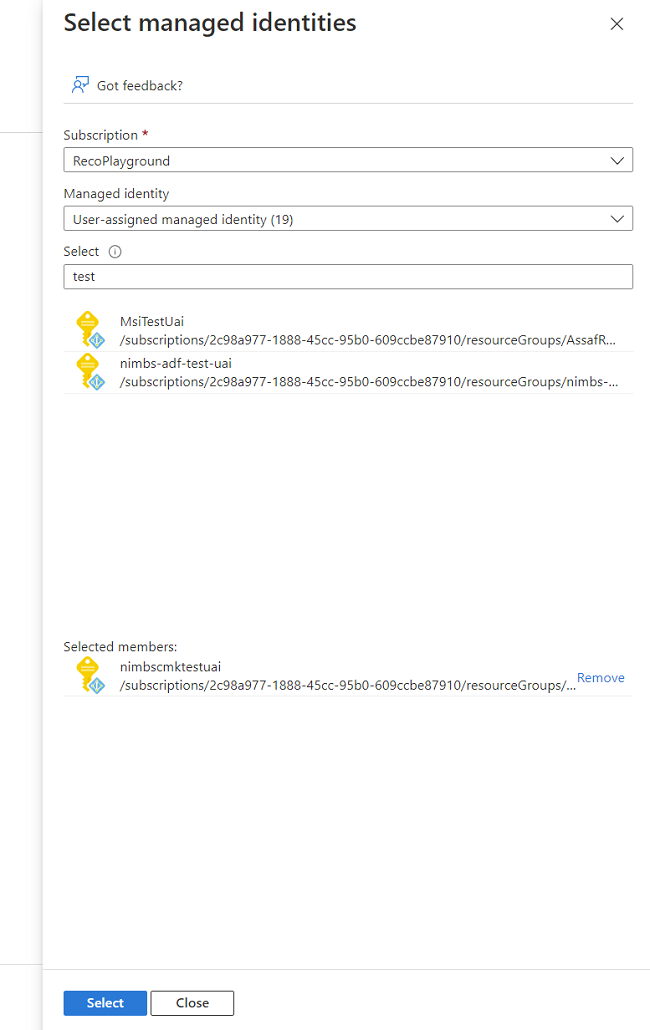
- Save your changes by clicking on the "Review + Assign" button and close the dialog.
Next, you need to connect your Intelligent Recommendations account to your user-assigned managed identity:
- Go to your Intelligent Recommendations account.
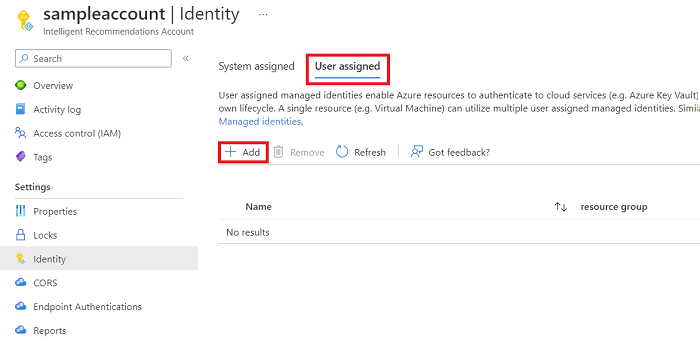
- On the left pane, select Identity.
- On the Identity tab, select User assigned tab and select + Add.
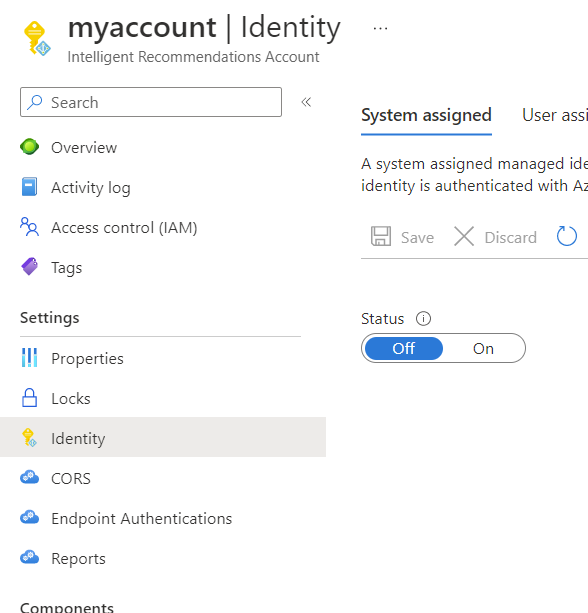
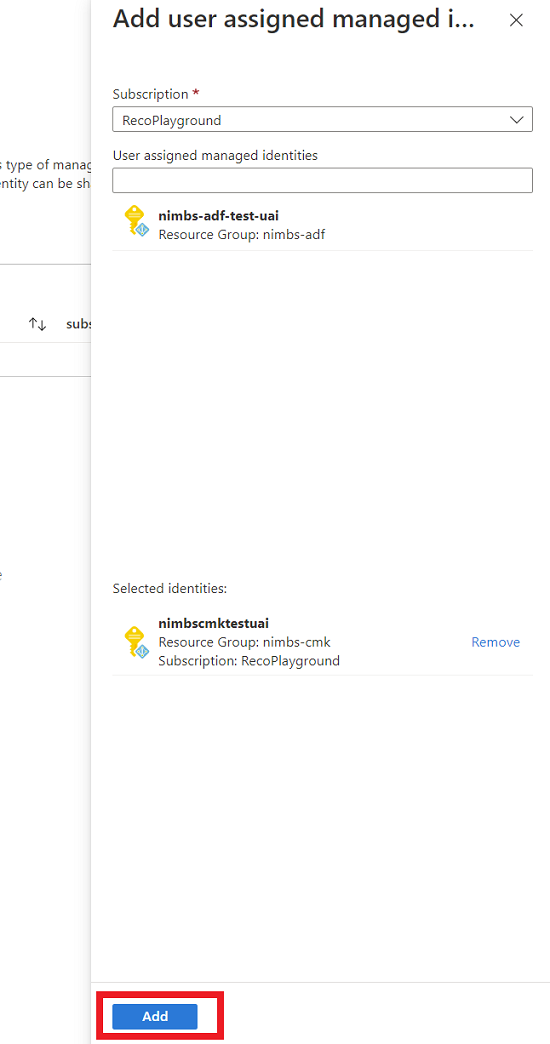
Select your user-assigned managed identity that you want connected to the IR Account. You can connect more than one identity to your IR account if necessary.
Select Add to save your choices.
Verify your role assignments
Verify that you have the correct set of permissions by returning to your storage account and ircontainer.
- From your ircontainer, select Access Control (IAM) from the left pane.
- Select View from the View access to this resource section.
- Search for the Intelligent Recommendations service, and verify that the service is listed on the Role assignments section with Storage Blob Data Reader and Storage Blob Data Contributor. If these roles are missing, go back and re-add the roles using the steps outlined previously.
Note
It's also possible to set up permissions on the folder level (ACL permissions). For more information about ACL permissions, go to Access control lists in Azure Data Lake Storage Gen2.
Prepare data
Intelligent Recommendations supports multiple data types. For best results, place each data type in a unique subfolder with a specific name that Intelligent Recommendations recognize. You can place CSV files with the correct schema inside each folder.
Keep the following tips in mind when preparing CSV files:
- The names of the folders underneath the root folder level are important and must match exactly what is expected in the model.json file.
- The names of the CSV files aren't important.
- You can place multiple CSV files in the folder. Intelligent Recommendations will also attempt to read them.
- The amount of data doesn't matter, either. You can partition the data the way you want.
- Scenarios such as personalized recommendations require different data entities.
A data entity is a set of one or more data text files. Each file has a list of columns, or attributes, and rows containing the actual data. Intelligent Recommendations defines logical groups of data entities, each with its own purpose. Data entities are optional (unless explicitly stated otherwise), which means that their data can be empty or entirely missing.
Learn more about data types for Intelligent Recommendations in Data contracts reference.
To prepare data, you need to add three data entities:
- Reco_ItemsAndVariants: This file contains the full list of items that Intelligent Recommendations recommend to users.
- Reco_Interactions: This file stores each raw event or user interaction between users and items. Common events include clicks, views, and transactions.
- Reco_Config: This file isn't a data folder specifically, but is used for other list configurations.
Next, you need to add the data schema.
Download the model.json file and configure the root folder
The entire data schema is described in a downloadable file, model.json.
Select this link to download the model.json file. This JSON file must be placed in the root folder and doesn't need other modifications.
Note
Do NOT modify the model.json file. Modifying the file will cause the Intelligent Recommendations service to fail to start processing data.
Save or move model.json to the root folder.
Create three subfolders for the data entities: Reco_ItemsAndVariants, Reco_Interactions, and Reco_Config.
Using a text editor, create a default config.csv file and move it to the Reco_Config folder.
The file structure should now look like this:

Create a basic catalog file
A catalog in its most basic form is just a plain list of item IDs. For now, you use the ItemsAndVariants data entity schema, which only has five fields.
The full schema looks like this:
ItemId, ItemVariantId, Title, Description, ReleaseDate
For the purposes of jump-starting your service, only ItemId is required. A few example rows for the file you should create are as follows:
0000394e,,,,
0000394f,,,,
0000394g,,,,
Create a basic interactions file
The Interactions data entity schema has 12 fields, but you can set most fields to their default values for now.
Set the following values:
| Required field | Description |
|---|---|
| InteractionsGroupingId | Can be anything that groups items together. You can set it to UserId or to SessionId or to OrderId. If you're unsure what to use, and you have UserId, then go ahead and set it to UserId. |
| ItemId | The same ItemId mentioned in Create a basic catalog file. These values must match your catalog. |
| UserId | Any string representing a user. Intelligent Recommendations doesn't use this field to query any external system, so this value can represent anything mapping to an actual user ID. |
| Timestamp | Represents the date and time of a recorded event. |
The full Interactions schema looks like this:
InteractionsGroupingId, ItemId, ItemVariantId, UserId, InteractionType, Timestamp, RealtimeEventId, PaidPrice, Channel, Catalog, Strength, IsPositive
For now, you can set the other fields to their default values. The interactions file needs to have sufficient data rows to enable the machine learning based modeling instance to compute results. You can use the built-in reports from logging to determine if you've enough. For more information about logging, go to Set up error logging.
A few example rows for the file you should create are as follows:
1,0000394e,,1,Transaction,2018-09-02T13:30:10.000Z,,,,,1,TRUE
1,0000394f,,1,Transaction,2018-09-01T03:48:38.000Z,,,,,1,TRUE
2,0000394e,,2,Transaction,2016-06-17T17:01:23.000Z,,,,,1,TRUE
2,0000394f,,2,Transaction,2017-04-19T07:15:53.000Z,,,,,1,TRUE
3,0000394e,,3,Transaction,2016-11-16T18:28:50.000Z,,,,,1,TRUE
Create a default configuration file
For now, copy this text into the text editor of your choice and save it as config.csv:
TrendingListMaxAgeDays,18250
TrendingListTransactionsIntervalDays,18250
BestSellingListTransactionsIntervalDays,36500
PersonalizationEnabled,False
ItemIdAsGuid,False
See also
Deployment overview
Create a new Intelligent Recommendations account
Use data contracts to share data