Exercise - Access a user's calendar events by using Microsoft Graph
Let's use all the concepts discussed up to this point and make changes to the sample app to access the calendar events.
Locate the index.html file in your code editor. Add the following HTML code in the
<main>tag just before its closing</main>tag.<button id="btnShowEvents" style="display: none;" onclick="displayEvents();">Show events</button> <div id="eventWrapper" style="display: none;"> <p>Your events retrieved from Microsoft Graph for the upcoming week:</p> <ul id="events"></ul> </div>Locate the graph.js file in your editor. Add a new function to get the calendar events of the signed-in user for the upcoming week by using the Microsoft Graph API endpoint
/me/calendarView. You'll call this functiongetEvents().Add the following code to the end of the file:
async function getEvents() {
  ensureScope('Calendars.read');
  const dateNow = new Date();
  const dateNextWeek = new Date();
  dateNextWeek.setDate(dateNextWeek.getDate() + 7);
  const query = `startDateTime=${dateNow.toISOString()}&endDateTime=${dateNextWeek.toISOString()}`;

  return await graphClient
  .api('/me/calendarView').query(query)
  .select('subject,start,end')
  .orderby(`start/DateTime`)
  .get();
}
Locate the ui.js file, and add a new function to display the calendar events received from Microsoft Graph in the list element. You'll call this function
displayEvents().Add the following code to the end of the file:
async function displayEvents() {
  var events = await getEvents();
  if (!events || events.value.length < 1) {
    var content = document.getElementById('content');
    var noItemsMessage = document.createElement('p');
    noItemsMessage.innerHTML = `No events for the coming week!`;
    content.appendChild(noItemsMessage)

  } else {
    var wrapperShowEvents = document.getElementById('eventWrapper');
    wrapperShowEvents.style = "display: block";
    const eventsElement = document.getElementById('events');
    eventsElement.innerHTML = '';
    events.value.forEach(event => {
      var eventList = document.createElement('li');
      eventList.innerText = `${event.subject} - From  ${new Date(event.start.dateTime).toLocaleString()} to ${new Date(event.end.dateTime).toLocaleString()} `;
      eventsElement.appendChild(eventList);
    });
  }
  var btnShowEvents = document.getElementById('btnShowEvents');
  btnShowEvents.style = "display: none";
}
In the same ui.js file, update the
displayUI()function to display the Show events button only on successful authorization.Add the following code to the end of the
displayUI()function:var btnShowEvents = document.getElementById('btnShowEvents'); btnShowEvents.style = "display: block";
Now that you've added all the other functions and code snippets to a signed-in user's events for the upcoming week, the next step is to run the app locally.
Run the app
To run and test the application, you'll need to add some calendar events into your calendar by using Microsoft Outlook or Microsoft Teams. The events should fall within a one-week period.
Tip
For this step, make sure you have Node.js installed in your machine.
It's time to see your application run locally.
In the terminal window, go to the project folder where the source code is located.
Run the following script in the command line to start your app locally by opening
http://localhost:8080in the browser.npm startIf the app is configured correctly, you'll see a sign-in button.
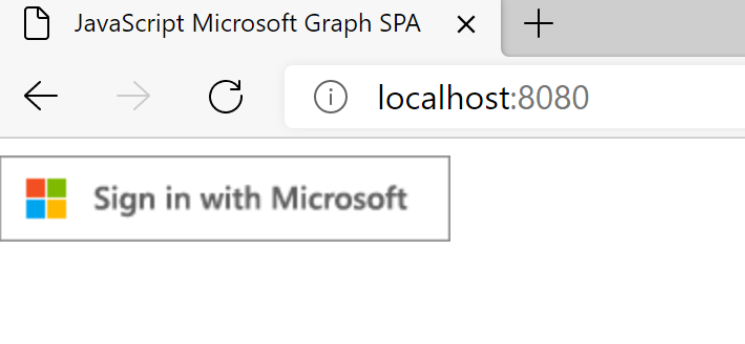
Sign in by using an account in the same Microsoft 365 developer tenant used in unit 2, where you registered the Microsoft Entra application.
After you successfully sign in, you're prompted to give consent.
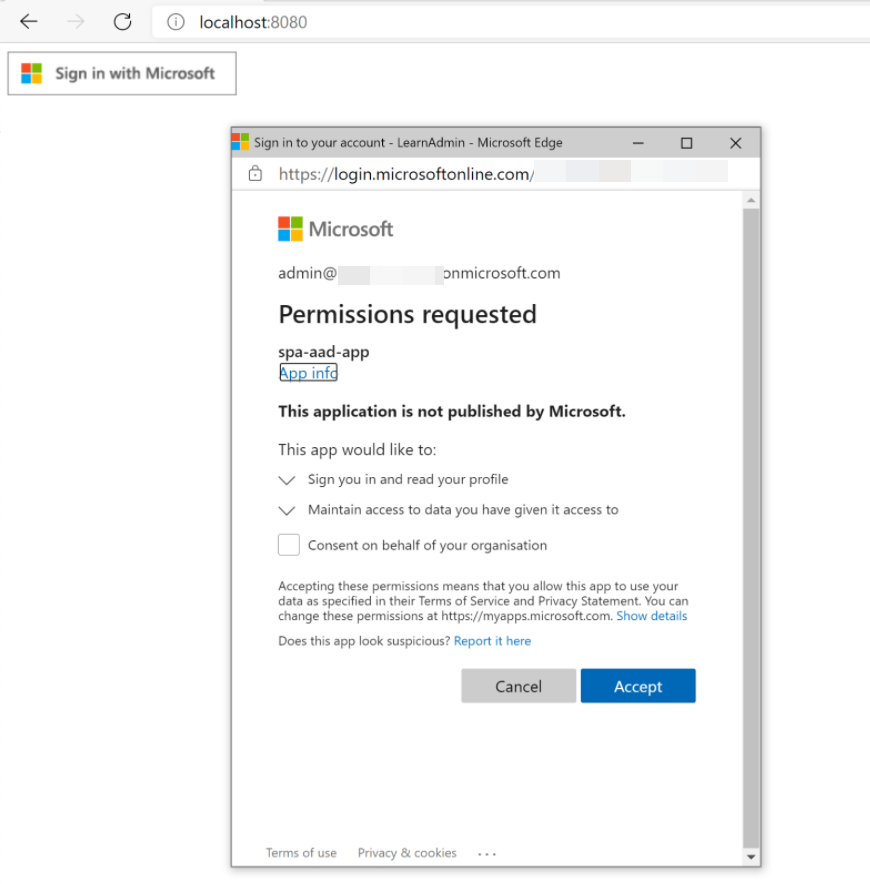
Select Accept to give consent for the application to do operations for the user.
After you consent, the application tries to get an access token by using the validated account information. The Microsoft Authentication Library handles this step for you.
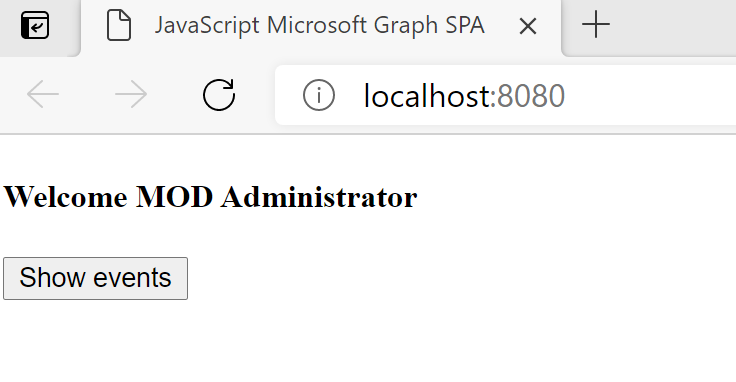
After the token is back in the application, a GET request is made to the Microsoft Graph
/meendpoint. The access token is passed in the Authorization Header. The call to/methen retrieves the data securely from the service.After the response is received from Microsoft Graph, you'll see the welcome message with the name of the signed-in user. Select the Show events button.
Another consent dialog appears. Notice the Read your calendar permission scope you're consenting to.
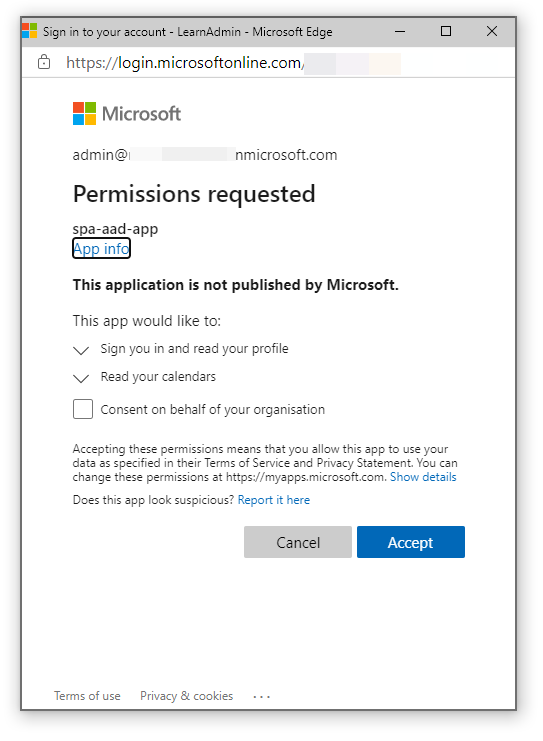
Select Accept to give consent for the application to do operations for the user.
After you consent, the application tries to get an access token by using the validated account information. The Microsoft Authentication Library handles this step for you.
After the token is back in the application, a GET request is made to the Microsoft Graph
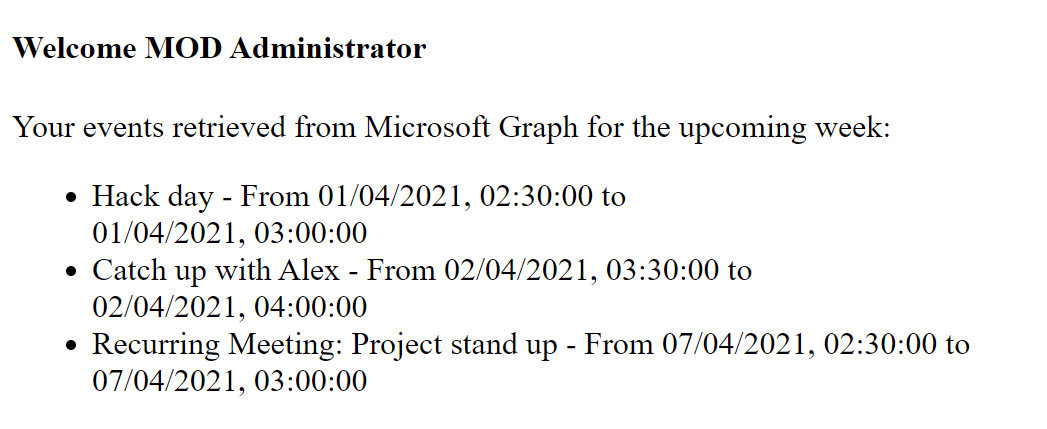
/me/calendarViewendpoint. The access token is passed in the Authorization Header. The call to/me/calendarViewthen retrieves the data securely from the service.After the response is received from Microsoft Graph, you'll see the signed-in user's calendar events listed for the upcoming week.
You've successfully demonstrated how to access and display Microsoft 365 calendar events for a signed-in user by using Microsoft Graph.