Exercise - Get started with PC Holographic Remoting
Welcome to the HoloLens 2 tutorials. In this tutorial, you'll learn how to create a Mixed Reality experience that features UI elements, 3D model manipulation, model clipping, and eye-tracking features. In the second tutorial, you'll learn how to create a PC app for Holographic Remoting that lets you connect to the HoloLens 2 at any time and visualize your app in 3D.
To complete this tutorial successfully, you should have some basic knowledge of Unity and the Mixed Reality Toolkit (MRTK). If you don't, we recommend that you complete the Getting started tutorials before continuing.
Create and prepare the Unity project
In this section, you'll create a new Unity project and get it ready for MRTK development.
Go to the HoloLens 2 fundamentals path and complete the modules there, but stop when you reach the HoloLens 2 modules. As a result of completing those instructions, you'll have done the following:
- Created the Unity project and gave it a suitable name; for example, PC Holographic Remoting.
- Switched the build platform.
- Imported the TextMeshPro Essential Resources.
- Imported the Mixed Reality Toolkit and configured the Unity project.
- Created and set the scene and gave it a suitable name--for example, PC Holographic Remoting.
Import the tutorial assets
Download and import the MRTK.HoloLens2.Unity.Tutorials.Assets.PCHolographicRemoting.3.0.0.unitypackage .
Tip
For a reminder on how to import a Unity custom package, you can refer to the Importing the Mixed Reality Toolkit instructions.
After you have imported the tutorial assets, your Project window should look similar to this:

Configure and prepare the scene
In this section, you'll prepare the scene by adding some of the tutorial prefabs.
First, because some of the models are in glTF format that Unity doesn't natively support, we need to install a package that allows them to be imported.
To install the open source glTFast library, download and run this file: https://package-installer.glitch.me/v1/installer/OpenUPM/com.atteneder.gltfast?registry=https%3A%2F%2Fpackage.openupm.com&scope=com.atteneder
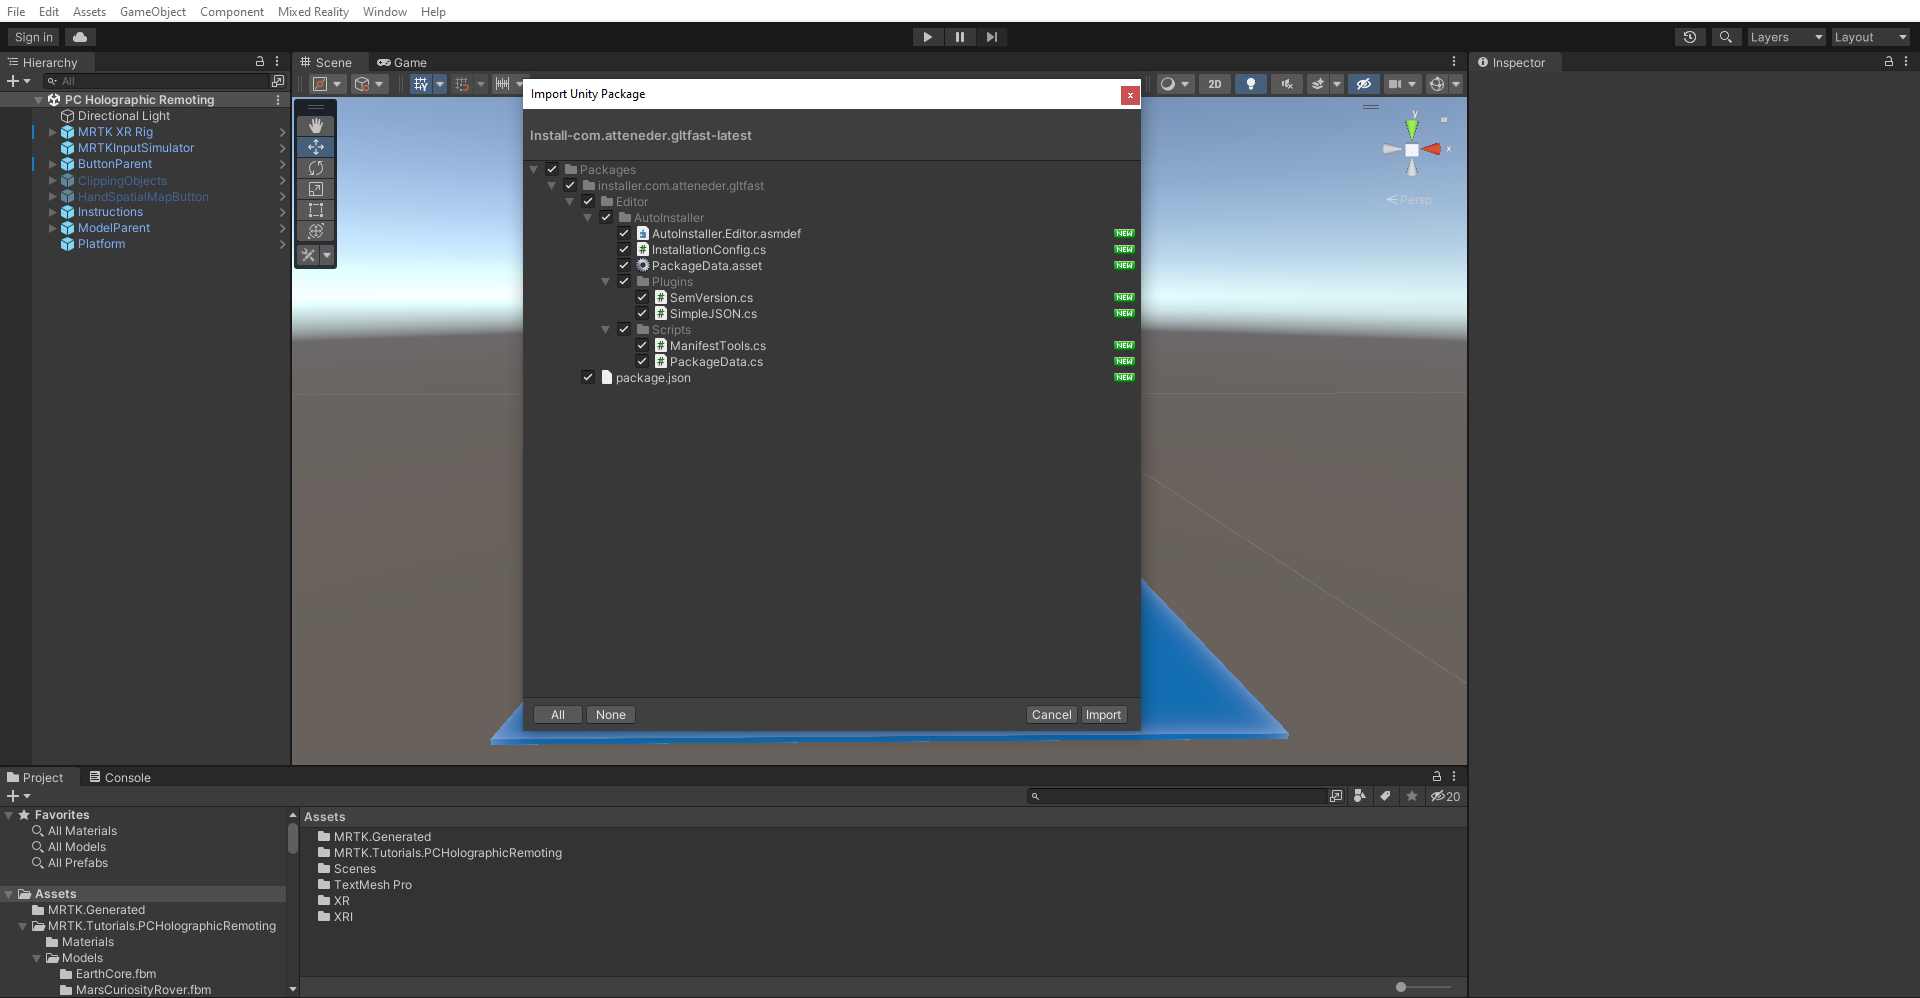
Select Import.

Select Close.
In the Project window, navigate to the Assets > MRTK.Tutorials.PCHolograhicRemoting > Prefabs folder. Select the SceneContent prefab and drag it to the bottom of the Hierarchy window.

To view the scene from the camera's point of view, right-click the Main Camera object in the Hierarchy window, then select Align view to selected.

Tip
If you feel that the large icons in your scene are distracting (for example, the large framed 'T' icons), you can hide them by toggling the Gizmos to the Off position.


Configure the buttons to operate the scene
In this section, you'll add scripts to the scene and create button events that demonstrate the fundamentals of model switching and clipping functionality.
Configure the Pressable Button (script) component
In the Hierarchy window, expand the SceneContent and ButtonParent objects and select the Next button. In the Inspector window, locate the Pressable Button component and select the plus sign icon (+) under OnClick () event.

With the NextButton object still selected in the Hierarchy window, drag the ButtonParent object from the Hierarchy window into the empty None (Object) field of the event you just added to make the ButtonParent object listen for the button click event from this button:
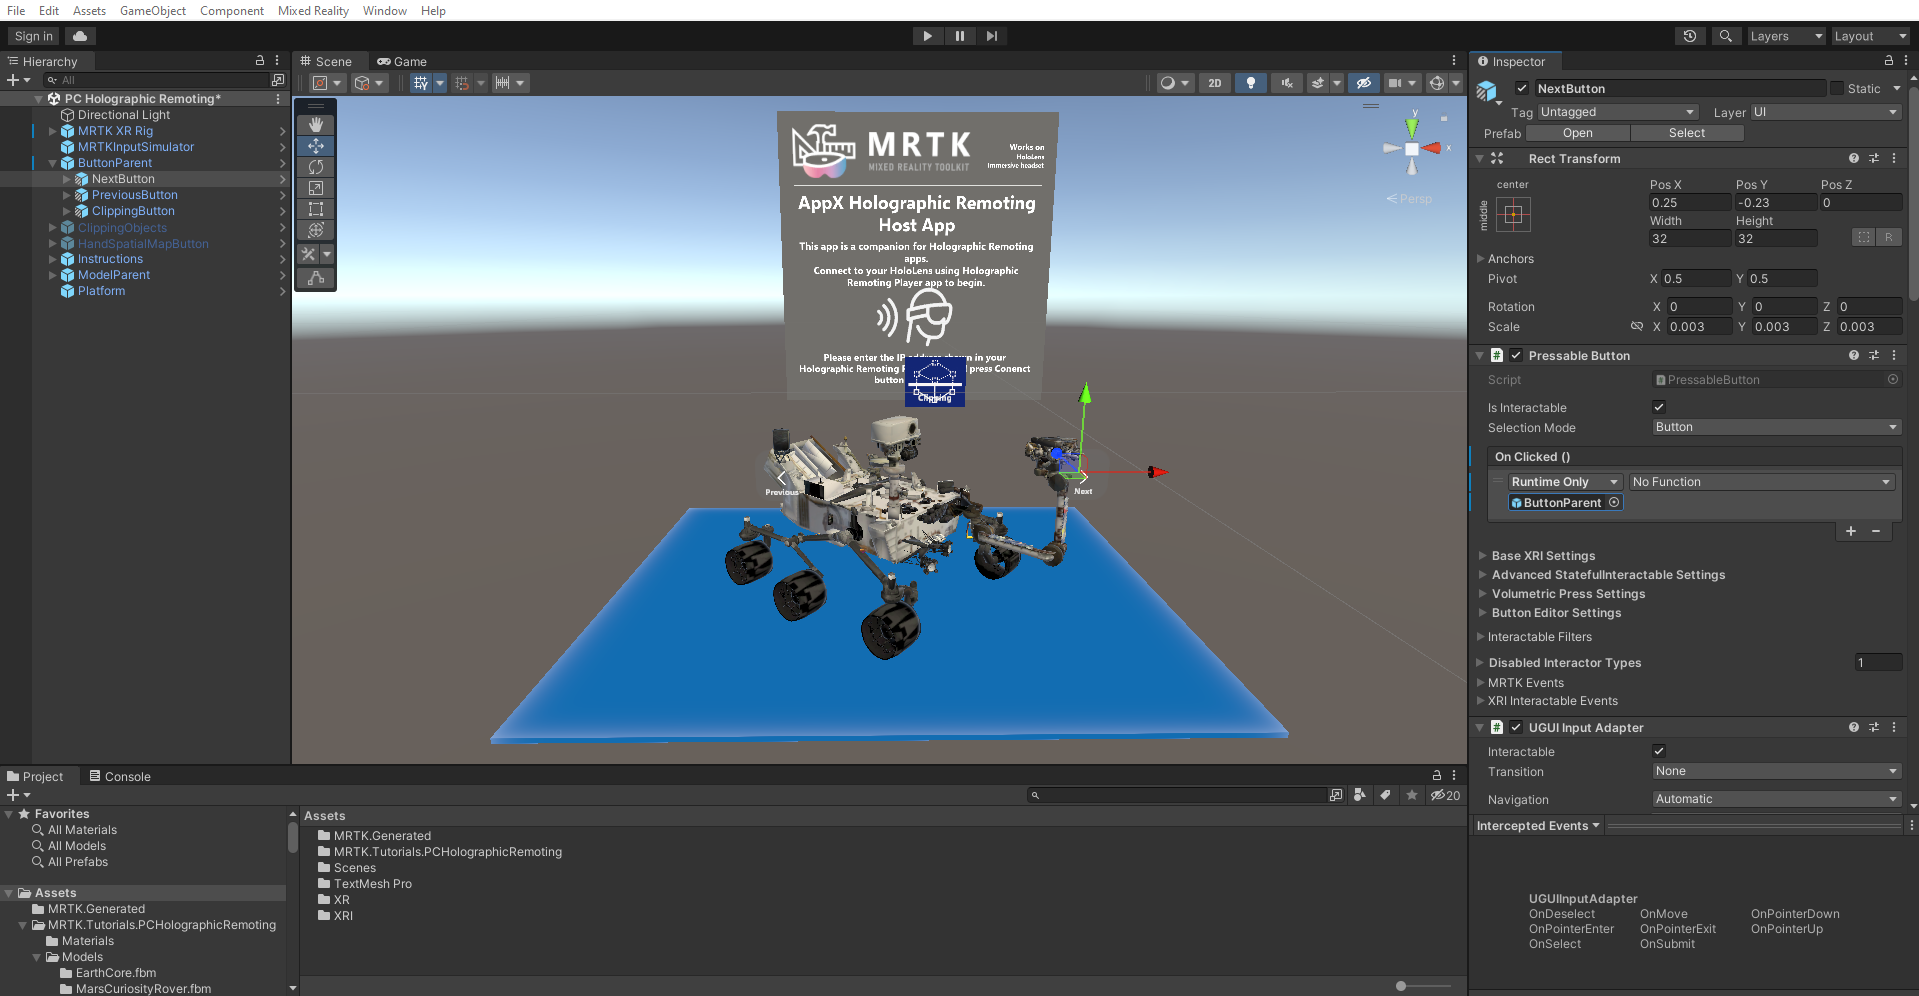
Select the No Function dropdown of the same event, then select ViewButtonControl > NextModel () to set the NextModel () function as the action that's triggered when the button is pressed:


Configure the remaining buttons
For each of the remaining buttons, complete the process outlined above to assign functions to the OnClick () events:
- For the PreviousButton object, assign the ViewButtonControl > PreviousModel () function.
- For ClippingButton, select the ToggleButton > ToggleClipping () function.
Configure the view button control (script) and toggle button (script) components
At this point, your buttons are configured to demonstrate the model switching and clipping functionality. Next, you'll add 3D models to the scene and the clipping objects to the script.
We've provided six different 3D models for demonstration. Expand the ModelParent object to expose these models.
With the ButtonParent object still selected in the Hierarchy window, in the Inspector window, locate the View Button Control (Script) component and expand the Models variable.
In the Size field, enter the number of 3D models you would like to have in your scene; in this case, six. This creates fields for adding new 3D models.

Drag each child object of the ModelParent object into these fields.

Drag the ClippingObjects object from the Hierarchy window to the Toggle Button (Script) component's Clipping Object field.
Note
Stay in the ButtonParent object only.

In the Hierarchy window, select the ClippingObjects prefab and enable it in the Inspector window to turn on the Clipping objects.


Configure the clipping objects to enable clipping feature
In this section, you'll add MarsCuriosityRover object's child objects renderer into an individual clipping object to demonstrate the clipping of the MarsCuriosityRover model.
In the Hierarchy window, expand the ClippingObjects object to expose the three different clipping objects you'll use in this project.
To configure the ClippingSphere object, select it, then add a Clipping Sphere component in the Inspector window. Next, enter the number of renderers in the Size field that you need to add for your 3D model. In this case, add 10 for MarsCuriosityRover child objects. This will create fields for adding renderers. Next, drag the MarsCuriosityRover object's child model objects into these fields.

Make sure the Clipping objects are turned on by enabling the ClippingObjects prefab in the Hierarchy window.
