Installing & Configuring DeployR 8.0.0
Applies to: DeployR 8.x (See comparison between 8.x and 9.x)
Looking to deploy with Machine Learning Server? Start here.
System Requirements for DeployR
Before you begin installing DeployR, make sure the computer meets the minimum hardware and software requirements.
Operating System (all 64-bit processor).
| DeployR Enterprise | DeployR Open |
|---|---|
| Supported Platforms. - SUSE Linux Enterprise Server 11 (SP2) - RHEL/CentOS 5.8, 6.x - Windows Server 2008 (R2 SP1), 2012 |
Supported Platforms. - SUSE Linux Enterprise Server 11 (SP2) - RHEL/CentOS 5.8, 6.x, 7.0 - Windows Server 2008 (R2 SP1), 2012 Experimental platforms. While DeployR Open can run on these OS, they are not fully tested or officially supported. Not recommended for production environments. - openSUSE 13.1 - Ubuntu 12.04, 14.04 - Mac OS X Mavericks (10.9), Yosemite (10.10) - Windows 7.0 (SP1), 8.1, 10 |
Hardware. Intel Pentium®-class processor; 3.0 GHz recommended
Free disk space. 250 GB or more recommended
RAM. 4 GB or more is recommended
Java JVM heap size. 1 GB or more in production
Swap space. 8 GB or more for larger data sets is recommended
Internet access. To download DeployR and software dependencies as well as to interact with the Repository Manager, Administration Console, API Explorer Tool, and this comprehensive website. If using Microsoft Internet Explorer, use version 8 or later.
We highly recommend installing DeployR on a dedicated server machine.
Software Dependencies
DeployR depends on the installation and configuration of a number of software dependencies. The list and steps depend on the platform onto which you are installing.
See the DeployR dependencies for your OS:
Installing on Windows
Important
- Install the DeployR main server first before installing any grid nodes.
- We highly recommend installing DeployR on a dedicated server machine.
- Review the system requirements & supported operating systems list before you continue.
- If you already have a version of DeployR, carefully follow the migration instructions before continuing.
- You may need to temporarily disable your anti-virus software to install DeployR. Turn it back on as soon as you are finished.
Dependencies for Windows
Before you can install DeployR on the main server machine or any additional grid node (DeployR Enterprise only), you must manually install the following dependencies. All other dependencies are installed for you.
DeployR Enterprise Dependencies
DeployR Enterprise depends on the manual installation and configuration of these dependencies.
| Dependency Name | DeployR Server | DeployR Grid Node |
|---|---|---|
| Java™ Runtime Environment 8 or 7u13 (or later) | Yes | No |
| Revolution R Enterprise for Windows 8.0 and its dependencies | Yes | Yes |
| DeployR Rserve 7.4.2 | Yes | Yes |
| MongoDB 2.6.7 MongoDB is licensed by MongoDB, Inc. under the Affero GPL 3.0 license; commercial licenses are also available. Additional information on MongoDB licensing is available here. |
Yes | No |
To install the required dependencies for DeployR Enterprise:
On the DeployR server, download and install Java™ Runtime Environment 8 or 7u13 (or later).
Java is only required on the DeployR server, not on any grid node machines.
Install Revolution R Enterprise for Windows, which includes ScaleR for multi-processor and big data support. Follow the instructions provided with RRE to install it as well as any of its dependencies. Contact technical support if you cannot find the proper version of Revolution R Enterprise for Windows.
Install DeployR Rserve 7.4.2 in one of the following ways:
Install using the R GUI. This assumes you have write permissions to the global R library. If not, use the next option.
- Download DeployR Rserve 7.4.2 for Windows, deployrRserve_7.4.2.zip.
- Launch
Rgui.exe, located by default underC:\Program Files\Microsoft\MRO-for-RRE\8.0\R-3.2.2\bin\x64. - From the menus, choose Packages > Install Package(s) from local zip files.
- Select
deployrRserve_7.4.2.zipfrom the folder into which it was downloaded. - Click Open to install it.
Alternatively, install using the command prompt:
Download DeployR Rserve 7.4.2 for Windows, deployrRserve_7.4.2.zip.
Open a Command Prompt window as Administrator.
Run the following command to install DeployR Rserve 7.4.2:
<PATH_TO_R>\bin\x64\R.exe CMD INSTALL -l <PATH_TO_R>\library <PATH_TO_RSERVE>\deployrRserve_7.4.2.zip
<PATH_TO_R>is the path to the directory that contains the R executable, by defaultC:\Program Files\Microsoft\MRO-for-RRE\8.0\R-3.2.2. And, where<PATH_TO_RSERVE>is the path into which you downloaded Rserve.Example: A user with administrator privileges might run these commands for example.
cd "C:\Program Files\Microsoft\MRO-for-RRE\8.0\R-3.2.2\bin\x64"
R CMD INSTALL -l "C:\Program Files\Microsoft\MRO-for-RRE\8.0\R-3.2.2\library" "%homepath%\Downloads\"
Download and unzip the MongoDB 2.6.7 contents into
%TEMP%\MONGODB_DEPLOYRdirectory as described in the following steps. Applies to DeployR Enterprise only.MongoDB is licensed by MongoDB, Inc. under the Affero GPL 3.0 license; commercial licenses are also available. Additional information on MongoDB licensing is available here.
Download MongoDB 2.6.7.
In Windows Explorer, type
%TEMP%into the file path field and press Enter.This path varies from one Windows version to another.
For example, on Windows Server 2012, it might appear as:C:\Users\<username>\AppData\Local\Temp\2.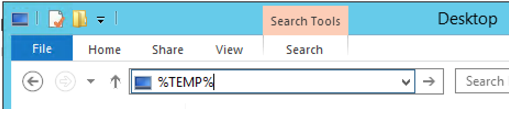
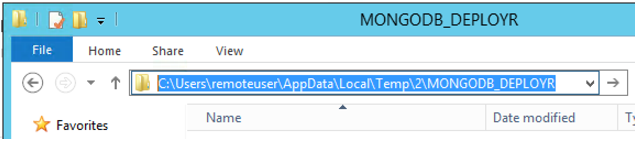
Create a directory named
MONGODB_DEPLOYRunder the path you just revealed.Go to the new
MONGODB_DEPLOYRdirectory.To capture the path to this directory to use when unzipping later, copy the file path to your clipboard. To see the full path, click inside the file path field.
Extract the contents of the MongoDB 2.6.7 zip file into the new
MONGODB_DEPLOYRdirectory.
-- The prerequisites for DeployR Enterprise are installed. You can now install the main server for DeployR Enterprise. --
DeployR Open Dependencies
DeployR Open depends on the manual installation and configuration of these dependencies.
| Dependency Name | DeployR Server | DeployR Grid Node |
|---|---|---|
| Java™ Runtime Environment 8 or 7u13 (or later) | Yes | No |
| Revolution R Open v8.0.x, 3.2.0 - 3.2.2 or R v3.1.x, 3.2.0 - 3.2.2. | Yes | Yes |
| DeployR Rserve 7.4.2 | Yes | Yes |
To install the required dependencies for DeployR Open
On the DeployR server, download and install Java™ Runtime Environment 8 or 7u13 (or later).
Java is only required on the DeployR server, not on any grid node machines.
Install either Revolution R Open v8.0.x, 3.2.0 - 3.2.2 or R v3.1.x, 3.2.0 - 3.2.2. Revolution R Open is the enhanced distribution of R from Microsoft.
Install DeployR Rserve 7.4.2 in one of the following ways:
Install using the R GUI. This assumes you have write permissions to the global R library. If not, use the next option.
- Download DeployR Rserve 7.4.2 for Windows, deployrRserve_7.4.2.zip.
- Launch
Rgui.exefor the version of R you installed. - From the menus, choose Packages > Install Package(s) from local zip files.
- Select
deployrRserve_7.4.2.zipfrom the folder into which it was downloaded. - Click Open to install it.
Alternatively, install using the command prompt:
Download DeployR Rserve 7.4.2 for Windows, deployrRserve_7.4.2.zip.
Open a Command Prompt window as Administrator.
Run the following command to install DeployR Rserve 7.4.2:
<PATH_TO_R>\bin\x64\R.exe CMD INSTALL -l <PATH_TO_R>\library <PATH_TO_RSERVE>\deployrRserve_7.4.2.zip<PATH_TO_R>is the path to the directory containing the R executable you installed.
And, where<PATH_TO_RSERVE>is the path into which you downloaded Rserve.
Example: A user with administrator privileges might run these commands for example.
cd "C:\Program Files\RRO\R-3.2.2\bin\x64"
R CMD INSTALL -l "C:\Program Files\RRO\R-3.2.2\library" "%homepath%\Downloads\"
-- The prerequisites for DeployR Open are now installed. You can begin installing the main server for DeployR Open now. --
Basic DeployR Install for Windows
The basic installation of DeployR installs the DeployR main server. DeployR Enterprise customers can also install additional grid nodes for optimized workload distribution.
DeployR Enterprise Only:
Get DeployR Enterprise today to take advantage of great DeployR features like enterprise security and a scalable grid framework. DeployR Enterprise is part of Microsoft R Server.
After installing these prerequisites, install DeployR as follows:
To install properly on Windows, you must have administrator privileges. Log in as a user with administrator rights. Also, you may need to temporarily turn off or disable your anti-virus software to complete the installation process. Turn it back on as soon as you are finished.
Download and launch the DeployR installer files.
For DeployR Enterprise, download
DeployR-Enterprise-8.0.0.exe, which can be found in the Microsoft R Server package, and launch this installer. Contact technical support if you cannot find this file.For DeployR Open, download
DeployR-Open-8.0.0.exeand launch the installer.
If a message appears onscreen during installation asking whether you want to “allow the following program to make changes to this computer”, click Continue.
When prompted, accept the installation of any missing dependencies required for this version of DeployR.
When prompted, choose to accept the default installation directory or enter a unique directory path for this version of DeployR.
Follow the onscreen prompts to complete the installation. When the setup completes, a script is launched to finalize the installation. This step can take a few minutes. This script generates backup copies of the files that are changed. Each backup file uses the original name but with the suffix
YYYY-MM-DD\_HH-MMsuch asdeployr.groovy.2016-02-16_08-05. Additionally, the script generates a log file called%TEMP%\DeployR-configuration.logcontaining the steps taken during this configuration process.When the script is complete, press the Enter key to exit the window.
If you are provisioning your server on a cloud service such as Azure or AWS EC2, you must:
Set the DeployR server Web context to the external Public IP or else you will not be able to access to the DeployR landing page or other DeployR components after installation and be sure the automatic detection of IP address: (Setup: Azure or AWS EC2).
Open DeployR ports
8000,8001, and8006: (Setup: Azure or AWS EC2).Open the same DeployR ports in Windows Firewall.
-- The basic installation of DeployR is now complete --
What's Next After Installing?
- Verify your install by running a diagnostic check of the server from the DeployR landing page. Log in as 'admin' with the password
changemeathttp://<DEPLOYR_SERVER_IP>:8000/deployr/landing. You are prompted for a new password the first time. Consult the Troubleshooting section for additional help or post questions to our DeployR Forum.- Add any additional grid nodes (DeployR Enterprise only).
- Finish configuring DeployR. Follow the topics in that section in the order in which they are presented.
- Download DeployR client-side developer tools, including the RBroker framework and client libraries.
- Create new user accounts in the Administration Console. Then, provide each user with their username and password as well as the address of the DeployR landing page.
- Review the Administrator Getting Started to get up and running quickly. Also available are the Data Scientist Getting Started guide and the Application Developer Getting Started guide.
Grid Node Install for Windows
When you install the DeployR server, one local grid node is installed automatically for you. DeployR Open supports only this single node installed on localhost with a fixed slot limit. DeployR Enterprise, on the other hand, allows you to point this default grid node to a remote location, customize its slot limit, and even add additional grid nodes to scale for increasing load. This option also assumes that you have already installed the DeployR server.
Get DeployR Enterprise today to take advantage of great DeployR features like enterprise security and a scalable grid framework. DeployR Enterprise is part of Microsoft R Server.
Tip
- For help in determining the right number of grid nodes for you, refer to the Scale & Throughput document.
- Once you have installed and configured one grid node, you can copy the files over from the server that has already been set up over to the next one.
- Install each grid node on a separate host machine.
After installing the main server for DeployR Enterprise, install each grid node on a separate machine as follows:
Log in to the machine on which you install the grid node with administrator rights.
Install Microsoft R Server and RServe as described here on the grid node machine.
Download the node installer file,
DeployR-Enterprise-node-8.0.0.exe, which can be found in the Microsoft R Server package. Contact technical support if you cannot find this file.Launch the installer,
DeployR-Enterprise-node-8.0.0.exe.If a message appears onscreen during installation asking whether you want to “allow the following program to make changes to this computer”, click Continue.
When the script is complete, press the Enter key to exit the window.
Repeat these steps on each machine that hosts a remote grid node.
When the installer completes, log in to the DeployR landing page as 'admin' at
http://<DEPLOYR_SERVER_IP>:8000/deployr/landingwhere<DEPLOYR_SERVER_IP>is the IP of the main DeployR server.- Go to the Administrative Console and configure each grid node.
- Return to the landing page and run a diagnostic check. Consult the Troubleshooting section for help.
-- The grid node installation is now complete --
Installing on Linux
Important
- Always install the DeployR main server first before installing any grid nodes.
- We highly recommend installing DeployR on a dedicated server machine.
- Review the system requirements & supported operating systems list before you continue.
- If you already have a version of DeployR, carefully follow the migration instructions before continuing.
- The Ubuntu and openSUSE releases of DeployR Open are experimental and not officially supported. They are not available for DeployR Enterprise.
Dependencies for Linux
Before you can install DeployR on the main server machine, a remote database (DeployR Enterprise only), or any additional grid node (DeployR Enterprise only), you must manually install the following dependencies. All other dependencies will be installed for you.
DeployR depends on the manual installation and configuration of these dependencies.
| Dependency | DeployR Server | DeployR Grid Node |
|---|---|---|
| Java™ Runtime Environment 8 or 7u13 (or later) | Yes | No |
| R Engine: - DeployR Enterprise: Microsoft R Server 8.0 and its dependencies - DeployR Open: Revolution R Open v8.0.x, 3.2.0 - 3.2.2 or R v3.1.x, 3.2.0 - 3.2.2 |
Yes | Yes |
| DeployR Rserve 7.4.2 | Yes | Yes |
| MongoDB 2.6.7 for DeployR Enterprise MongoDB is licensed by MongoDB, Inc. under the Affero GPL 3.0 license; commercial licenses are also available. Additional information on MongoDB licensing is available here. |
Yes | No |
| make, gcc, gfortran | Yes | Yes |
| nfs-utils and nfs-utils-lib Note: On Ubuntu, install nfs-common to get nfs-utils. |
Yes, for external directories | Yes, for external directories |
To install the required dependencies:
On the main DeployR server, install Java™ Runtime Environment 8 or 7u13 (or later), a dependency of DeployR, as follows. For more help installing Java or setting the path, refer to oracle.com.
Java is only required on the main DeployR server.
Download the tar file from Oracle and install it OR install using your local package manager.
Set
JAVA_HOMEto the installation path for the JDK or JRE you installed. For example, if the installation path was/usr/lib/jvm/jdk1.8.0_45/jre, then the command would be:export JAVA_HOME=/usr/lib/jvm/jdk1.8.0_45/jre
Install R, another dependency, for your edition of DeployR.
DeployR Enterprise 8.0.0 requires Microsoft R Server 8.0.0, which includes ScaleR for multi-processor and big data support. Follow the instructions provided with Microsoft R Server to install it as well as any of its dependencies. Contact technical support if you cannot find the proper version of Microsoft R Server.
DeployR Open 8.0.0 requires either Revolution R Open v8.0.x, 3.2.0 - 3.2.2 or R v3.1.x, 3.2.0 - 3.2.2. Revolution R Open is the enhanced distribution of R from Microsoft.
Install DeployR Rserve 7.4.2, a dependency of DeployR, after Microsoft R Server, Revolution R Open, or R is installed as follows:
Download the Linux tar file for DeployR Rserve 7.4.2,
deployrRserve_7.4.2.tar.gz.Run the following command to install RServe:
R CMD INSTALL deployrRserve_7.4.2.tar.gz
For DeployR Enterprise only: Prepare for MongoDB 2.6.7.
Download MongoDB 2.6.7.
Untar the MongoDB download into home directory of the user who is installing DeployR Enterprise. For example:
/home/deployr-user/. The DeployR Enterprise installer finds it later.
MongoDB is licensed by MongoDB, Inc. under the Affero GPL 3.0 license; commercial licenses are also available. Additional information on MongoDB licensing is available here.
Make sure the system repositories are up-to-date prior to installing DeployR. The following commands do not install anything; however running them ensures that the repositories contain the latest software:
Run the following command:
Redhat / CentOS:
sudo yum clean allUbuntu:
sudo apt-get updateopenSUSE / SLES:
sudo zypper clean --allInstall the following packages (
make,gcc, andgfortran) if missing:Install packages as
rootor a user withsudopermissions.Redhat / CentOS:
Check if the packages are already installed.
yum list make gcc gfortran
Install any missing packages:
#if make is missing, run
yum install make

#if gcc is missing, run
yum install gcc

#if gfortran is missing, run
yum install gfortran
Ubuntu:
Check if the packages are already installed.
dpkg -l make gcc gfortranInstall any missing packages:
#if make is missing, run
sudo apt-get install make

#if gcc is missing, run
sudo apt-get install gcc

#if gfortran is missing, run
sudo apt-get install gfortran
openSUSE / SLES:
Check if the packages are already installed.
sudo zypper search -i make
sudo zypper search -i gcc
sudo zypper search -i gfortran
Install any missing packages:
#if make is missing, run
sudo zypper install make

#if gcc is missing, run
sudo zypper install gcc

#if gfortran is missing, run
sudo zypper install gfortran
-- The prerequisites are now installed. You can begin installing DeployR now. --
Basic DeployR Install for Linux
The basic installation of DeployR installs the DeployR main server and configure a local MongoDB database on the same machine.
DeployR Enterprise Only: In addition to this basic installation, DeployR Enterprise customers can also use a remote database for DeployR or install additional grid nodes for optimized workload distribution.
DeployR Enterprise
After installing these prerequisites, install DeployR Enterprise as follows:
Log in to the operating system.
Create the
deployrdownloaddirectory and go to that directory. At the prompt, type:Examples are written for user
deployr-user. For another user, update the commands accordingly.mkdir /home/deployr-user/deployrdownload cd /home/deployr-user/deployrdownloadDownload the software,
DeployR-Enterprise-Linux-8.0.0.tar.gz, using the link in your customer welcome letter.Unzip the tar file contents, go the
installFilesdirectory, and launch the installation script. At the prompt, type:tar -xzf DeployR-Enterprise-Linux-8.0.0.tar.gz cd installFiles ./installDeployREnterprise.shWhen the installer starts, accept the terms of the agreement to continue.
Choose
Option 1. This installs the DeployR server along with a local database.Follow the onscreen installer prompts. If you are keeping an older version of DeployR on this same machine for the purposes of migrating data, for example, then be sure to install this version in its own directory.
If you are provisioning your server on a cloud service such as Azure or AWS EC2, you must:
Set the DeployR server Web context to the external Public IP or else you will not be able to access to the DeployR landing page or other DeployR components after installation and be sure the automatic detection of IP address: (Setup: Azure or AWS EC2).
Open DeployR ports
8000,8001, and8006: (Setup: Azure or AWS EC2).
-- The basic installation of DeployR is now complete --
DeployR Open
After installing these prerequisites, install DeployR Open as follows:
Log in to the operating system.
Create the
deployrdownloaddirectory and go to that directory. At the prompt, type:Examples are written for user
deployr-user. For another user, update the commands accordingly.mkdir /home/deployr-user/deployrdownload cd /home/deployr-user/deployrdownloadDownload the install bundle for DeployR Open,
DeployR-Open-Linux-8.0.0.tar.gz.Unzip the tar file contents, go the
installFilesdirectory, and launch the installation script. At the prompt, type:tar -xzf DeployR-Open-Linux-8.0.0.tar.gz cd installFiles ./installDeployROpen.shWhen the installer starts, accept the terms of the agreement to continue.
When prompted by the installer, choose installation
Option 1. This installs the DeployR server along with a local database.Follow the remaining onscreen installer prompts. If you are keeping an older version of DeployR on this same machine for the purposes of migrating data, for example, then be sure to install this version in its own directory.
If you are provisioning your server on a cloud service such as Azure or AWS EC2, you must:
Set the DeployR server Web context to the external Public IP or else you will not be able to access to the DeployR landing page or other DeployR components after installation and be sure the automatic detection of IP address.
Open DeployR ports
8000,8001, and8006.
-- The basic installation of DeployR is now complete --
What's Next After Installing?
- Verify your install by running a diagnostic check of the server from the DeployR landing page. Log in as 'admin' with the password
changemeathttp://<DEPLOYR_SERVER_IP>:8000/deployr/landing. You are prompted for a new password the first time. Consult the Troubleshooting section for additional help or post questions to our DeployR Forum.- Add any additional grid nodes (DeployR Enterprise only).
- Finish configuring DeployR. Follow the topics in that section in the order in which they are presented.
- Download DeployR client-side developer tools, including the RBroker framework and client libraries.
- Create new user accounts in the Administration Console. Then, provide each user with their username and password as well as the address of the DeployR landing page.
- Review the Administrator Getting Started to get up and running quickly. Also available are the Data Scientist Getting Started guide and the Application Developer Getting Started guide.
Grid Node Install for Linux
When you install the DeployR server, one local grid node is installed automatically for you. DeployR Open supports only this single node installed on localhost with a fixed slot limit. DeployR Enterprise, on the other hand, allows you to point this default grid node to a remote location, customize its slot limit, and even add additional grid nodes to scale for increasing load. This option also assumes that you have already installed DeployR using Option 1 or Option 3.
Tip
- For help in determining the right number of grid nodes for you, refer to the Scale & Throughput document.
- Once you have installed and configured one grid node, you can copy the files over from the server that has already been set up over to the next one.
- Install each grid node on a separate host machine.
After installing the main DeployR server, install each grid node on a separate machine as follows:
Log in to the operating system on the machine on which you install the grid node.
Install Microsoft R Server and RServe as described here on the grid node machine.
Create the
deployrdownloaddirectory and go to that directory. At the prompt, type:Examples are written for user
deployr-user. For another user, update the commands accordingly.mkdir /home/deployr-user/deployrdownload cd /home/deployr-user/deployrdownloadDownload the software,
DeployR-Enterprise-Linux-8.0.0.tar.gz, using the link in your customer welcome letter.Unzip the tar file contents, go the
installFilesdirectory, and launch the installation script. At the prompt, type:tar -xzf DeployR-Enterprise-Linux-8.0.0.tar.gz cd installFiles ./installDeployREnterprise.shWhen the installer starts, accept the terms of the agreement to continue.
When prompted by the installer, choose installation
Option 4and follow the onscreen installer prompts. This installs a remote grid node.Enter the directory path in which to install. If you are keeping an older version of DeployR on this same machine for the purposes of migrating data, for example, then be sure to install this version in its own directory.
When the installer completes, log in to the DeployR landing page as 'admin' at
http://<DEPLOYR_SERVER_IP>:8000/deployr/landingwhere<DEPLOYR_SERVER_IP>is the IP of the main DeployR server.- Go to the Administrative Console and configure each grid node.
- Return to the landing page and run a diagnostic check. Consult the Troubleshooting section for help or post questions to our DeployR Forum.
-- The grid node installation is now complete --
DeployR Install with Remote Database
DeployR Enterprise on Linux supports the installation of a remote database for DeployR. This requires that you first install that database on one machine, and then install these prerequisites followed by DeployR on a second machine.
Part A: Installing the Remote Database for DeployR (Option 2)
Log in to the operating system on the machine on which you install the database.
Create the
deployrdownloaddirectory and go to that directory. At the prompt, type:Examples are written for user
deployr-user. For another user, update the commands accordingly.mkdir /home/deployr-user/deployrdownload cd /home/deployr-user/deployrdownloadDownload the software,
DeployR-Enterprise-Linux-8.0.0.tar.gz, using the link in your customer welcome letter.Unzip the tar file contents, go the
installFilesdirectory, and launch the installation script. At the prompt, type:tar -xzf DeployR-Enterprise-Linux-8.0.0.tar.gz cd installFiles ./installDeployREnterprise.shWhen the installer starts, accept the terms of the agreement to continue.
When prompted by the installer, choose installation
Option 2and follow the onscreen installer prompts. This installs the database that is used remotely by DeployR server. This option assumes that you will installOption 3on another machine after installingOption 2.Enter the directory path in which to install. If you are keeping an older version of DeployR on this same machine for the purposes of migrating data, for example, then be sure to install this version in its own directory.
If using IPTABLES firewall, add the MongoDB port to the firewall settings to allow communications from the DeployR main server. For this release, add
8003.Once the database has been installed, go to the machine on which you will install DeployR and follow the steps in the next section.
Part B: Installing DeployR for Use with a Remote Database (Option 3)
Install DeployR as follows:
Install these prerequisites.
Log in to the operating system on the machine on which you want to install DeployR.
Create the
deployrdownloaddirectory and go to that directory. At the prompt, type:Examples are written for user
deployr-user. For another user, update the commands accordingly.mkdir /home/deployr-user/deployrdownload cd /home/deployr-user/deployrdownloadDownload the software,
DeployR-Enterprise-Linux-8.0.0.tar.gz, using the link in your customer welcome letter.Unzip the tar file contents, go the
installFilesdirectory, and launch the installation script. At the prompt, type:tar -xzf DeployR-Enterprise-Linux-8.0.0.tar.gz cd installFiles ./installDeployREnterprise.shWhen the installer starts, accept the terms of the agreement to continue.
When prompted by the installer, choose installation
Option 3. This installs the DeployR server and configures it for the remote database you installed above.Enter the directory path in which to install. If you are keeping an older version of DeployR on this same machine for the purposes of migrating data, for example, then be sure to install this version in its own directory.
Enter and confirm IP address or hostname for the remote MongoDB database server and follow the prompts.
Enter the port number for Tomcat or accept the default.
If you are provisioning your server on a cloud service such as Azure or AWS EC2, you must:
Set the DeployR server Web context to the external Public IP or else you will not be able to access to the DeployR landing page or other DeployR components after installation and be sure the automatic detection of IP address.
Open DeployR ports
8000,8001, and8006.
-- The installation of the remote database and DeployR is now complete --
What's Next After Installing?
- Verify your install by running a diagnostic check of the server from the DeployR landing page. Log in as 'admin' with the password
changemeathttp://<DEPLOYR_SERVER_IP>:8000/deployr/landing. You are prompted for a new password the first time. Consult the Troubleshooting section for additional help.- Add any additional grid nodes (DeployR Enterprise only).
- Finish configuring DeployR. Follow the topics in that section in the order in which they are presented.
- Download DeployR client-side developer tools, including the RBroker framework and client libraries.
- Create new user accounts in the Administration Console. Then, provide each user with their username and password as well as the address of the DeployR landing page.
- Review the Administrator Getting Started to get up and running quickly. Also available are the Data Scientist Getting Started guide and the Application Developer Getting Started guide.
Installing on Mac OS X
Important
- We highly recommend installing DeployR on a dedicated server machine.
- The Mac OS X release of DeployR is experimental, and therefore not officially supported. It is not available for DeployR Enterprise. See the list of supported OS for more.
Dependencies
Before you can install DeployR on the main server machine, you must manually install the following dependencies. All other dependencies are installed for you.
| Dependency | DeployR Server |
|---|---|
| Java™ Development Kit 8 or 7u13 (or later) | Yes |
| Revolution R Open v8.0.x, 3.2.0 - 3.2.2 or else R v3.1.x, 3.2.0 - 3.2.2 | Yes |
| DeployR Rserve 7.4.2 | Yes |
| nfs-utils and nfs-utils-lib | Yes, for external directories |
To install the required dependencies:
On the main DeployR server, install Java™ Development Kit 8 or 7u13 (or later), a dependency of DeployR, as follows. For more help installing Java or setting the path, refer to oracle.com.
Download the install file from Oracle and install it.
Set
JAVA_HOMEto the installation path for the JDK you installed.
For example, if the installation path wasJAVA_HOME=/Library/Java/JavaVirtualMachines/jdk1.8.0_45.jdk, then the command would be:export JAVA_HOME=/Library/Java/JavaVirtualMachines/jdk1.8.0_45.jdk/Contents/Home
Install Revolution R Open v8.0.x, 3.2.0 - 3.2.2 or R v3.1.x, 3.2.0 - 3.2.2 on the DeployR Open host.
If you intend to use CRAN R for DeployR, you must explicitly define your preferred R mirror address as follows:
Go to
/Library/Frameworks/R.framework/Resources/etc.Create a file called
Rprofile.site.In that new file, add the following line and substitute your preferred R mirror address. For example, here is the address snapshot used for Revolution R Open 3.2.2, such as the
options(repos = c(CRAN = "https://mran.revolutionanalytics.com/snapshot/2015-08-27)):options(repos = c(CRAN = "YOUR FAVORITE MIRROR"))
Install DeployR Rserve 7.4.2 after Revolution R Open or R as follows:
Download the Mac OS X file of DeployR Rserve 7.4.2. Choose the file version for the version of R or RRO you installed in the previous step.
Change to the directory where the file was downloaded.
Run the following command to install RServe:
Some browsers change the file extension to a
.tarupon download. If this occurs, then update the following command accordingly.If you have RRO 3.2.x or R 3.2.x, then run this command:
R CMD INSTALL deployrRserve_7.4.2_for_R_3.2.x.tgzIf you have RRO 8.x or R 3.1.x, then run this command:
R CMD INSTALL deployrRserve_7.4.2_for_R_3.1.x.tgz
Installing DeployR for Mac OS X
After installing these prerequisites, install DeployR Open as follows:
Examples on this site are written for user
deployr-user. For another user, update the commands accordingly.
Log in to the operating system.
Create the
/deployrdownloaddirectory into which the tar file is downloaded. At the prompt, type:mkdir ~/deployrdownloadDownload the install bundle,
DeployR-Open-OSX-8.0.0.tar.gzto the newly created/deployrdownloaddirectory. You may need to move the file to that directory.Unzip the tar file contents, go the
installFilesdirectory, and launch the installation script. At the prompt, type:cd ~/deployrdownload tar -xzf DeployR-Open-OSX-8.0.0.tar.gz cd installFiles ./installDeployROpen.shWhen the installer starts, accept the terms of the agreement to continue.
When prompted by the installer, choose installation
Option 1. This installs the DeployR server.Follow the remaining onscreen installer prompts. If you are keeping an older version of DeployR on this same machine for the purposes of migrating data, for example, then be sure to install this version in its own directory.
-- The basic installation of DeployR is now complete --
What's Next After Installing?
- Verify your install by running a diagnostic check of the server from the DeployR landing page. Log in as 'admin' with the password
changemeathttp://<DEPLOYR_SERVER_IP>:8000/deployr/landing. You are prompted for a new password the first time. Consult the Troubleshooting section for additional help or post questions to our DeployR Forum.- Finish configuring DeployR. Follow the topics in that section in the order in which they are presented.
- Download DeployR client-side developer tools, including the RBroker framework and client libraries.
- Create new user accounts in the Administration Console. Then, provide each user with their username and password as well as the address of the DeployR landing page.
- Review the Administrator Getting Started to get up and running quickly. Also available are the Data Scientist Getting Started guide and the Application Developer Getting Started guide.
Upgrading DeployR
Carefully follow these migration instructions before you install a more recent version of DeployR to migrate users, R Scripts, projects, other DeployR data as well as to learn how to update/preserve client application files.
These migration steps apply to RevoDeployR 7.0 and DeployR 7.1 - 7.4.1:
If you want to upgrade or reinstall your version or R or Microsoft R Server, follow these instructions.
DeployR Enterprise Only: To extend the DeployR server's grid beyond the Default Grid Node, install all of the grid nodes you want to use, and then configure them in The Grid tab in the Administration Console.
Get DeployR Enterprise today to take advantage of great DeployR features like enterprise security and a scalable grid framework. Note that DeployR Enterprise is part of Microsoft R Server.
Migrating to 8.0.0
The following instructions walk you through a migration of DeployR 7.4.1 or earlier to the current version of DeployR.
To migrate:
Be sure to review the following:
Do not uninstall your older version of DeployR until you have backed up the data you want to keep and completed the data migration.
While it is technically possible to run instances of two different versions of DeployR side by side on a single machine, we strongly recommend that you dedicate one machine for each server instance that is in production so as to avoid resource contention.
Grid node configurations will not work after migration due to their dependence on a specific version of DeployR. After migrating, you will notice that the old grid configuration has been carried over to the newly installed DeployR version. However, since those grid nodes are not compatible with the DeployR 8.0.0 server, they appear highlighted in the Administration Console when you first start the DeployR server. This highlighting indicates that a node is unresponsive. We recommend deleting these old grid nodes in the Administration Console the first time you log in to the console.
Ensure your previous version of DeployR is running and that all users are logged out of the version.
Install and configure DeployR 8.0.0 and all its dependencies for your operating system ( Linux | Windows | Mac OS X ).
Ensure that all users are logged out of DeployR 8.0.0 as well.
Run the DeployR 8.0.0 migration script as follows. This script shuts down the DeployR 8.0.0 server, back up data in the MongoDB database of the previous version of DeployR, restore it into the DeployR 8.0.0 MongoDB database, and restart the DeployR 8.0.0 server.
Type the following at a command prompt:
Linux / Mac OS X:
cd <8.0.0_Install_Dir>/deployr/tools
./databaseUtils.sh
Windows:
cd <8.0.0_Install_Dir>\deployr\tools
./databaseUtils.bat
Where
<8.0.0_Install_Dir>is the full path to the DeployR 8.0.0 server installation directory.When prompted by the migration script:
Choose option
1to migrate the database.Enter the version from which you are migrating as
X.Y(for example,7.3).Enter the database password if you are migrating from 7.3 or later. You can find this password in the
deployr.groovyfile.Enter the hostname on which MongoDB was installed. The hostname (or ip) is
localhostunless you installed a remote database.Enter the MongoDB port number. By default, the MongoDB port number ends in
03prefixed by the version number, such as7303.
Log in to the DeployR 8.0.0 Administration Console.
In the Grid tab of the console, delete any of the old node configurations since those are version-specific and cannot be reused.
In the R Scripts tab of the console, repopulate the DeployR 8.0.0 example scripts that were lost when you migrated your data from a previous version of DeployR to version 8.0.0 in a step 5.
Click Import R Scripts.
Select the example script named
DeployR8.0_Example_Scripts.csv. By default, this file is installed under<8.0.0_Install_Dir>/deployr/.Click Load.
Choose Import All.
Enter the username
testuserfor the field Assign username as author for the selected scripts.Click Import.
Preserve and update any JavaScript client application files. Before you deploy any JavaScript client application files to DeployR 8.0.0, update the client files so that they use the current version of
jsDeployRclient library. After installation, update your application files to use the latest JavaScript API calls.
Configuring DeployR
After you install DeployR, review the following topics:
For the best results, respect the order in which the following information is presented when configuring DeployR.
Updating Your Firewall
For Linux / Mac OS X:
If you are using the IPTABLES firewall or equivalent service for your server, use the iptables command (or equivalent command/tool) to open the following ports:
If you are provisioning your server on a cloud service such as Azure or AWS EC2 or VirtualBox, then you must also configure endpoints for these ports (or use port-forwarding for VirtualBox).
| Machine | Ports | Open Ports |
|---|---|---|
| DeployR server machine Tomcat ports: - 8000 (Tomcat default port)- 8001 (Tomcat HTTPS port) |
To the outside | |
| DeployR server machine | - 8006 (DeployR event console port) |
To the public IP of DeployR server AND to the public IP of each grid node machine1 |
| Remote grid node machines1 | RServe ports: - 8004 (RServe connection port)- 8005 (RServe cancel port) |
To the public IP of the DeployR server |
| Remote MongoDB host machine2 | - 8003 (MongoDB port) |
To the public IP of the DeployR server |
1 Only DeployR Enterprise offers the ability to expand your Grid framework for load distribution by installing and configuring additional grid nodes.
2 Only DeployR Enterprise on Linux offers the ability to install a remote MongoDB database.
For Windows:
During installation, the Windows firewall was updated to allow inbound communications to DeployR on the ports listed in the following table:
If you are provisioning your server on a cloud service such as [Azure or AWS EC2 or VirtualBox, then you must also configure endpoints for these ports (or use port-forwarding for VirtualBox).
| Machine | Ports | Open Ports |
|---|---|---|
| DeployR server machine | Tomcat ports: - 8000 (Tomcat default port)- 8001 (Tomcat HTTPS port) |
To the outside |
| DeployR server machine | - 8006 (DeployR event console port) |
To the public IP of DeployR server AND to the public IP of each grid node machine1 |
| Remote grid node machines1 | RServe ports: - 8004 (RServe connection port)- 8005 (RServe cancel port) |
To the public IP of the DeployR server |
1 Only DeployR Enterprise offers the ability to expand your Grid framework for load distribution by installing and configuring additional grid nodes.
Note
- If you have made any changes to the port numbers designated for communications between DeployR and any of its dependencies, add those port numbers instead.
- For NFS ports for external directory support, see the Configuration section of the Managing External Directories for Big Data document.
Changing Default Passwords
DeployR is delivered with two user accounts: 'admin' and testuser. You must change the default password to the 'admin' account the first time you log in.
Go to the DeployR landing page.
After installing, you can log in to the DeployR landing page at
http://<DEPLOYR_SERVER_IP>:8000/deployr/landing.<DEPLOYR_SERVER_IP>is the IP address of the DeployR main server machine. If you do not have a username or password, please contact your administrator.Log in as the default administrator using the following:
username: 'admin' password:changemeYou are redirected to the reset password page.
Enter a new password and confirm this new password for 'admin'.
To manage and create new user accounts, log in to the Administration Console as 'admin' and go to the Users tab and use these instructions. We also recommend that you change the passwords to the other default user accounts.
Configuring Public Access
When the wrong IP is defined, you will not be able to access to the DeployR landing page or other DeployR components after installation or reboot. In some cases, the wrong IP address may be automatically assigned during installation or when the machine is rebooted, and that address may not be the only IP address for this machine or may not be publicly accessible. If this case, you must update the server Web context address.
To fix this issue, ensure that:
The appropriate external server IP address and port number are defined as the Server web context. For Azure & AWS services: Set the server Web context to the external Public IP. (Learn more: Azure or AWS EC2).
The autodetection of the IP address is disabled.
To make changes to the IP address:
Either, edit the Server web context and Disable IP auto-detection settings the Administration Console's Server Policies tab. Log in to the Administration Console as described in the preceding section.
Or, you can run the server Web context script.
Configuring the DeployR Grid
More DeployR Power:
DeployR Enterprise offers the ability to expand your Grid framework for load distribution by installing and configuring additional grid nodes. Get DeployR Enterprise today to take advantage of great DeployR features like enterprise security and a scalable grid framework. Note that DeployR Enterprise is part of Microsoft R Server.
Log in to the Administration Console as described in the preceding section.
Click The Grid in the main menu.
If any additional grid nodes were installed, besides the DeployR Default Node, click New Grid Node and configure the Name, Host, Operating Type and External Directory for each node using these instructions.
Grid node configurations are dependent on a specific version of DeployR; therefore, any migrated configurations are not forward compatible. You must redefine any grid nodes in the Administration Console.
Configuring SELinux (Linux Only)
Configure SELinux to permit access to DeployR using one of these options:
To benefit from the protection of SELinux, enable SELinux and configure the appropriate SELinux exception policies as described here: http://wiki.centos.org/HowTos/SELinux
Disable SELinux so that access to DeployR is allowed as follows:
- In
/etc/selinux/config, setSELINUX=disabled. - Save the changes.
- Reboot the machine.
- In
Uninstalling DeployR
Follow the instructions provided for your operating system.
Uninstalling on Linux
Remember to uninstall DeployR on both the main server and any other grid node machines.
Examples are written for user
deployr-user. For another user, update the commands accordingly.
To uninstall the DeployR main server:
Stop the Tomcat, RServe and MongoDB services. At the prompt, type:
/home/deployr-user/deployr/8.0.0/stopAll.shRemove DeployR, Tomcat, RServe, and MongoDB directories. At the prompt, type:
rm -rf /home/deployr-user/deployr/8.0.0Remove extraneous files. At the prompt, type:
rm -rf /home/deployr-user/deployrdownloadIf MongoDB is on a remote machine, then stop the process and remove the associated directories. At the prompt, type:
/home/deployr-user/deployr/8.0.0/mongo/mongod.sh stop
rm -rf /home/deployr-user/deployr/8.0.0
rm -rf /home/deployr-user/deployrdownload
If a non-default data directory (db_path) for the MongoDB database was used, then remove that directory as well. For example, if you configure MongoDB to use the data directory,
/home/deployr-user/mongo/deployr-database, then you must remove that directory as well. For this example, you would type:rm -rf /home/deployr-user/mongo/deployr-database
To uninstall remote grid nodes:
Repeat these steps on each grid node machine.
Stop the RServe service. At the prompt, type:
/home/deployr-user/deployr/8.0.0/rserve/rserve.sh stopRemove DeployR and RServe directories. At the prompt, type:
rm -rf /home/deployr-user/deployr/8.0.0Remove the extraneous files and directory. At the prompt, type:
rm -rf /home/deployr-user/deployrdownload
Uninstalling on Windows
Stop the Tomcat, RServe and MongoDB services as described here.
Remove DeployR using the Windows instructions for uninstalling a program specific to your version of Windows. For example, on Windows 8, choose Control Panel > Programs & Features > Uninstall.
Manually remove the DeployR install directory, by default
C:\Program Files\Microsoft\DeployR-8.0\.
Remember to uninstall DeployR on both the main server and any other grid node machines.
Uninstalling on Mac OS X
Examples are written for user
deployr-user. For another user, update the commands accordingly.
To uninstall the DeployR:
Stop the Tomcat, RServe and MongoDB services. At the prompt, type:
/Users/deployr-user/deployr/8.0.0/stopAll.shRemove DeployR, Tomcat, RServe, and MongoDB directories. At the prompt, type:
rm -rf /Users/deployr-user/deployr/8.0.0Remove extraneous files. At the prompt, type:
rm -rf /Users/deployr-user/deployrdownloadIf a non-default data directory (db_path) for the MongoDB database was used, then remove that directory as well. For example, if you configure MongoDB to use the data directory,
/Users/deployr-user/mongo/deployr-database, then you must remove that directory as well. For this example, you would type:rm -rf /Users/deployr-user/mongo/deployr-database