Note
Access to this page requires authorization. You can try signing in or changing directories.
Access to this page requires authorization. You can try changing directories.
Applies to: Android, iOS/iPadOS, macOS, Windows 10, Windows 11
Set up enrollment notifications in Microsoft Intune to notify employees of newly enrolled devices. Enrollment notifications are sent to assigned users via your selected method: email or push notification. Within a notification, you can:
- Add a custom message for the user, with information about how to report an unrecognized device.
- Apply your tenant's branding and customization settings (email notifications only).
Enrollment notifications are supported on these devices:
- Android devices in bring-your-own-device (BYOD) scenarios.
- iOS/iPadOS devices in BYOD scenarios such as device enrollment. However, enrollment notifications aren't supported with user enrollment.
- macOS devices in BYOD scenarios such as device enrollment.
- Devices running Windows 10/11, excluding Microsoft Entra hybrid joined devices.
- Windows Autopilot devices, excluding userless scenarios such as Windows Autopilot for pre-provisioned deployment.
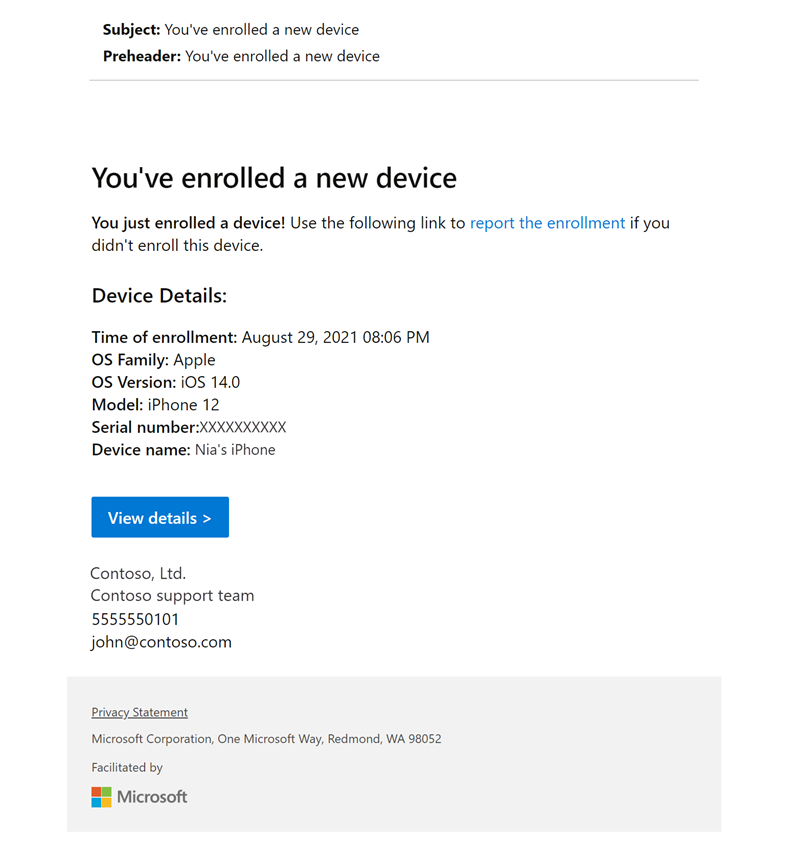
Example
The following example image shows what an enrollment notification looks like to a device user.
Prerequisites
Prior to creating enrollment notifications, you must configure Microsoft Intune branding and customization settings under Tenant administration > Customization.
Enrollment notifications work with user-driven enrollment methods. They aren't supported in userless enrollment scenarios, or when provisioning Windows 365 Cloud PCs.
You should know
Email notifications appear in the user's inbox. Push notifications appear in the Intune Company Portal apps for iOS/iPadOS, macOS, and Android. Enrollment push notifications aren't supported in the Company Portal for Windows, so they'll never appear there.
Create an enrollment notification
Tip
Use the built-in HTML editor to format and style email notifications. Intune supports the following HTML tags: <a>, <strong>, <b>, <u>, <ol>, <ul>, <li>, <p>, <br>, <code>, <table>, <tbody>, <tr>, <td>, <thead>, and<th>. It also supports the href attribute for hyperlinks, but only for HTTPS links.
Sign in to the Microsoft Intune admin center as an Intune Administrator.
Go to Devices > Enrollment.
Select the Windows, Apple, or Android tab.
Choose Enrollment notifications.
Apple and Android notifications are supported on iOS, macOS, Android Enterprise, and Android device administrator, respectively. Select the tab that corresponds to the OS you're managing.
Your options for Apple enrollment are:
- iOS/iPadOS Notifications
- macOS Notifications
Your options for Android enrollment are:
- Android Enterprise Notifications
- Android device administrator Notifications
Select Create notifications.
In Basics, configure the following settings:
- Name: Enter a descriptive name for the notification. Name your notifications so you can easily identify them later.
- Description: Enter a description for the notification. This setting is optional, but recommended.
Select Next.
In Notification settings, configure the notification messages.
The options for push notifications are:
- Send Push Notification: Flip the switch On to enable and create a push notification.
- Subject: Enter the subject of the enrollment notification.
- Message: Enter your message, explaining the purpose of the notification. The character limit is 2000.
The options for email notifications are:
- Send Email Notification: Flip the switch On to enable and create an email notification.
- Subject: Enter the subject of the enrollment notification.
- Message: Enter your message. The character limit is 2000.
- Raw HTML editor: Flip the switch On to enable HTML formatting.
The options for branding and customization are:
- Show company logo: Flip the switch On to make your organization's logo visible in the email header. This option becomes available after you've configured Company Portal branding in your tenant.
- Show device details: Device details are turned off by default. Flip the switch On to show device details in the footer of the email. Emails with device details can take longer to deliver. Intune may not be able to populate all details. Details include:
- Device name
- Model
- OS
- OS version
- Serial number
Note
Device name does not always reflect the most recent device name in a tenant. Some devices have a pre-configured device name from Intune that changes once enrolled and given timing, this pre-configured name can sometimes show in the Device details of the message. The Company portal website link will always show the most recent and accurate device name.
- Show company name: Flip the switch On to make your organization's name visible in the footer of the email. The tenant value is automatically populated.
- Show contact information: Flip the switch On to show your organization's contact information. The tenant value is automatically populated.
- Show Company portal website link: Flip the switch On to show a link to the Company Portal website. The tenant value is automatically populated.
- Select Next.
- Optionally, assign a scope tag, like
US-NC IT TeamorJohnGlenn_ITDepartment, to limit management of the notification to specific IT groups. Then select Next. - In Assignments, select the users or groups receiving the notification.
Note
The exclude feature isn't available for enrollment notifications.
- Select Next.
- In Review + create, review the notification details, and then select Create.
Enrollment notifications are sent out to assigned groups when enrollment is triggered. Return to Enrollment notifications to view and edit notifications, or change priority level.