Note
Access to this page requires authorization. You can try signing in or changing directories.
Access to this page requires authorization. You can try changing directories.
Use Mesh on the web to create and manage events, Mesh collections, and custom environments. Once events are made, Mesh events show up in your Outlook or Teams calendar with a direct link that people can use to join events, making inviting and joining events quicker.
The overall flow of creating an event in Mesh on the web is:
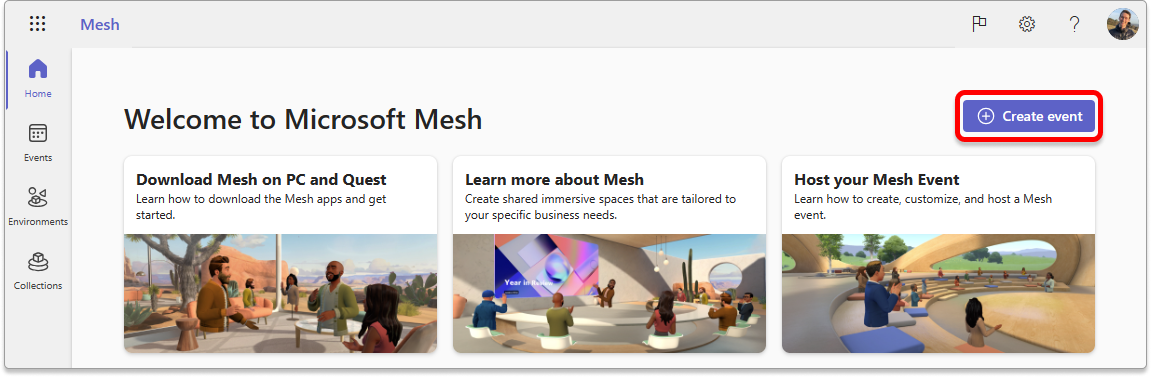
Select Create event in the top right.
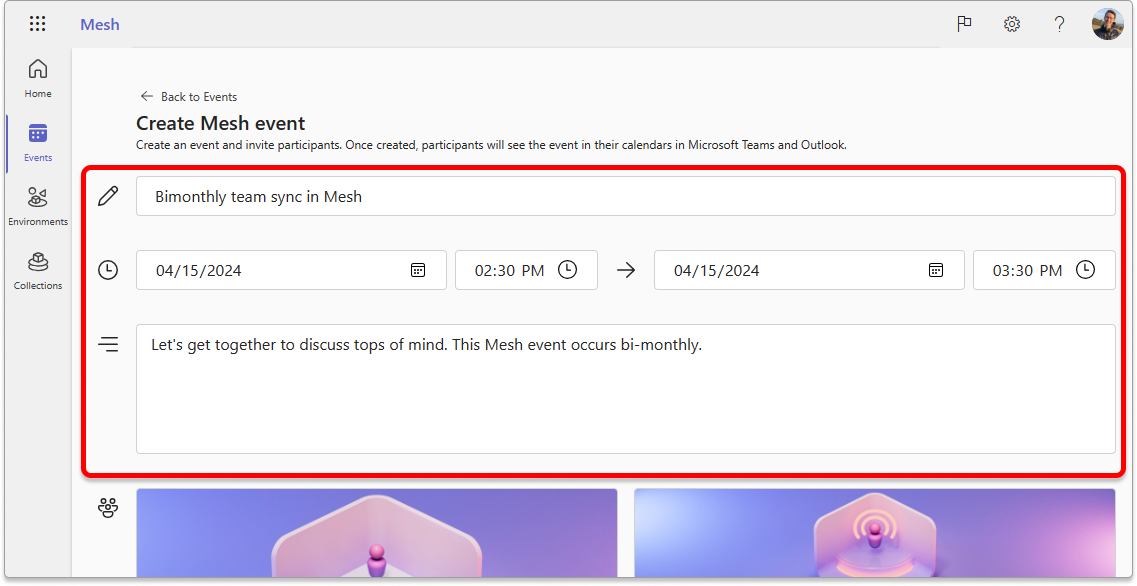
Add the Title, Date/Duration, and Details about the event.
Choose your room settings like:
Single room
Multi-room
Invite people:
- Co-organizers (People to help set up and run the event)
- Attendees (People to join the event)
Choose the event space:
- Choose a template (that you or someone previously created)
- Start from scratch (a default environment or custom environment with no customizations)
(Optional) Upload an event cover image (size 512x256 px)
Select Create to finalize event creation.
In Outlook, all co-organizers and attendees will receive the Mesh event invite which can be viewed on their Calendar.
Forward the event invite to add more attendees
Copy the Event link to share it with Guest attendees
(Optional) Customize your event 30 minutes before it starts!
Important
If you're inviting external guest users from another organization into your organization's event, make sure to share the Event link from the Outlook invite directly with guest attendees. This step is critical given guest users don't see the Mesh Dashboard.
Considerations before your event
Single room events:
- Capacity: 16 people
- Time limit: 24-hours
- Events can be rejoined from the Mesh Dashboard or via the link created for the event
Multi-room events:
- Capacity: 330 people
- Time limit: 3-hours
- Events can be rejoined from the Mesh Dashboard or via the link created for the event
- Co-organizers are in their own room and attendees are grouped into 16 person rooms
Customize and save edits at least 30 minutes before your event to ensure the event runs smoothly
Create an event
Open Mesh on the web at https://mesh.cloud.microsoft/.
Log in with your corporate account.
Select Create event at the top right.
Add the Title, Date/Duration, and Details about the event.
Note
All events should be scheduled more than 30 minutes in advance to allow for event customization in the Mesh app.
Choose the room configuration for your event: Single or Multi-room.
Add your Co-organizers and your Attendees. You may add groups or individuals.
- Co-organizers can edit the event, customize the environment in the Mesh application, and forward the event or invite others in Outlook
- Attendees can join the event.
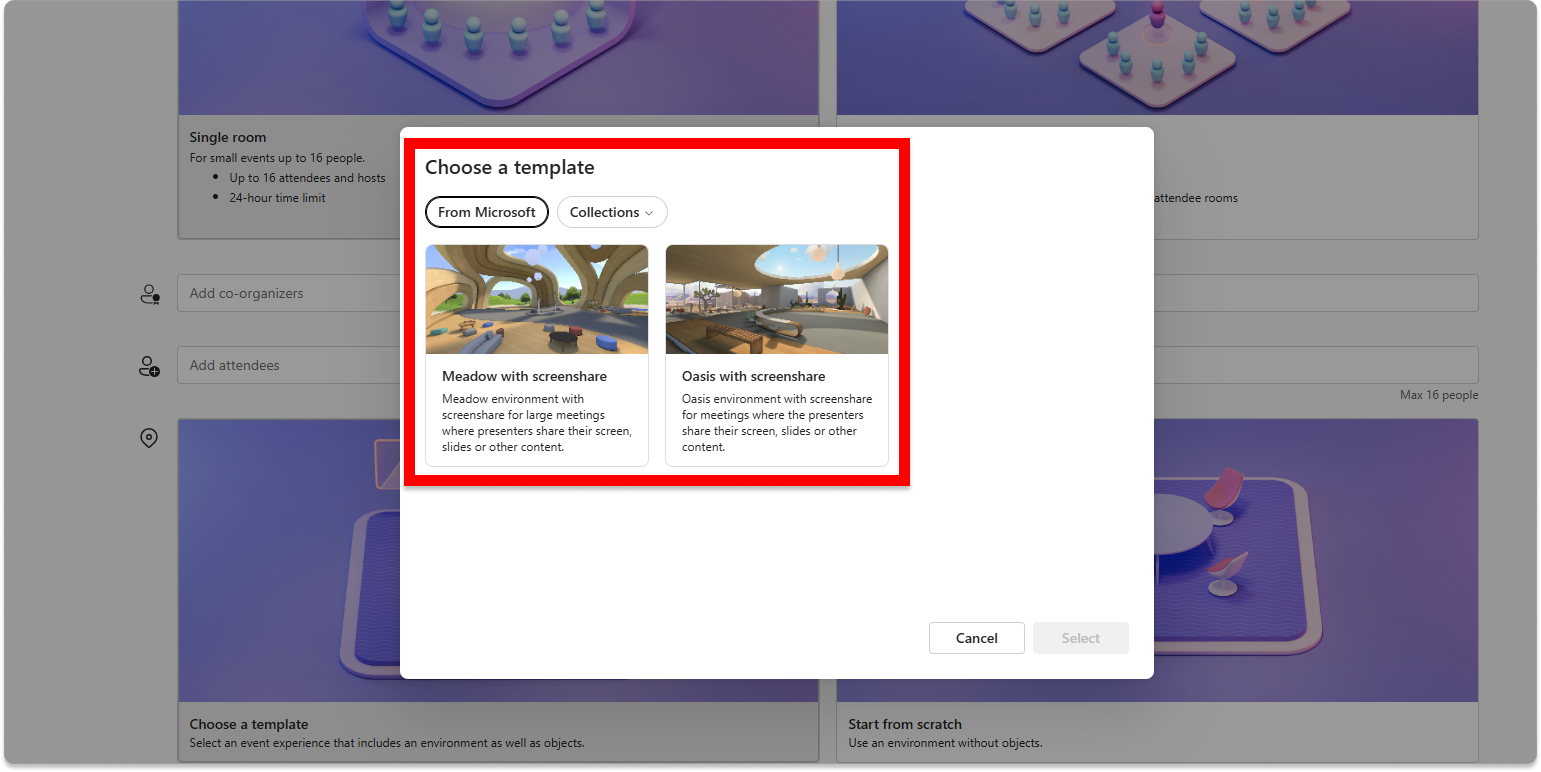
Choose the event space: Choose a template or Start from scratch.
Tip
With Mesh, you can create environment templates with customizations to be reused as needed. Create a Template, customize it once, and reuse it again and again.
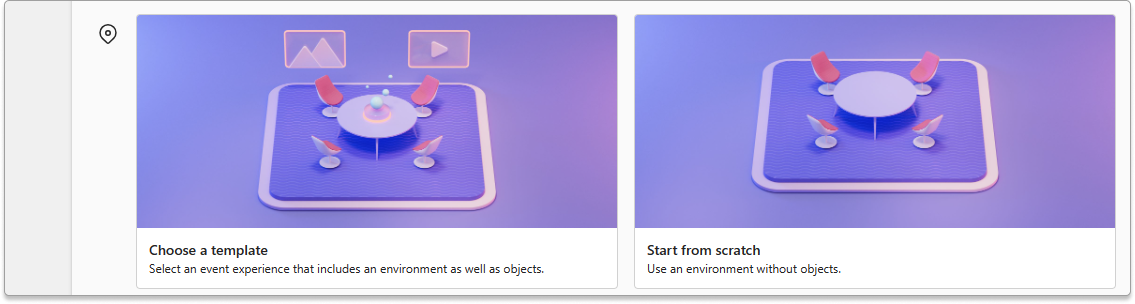
Whether you Choose a template or Start from scratch, you can choose environments from Microsoft directly or from your Collections.
For example, when you Choose a template, you can see the templates provided from Microsoft below:
Note
If you are unable to create an event, there may be a policy that blocks your account from creating events.
(Optional) Upload an event cover image.
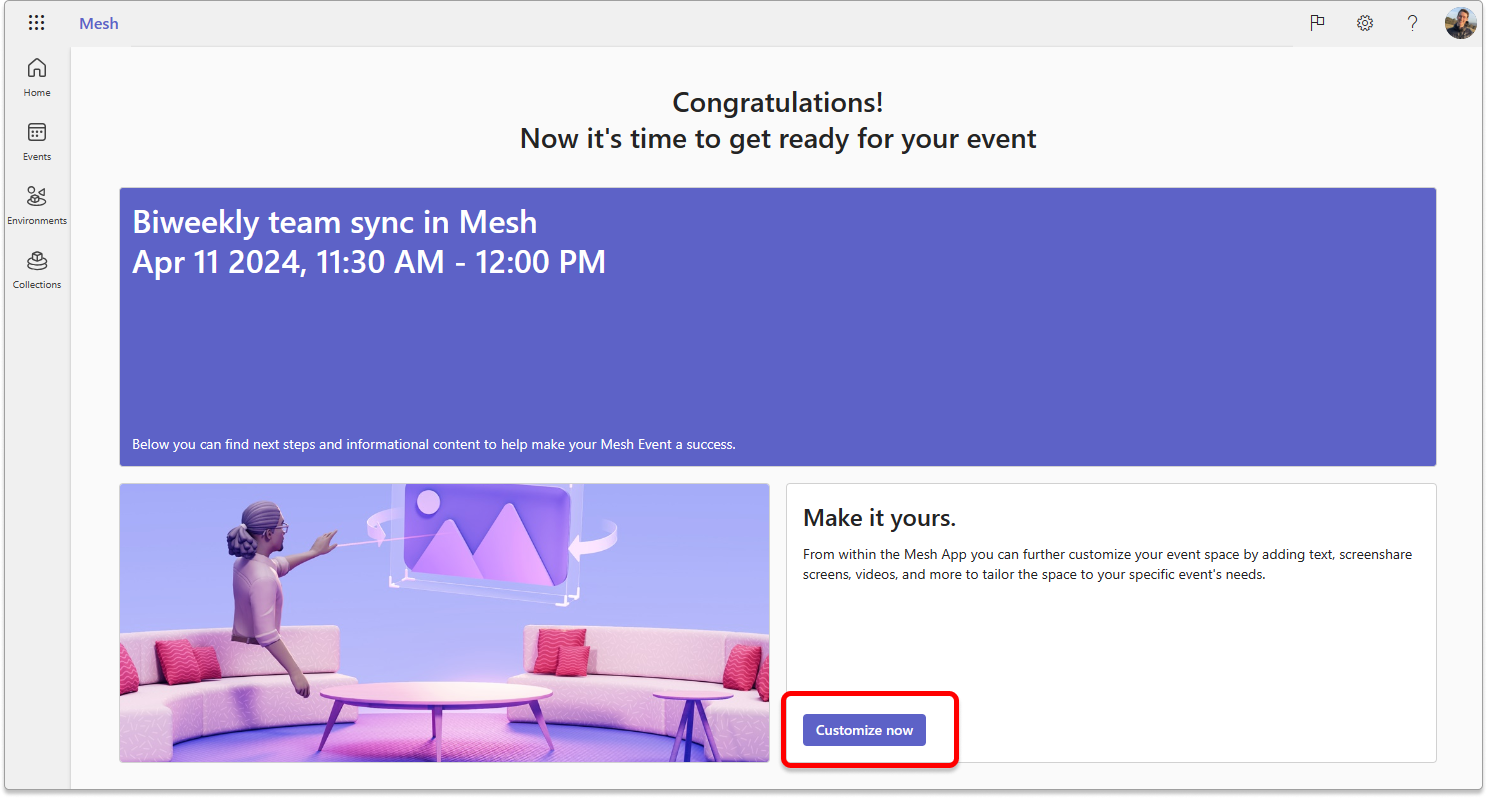
Great job! You've now created your event. Co-organizers and invitees will now see the event in their Outlook and Teams calendars. Select Customize now to open the Mesh app and customize your event by adding objects to your environment to help with your meeting.
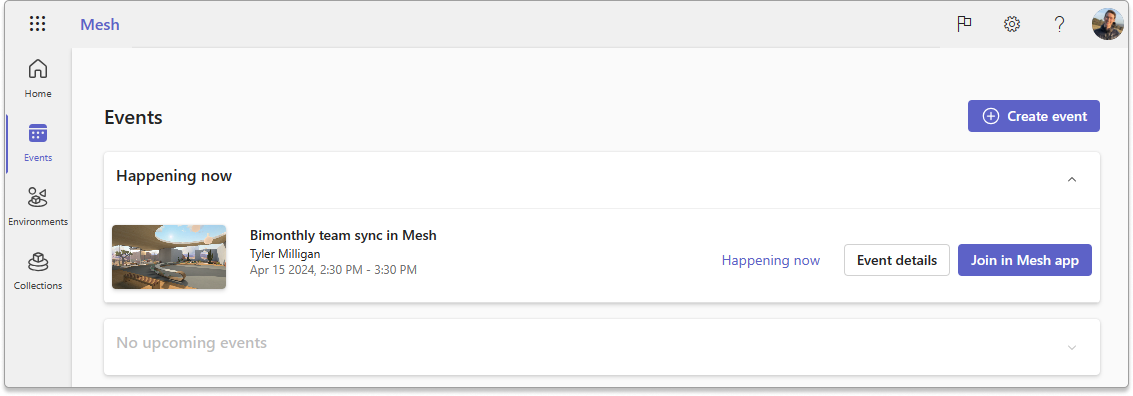
You can also review your event in the Events tab in Mesh on the web.