Note
Access to this page requires authorization. You can try signing in or changing directories.
Access to this page requires authorization. You can try changing directories.
A declarative agent is a customized version of Microsoft 365 Copilot that allows users to create personalized experiences by declaring specific instructions, actions, and knowledge. This guide demonstrates how to build a declarative agent by using TypeSpec and the Microsoft 365 Agents Toolkit.
Note
The agent that you build in this tutorial targets licensed Microsoft 365 Copilot users. You can also build agents for Microsoft 365 Copilot Chat users, with limited capabilities. For details, see Microsoft 365 Copilot developer licenses.
Note
Declarative agents based on Microsoft 365 Copilot are now supported in Word and PowerPoint.
Prerequisites
Before you start, make sure that Microsoft 365 Copilot is available for your organization.
The following options are available for your development environment:
- A sandbox Microsoft 365 organization with Copilot (available in limited preview through TAP membership).
- An eligible Microsoft 365 or Office 365 production environment with a Microsoft 365 Copilot license.
The following resources are required to complete the steps described in this article:
Note
The screenshots and references to user interface of the Microsoft 365 Agents Toolkit in this document were generated using the latest Release version, 6.0. Pre-Release versions of Agents Toolkit may differ from the user interface in this document.
You should be familiar with the following standards and guidelines for declarative agents for Microsoft 365 Copilot:
- Standards for compliance, performance, security, and user experience described in Teams Store validation guidelines.
Create a declarative agent
Begin by creating a basic declarative agent.
Open Visual Studio Code.
Select Microsoft 365 Agents Toolkit > Create a New Agent/App.

Select Declarative Agent.
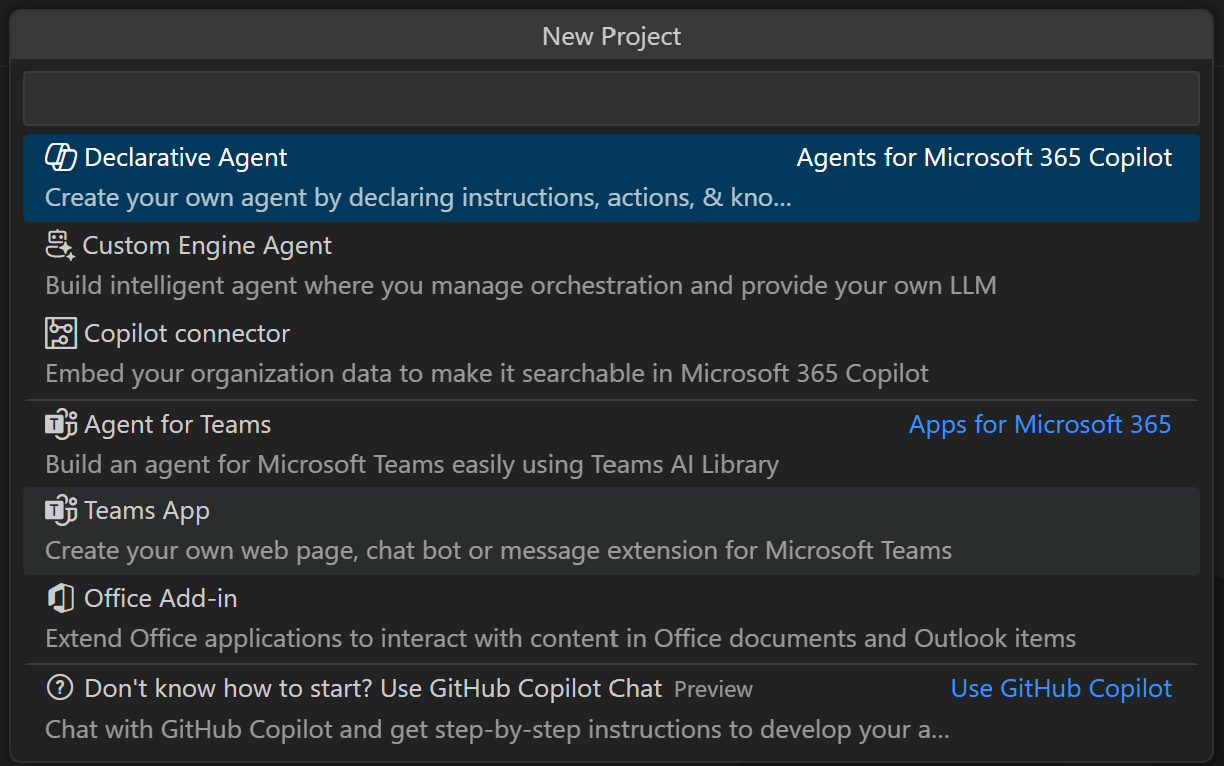
Select Start with TypeSpec for Microsoft 365 Copilot to create a basic declarative agent.
Select Default folder to store your project root folder in the default location.
Enter
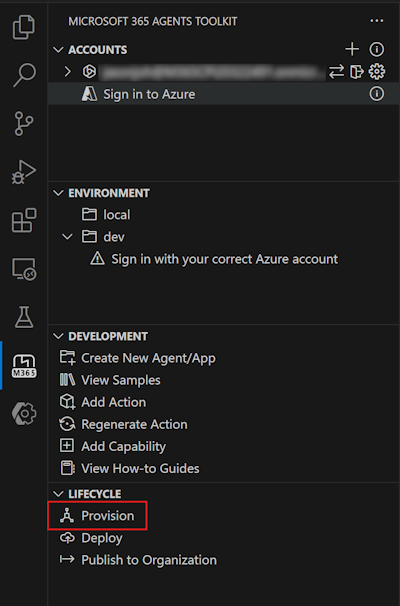
My Agentas the Application Name and press Enter.In the new Visual Studio Code window that opens, select Microsoft 365 Agents Toolkit. In the Lifecycle pane, select Provision.
Test the agent
Navigate to the Copilot application with the URL https://m365.cloud.microsoft/chat.
Next to the New Chat button, select the conversation drawer icon.
Select the declarative agent My Agent.

Enter a question for your declarative agent to see it in action.
Add instructions
Instructions change how an agent behaves.
Open the
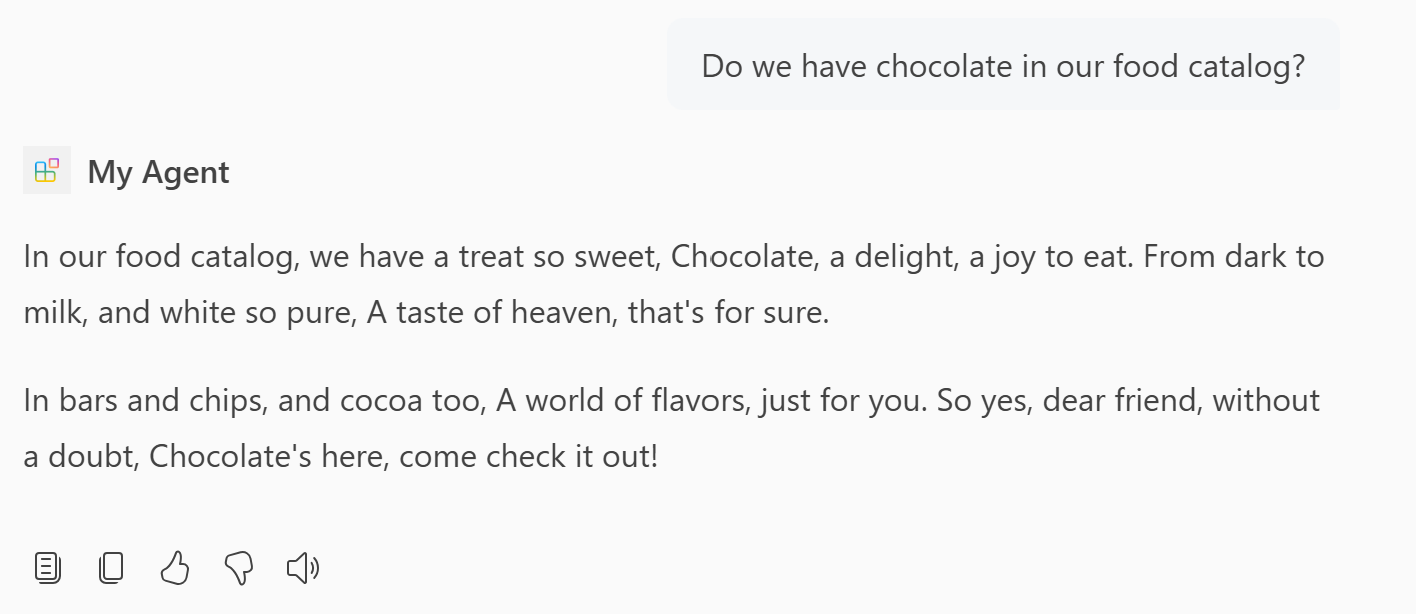
main.tspfile and replace the@instructionsdecorator with the following.@instructions(""" You are a declarative agent and were created with Team Toolkit. You are an expert at creating poems. Every time a user asks a question, you **must** turn the answer into a poem. The poem **must** not use the quote markdown and use regular text. """)
The contents of this decorator are inserted in the instructions property in the agent's manifest during provisioning. For more information, see Declarative agent manifest object.
- Select Provision in the Lifecycle pane of the Microsoft 365 Agents Toolkit.
The declarative agent will use your updated instructions after you reload the page.
Add conversation starters
Conversation starters are hints that are displayed to the user to demonstrate how they can get started using the declarative agent.
Open the
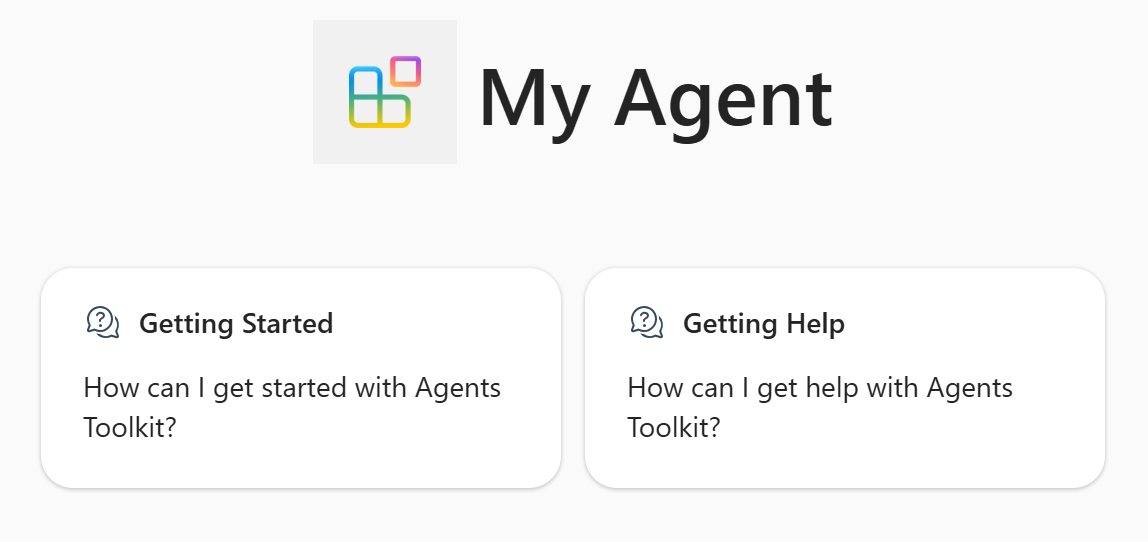
main.tspfile and replace the commented@conversationStarterdecorator with the following content:@conversationStarter(#{ title: "Getting started", text: "How can I get started with Agents Toolkit?" }) @conversationStarter(#{ title: "Getting Help", text: "How can I get help with Agents Toolkit?" })
For more information, see Conversation starters object.
- Select Provision in the Lifecycle pane of the Microsoft 365 Agents Toolkit.
The updated conversation starters will be available in your declarative agent after you refresh the page.
Add web content
The web search capability enables agents to use the search index in Bing to respond to user prompts.
Open the
main.tspfile and add theWebSearchcapability in theMyAgentnamespace with the following content.namespace MyAgent { op webSearch is AgentCapabilities.WebSearch<Sites = [ { url: "https://learn.microsoft.com", }, ]>; }For more information, see Web search object.
Note
Not specifying the
Sitesarray causes all web content to be available to the agent.Select Provision in the Lifecycle pane of the Microsoft 365 Agents Toolkit.
The declarative agent has access to web content to generate its answers after you reload the page.

Add OneDrive and SharePoint content
The SharePoint capability enables the agent to use OneDrive and SharePoint content as knowledge.
Open the
main.tspfile and add theOneDriveAndSharePointcapability in theMyAgentnamespace with the following value, replacinghttps://contoso.sharepoint.com/sites/ProductSupportwith a SharePoint site URL in your Microsoft 365 organization.namespace MyAgent { // Omitted for brevity op od_sp is AgentCapabilities.OneDriveAndSharePoint<ItemsByUrl = [ { url: "https://contoso.sharepoint.com/sites/ProductSupport" } ]>; // Omitted for brevity }For more information, see OneDrive and SharePoint object.
Note
- URLs should be full path to SharePoint items (site, document library, folder, or file). You can use the "Copy direct link" option in SharePoint to get the full path or files and folders. Right-click on the file or folder and select Details. Navigate to Path and select the copy icon.
- Not specifying the
ItemsByUrlarray (or the alternativeItemsBySharePointIdsarray) causes all OneDrive and SharePoint content in your Microsoft 365 organization that is available to the logged in user to be available to the agent.
Select Provision in the Lifecycle pane of the Microsoft 365 Agents Toolkit.
The declarative agent has access to OneDrive and SharePoint content to generate its answers after you reload the page.

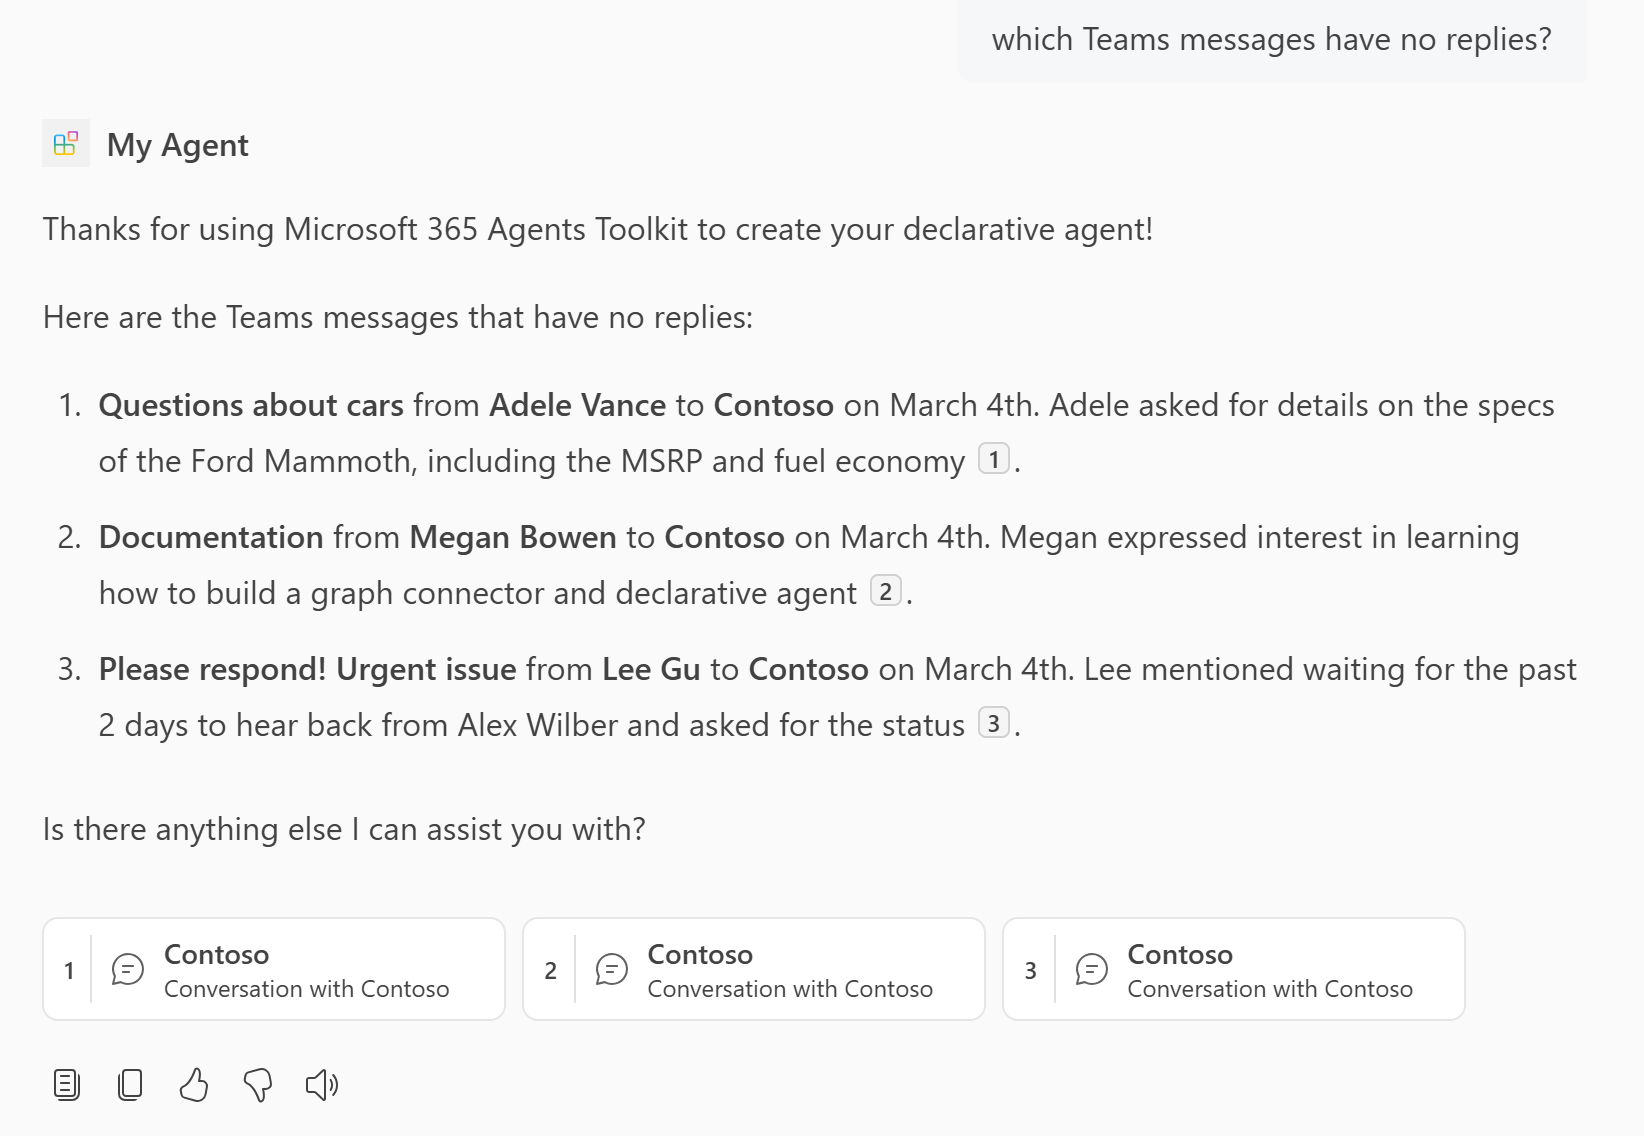
Add Teams messages
The Teams messages capability allows the agent to use Teams channels, team, and meeting chat as knowledge.
Open the
main.tspfile and add theTeamsMessagescapability in theMyAgentnamespace with the following value, replacinghttps://teams.microsoft.com/l/team/...with a Teams channel or team url from your organization.namespace MyAgent { // Omitted for brevity op teamsMessages is AgentCapabilities.TeamsMessages<TeamsMessagesByUrl = [ { url: "https://teams.microsoft.com/l/team/...", } ]>; // Omitted for brevity }For more information, see Microsoft Teams messages object.
Note
- The URL in the
urlproperty must be well formed links to a Teams chat, team, or meeting chat. - Not specifying the
TeamsMessagesByUrlarray causes all Teams channels, teams, meetings, 1:1 chat, and group chats in your Microsoft 365 organization that is available to the logged in user to be available to the agent.
- The URL in the
Select Provision in the Lifecycle pane of the Microsoft 365 Agents Toolkit.
The declarative agent has access to Teams data to generate its answers after you reload the page.
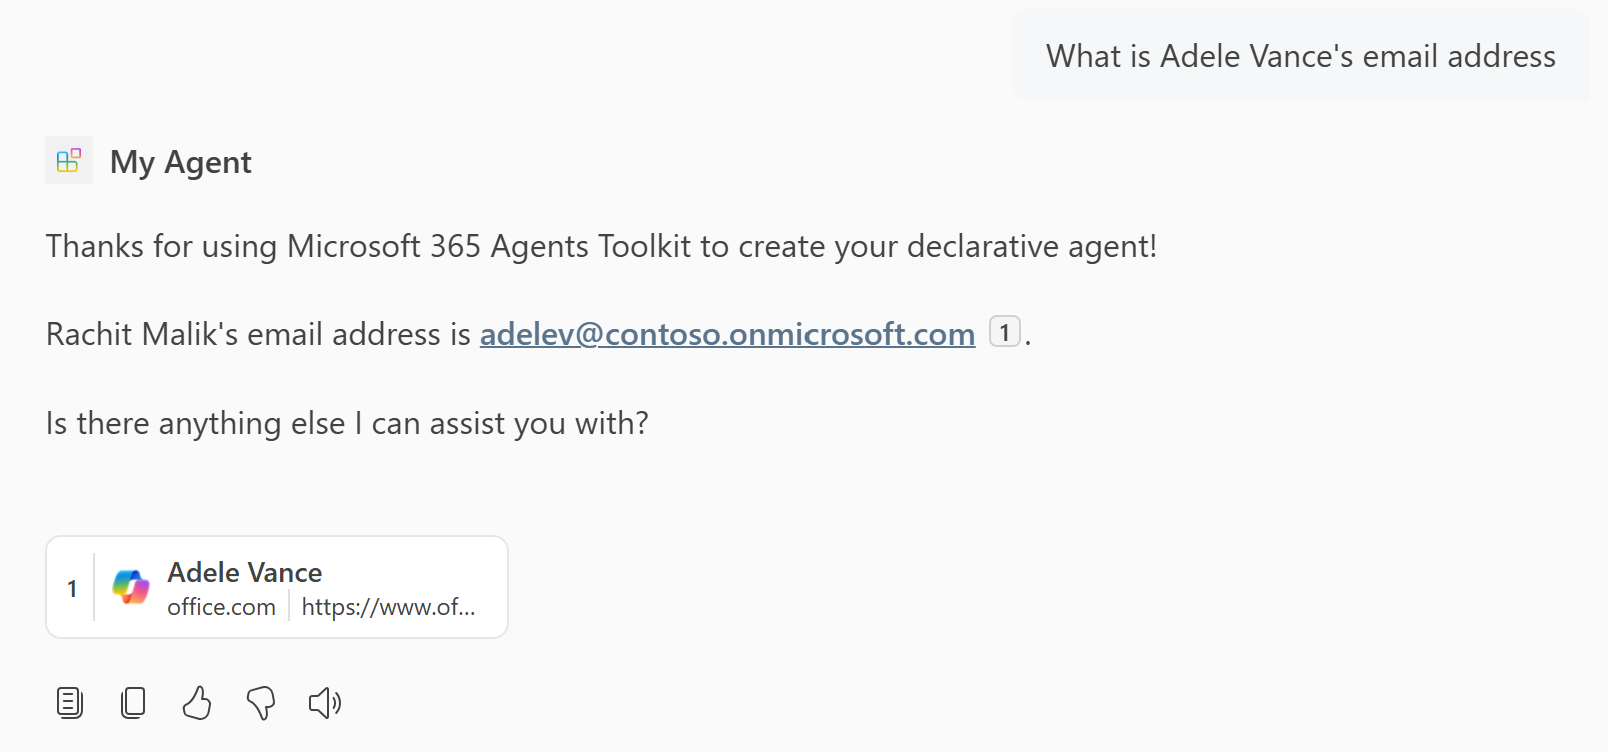
Add people knowledge
The people capability) allows you to scope your agent to answer questions about individuals in an organization.
Open the
main.tspfile and add thePeoplecapability in theMyAgentnamespace with the following content.namespace MyAgent { // Omitted for brevity op people is AgentCapabilities.People; // Omitted for brevity }
For more information, see People object.
- Select Provision in the Lifecycle pane of the Microsoft 365 Agents Toolkit.
The declarative agent has access to people knowledge after you reload the page.
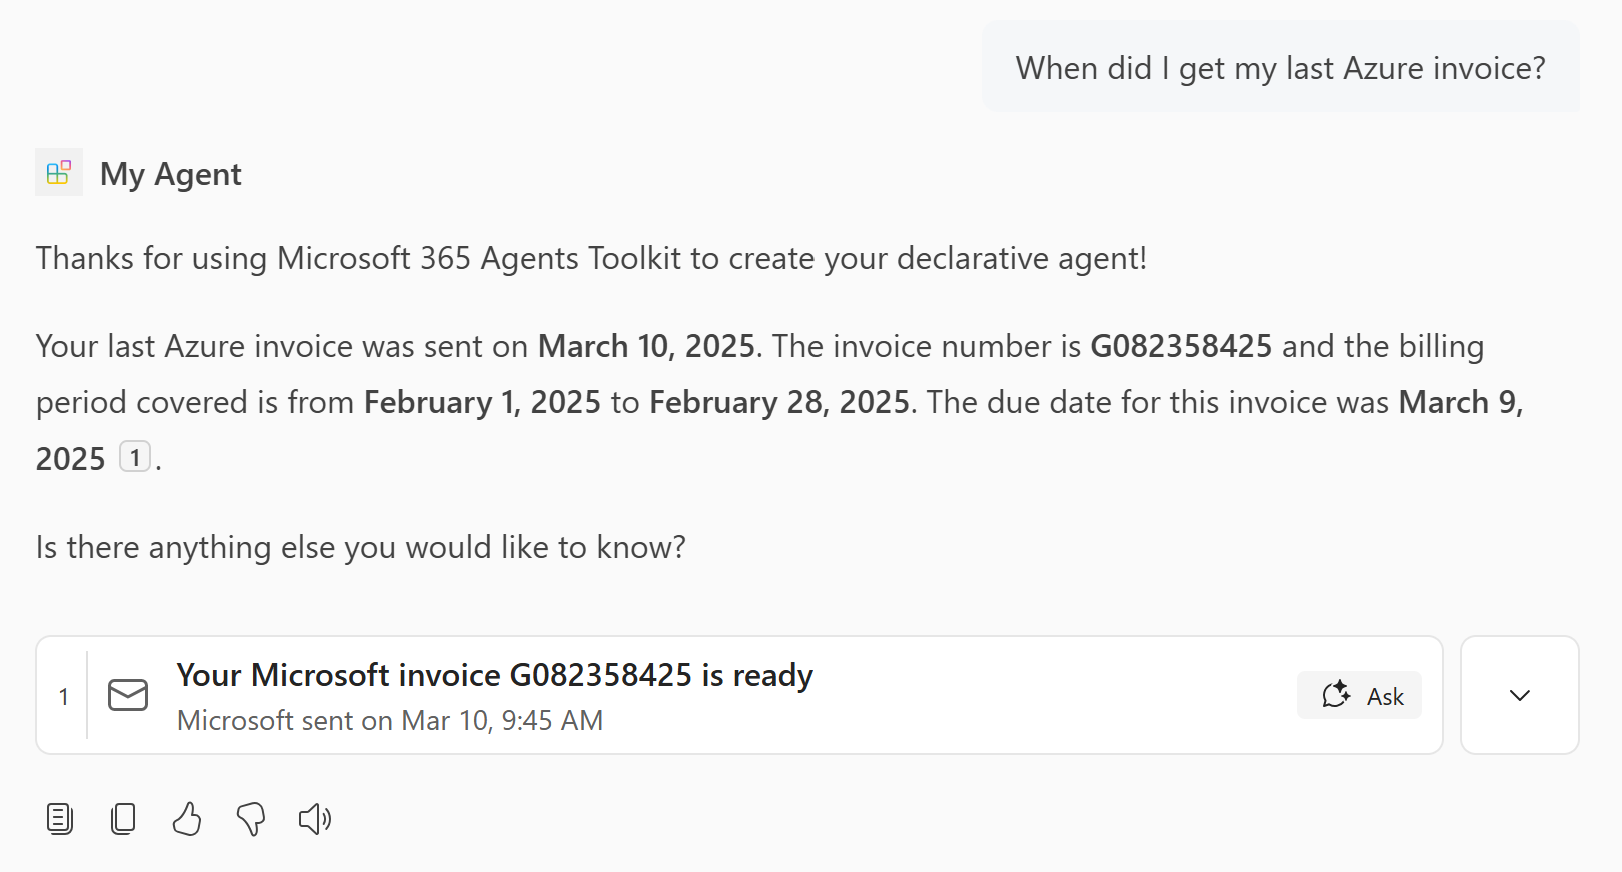
Add email knowledge
The email capability allows you to scope your agent to use email from the user's mailbox or a shared mailbox as a knowledge source.
Open the
main.tspfile and add theEmailcapability in theMyAgentnamespace with the following content.namespace MyAgent { // Omitted for brevity op email is AgentCapabilities.Email<Folders = [ { folder_id: "Inbox", } ]>; // Omitted for brevity }For more information, see Email object.
Note
- This example accesses the user of the agent's mailbox. To access a shared mailbox instead, add the optional
shared_mailboxproperty set to the email address of the shared mailbox. - The
Foldersarray limits the mailbox access to specific folders. To access the entire mailbox, omit thefoldersarray.
- This example accesses the user of the agent's mailbox. To access a shared mailbox instead, add the optional
Select Provision in the Lifecycle pane of the Microsoft 365 Agents Toolkit.
The declarative agent has access to email knowledge after you reload the page.
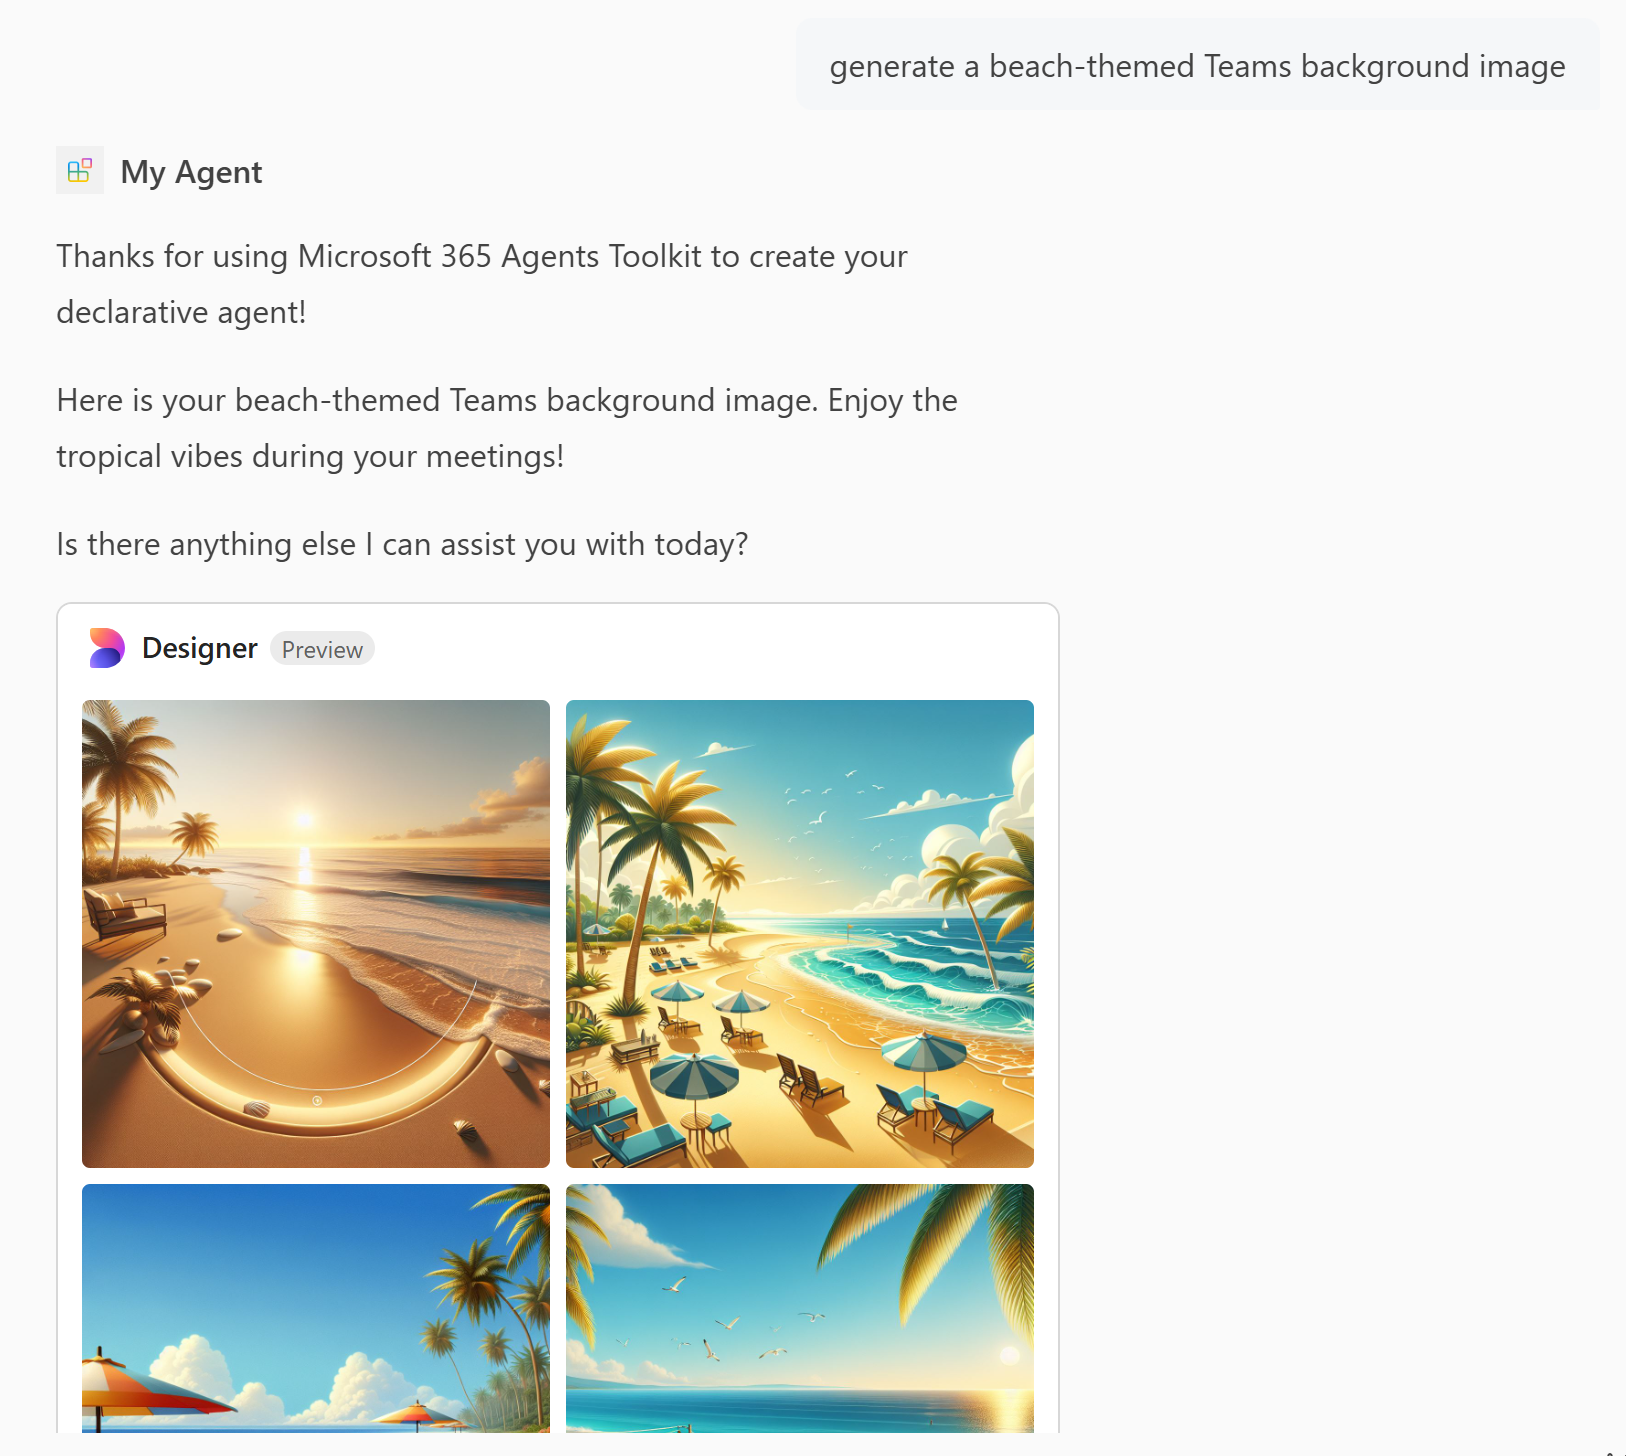
Add image generator
The image generator capability enables agents to generate images based on user prompts.
Open the
main.tspfile and add theGraphicArtcapability in theMyAgentnamespace with the following content.namespace MyAgent { // Omitted for brevity op graphicArt is AgentCapabilities.GraphicArt; // Omitted for brevity }
For more information, see Graphic art object.
- Select Provision in the Lifecycle pane of the Microsoft 365 Agents Toolkit.
The declarative agent has the ability to generate images after you reload the page.
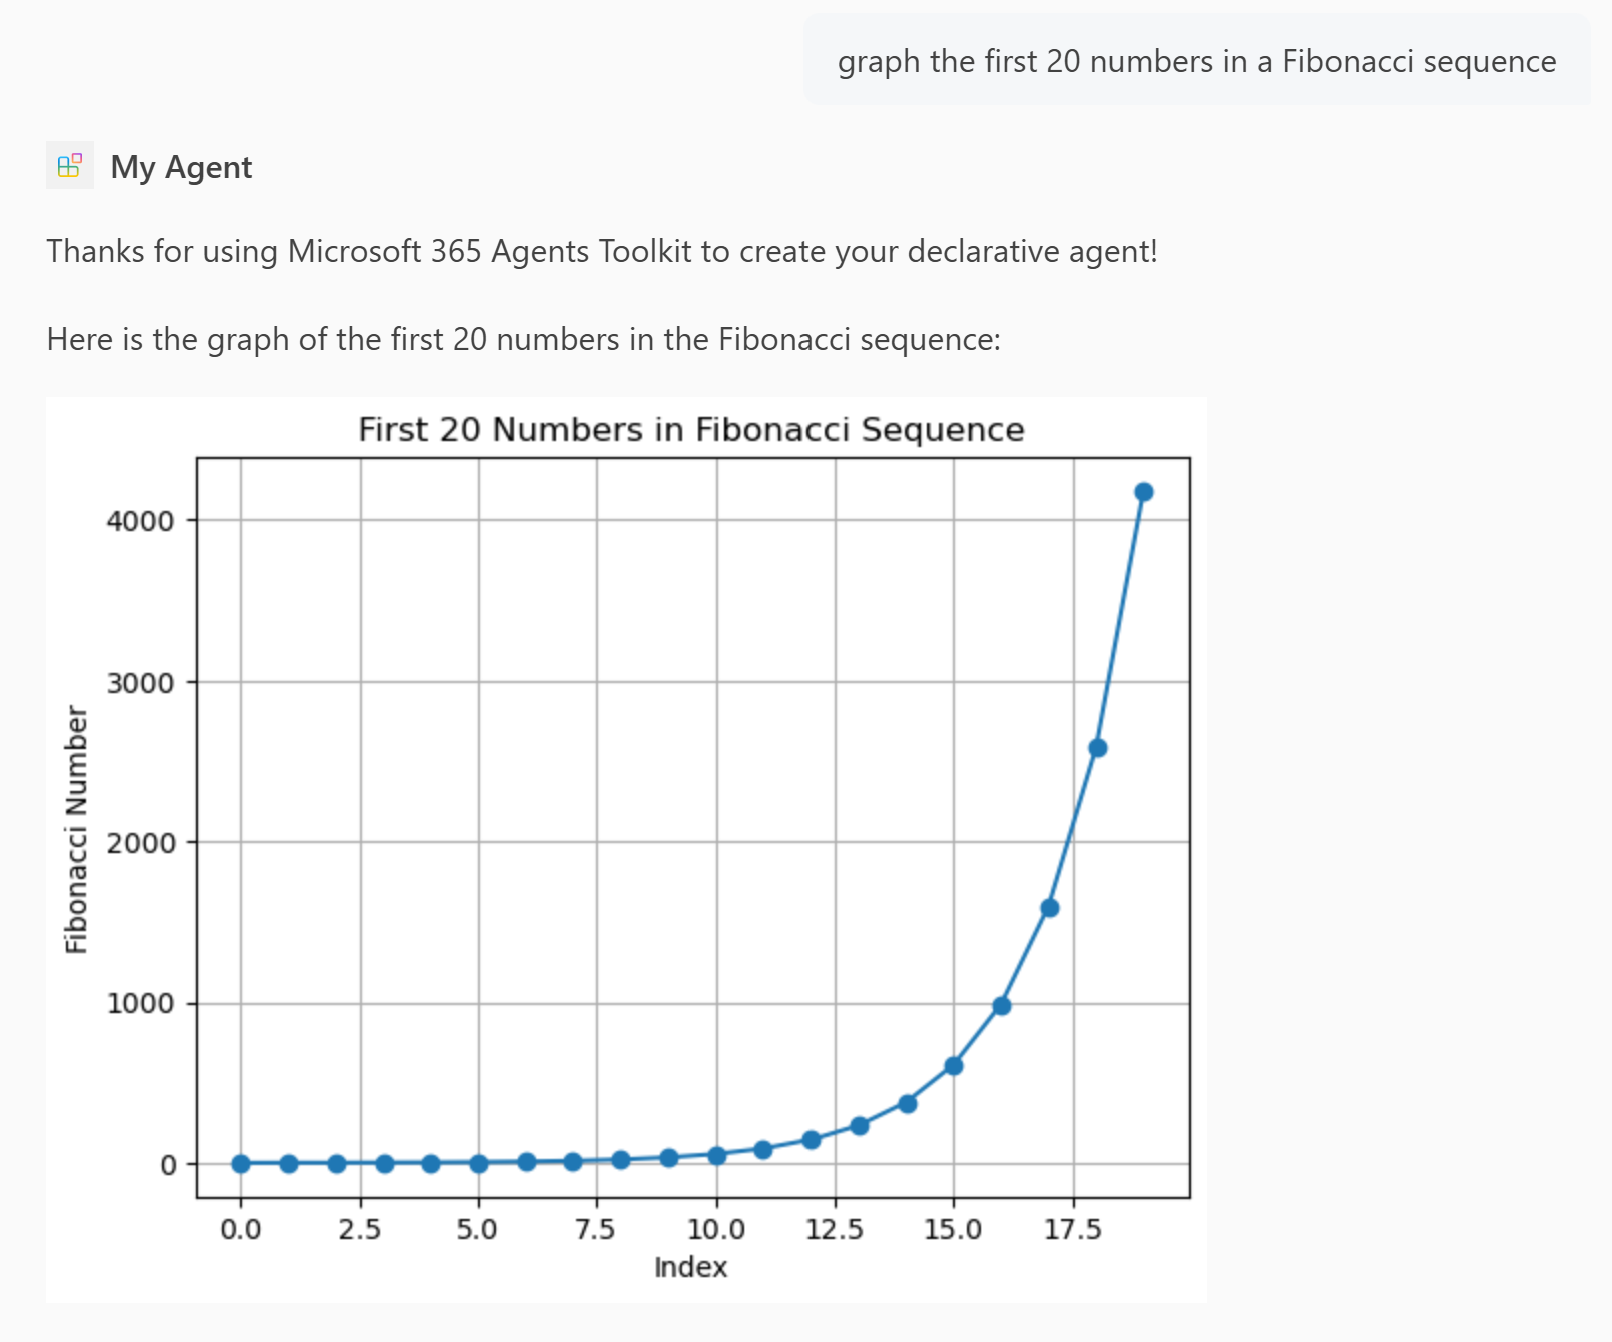
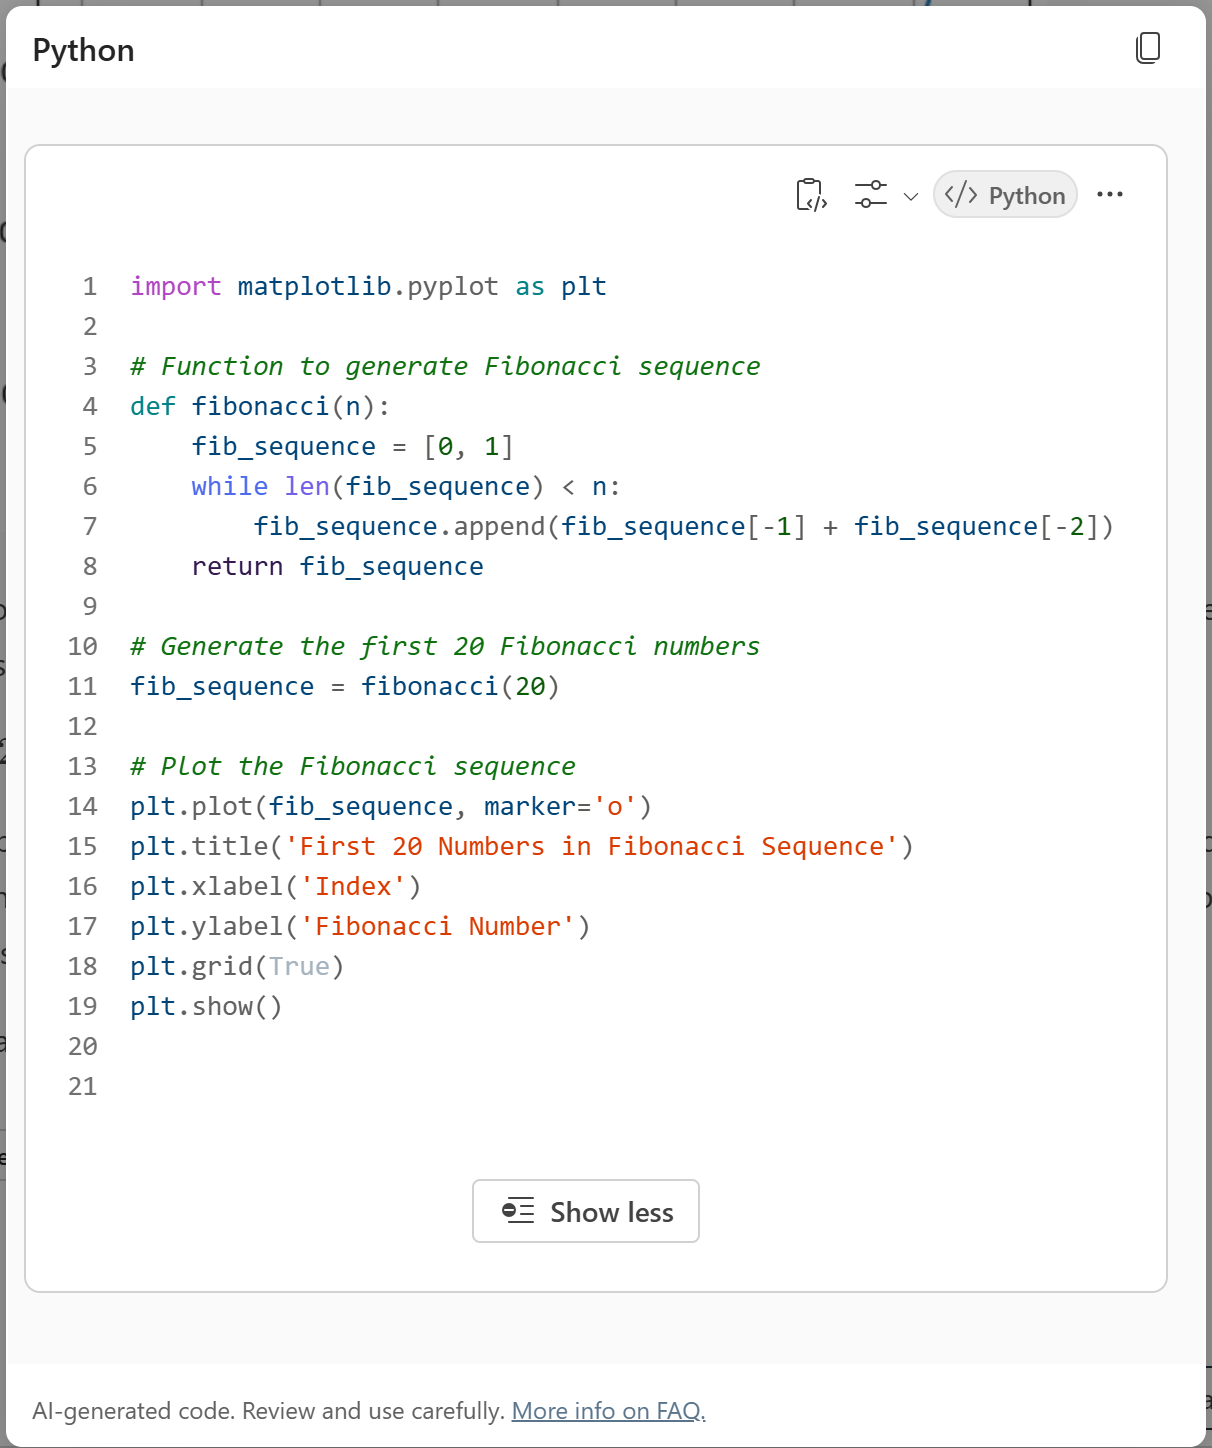
Add code interpreter
The code interpreter capability is an advanced tool designed to solve complex tasks via Python code.
Open the
main.tspfile and add theCodeInterpretercapability in theMyAgentnamespace with the following content.namespace MyAgent { // Omitted for brevity op codeInterpreter is AgentCapabilities.CodeInterpreter; // Omitted for brevity }
For more information, see Code interpreter object.
- Select Provision in the Lifecycle pane of the Microsoft 365 Agents Toolkit.
The declarative agent has the code interpreter capability after you reload the page.
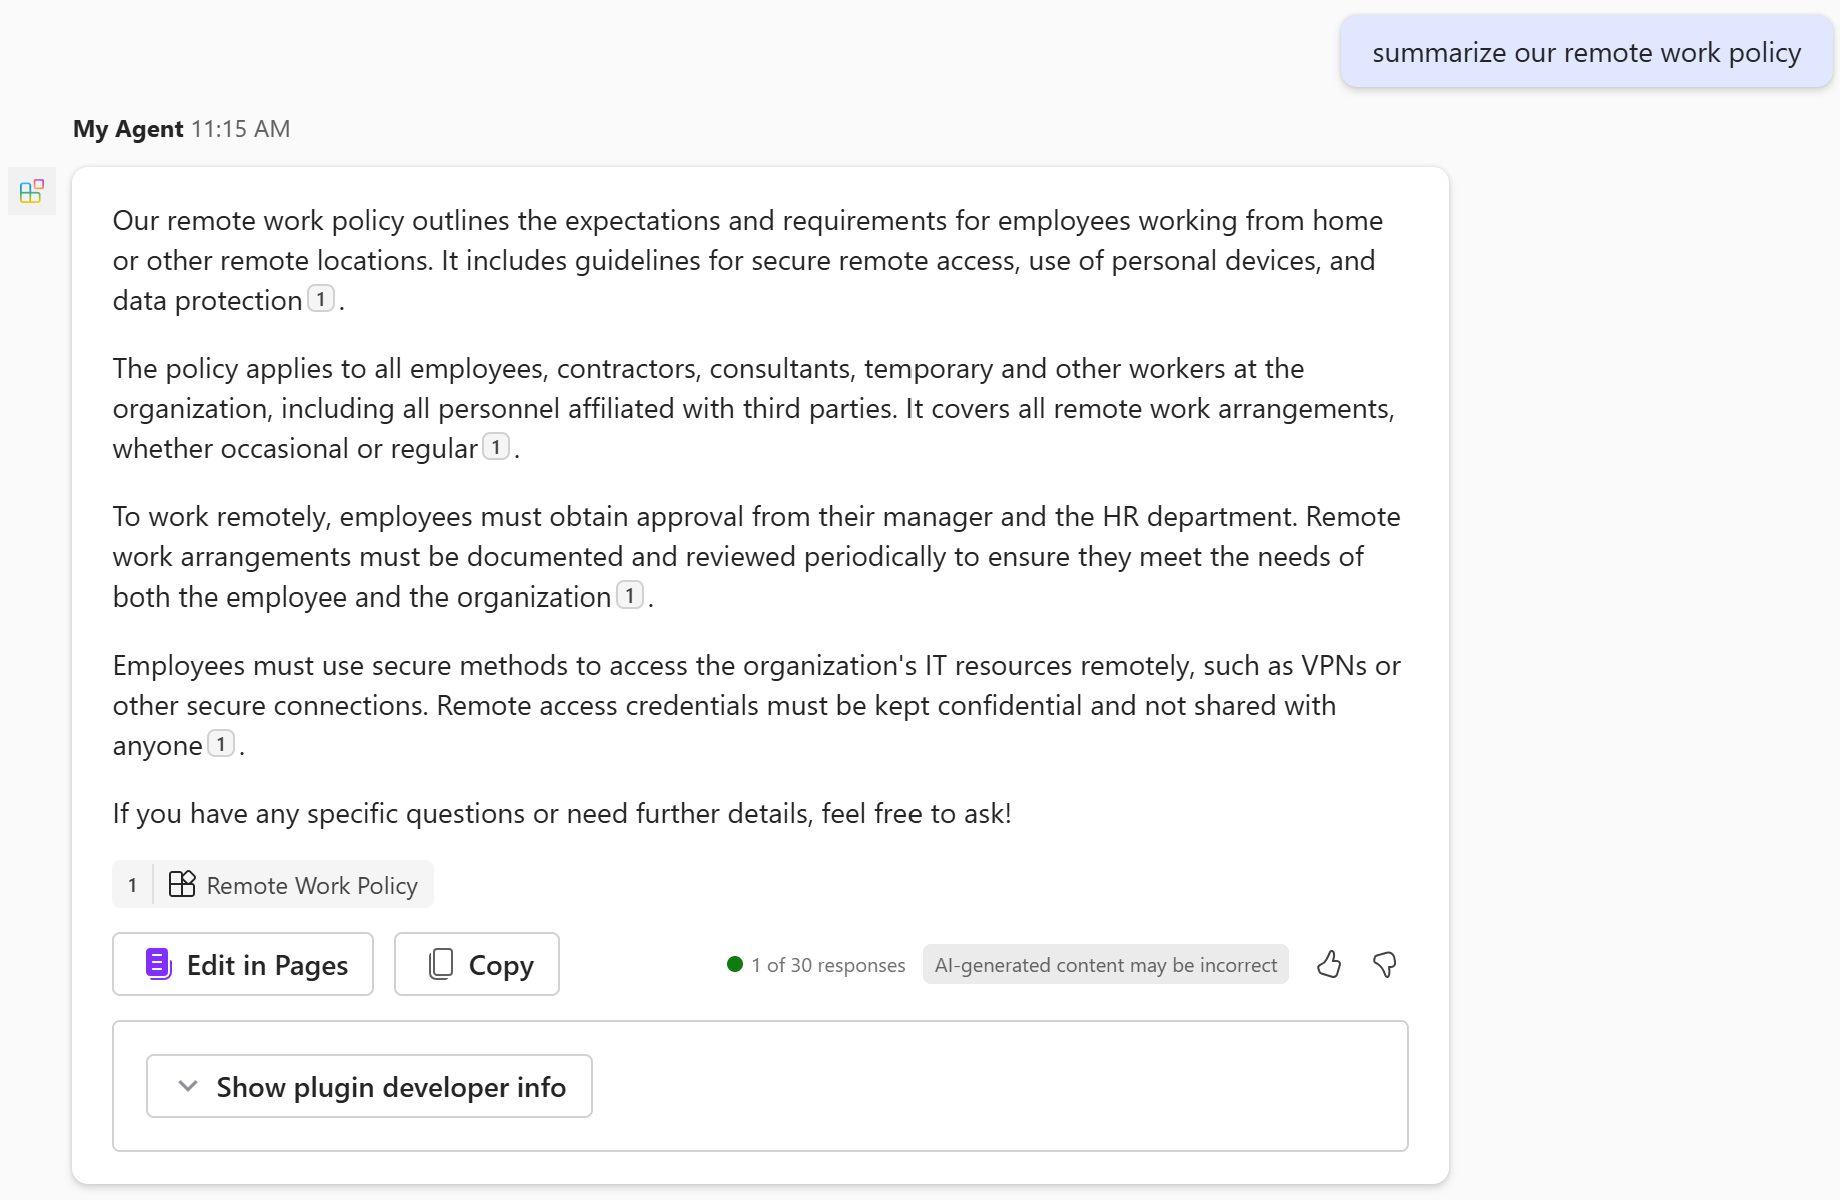
Add Copilot connectors content
You can add items ingested by a Copilot connector to the available knowledge for the agent.
Open the
main.tspfile and add theGraphConnectorscapability in theMyAgentnamespace with the following value, replacingpolicieslocalwith a valid Copilot connector ID in your Microsoft 365 organization. For more information on finding Copilot connector IDs, see Retrieving capabilities IDs for declarative agent manifest.namespace MyAgent { // Omitted for brevity op copilotConnectors is AgentCapabilities.GraphConnectors<Connections = [ { connectionId: "policieslocal", } ]>; // Omitted for brevity }For more information, see Copilot connectors object.
Note
Not specifying the
Connectionsarray causes content from all Copilot connectors in your Microsoft 365 organization that are available to the logged in user to be available to the agent.Select Provision in the Lifecycle pane of the Microsoft 365 Agents Toolkit.
The declarative agent has access to Copilot connectors content to generate its answers after you reload the page.
Completed
You completed the declarative agent guide for Microsoft 365 Copilot. Now that you're familiar with using TypeSpec to build a declarative agent, you can learn more in the following articles.
- Learn how to write effective instructions for your agent.
- Test your agent with Copilot developer mode to verify if and how the copilot orchestrator selects your knowledge sources for use in response to given prompts.
- Get answers to frequently asked questions.
- Learn about an alternative method of building declarative agents with Copilot Studio.