Set up a Microsoft Entra application for authentication
Third party custom applications will require the use of OAuth as authentication type and you will first need to register an application in Microsoft Entra ID to enable this authentication. This application will be used to authenticate and retrieve an authorization token that is required to invoke the REST APIs used by the application. You can read more about authentication scenarios and follow the steps below:
NOTE: For a complete view of how to create and configure an Azure App Registrations, review the Quick start: Register an application with the Microsoft identity platform documentation.
Provision the Assist API Service Principal:
a. In a new browser window, navigate to the following URL:
https://login.microsoftonline.com/common/oauth2/v2.0/authorize?client_id=2b8844d8-6c87-4fce-97a0-fbec9006e140&response_type=code&redirect_url=https://assist.microsoft.com/authenticate&response_mode=query&scope=2b8844d8-6c87-4fce-97a0-fbec9006e140/.default&state=12345- This URL prompts the user to log in to Microsoft Entra ID using the following parameters:
client_id=2b8844d8-6c87-4fce-97a0-fbec9006e140– This is the application ID for the Business Assist API.response_type=coderesponse_mode=queryredirect_url=https://assist.microsoft.com/authenticate– The Business Assist API authenticationscope=2b8844d8-6c87-4fce-97a0-fbec9006e140/.default– The default permission scope for the Business Assist APIstate=12345– A generic required parameter for Microsoft Entra authentication
b. Login using your Microsoft Entra credentials for your tenant.
c. Once the login process has completed, you will see a user token in the browser window. This token can be disregarded for now. In the background, this process will trigger the auto provisioning of the Assist API Service Principal which will be needed to complete step 4 below.
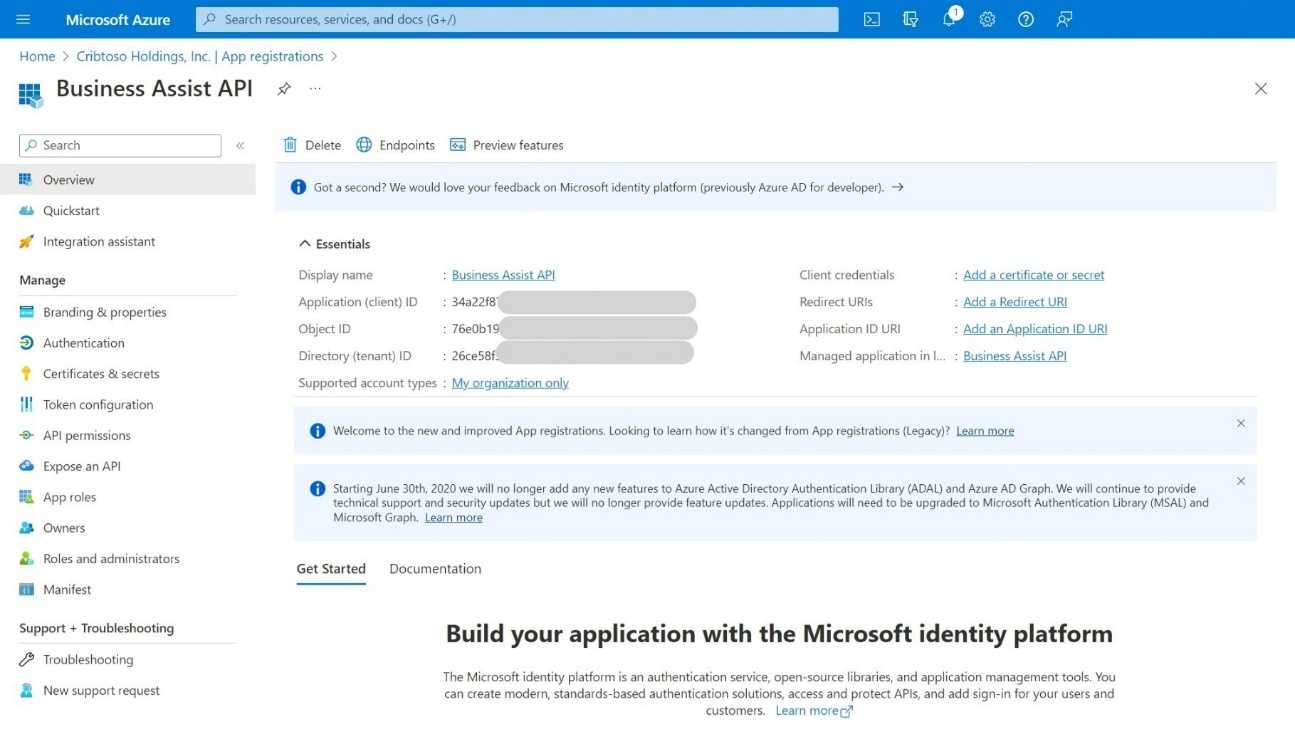
Create a Microsoft Entra App Registration
a. Navigate to
https://portal.azure.comto open the Azure Portal for your tenant.b. Select Microsoft Entra service.
c. In the Microsoft Entra blade, select App Registrations from the left menu.
d. Select the + New registration button to open the new App Registration dialog.
e. Enter the following in the new App Registration dialog:
i. Name: Business Assist API
ii. Supported account types: This Organization Only
iii. Redirect URL:
https://assist.microsoft.com/authenticatef. Click Register at the bottom of the dialog to create the App Registration.
g. From the App Registration Overview page, note down the displayed: Application (Client) ID and the Directory (tenant) IDs as these will be required later.
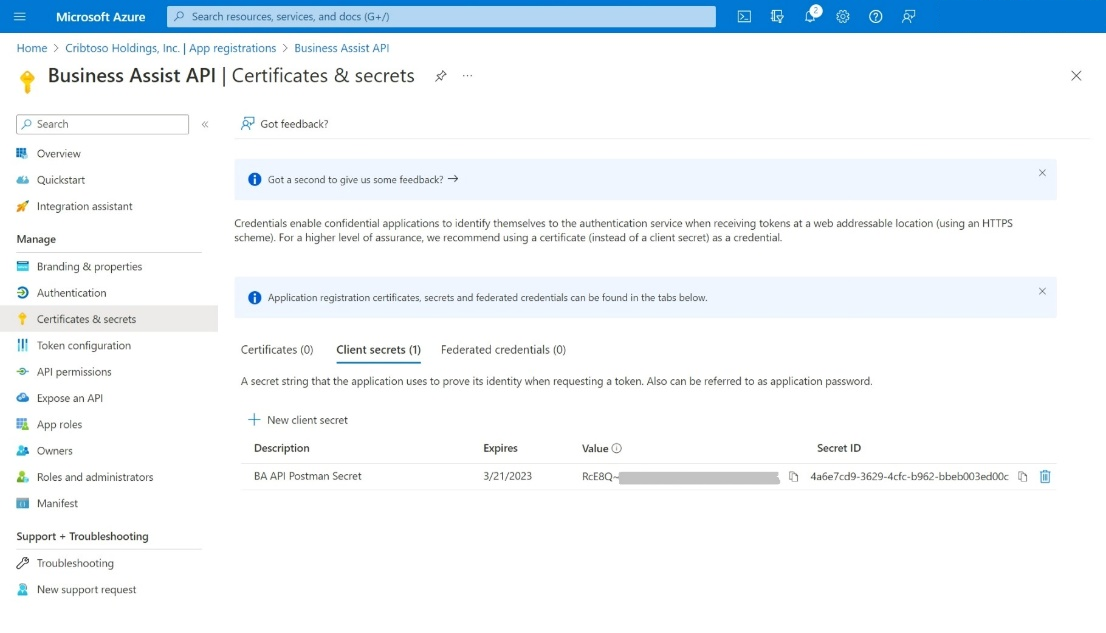
Add a Client Secret to the App Registration
a. From the left menu, select Certificates & secrets.
b. Select + New client secret.
i. Enter BA API Postman Secret in the Description field.
ii. Leave the default Expires time span set at the recommended 6 months.
iii. Select Add at the bottom of the dialog to add the secret.
c. From the Certificates & secrets page, note the Value data shown for the new client secret. This value will only be displayed once.
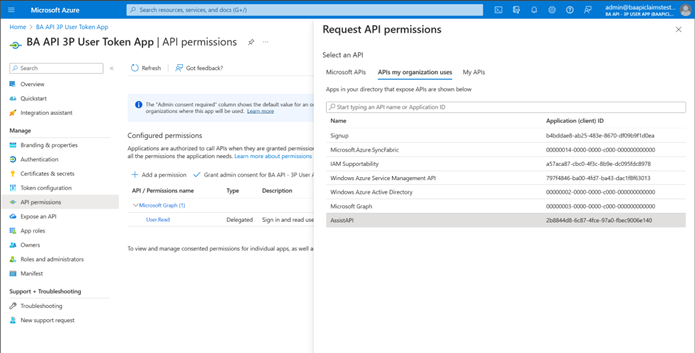
Add the Required API Permissions
a. From the left menu, select the API Permissions item.
b. Select + Add a permission.
i. In the Request API Permissions flyout, select the APIs my organization uses tab.
ii. In the flyout dialog, select APIs My Organization Uses
iii. Select AssistAPI from the list of applications.
iv. Select Application Permissions.
v. Select
Assist.All.vi. Select Delegated Permissions
vii. Select
Assist.Allviii. Select Add Permissions.
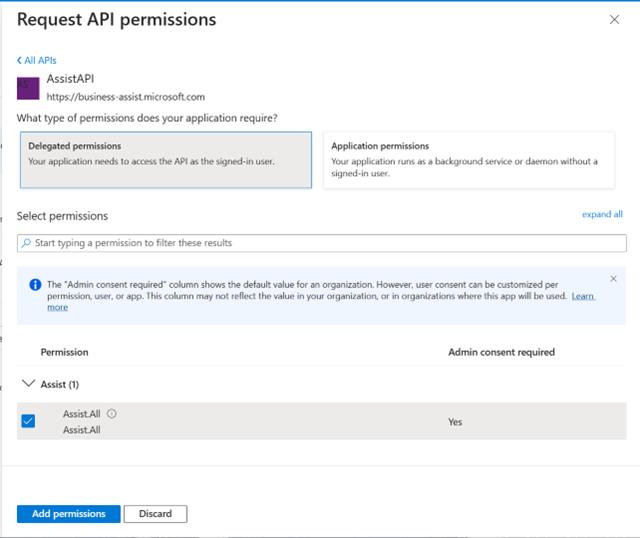
From the API Permissions page, grant admin consent for the
Assist.AllAPI permissions.
Note: The admin consent procedure must be completed by a Global Administrator or Privileged Role Administrator within the tenant.
At this point, you now have a valid Microsoft Entra app registration that can be used to authenticate against Microsoft Entra ID. The next step is to validate and test the connection to the Business Assist API using Postman.
Next steps
Authenticate to AD and retrieve an access token: