Validate applications from your own Intune tenant
Important
Test Base for Microsoft 365 will transition to end-of-life (EOL) on May 31, 2024. We're committed to working closely with each customer to provide support and guidance to make the transition as smooth as possible. If you have any questions, concerns, or need assistance, submit a support request.
Many enterprises' IT departments have mentioned compatibility concerns after applications re-formatting during their migration to Intune. Others might be suffering to validate policy deployment before they reach the end users.
Test Base now provides an efficient way that allows you to validate your Intune applications in batch, or to set up even more complex automatic testing plans. This guidance shows you how to enroll the testing VM under your Intune tenant and set up your test plan with our upgraded testing service.
In this article,
- Prerequisites
- Importing Intune Credential in Test Base
- Validate Intune app deployment against Windows monthly updates
- Validate Intune app deployment before / after in-place upgrade to next version OS
- Check Intune enrollment test results
Prerequisites
- Creating a Test Base Account | Microsoft Learn
- Grant Test Base managed identities to your Key Vault account
- Prepare your Intune tenant:
- Disable MFA for new created account (Conditional access policy)
- Enable Windows automatic enrollment: Enable MDM automatic enrollment for Windows | Microsoft Learn
- Create dynamic group to include the new enrolled VM (Query: device.displayName -startsWith "exepipe")
- Assign test apps and policies to newly created dynamic groups.
Importing Intune Credentials in Test Base
Security might be one of the top concerns when it comes to enrolling testing VM into your Intune tenant. Test Base provides a secure way for Intune account connection via managed identity.
Attention: Before importing Intune credentials, please make sure you or your organization administrators have already granted Test Base managed identities to your Key Vault account where you store the Intune credentials (guidance).
In this section, we show you how to
Store your Intune credentials in Azure key vault
Store your user account in Azure key vault Secret
a. Select Secrets , select Generate/Import
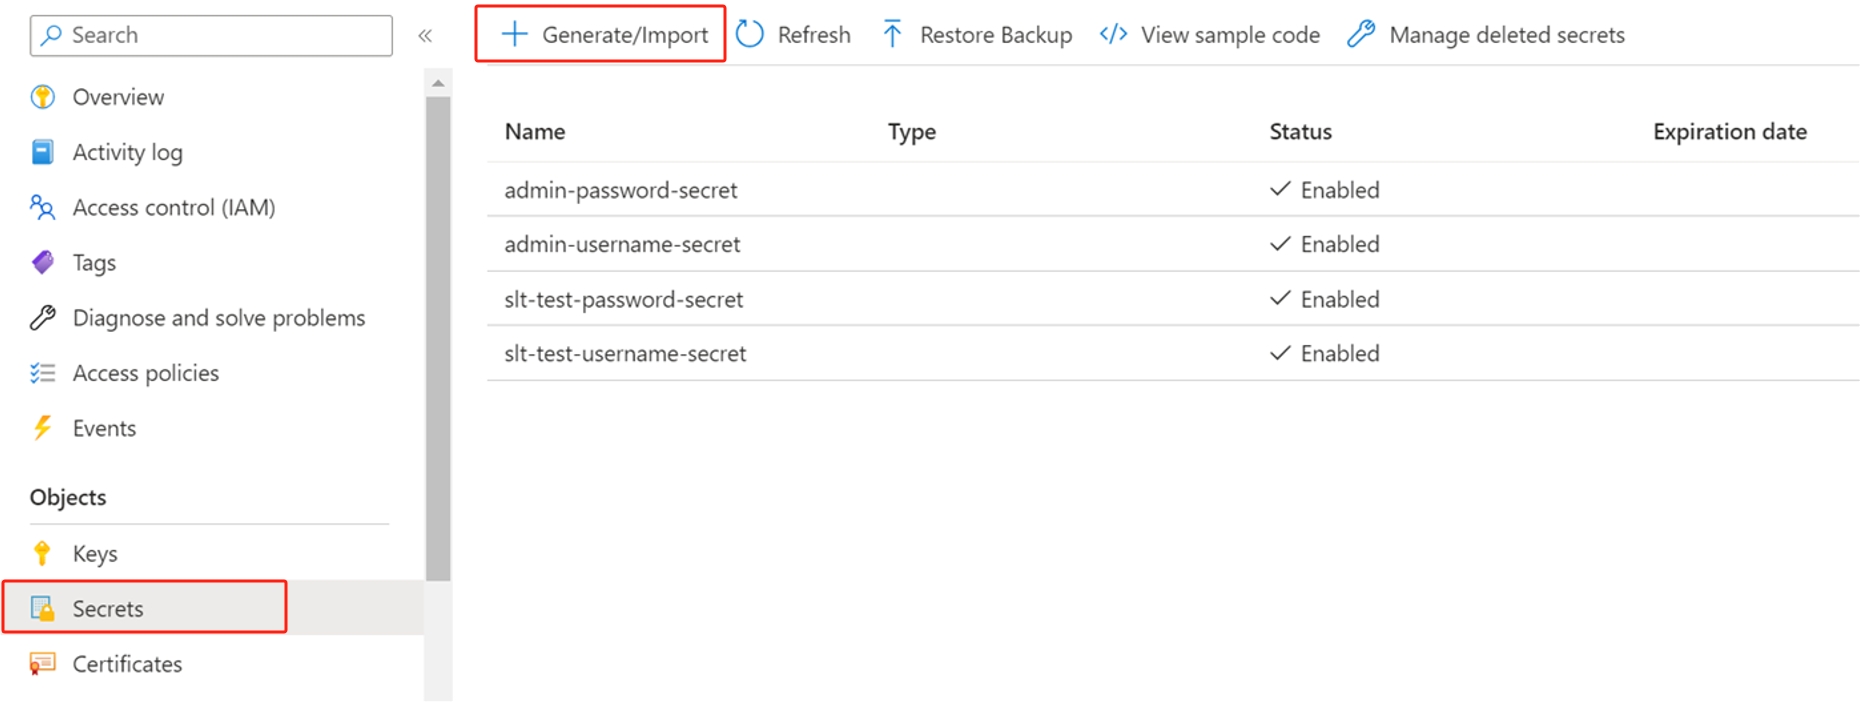
b. Put your user account in the input box Secret value. Name the secret.
c. Select Create
Store your password in Key vault Secret
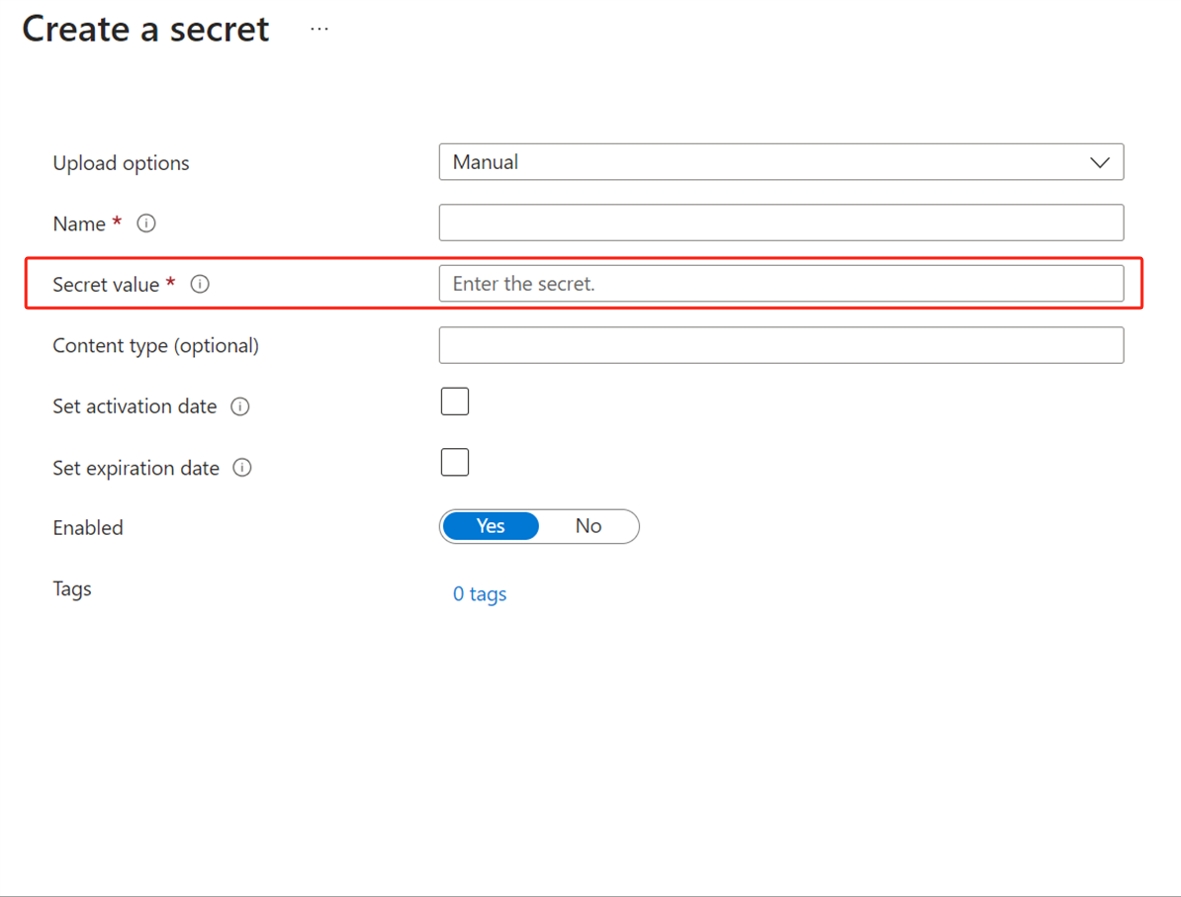
- Select Secrets , select Generate/Import
- Put your password in the input box Secret value. Name the secret.
- Select Create


Import your credential secrets in Test Base
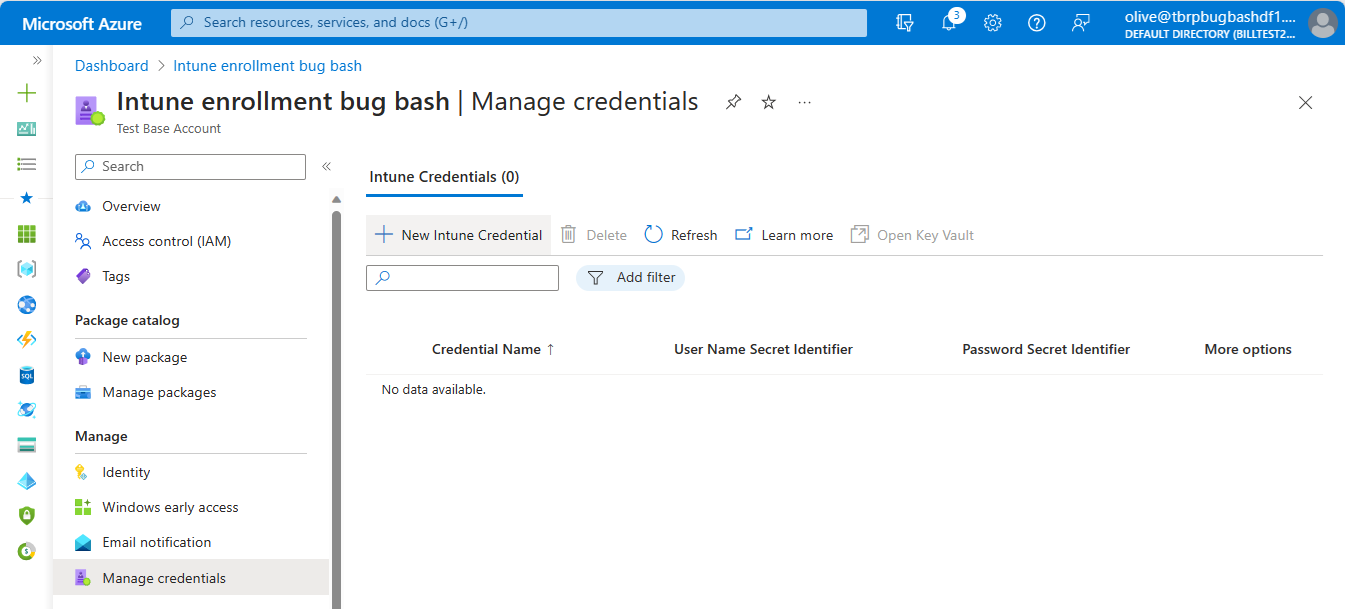
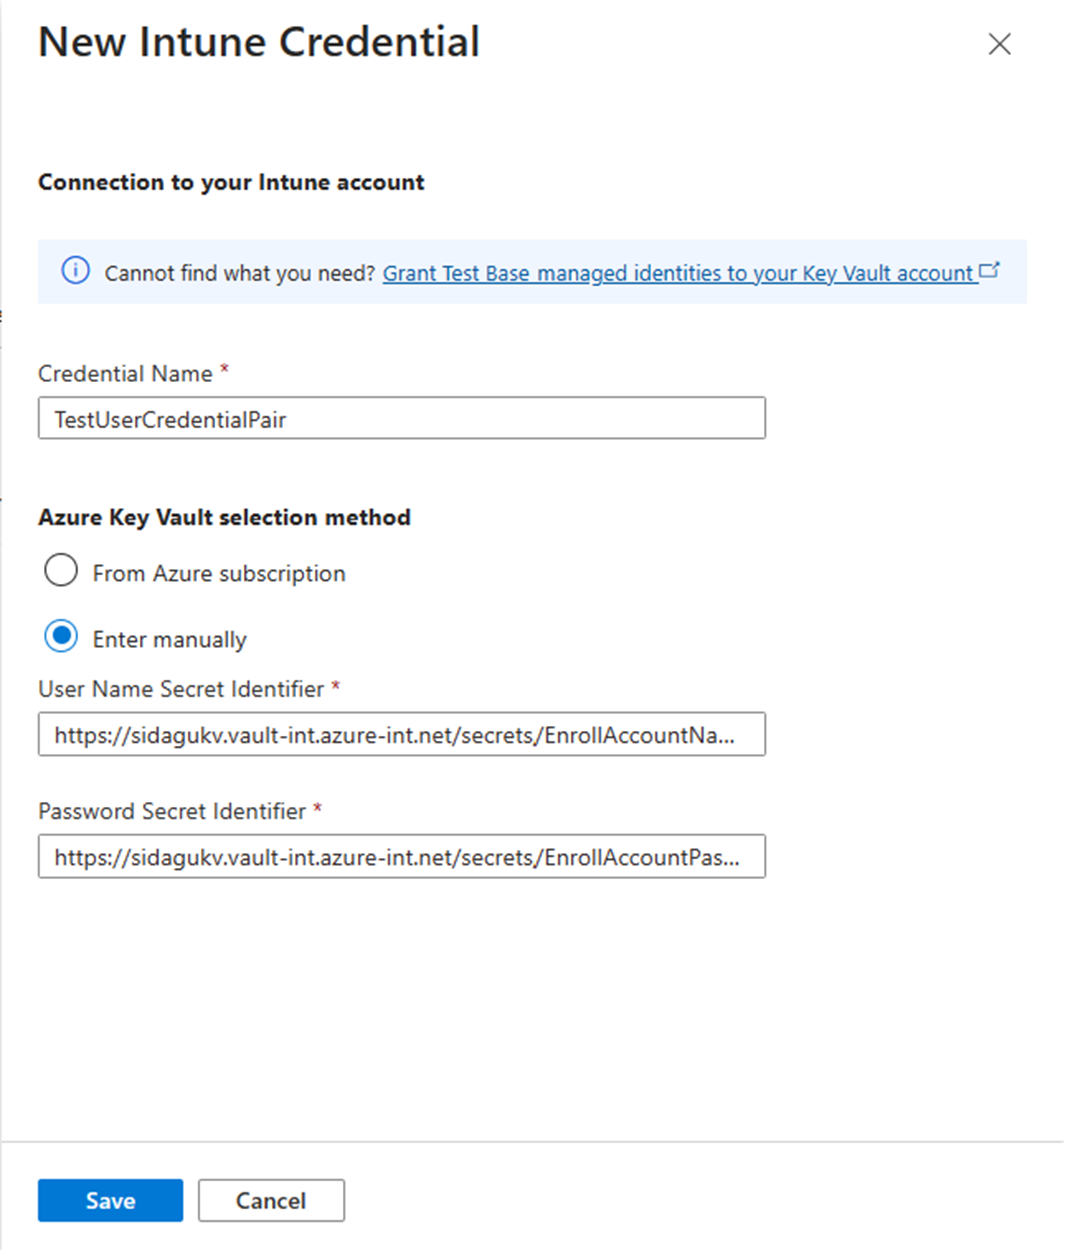
Select Manage | Manage credentials. Click on + New Intune Credentials
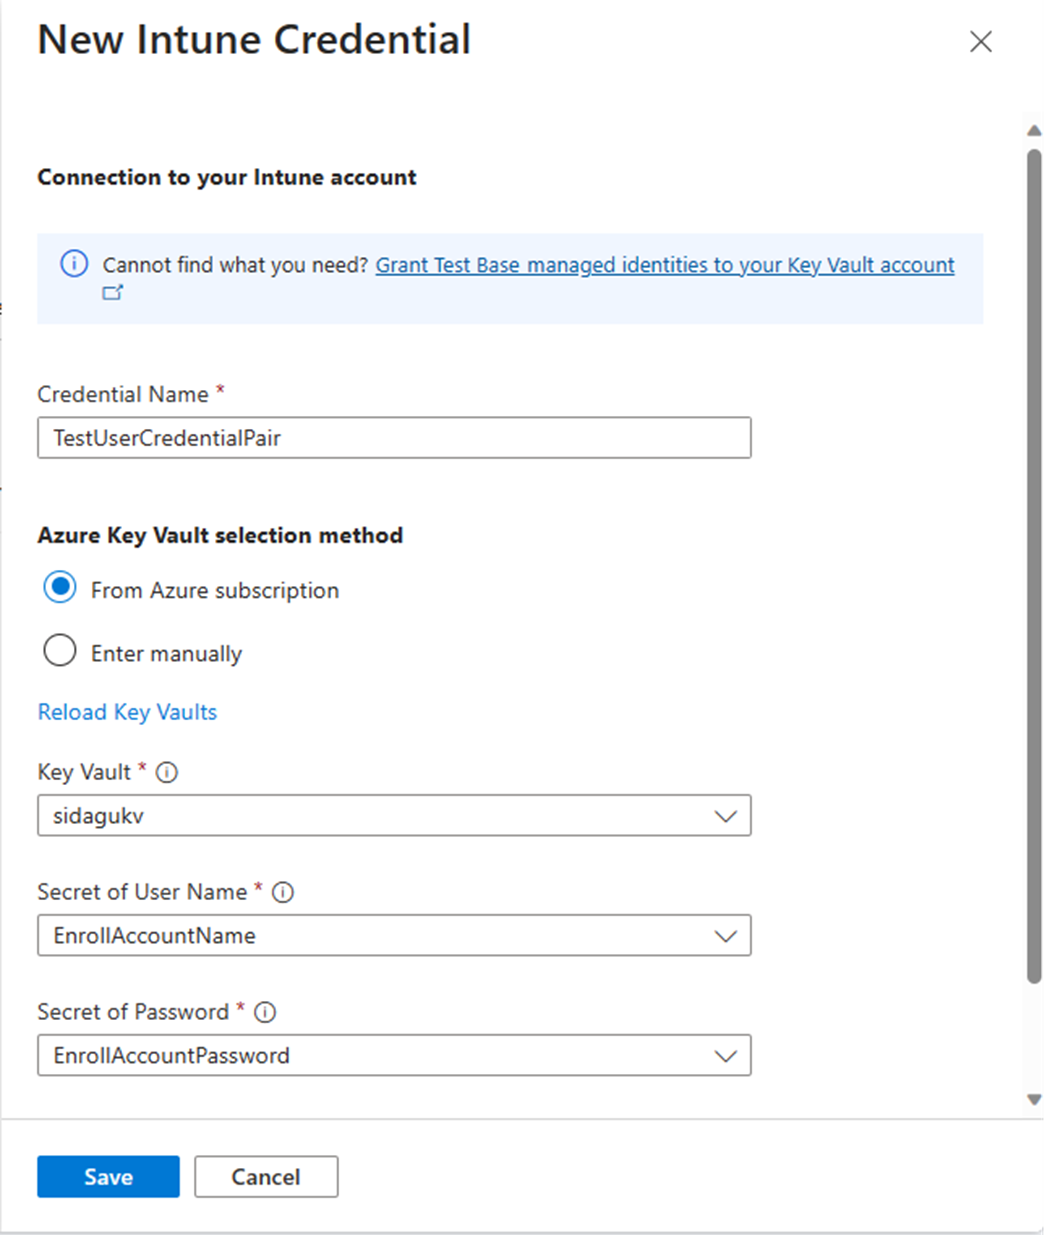
Name the new credential so that you can find it easily later.
Select Key Vault account and secrets where you stored Intune credentials.
a. If you're the admin of both the Test Base account and the Key Vault account, you may easily select to input your key vault information From Azure subscription.
Note
If you use the prepared testing account, please select the same value as shown on above image.
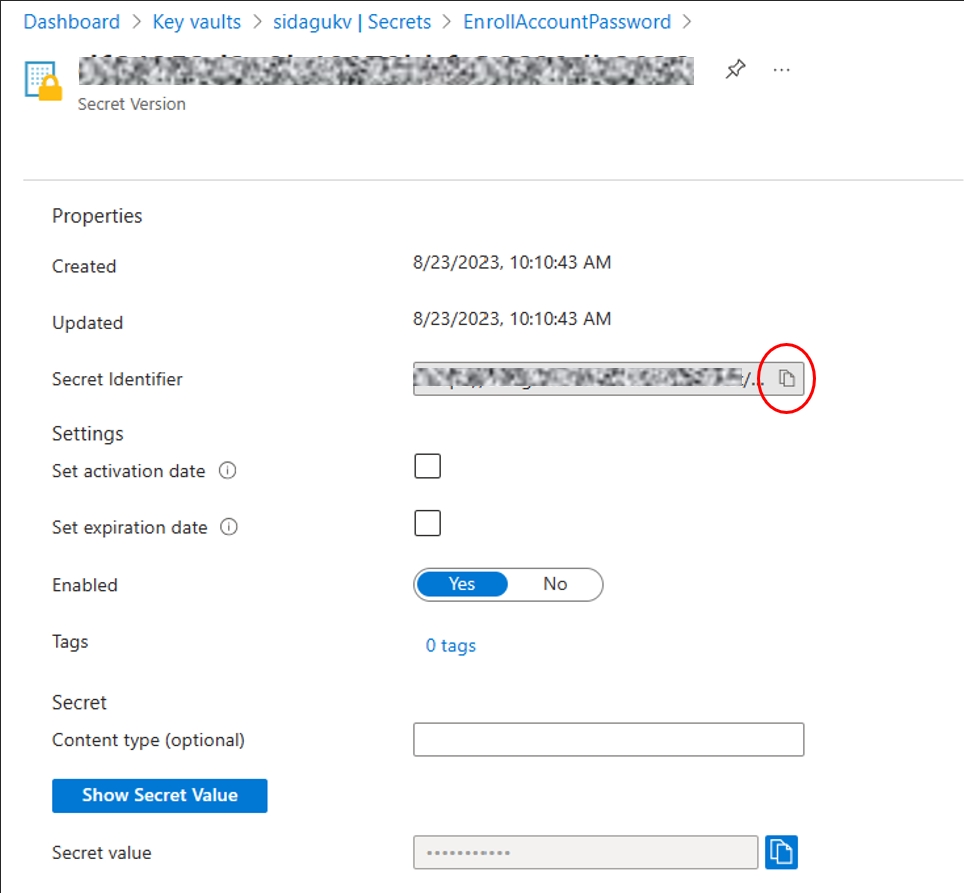
b. If you don't have access to your tenant's Key Vault account, please select Enter manually. Paste the username secret ID and password secret ID into input box (You would need your colleague's help to get the secret IDs).
Copy secret IDs from your Intune account: Open your key vault account > Secrets > Select the secret > Select the version > Copy secret identifier


Validate Intune app deployment against Windows monthly updates
In this section, you should follow the steps below to set up your tests:
- Step 0: Start your package onboarding
- Step 1: Define content
- Step 2: Configure test
- Step 3: Edit package
- Step 4: Set test matrix
- Step 5: Review + Publish
Step 0: Start your package onboarding
- Log in into your Test Base account.
- Click on menu New package > Enroll from Intune.


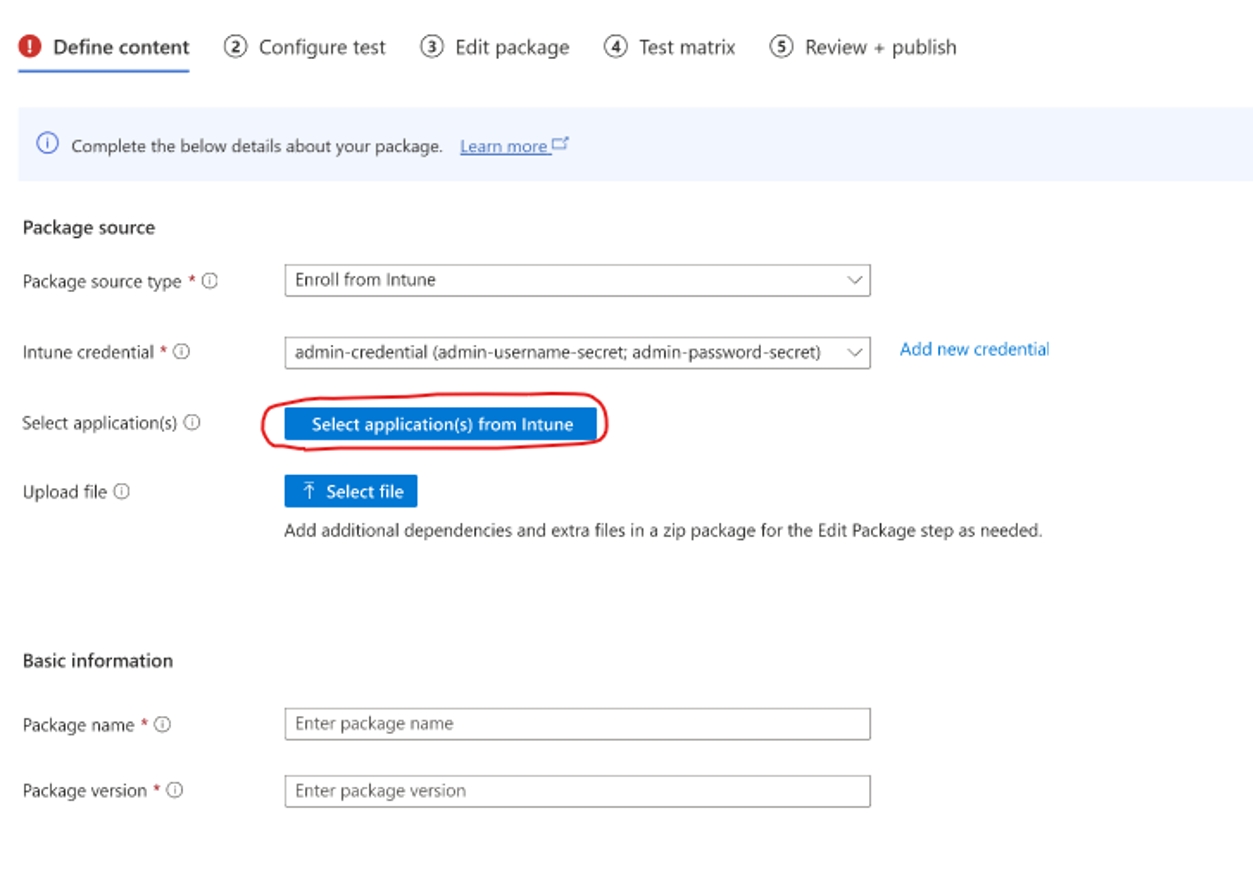
Step 1: Define content
Create a new package with Package source type as Enroll from Intune.
Select credential pair. Or, click on Add new credential. Reference: Import your credential secrets in Test Base

(Optional) Select application(s) to test against (Apps from your Intune account).
a. Click on Select application(s) from Intune.
b. Select application(s) to test against (Multi-selection available). Then, click on Next: App Setting to proceed.
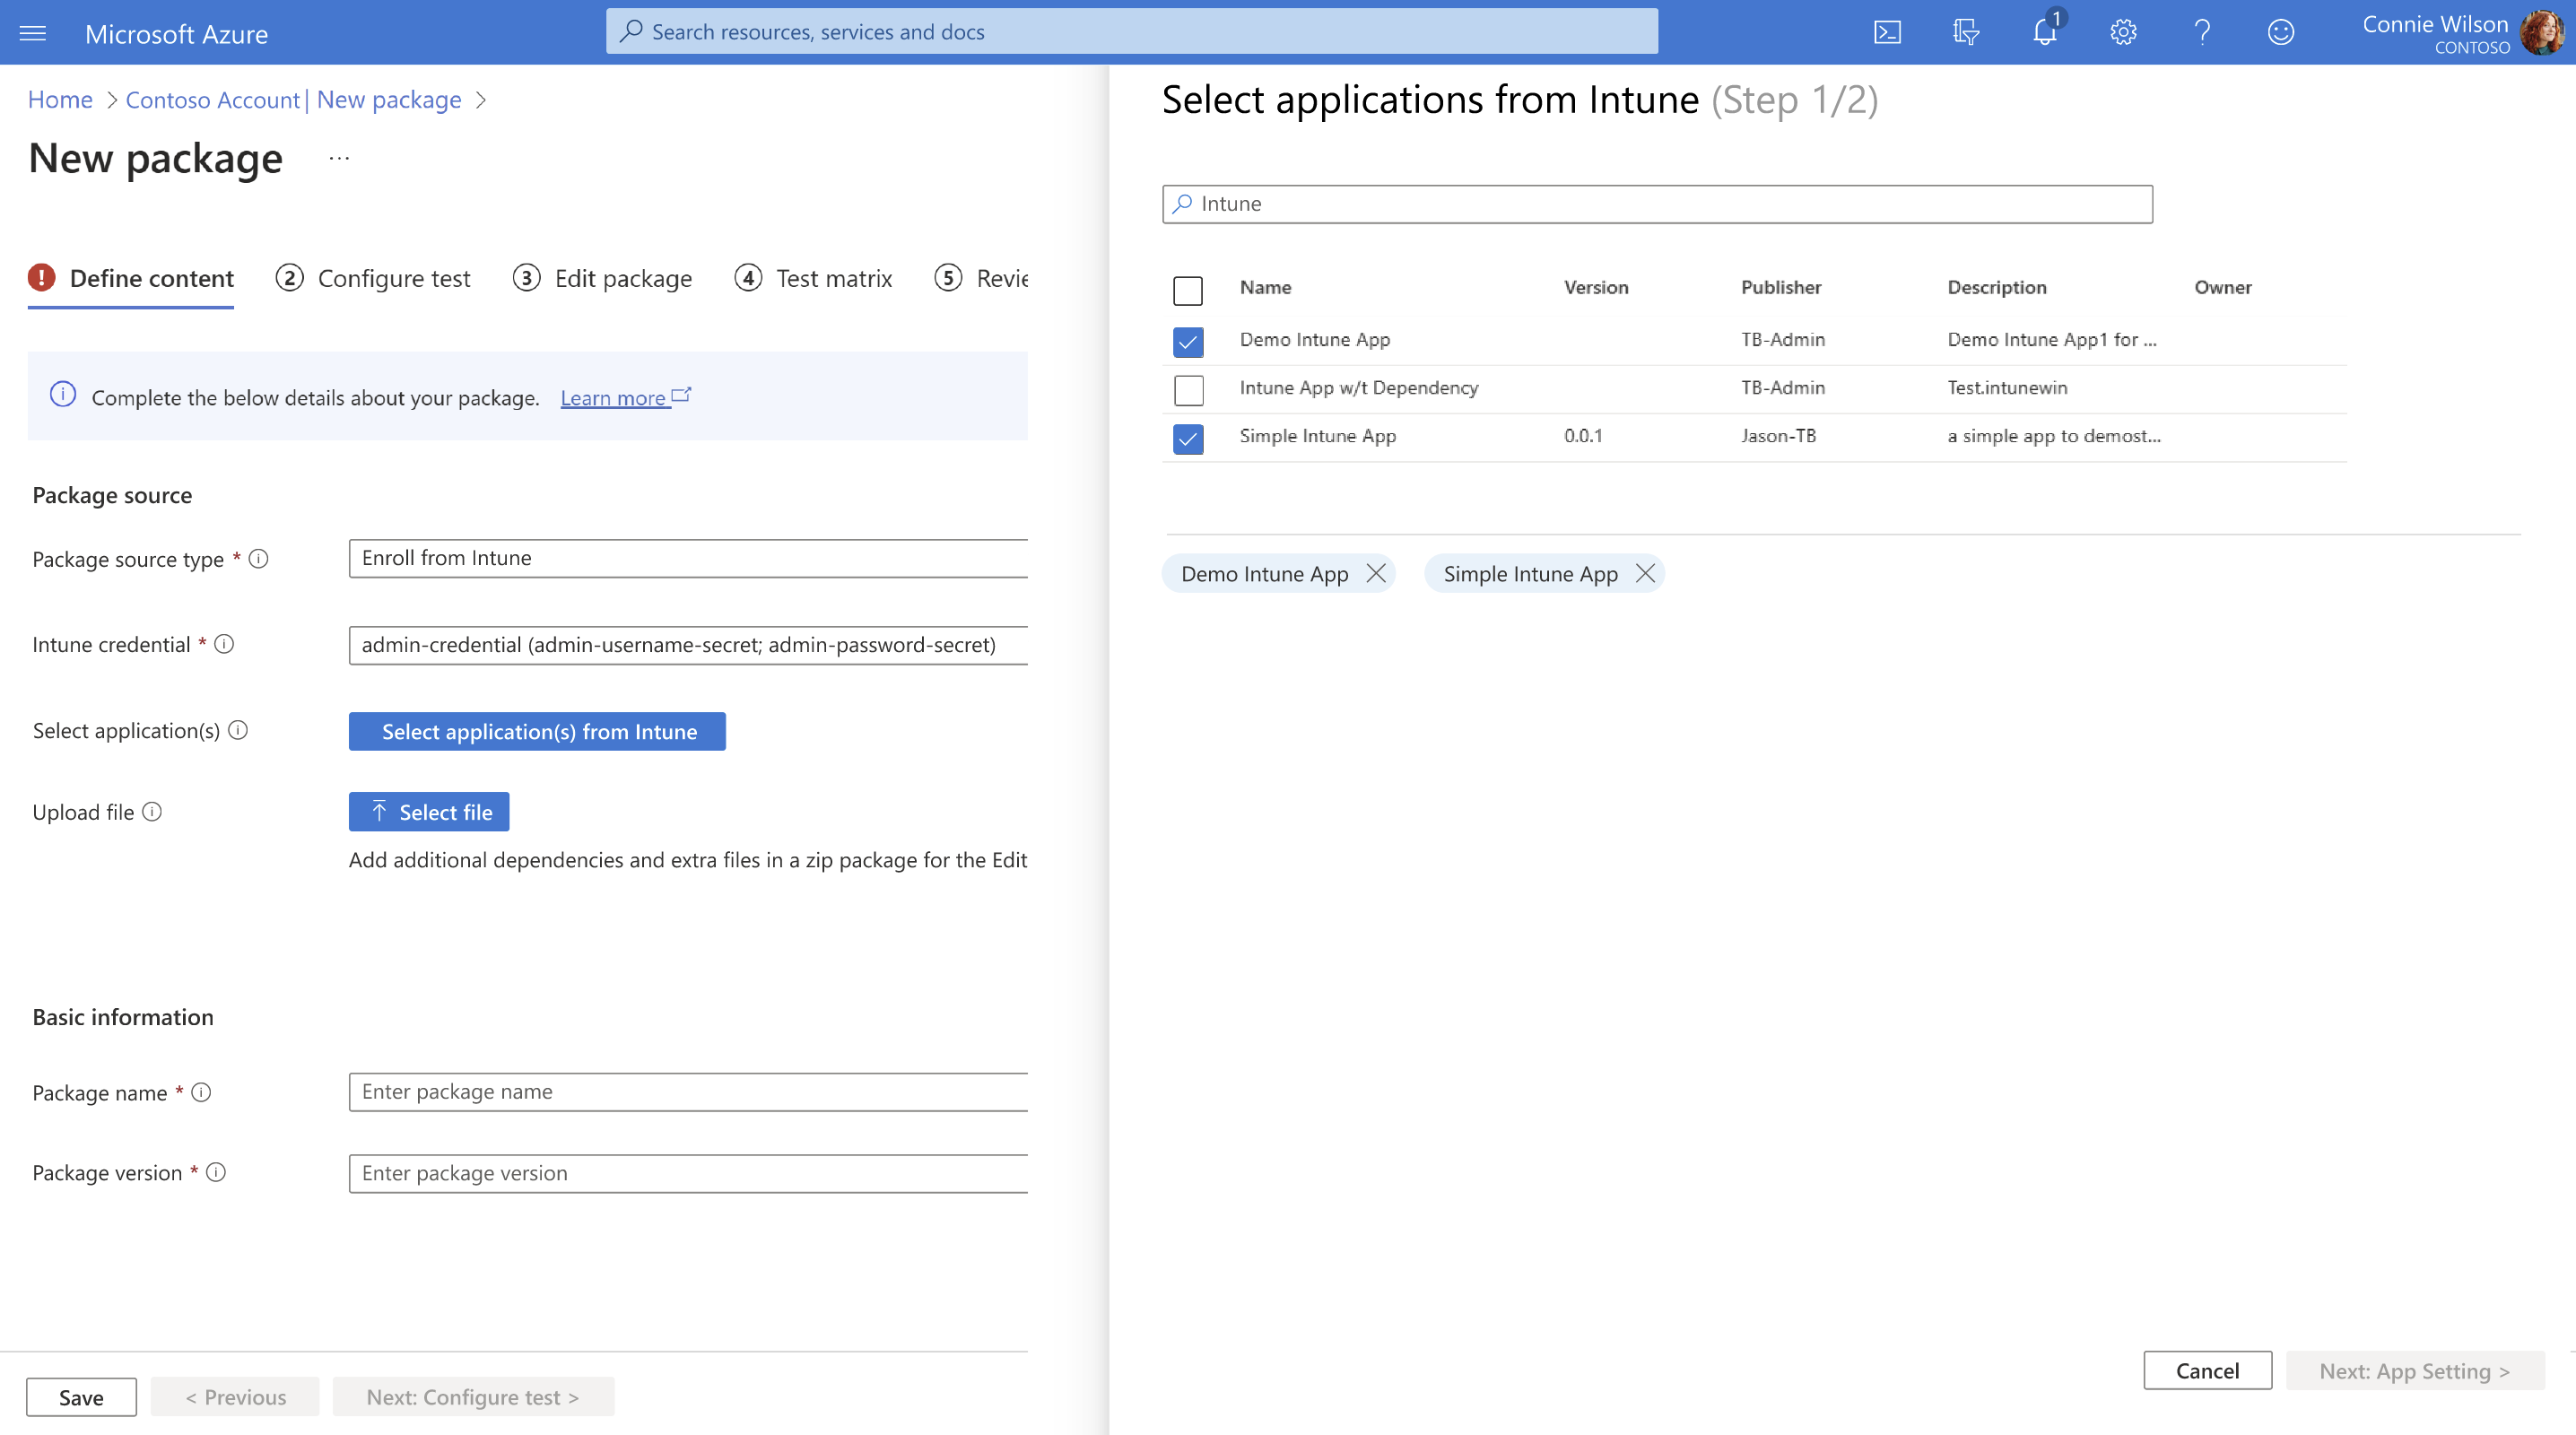
c. For each application selected, it's required to let the system know where to find the executable file. This is to automatically generate test scripts for you so that you can complete following steps easier.

d. Click on Save Selection.
(Optional) If you have any testing scripts, dependency libraries, or other test app packages, you can click on Select file and upload them.
Input Package name and Package version so that you can track this group of tests easier in the result reports.


Step 2: Configure test
Select Functional as your Test type.
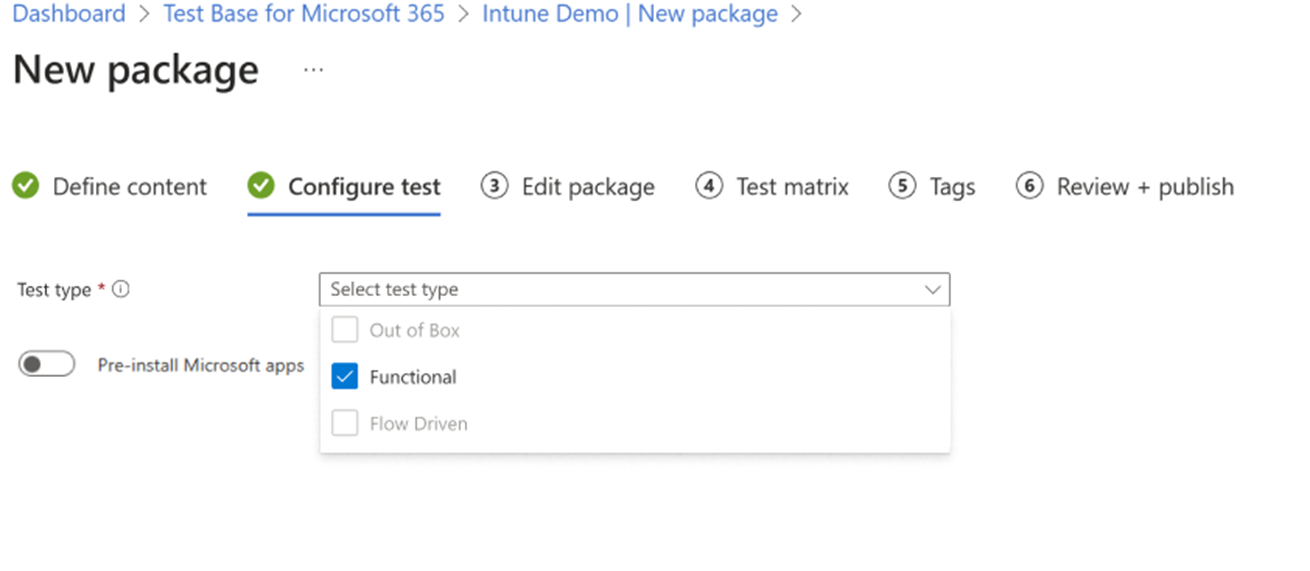
(Optional) Turn on the toggle Pre-install Microsoft apps if you want to set interoperability tests with other Microsoft first party application updates.

Step 3: Edit package
(Optional) System automatically generated launch / close scripts files. You may click the file and open Code editor to check if need to reorder the scripts.
Click on the Edit button to set up detailed test flow.
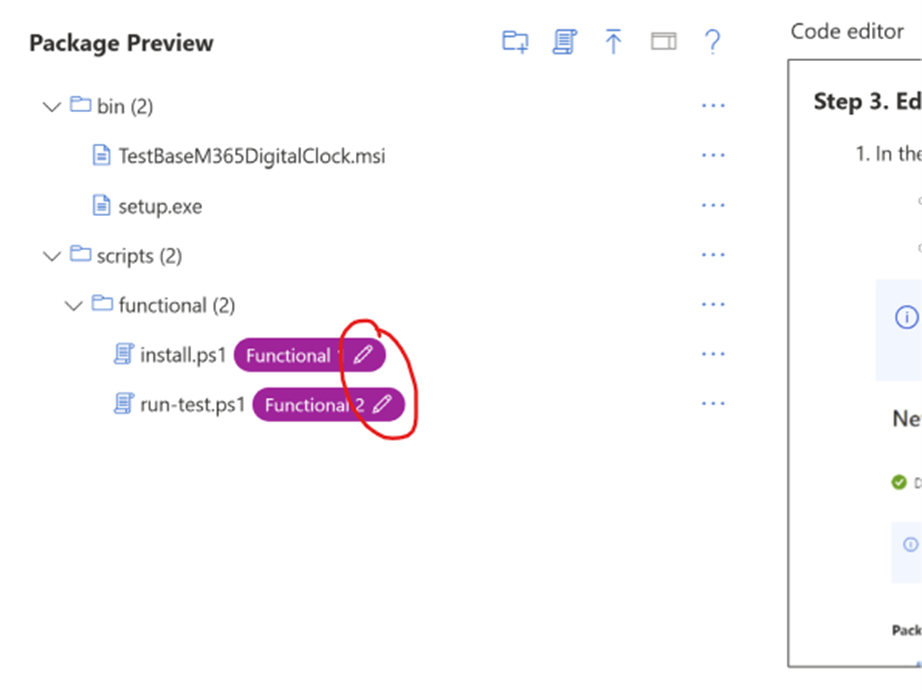
Define the script execution sequence.
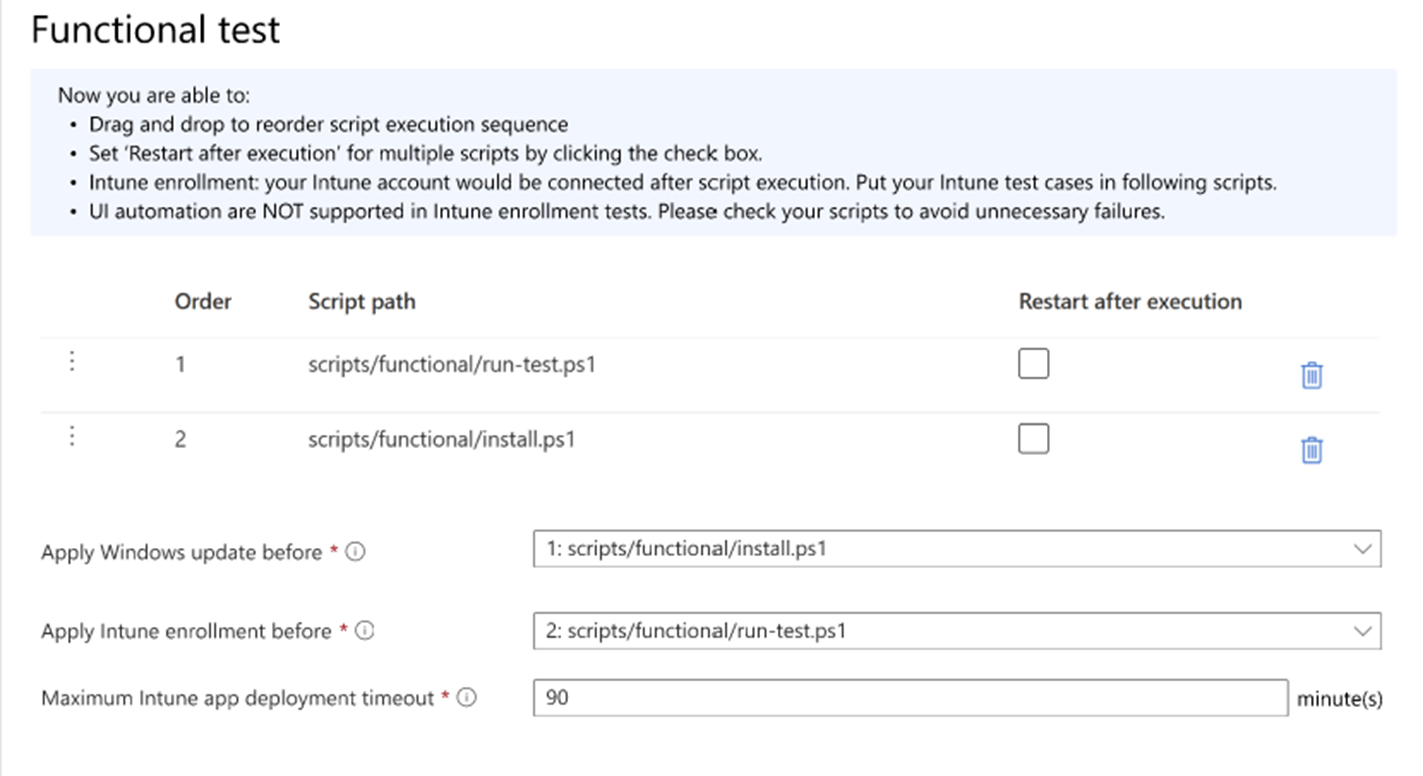
Click on Apply to confirm setting


Step 4: Set test matrix
- Select Security update as the OS update type
- Select the OS(es) you'd like to set up scheduled tests for monthly updates.
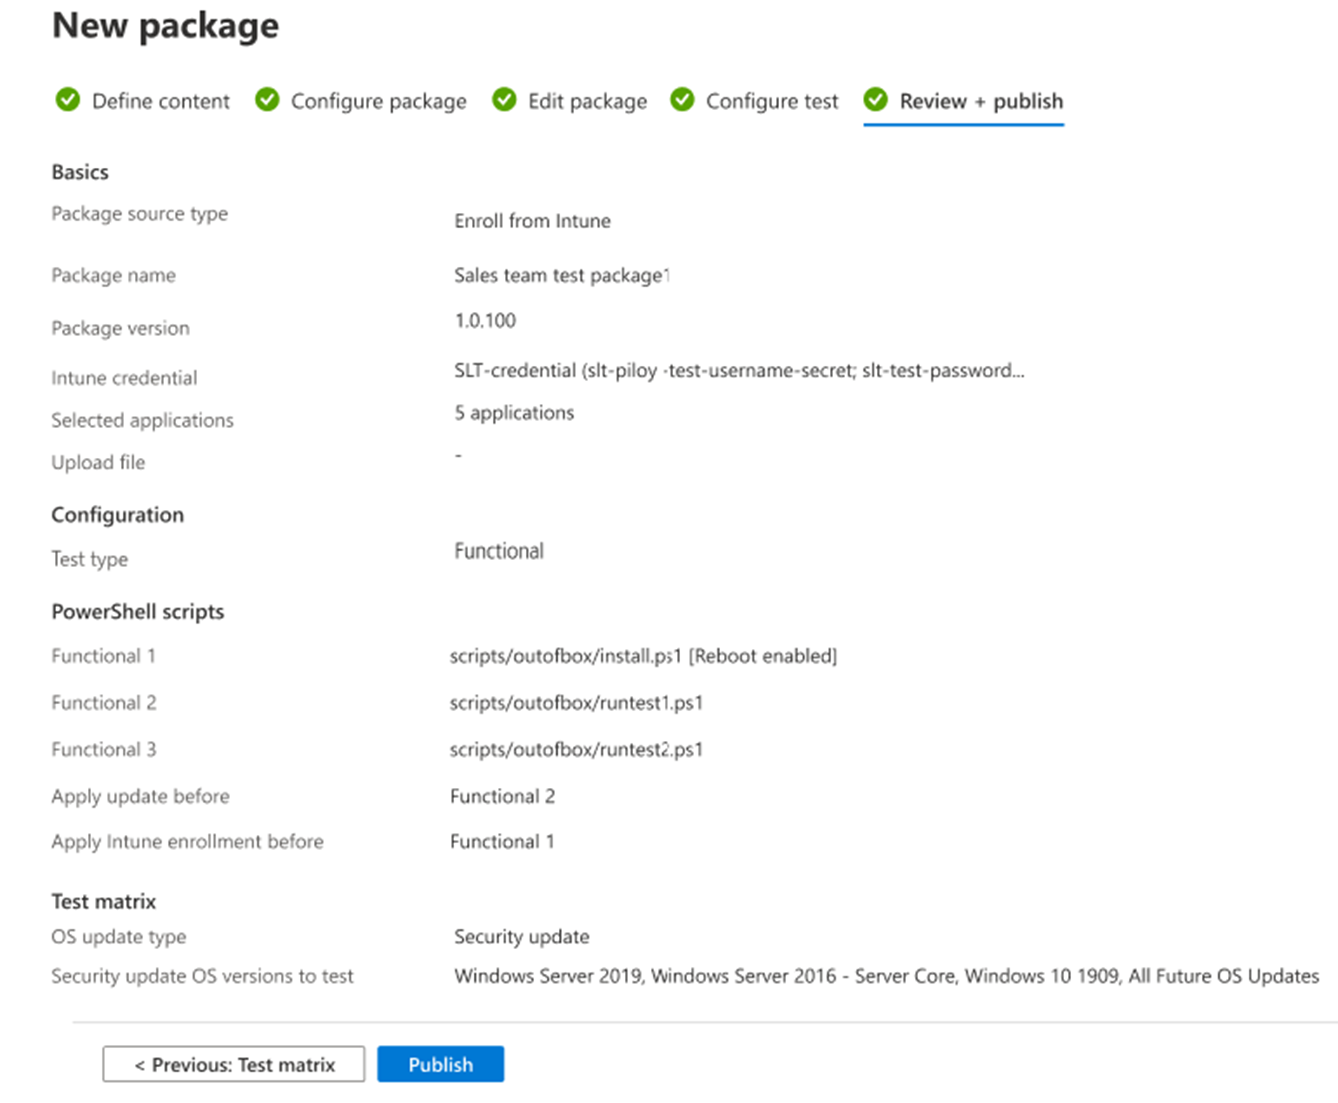
Step 5: Review + Publish
Review the configuration.
Click to Publish the package.
The first test is triggered immediately with the latest Windows update that you selected. It may take up-to 24 hours to complete the initial validation test. You can learn quickly if there is any compatibility issue or package setting issue.
After that, your test will be automatically triggered when there is a new update depending on the update ring you selected.
You can track published package status or modify existing package via Package catalog | Manage packages.

Validate Intune app deployment before / after in-place upgrade to next version OS
In this section, you should follow the steps below to set up your tests:
- Step 0: Start your package onboarding
- Step 1: Define content
- Step 2: Configure test
- Step 3: Edit package
- Step 4: Set test matrix
- Step 5: Review + Publish
Step 0: Start your package onboarding
- Log in into your Test Base account.
- Click on menu New package > Enroll from Intune.
Step 1: Define content
Create a new package with Package source type as Enroll from Intune.
Select credential pair. Or, click on Add new credential.
Reference: Import your credential secrets in Test Base
(Optional) Select application(s) to test against (Apps from your Intune account).
a. Click on Select application(s) from Intune.
b. Select application(s) to test against (Multi-selection available). Then, click on Next: App Setting to proceed.
c. For each application selected, it's required to let the system know where to find the executable file. This is to automatically generate test scripts for you so that you can complete following steps easier.
d. Click on Save Selection.
(Optional) If you have any testing scripts or dependency libraries, you can click on Select file and upload them.
Input Package name and Package version so that you can track this group of tests easier in the result reports.
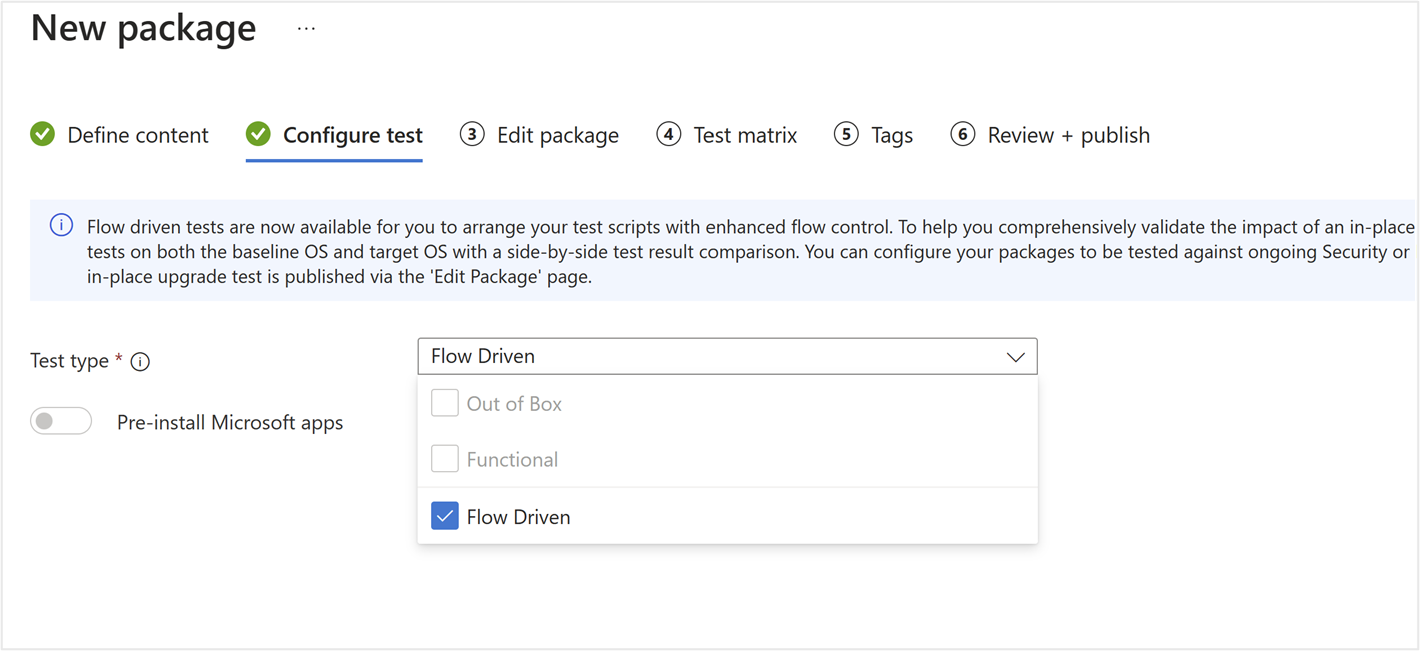
Step 2: Configure test
- Select Flow Driven as your Test type.

Step 3: Edit package
(Optional) System automatically generated launch / close scripts files. You may click the file and open Code editor to check if need to reorder the scripts.
Click on the Edit button to set up detailed test flow.

Define the script execution sequence.
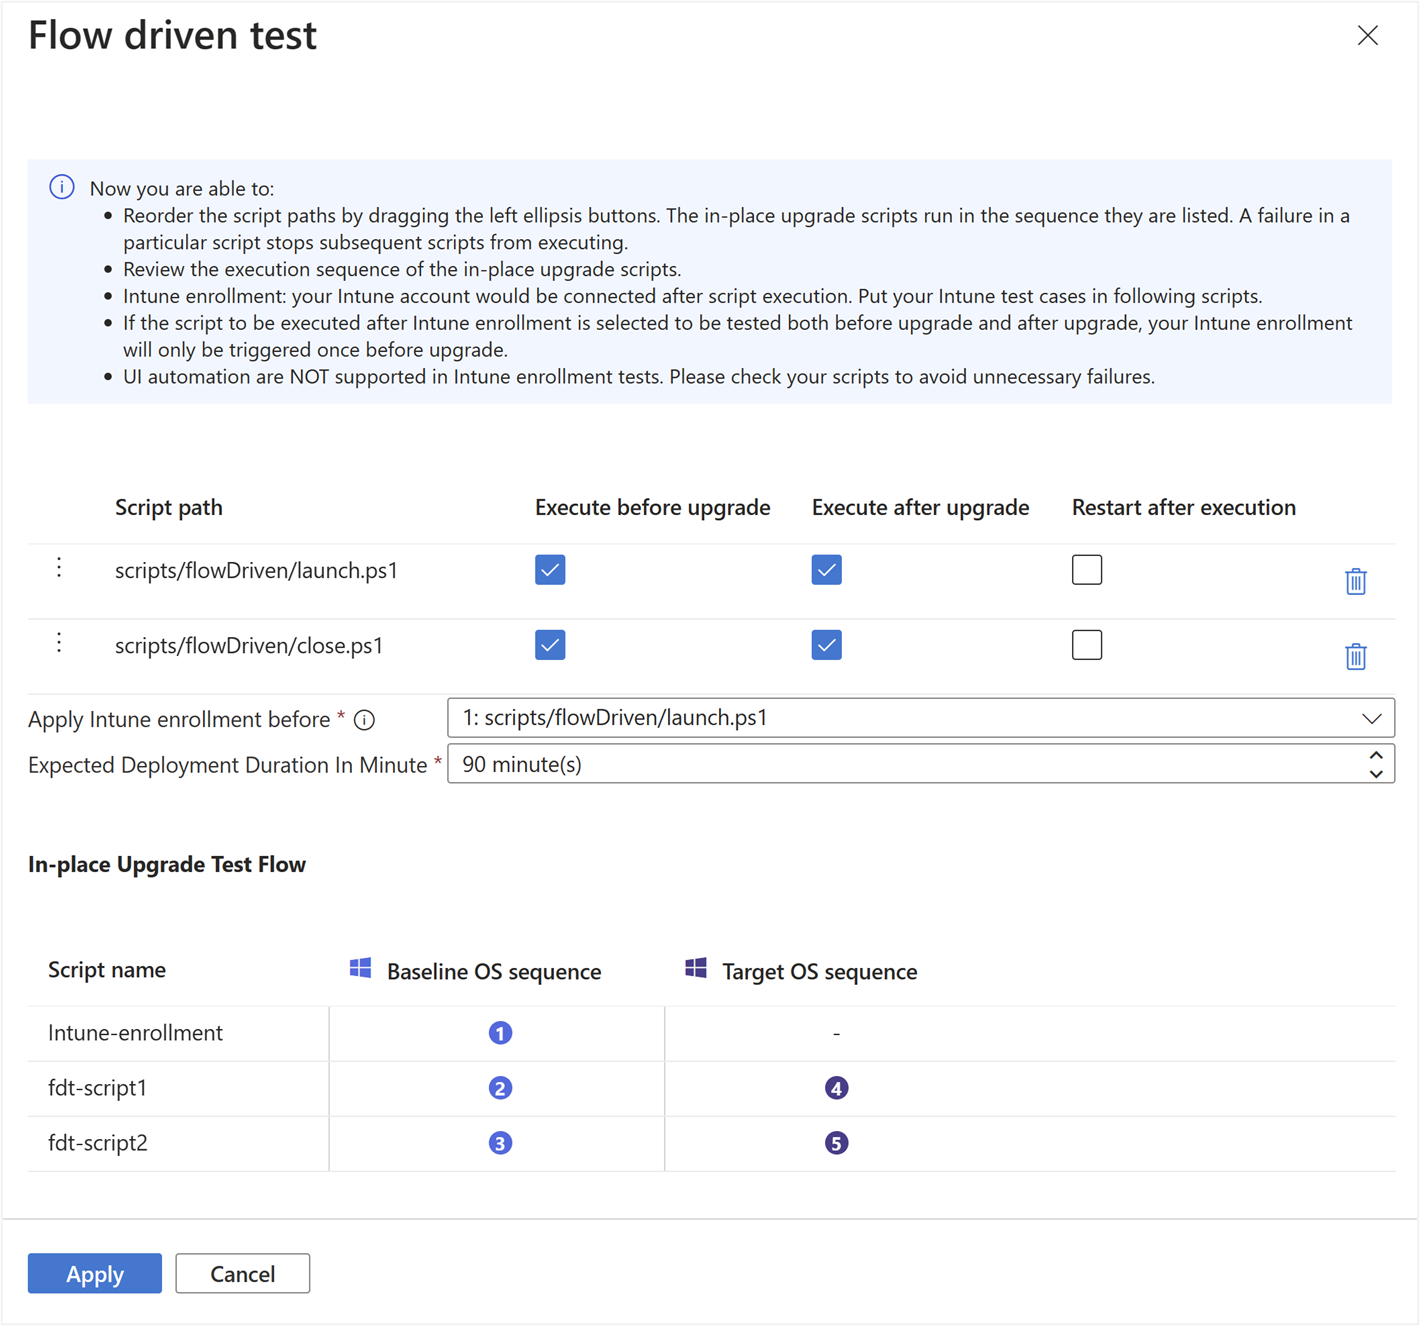
Click on Apply to confirm setting


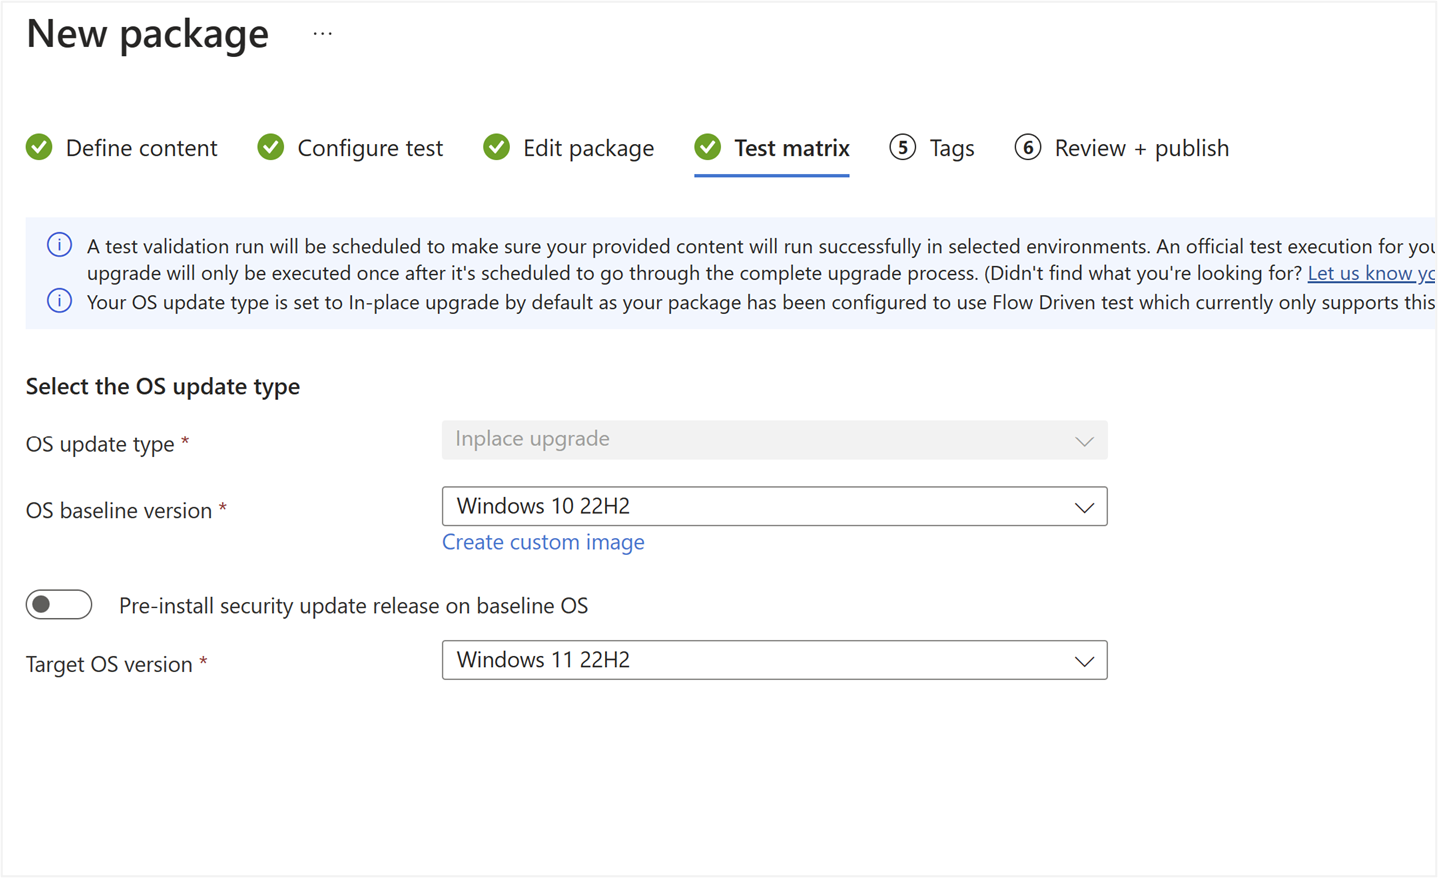
Step 4: Set test matrix
- Select Inplace upgrade as the OS update type.
- Select the baseline OS version and the target OS version.

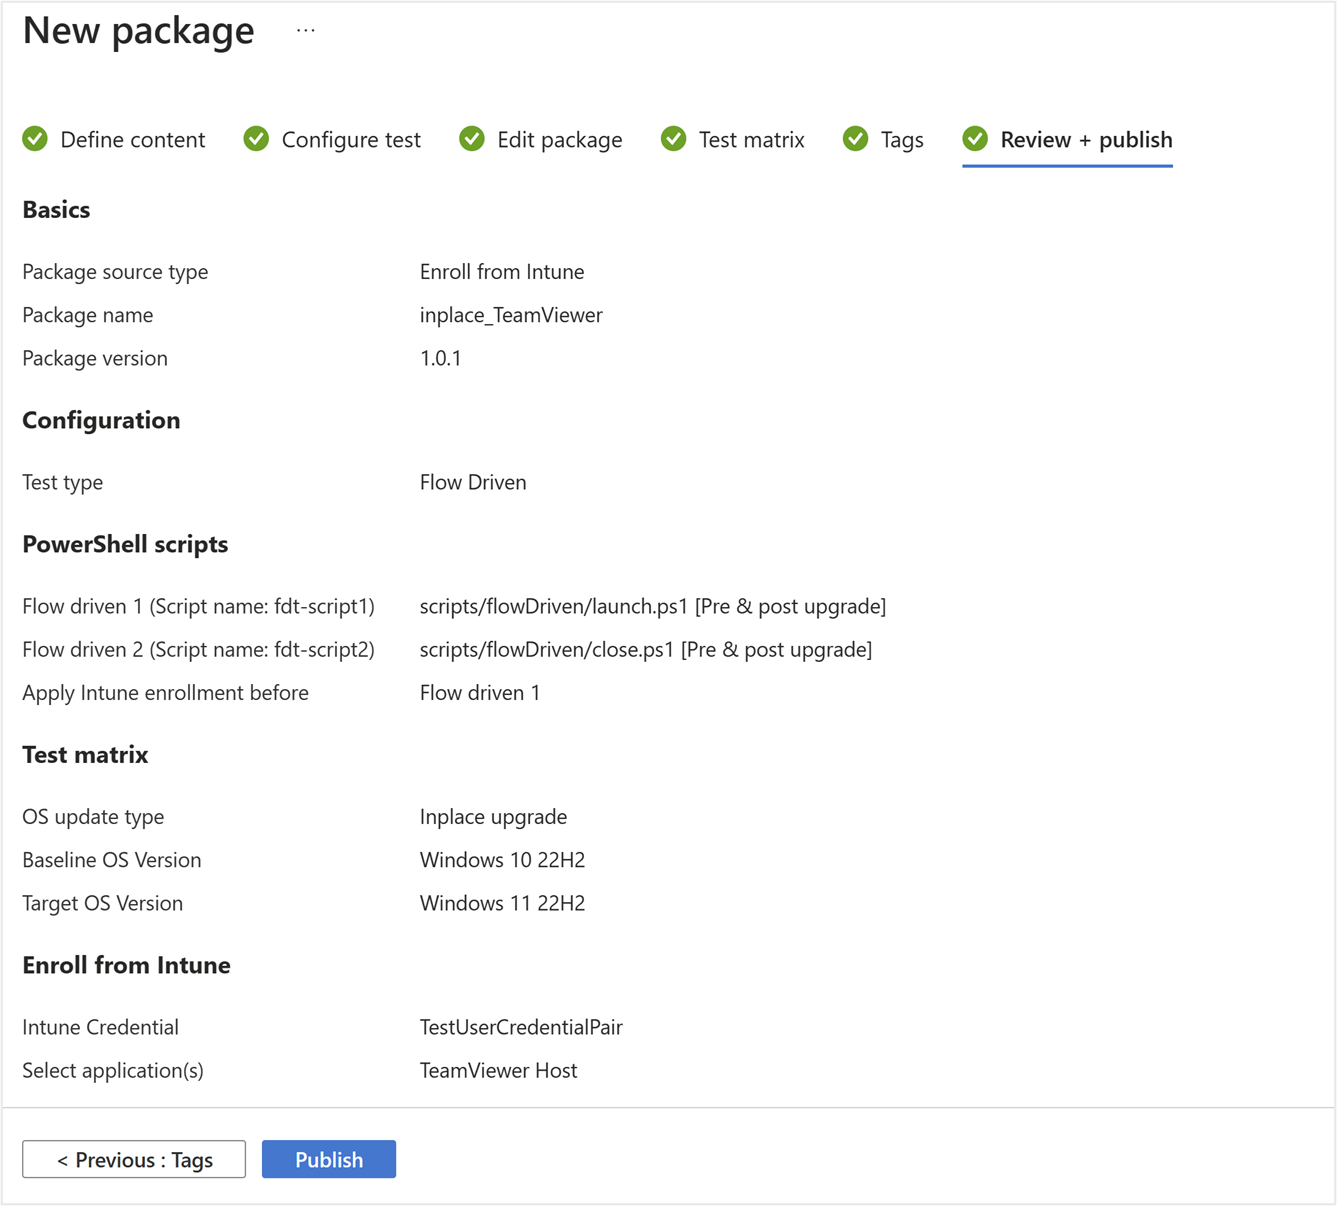
Step 5: Review + Publish
Review the configuration.
Click to Publish the package.
The first test is triggered immediately with the latest Windows update that you selected. It may take up-to 24 hours to complete the initial validation test. You can learn quickly if there is any compatibility issue or package setting issue.
After that, your test will be automatically triggered when there is a new update depending on the update ring you selected.
You can track published package status or modify existing package via Package catalog | Manage packages.

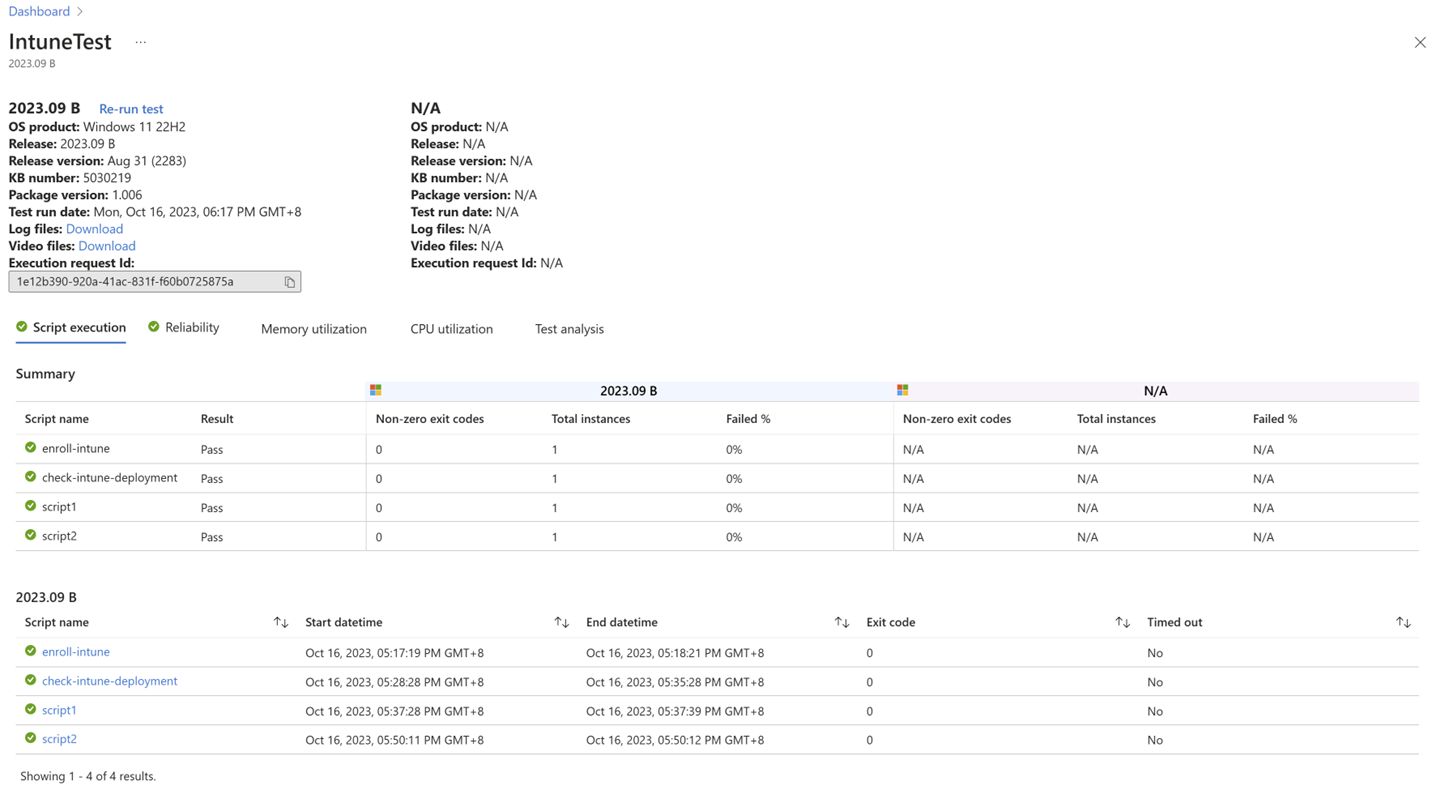
Check Intune enrollment test results
- Find your package under navigation menu Insights > Test summary.
- Select the run, which you want to check. Click on See details. You may click to check execution log of each test script, or download log file package and videos for more test details.

Feedback
Coming soon: Throughout 2024 we will be phasing out GitHub Issues as the feedback mechanism for content and replacing it with a new feedback system. For more information see: https://aka.ms/ContentUserFeedback.
Submit and view feedback for