Grant Test Base managed identities to your Key Vault account
Important
Test Base for Microsoft 365 will transition to end-of-life (EOL) on May 31, 2024. We're committed to working closely with each customer to provide support and guidance to make the transition as smooth as possible. If you have any questions, concerns, or need assistance, submit a support request.
This article includes step-by-step guidance to grant Test Base access to your key vault secrets so that you can authorize Test Base access to other platforms during your compatibility tests in a secure way.
In this article,
Relevant links
Prerequisite
- Resource group and Subscription are already known for your project.
- Test Base Account and Azure Key Vault Accounts are created.
Reference
Grant Test Base managed identities to your Key Vault account
- Turn on System assigned identity in Test Base: Go to Manage > Identity > System assigned to enable managed identity in Test Base

Click on the copy button (
 ) to copy Test Base system assigned Object ID
Assign Key Vault access to Test Base:
Before assigning Key Vault access, please check your Key Vault configuration: Go to Settings > Access configuration.
 Depending on your permission model, please select below guidance:
a. Grant Key Vault access to Test Base when your Permission model is Azure role-based access control.
b. Grant Key Vault access to Test Base when your Permission model is Vault access policy.Grant Key Vault access to Test Base when your Permission model is Azure role-based access control.
Reference: Grant a user access to Azure resources using the Azure portal - Azure RBAC | Microsoft Learn
1). Open your Test Base account, select Manage > Identity > Azure role assignments.
 2). Click on Add role assignment.
 3). Set Scope as Key Vault. Select Subscription and Resource. Select the Role as Key Vault Secrets User.
 4). Repeat step b-c and select the Role as Key Vault Reader.
Grant Key Vault access to Test Base when your Permission model is Vault access policy.
Reference: Assign an Azure Key Vault access policy (CLI) | Microsoft Learn
1). Select Access policies , then select Create
 2). Select all permissions under Secret permissions
 3). Under the Principal selection pane, paste Test Base Object ID
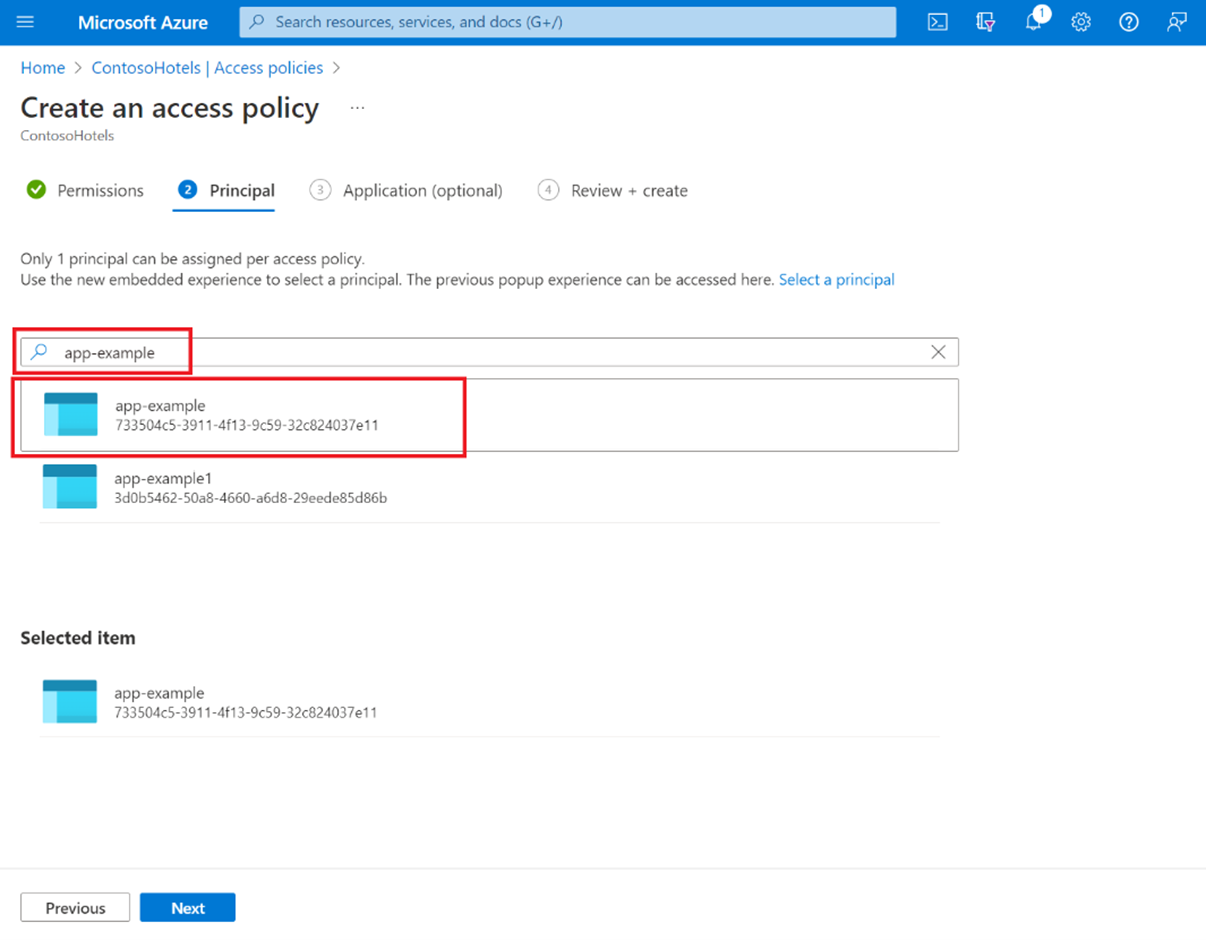 4). Click Next to continue.
5). Review the access policy changes and select Create to save the access policy


Feedback
Coming soon: Throughout 2024 we will be phasing out GitHub Issues as the feedback mechanism for content and replacing it with a new feedback system. For more information see: https://aka.ms/ContentUserFeedback.
Submit and view feedback for