Note
Access to this page requires authorization. You can try signing in or changing directories.
Access to this page requires authorization. You can try changing directories.
You can quickly set up an AI agent in Service in Microsoft 365 Copilot, and then embed it in non-Microsoft CRM systems.
Prerequisites
- Set up Service in Microsoft 365 Copilot.
- You need a System Customizer or System Administrator role on the environment where your AI agent is created. Learn more in predefined security roles.
- ServiceNow or Salesforce instance if you want to test your connection.
Navigation
You can navigate to Copilot embeddable widget in one of the following ways:
- Select View in Get Started > Home > Set up Copilot embeddable widget.
- Select Manage in Agent experience > Productivity > Copilot embeddable widget.
Configure embedded AI agent
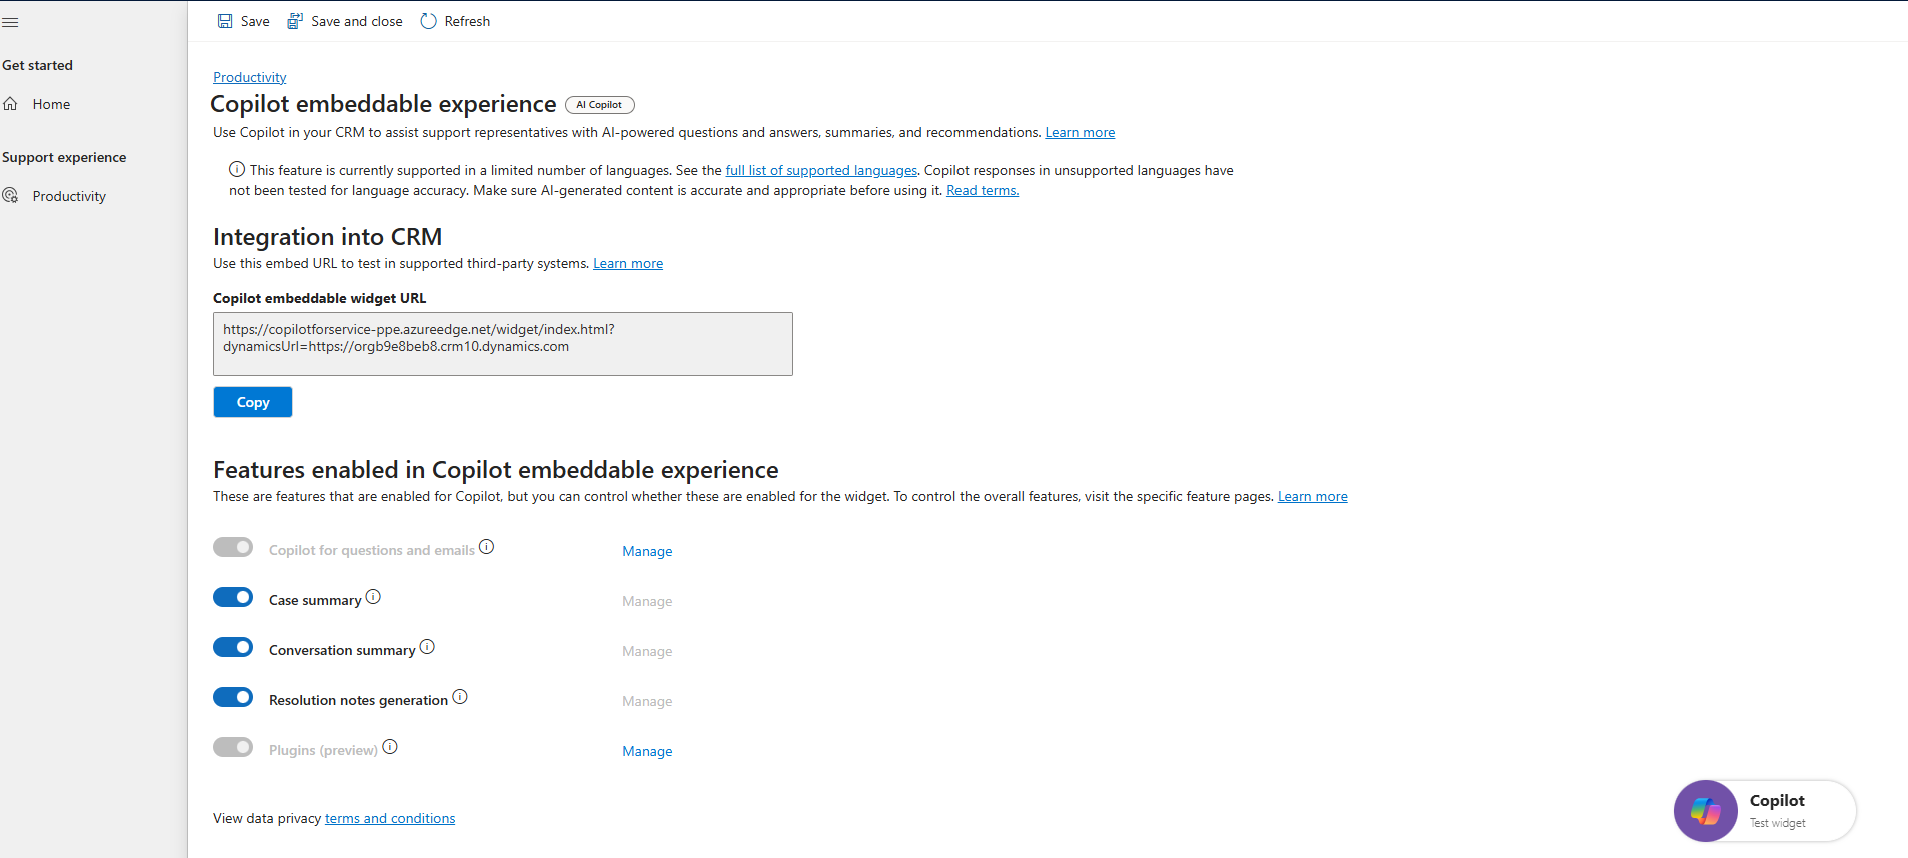
On the Copilot embeddable widget the application displays the following:
Copilot embeddable widget URL: The URL that you can use to embed the Service in Microsoft 365 Copilot agent in your non-Microsoft CRM systems. Currently, you can embed the agent in Salesforce and ServiceNow CRM systems.
Enable Copilot features: Enable the following Copilot features that the customer service representatives in your non-Microsoft CRM systems can use:
- Copilot for questions and emails: Select Manage to customize the knowledge sources Copilot uses to generate responses. You can also customize what fields Copilot should use to generate email drafts and enable additional features.
- case and conversation summaries: Summarize cases and closed conversations.
- resolution notes: Generates resolution notes for cases.
- plugins: Use targeted keywords to gather quick information about the case that you're working on. Select Manage to add the plugin created in Copilot Studio.
Test your AI agent
Select the Copilot test widget to test how the AI agent works. You can test the agent by connecting to your Salesforce or ServiceNow CRM environment.
Note
You can only connect to one CRM.
In Copilot, select Salesforce in the CRM Account.
Select Set up.
Next to Salesforce, select Sign in. The panel displays the Salesforce sign-in details for Login URI Environment and Salesforce API Version.
Select Sign in, and then follow the onscreen prompts to verify your identity if necessary. Once the connection is confirmed, a green checkmark appears.
Select Confirm.
Next Steps
Embed your agent within a CRM desktop. More information: