Note
Access to this page requires authorization. You can try signing in or changing directories.
Access to this page requires authorization. You can try changing directories.
[This article is prerelease documentation and is subject to change.]
You can use REST APIs (including OpenAI API) to connect an agent you create with external systems and access available data for use within your agent. You can connect your agent to a REST API by providing Copilot Studio with three things:
- An OpenAPI specification defining the API’s functions and available actions
- Details on the type of authentication needed and the authentication details for users to connect to the API to access the external system
- Descriptions to help the language model determine when to invoke the API to utilize the data
You can add REST APIs to Copilot agents and custom agents through Copilot Studio.
Important
This article contains Microsoft Copilot Studio preview documentation and is subject to change.
Preview features aren't meant for production use and may have restricted functionality. These features are available before an official release so that you can get early access and provide feedback.
If you're building a production-ready agent, see Microsoft Copilot Studio Overview.
Copilot agents allow a maker to combine multiple data sources like connectors, APIs, prompts, and knowledge sources into a single agent. Use this agent to extend Microsoft-branded agent experiences like Microsoft 365 Copilot.
Custom agents are standalone agents that contain connectors, APIs, prompts, and knowledge sources. You can use custom agents directly by integrating them into websites or other channels.
Note
You must create REST API tools from an OpenAPI v2 specification. This requirement is due to the behavior of Power Platform in processing API specifications. If you submit a v3 specification, the creation process automatically translates it to a v2 specification.
Prerequisites
- Maker-level credentials, and a Copilot Studio license.
- A copy of the OpenAPI specification for the REST API you want to connect to
- Knowledge of the type of authentication needed to connect to the API, and the authentication details.
Add a REST API tool to your agent
To add a REST API tool to your agent, complete the following steps:
- Add a new agent tool and select REST API
- Provide API specification, description, and solution
- Provide authentication details
- Select tools from the API
- Review and publish
The following sections walk you through the process, step by step.
The process to add a REST API is the same for both custom agents and Microsoft 365 Copilot agents.
Add new agent tool and select REST API
Go to the Overview page of your agent.
In the Tools section, select Add tool. You can also go to the Tools tab and select Add a tool.
The Add tool page is displayed.
Select New tool > REST API.
Provide API specification, description, and solution
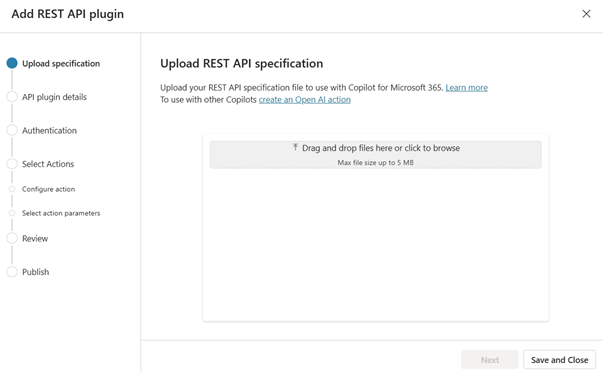
Upload an OpenAPI specification file for the REST API you want to connect to. You can either drag and drop the specification file into the Upload a REST API screen or browse your system to locate the file you wish to use.
Note
The OpenAPI specification must be a JSON file in v2 format. If you submit a v3 specification, the creation process automatically translates it to a v2 specification.
After you upload the specification, the screen updates to show the specification file name and the details.
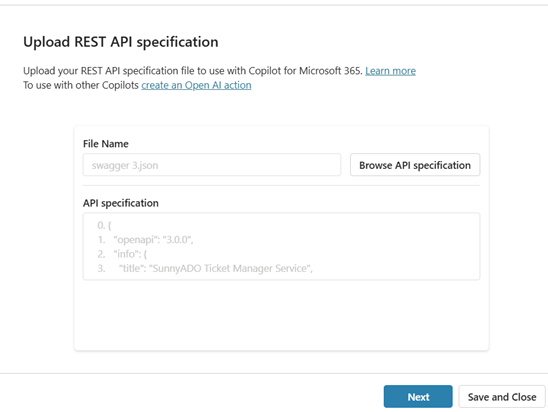
In the following steps, the procedure uses a specific example of SunnyADO, an ADO ticket management system. In the example, the intention is to allow the users to retrieve and update their tickets via the agent.
Verify the details, and then select Next.
You're presented with an API plugin details page where you can provide additional information about the API.

The description field is initially populated based on the description in the API specification you uploaded. Provide a detailed description, because your agent orchestration uses the description to determine when to use the particular tool. Provide details, including synonyms, to help your agent with the selection process.
For example, the initial description provided is: "A simple service to manage tickets."
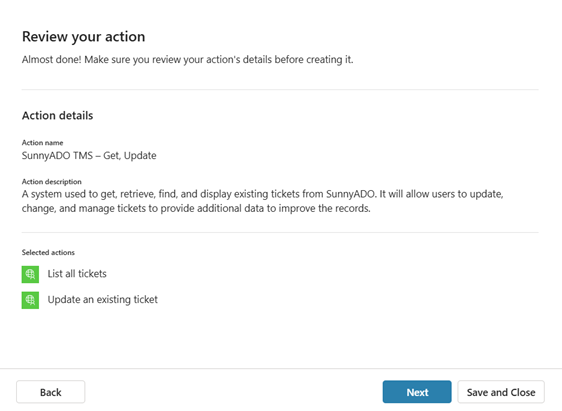
A better description is: "A system used to get, retrieve, find, and display existing tickets from SunnyADO. It allows users to update, change, and manage tickets to provide more data to improve the records."
Enter an improved description under the Description field.
Under Solution, a dropdown lists all solutions available within the current environment. Select the solution you want to use. Learn more about solutions in Solution concepts.

If you have a preferred solution, or your selected connector is already in the solution, that solution is automatically selected.
You can either select a solution or leave it blank. If you leave the solution blank, a solution is created for you with the action name and default publisher. Storing your action in a solution lets you move it easily across environments.
Note
If you don't see the default solution or the CDS default solution as an option in this case, add a custom solution for easy management. Learn more in Default solution vs. custom solution.
With a solution selected, select Next to proceed.
Provide authentication details
The Authentication page appears. Select the type of authentication to use for the API.
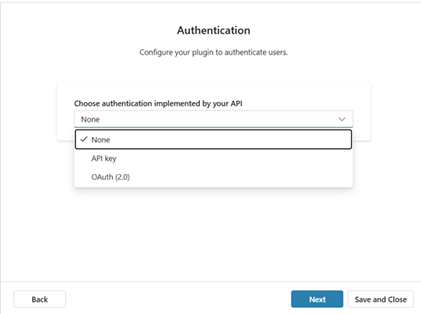
Select an authentication method from the list. Select from three options:
- None: No authentication is required to access the API.
- API key: Select this option if your API requires an API key for authentication. At runtime, when the agent wants to use the API tool, the agent prompts the user to authenticate. The user provides an API key and the agent connects to the API using that key.
- Auth 2.0: Select this option if your MCP server uses OAuth 2.0 for authentication. OAuth 2.0 lets individual users authenticate to the API via an identity provider. This authentication method lets the user grant permissions to your application (agent) without sharing their credentials with the agent.
Enter the required fields for the selected authentication method. The fields vary based on the authentication method.
- None: No information to provide.
- API key:
- Parameter label: A text label for the API parameter to present to users.
- Parameter name: The actual name for the API key parameter to use in either the header or query string.
- Parameter location: How you send the key for the API. Select either Header or Query.
- Auth 2.0:
- Client ID: The client identifier the identity provider issues when you register your app. The client ID lets the identity provider know what app is making the request.
- Client secret: The client secret the identity provider issues when you register your app. Your agent sends the client secret along with the client ID to prove your agent is authorized to request access tokens for the MCP server.
- Authorization URL: The identity provider endpoint where your agent redirects the user to sign in and grant permissions to your agent (consent card presented in the agent chat). The user authenticates here and then the identity provider responds back to the agent at the callback URL with an authorization code.
- Token URL: The endpoint where your agent exchanges the authorization code (or refresh token) for an access token and refresh token. The access token lets your agent use the MCP server on behalf of the user. Refresh tokens let your agent get new access and refresh tokens from the refresh endpoint when the previous access token expires.
- Refresh URL: The endpoint to request a new access token using a refresh token (so that the user doesn't have to sign in again when the token expires).
- Scope: (Optional): The permissions your app is asking for, as a space-separated list.
- Which Microsoft 365 organization accesses the endpoints: This setting limits access to the source to either the organization of the maker, or all organizations. Select either:
- My organization only
- Any Microsoft 365 organizations
- Which app (client) can use the endpoints: GUID that defines the client system that can be used to access this data. Apps could include Microsoft 365, Power Automate, and other options.
When you complete all fields, select Next.
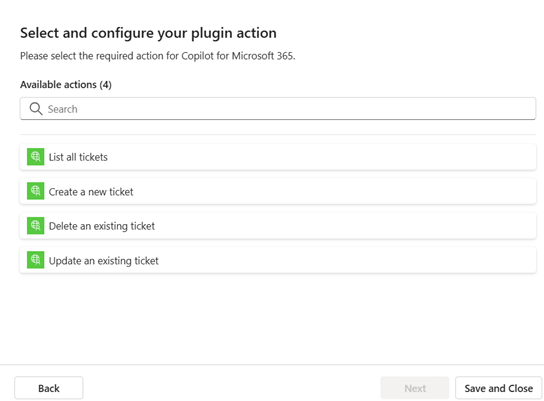
The Select and configure your tool page appears where you can select tools to enable from the API.
Select tools from the API
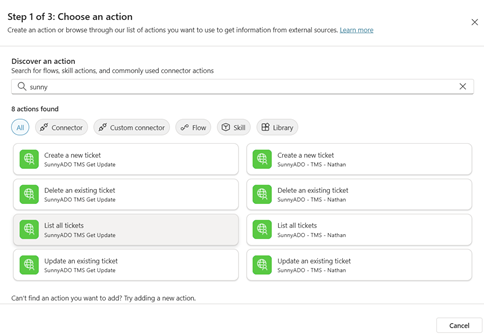
Select the API-supported tools from the REST API to add to your agent. Generally, a REST API offers a range of tools through the various combinations of endpoint and HTTP methods (get, put, post, delete, and so on) defined in the API specification. In some cases, you might not want the agent's users to have the ability to execute every action the API generally offers. For example, your API specification might include the ability to update and delete but you only want users of your agent to be able to create records.
Select a tool from the list to configure.
The Configure your tool page is displayed.
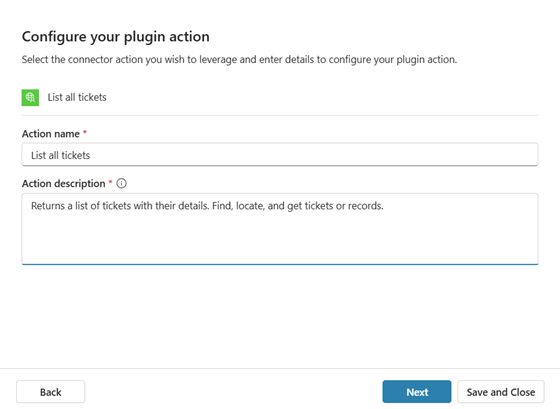
Configure the name and description for the selected tool. Similar to the overall API, provide a Tool name and Tool description. Descriptions are initially prepopulated from the descriptions in the API specification. The name doesn't need to be unique but it should represent the tool itself. The description, as with the overall API description, should be specific enough to provide the language model with details to better identify whether your query aligns with this specific tool.
Once the fields are completed, select Next.
The Review your tool's parameters page is displayed.
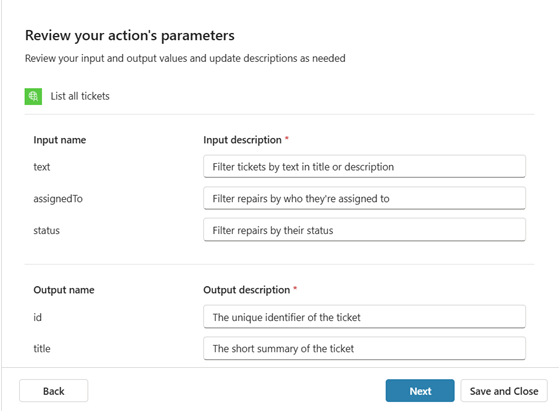
This page shows the values expected for input and the output values that are returned. You can't change these values, but you can update the descriptions of the inputs and outputs. All content in this page is pulled directly from the uploaded API specification.
Update the descriptions as needed. The descriptions provide a definition of what the values are used for. If any of the descriptions are blank, you must complete them before you can move forward. You can paste in the name if you don't have a better description.
After completing the descriptions, select Next.
The first tool is now configured and appears in the list of Selected tools on the Select and configure your plugin tool page.
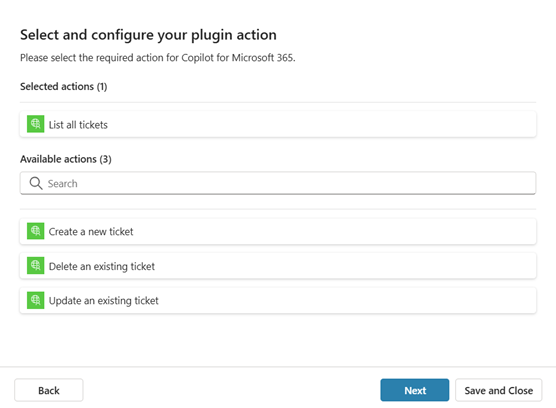
Add any other tools from the API that you wish to include at this time. When you're done adding tools you want your agent to support, select Next.
The Review your tool page is displayed. The page provides the details of the configured REST API tool.
Review and publish
If you need to make any updates, select Back and make your changes. Otherwise, select Next.
A screen appears indicating that your tool is being published while the process is in progress. You're informed once the publish is complete.
Select Create connection to continue. You're returned to the Add tool screen.
Select REST API in the tool type selector. You can see the newly created tools from your API. There should be one entry per tool you added from the API.
For each of the newly configured tools from the API, create or select a connection to the API and add the tool to your agent:
- On the Add tool screen, select the tool.
- Under Connection, select an existing connection or select Create new connection.
- Enter any information required for the connection, and then select Create to create the connection to the tool.
- Select Add and configure to add the tool to your agent.
The tools from the REST API are now available for use in your agent.
Tip
To more easily find your tool, use the Search bar to locate it.