Note
Access to this page requires authorization. You can try signing in or changing directories.
Access to this page requires authorization. You can try changing directories.
This article explains how to exclude SIP Gateway from Conditional Access Policy, which is a feature that allows you to control access to your organization's resources based on certain conditions. You can exclude SIP Gateway from conditional access if you use it for voice and don't want to enforce extra security requirements on those users. In this article, you'll find the steps to create an exclusion group and assign it to the policy along with the prerequisites.
The SIP Gateway resources mentioned in this article can’t be directly excluded from Conditional Access policies. Hence, we describe the dynamic app filter approach to exclude SIP Gateway apps. Also, simply excluding SIP Gateway apps won't address the gap as SIP Gateway apps don't own any scopes on their own and depend on Teams app for the required scopes.
Prerequisites
To add or deactivate custom security attributes definitions, you must have:
- Attribute Assignment Administrator
- Attribute Definition Administrator
- Microsoft Graph module, when using Microsoft Graph PowerShell
Important
By default, Global Administrator and other administrator roles do not have permissions to read, define, or assign custom security attributes.
Step 1: Add an attribute set
Sign in to the Microsoft Entra admin center as a Attribute Definition Administrator.
Browse to Protection > Custom security attributes.
Select Add attribute set to add a new attribute set.
Note
If Add attribute set is disabled, ensure that you're assigned the Attribute Definition Administrator role. For more information, see Troubleshoot custom security attributes.
Enter a name, description, and maximum number of attributes.
Tip
An attribute set name can be 32 characters with no spaces or special characters. Once you've specified a name, you can't rename it. For more information, see Limits and constraints.
When finished, select Add.
The new attribute set appears in the list of attribute sets.
Step 2: Add a custom security attribute definition
Sign in to the Microsoft Entra admin center as a Attribute Definition Administrator.
Browse to Protection > Custom security attributes.
On the Custom security attributes page, choose an existing attribute set or select Add attribute set to add a new attribute set. All custom security attribute definitions must be part of an attribute set.
Select to open the selected attribute set.
Select Add attribute to add a new custom security attribute to the attribute set.
In the Attribute name box, enter a custom security attribute name.
Tip
An attribute set name can be 32 characters with no spaces or special characters. Once you've specified a name, you can't rename it. For more information, see Limits and constraints.
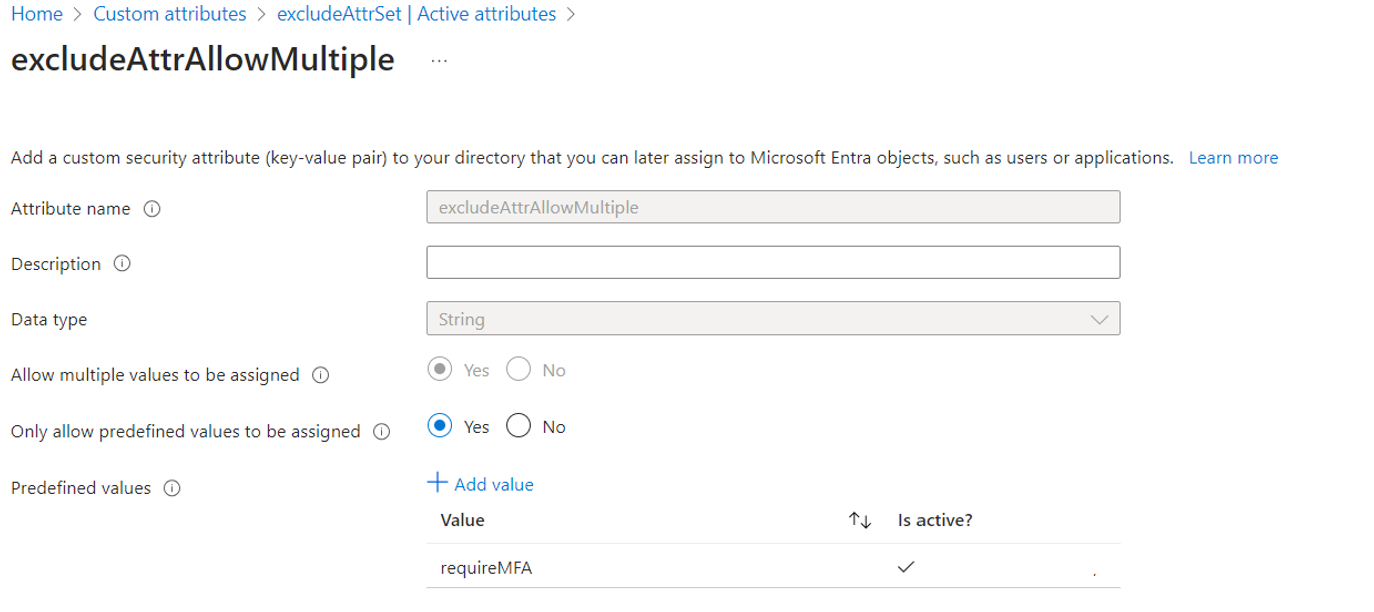
In the Description box, enter an optional description.
Tip
A description can be 128 characters long. If necessary, you can later change the description.
From the Data type list, select the data type for the custom security attribute.
- Data type: A description.
- Boolean: A Boolean value that can be true or false.
- Integer: A 32-bit integer.
- String: A string that can be X characters long.
For Allow multiple values to be assigned, select Yes or No.
- Select Yes to allow multiple values to be assigned to this custom security attribute.
- Select No to only allow a single value to be assigned to this custom security attribute.
For Only allow predefined values to be assigned, select Yes or No.
- Select Yes, if custom security attribute can be assigned values from a predefined values list.
- Select No to allow this custom security attribute to be assigned user-defined values or potentially predefined values.
If Only allow predefined values to be assigned is selected Yes, then select Add value to add predefined values. An active value is available for assignment of objects. A value that isn't active is defined, but not yet available for assignment.
When finished, select Save.
The new custom security attribute appears in the list of custom security attributes.

Step 3: Add SIP Gateway Service Principals to your tenant
Using Azure Active Directory module:
Open a new elevated PowerShell window.
Run
Install-Module AzureAD.Run
Import-Module AzureAD.Run
Connect-AzureRmAccount.Sign in with the admin account.
Run the following cmdlet:
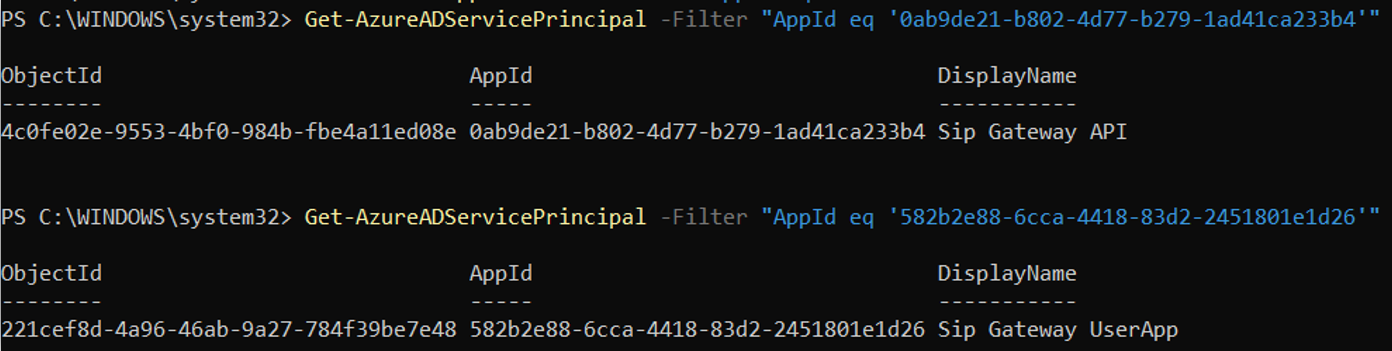
Get-AzureADServicePrincipal -Filter "AppId eq '582b2e88-6cca-4418-83d2-2451801e1d26'"If you get no output, then run:
New-AzureADServicePrincipal -AppId "582b2e88-6cca-4418-83d2-2451801e1d26"Run the following cmdlet:
Get-AzureADServicePrincipal -Filter "AppId eq '0ab9de21-b802-4d77-b279-1ad41ca233b4'"If you get no output, then run:
New-AzureADServicePrincipal -AppId "0ab9de21-b802-4d77-b279-1ad41ca233b4"
Using MS Graph module:
Run the following cmdlets:
## SIP Gateway API:
Get-MgServicePrincipal -Filter "AppId eq '0ab9de21-b802-4d77-b279-1ad41ca233b4'"
New-MgServicePrincipal -AppId "0ab9de21-b802-4d77-b279-1ad41ca233b4"
## SIP Gateway UserApp: Get-MgServicePrincipal -Filter "AppId eq '582b2e88-6cca-4418-83d2-2451801e1d26'" New-MgServicePrincipal -AppId "582b2e88-6cca-4418-83d2-2451801e1d26"After running these cmdlets, you should get the following output to proceed:
Bulk device sign-in
If you are using bulk-sigin for your devices, you will also have to add this extra service principal Teams SIP Gateway:
##Using AzureAd Module:
Get-AzureADServicePrincipal -Filter "AppId eq '61c8fd69-c13e-4ee6-aaa6-24ff71c09bca
If you get no output, then run:
New-AzureADServicePrincipal -AppId "61c8fd69-c13e-4ee6-aaa6-24ff71c09bca"
## Using MS Graph Module:
Get-AzureADServicePrincipal -Filter "AppId eq '61c8fd69-c13e-4ee6-aaa6-24ff71c09bca
New-MgServicePrincipal -AppId "61c8fd69-c13e-4ee6-aaa6-24ff71c09bca"
Step 4: Assign custom security attribute to SIP Gateway
Sign in to the Microsoft Entra admin center as at least a Conditional Access Administrator.
Browse to Identity > Applications > Enterprise applications.
Clear all filters.
Search for SIP Gateway API (0ab9de21-b802-4d77-b279-1ad41ca233b4) and select it.
Under Manage > Custom security attributes, select Add assignment.
Under Attribute set, select the attribute set you created in step 1.
Under Attribute name, select the attribute name you created in step 2.
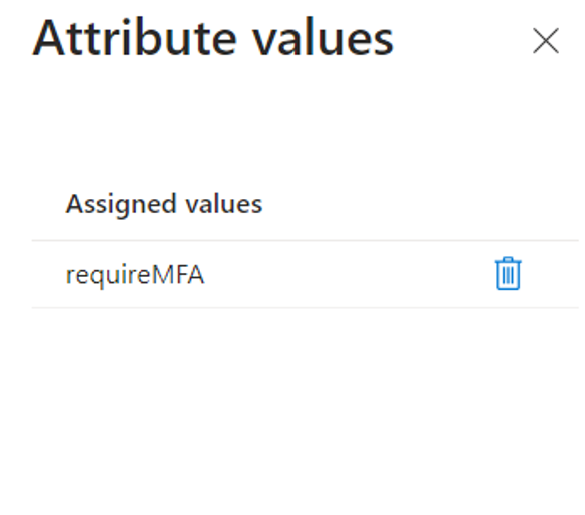
Under Assigned values, select Add values, select the value from the list (requireMFA in this example), then select Done.
Select Save.
Follow the same steps for SIP Gateway UserApp (582b2e88-6cca-4418-83d2-2451801e1d26).
Follow the same steps for Teams SIP Gateway (61c8fd69-c13e-4ee6-aaa6-24ff71c09bca) in case you’re using bulk signin for your devices.
Step 5: Exclude this attribute from your Conditional Access Policy
Sign in to the Microsoft Entra admin center as at least a Conditional Access Administrator.
Browse to Protection > Conditional Access.
Select the policy you want to change.
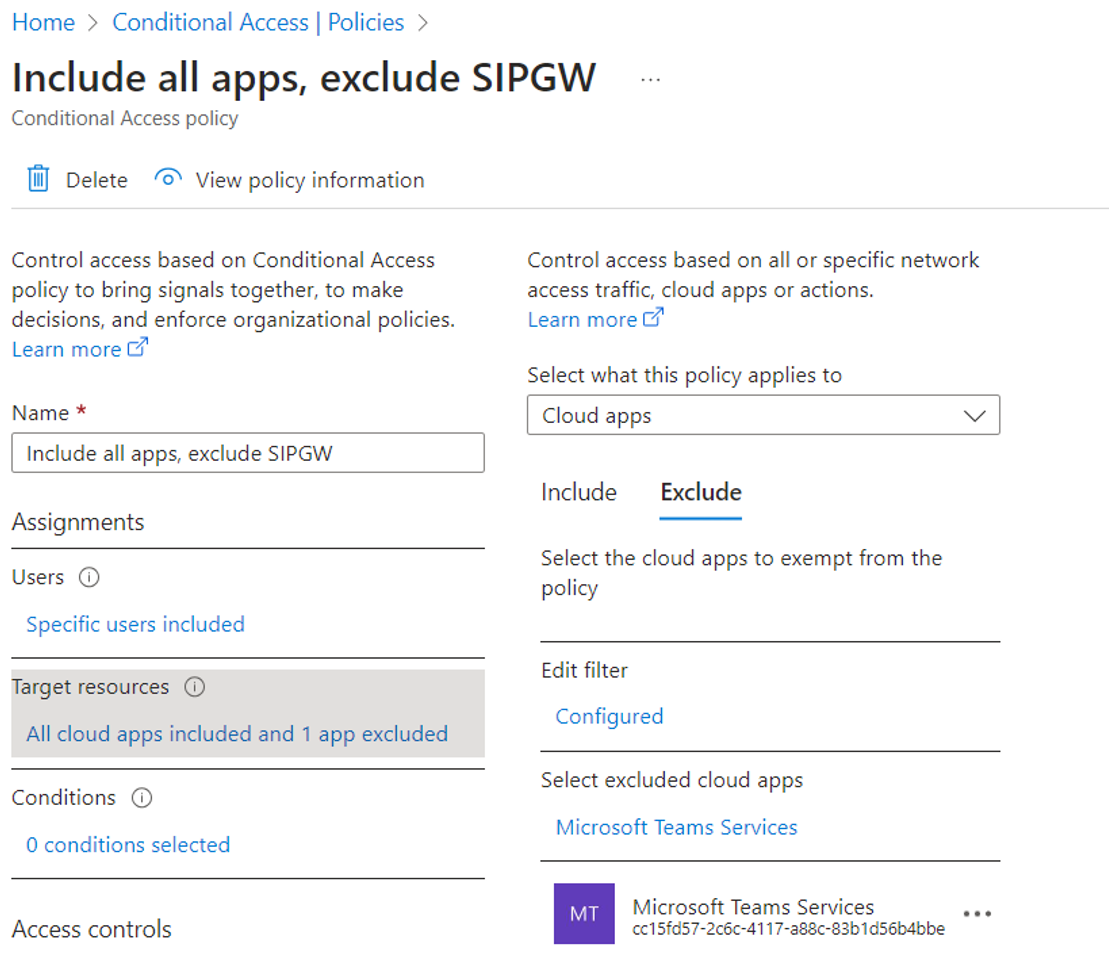
Under Target resources, select the following options to autofill this field:
- From Select what this policy applies to list, choose Cloud apps.
- On the Include tab, select All apps option.
- Change tab to Exclude and under Select excluded cloud apps, search for Microsoft Teams Services and click on Select.
Select Edit filter.
On the Edit filter page, set Configure to Yes.
Select the attribute you created earlier (in this case 'exclAttrAllowMultiple').
Set Operator to Contains.
Set Value to the one assigned to SIP Gateway apps in step 4 (in this case requireMFA).
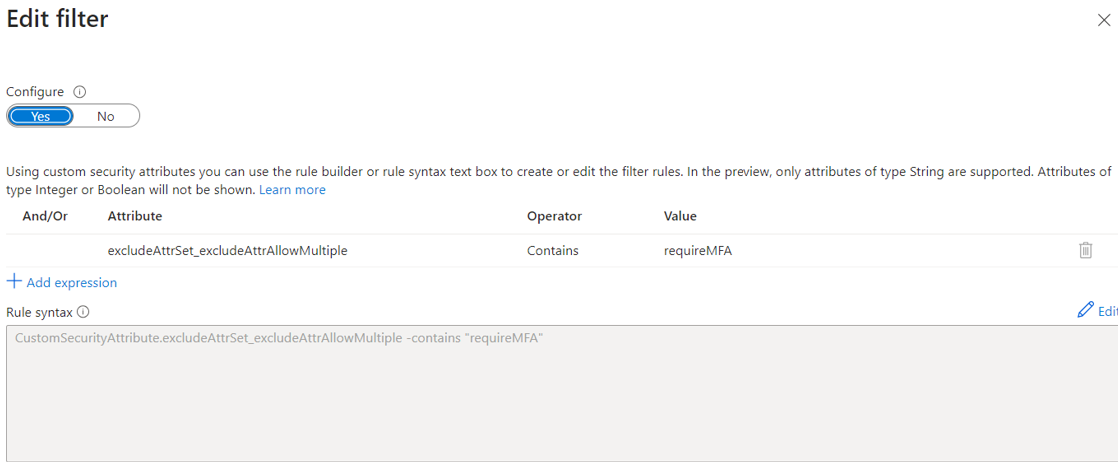
Select Done.
Review and confirm your settings.
Select Save to enable your policy.
