Note
Access to this page requires authorization. You can try signing in or changing directories.
Access to this page requires authorization. You can try changing directories.
You can upgrade to the new Teams client to your organization by setting policies in either the Teams Admin Center or by using PowerShell.
Tip
As a companion to this article, see our Teams setup guide to review best practices and learn to configure Teams features to meet your business needs. This comprehensive guide covers key areas like managing policies, external access, and tags. For a customized experience based on your environment, you can access the Teams automated setup guide in the Microsoft 365 admin center.
Prerequisites
See New Teams system requirements for information on the requirements for the Teams client.
Some additional information:
| Requirement | Version |
|---|---|
| Settings | Turn on the "Show Notification Banners" setting in System > Notifications > Microsoft Teams to receive Teams Notifications. |
| Delivery optimization (DO) | DO powers Teams automatic updates, which are required as part of the Servicing Agreement. Overview: What is Delivery Optimization? Recommended settings: Set up Delivery Optimization Note: Download Mode 100 (Bypass) isn't supported. |
Required Microsoft 365 Apps Security Updates
| Channel | Version & Build |
|---|---|
| Semi-Annual Enterprise Channel | Version 2302 (Build 16130.20306) Version 2208 (Build 15601.20578) |
| Monthly Enterprise Channel | Version 2301 (Build 16026.20222) Version 2212 (Build 15928.20294) |
| Office LTSB | Version 2018 (Build 10396.20023) Version 2021 (Build 14332.20481) |
Learn more at Update History for Microsoft 365 Apps.
Note
The end of availability for classic Teams client is June 30 2024. For more information see End of availability for classic Teams client.
Set the policies to upgrade to the new Teams client
As an admin, you can manage how new Teams to your users.
To control which users can see the toggle, use the Teams admin setting UseNewTeamsClient under the TeamsUpdateManagement policy.
Manage this setting in the Teams Admin Center or using Teams PowerShell.
Teams Admin Center
Configure setting via Teams Admin Center.
Policy settings for upgrade
| Setting | Description |
|---|---|
| Not enabled | Use this value to hide the new Teams toggle switch. Users won't be able to opt in to the new Teams. |
| Classic Teams as default | Use this value to have classic Teams the default version. The new Teams toggle switch displays to let users opt into the new Teams and switch back if needed. Note: This option was previously called Users can choose. |
| Microsoft controlled | Default. The value lets Microsoft control whether the new Teams toggle switch is shown or not based on product readiness |
| New Teams as default Rollout for the feature began in early August 2023 |
Use this value to make new Teams the default version. Users can switch back to classic Teams using the toggle. |
| New Teams only (Rolling out mid-February 2024) | Use this value to make new Teams the default version and uninstall classic Teams after a fourteen-day period. Users don't have the option to switch back to classic Teams. |
Important
Admins should know that they can always move forward in the steps to new Teams Only from any other point in the rollout schedule, but they can't move backwards in the steps from where they currently are. Some examples:
- If a customer is currently in classic Teams default mode, they can go to new Teams default mode, or new Teams Only, by assigning those policy states. However, they can't move back to the AdminDisabled state.
- If a customer is currently in new Teams default mode, they can move forward to new Teams Only by assigning that policy state. In this case, they couldn't move back to classic Teams default or AdminDisabled.
In addition to PowerShell, you can also use Teams Admin Center to manage the visibility of the toggle on a per-user basis.
Sign in to the Microsoft Teams admin center.
Select Teams > Teams Update policies from the left navigation pane.
Select Add to create a new policy or select an existing policy to open Update policy.
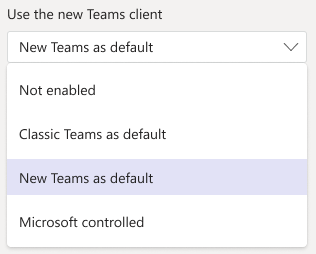
Name the update policy, add a description, and select the setting for “Use new Teams client”, as shown here.

| Setting | Description |
|---|---|
| Not enabled | Use this value to hide the new Teams toggle switch. Users won't be able to opt in to the new Teams. |
| Classic Teams as default | Use this value to have classic Teams the default version. The new Teams toggle switch displays to let users opt into the new Teams and switch back if needed. Note: This option was previously called Users can choose. |
| New Teams as default | Sets the new Teams as default. Note: This option is currently being rolled out |
| Microsoft controlled | Default. Use this value to let Microsoft control the following: -Whether the "Try the new Teams" toggle switch is shown or not - In the future, let Microsoft manage the installation of the new Teams client and Allow Microsoft to determine default client behavior based on the rollout schedule. |
Note
The option "Classic Teams as default" was previously called "Users can choose".
Select new Teams as default from this setting to ensure users can get the new Teams experience when they launch
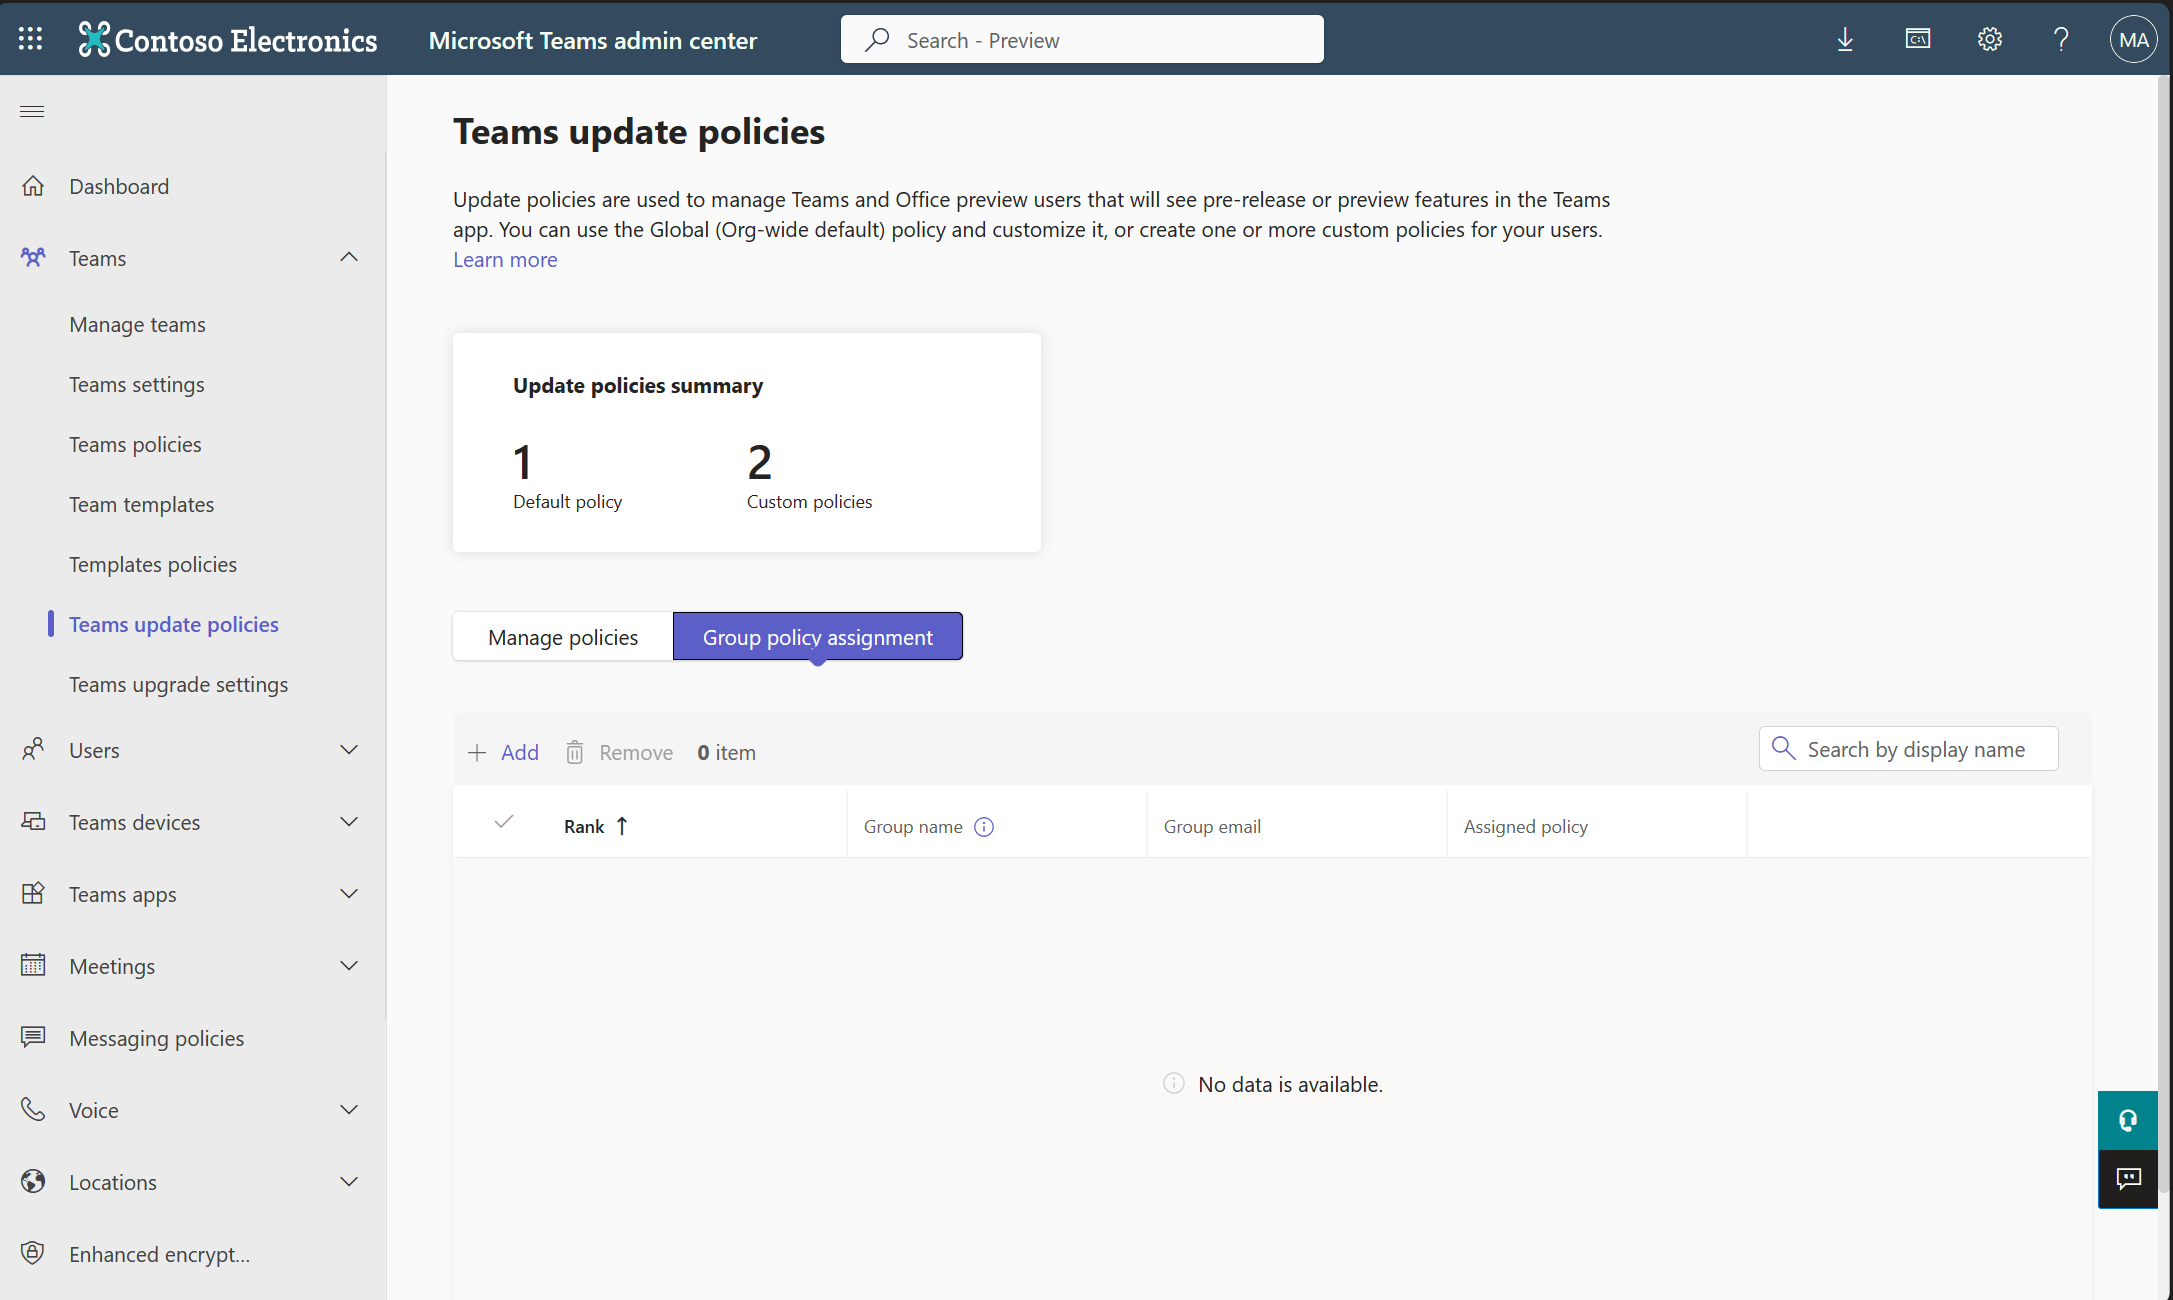
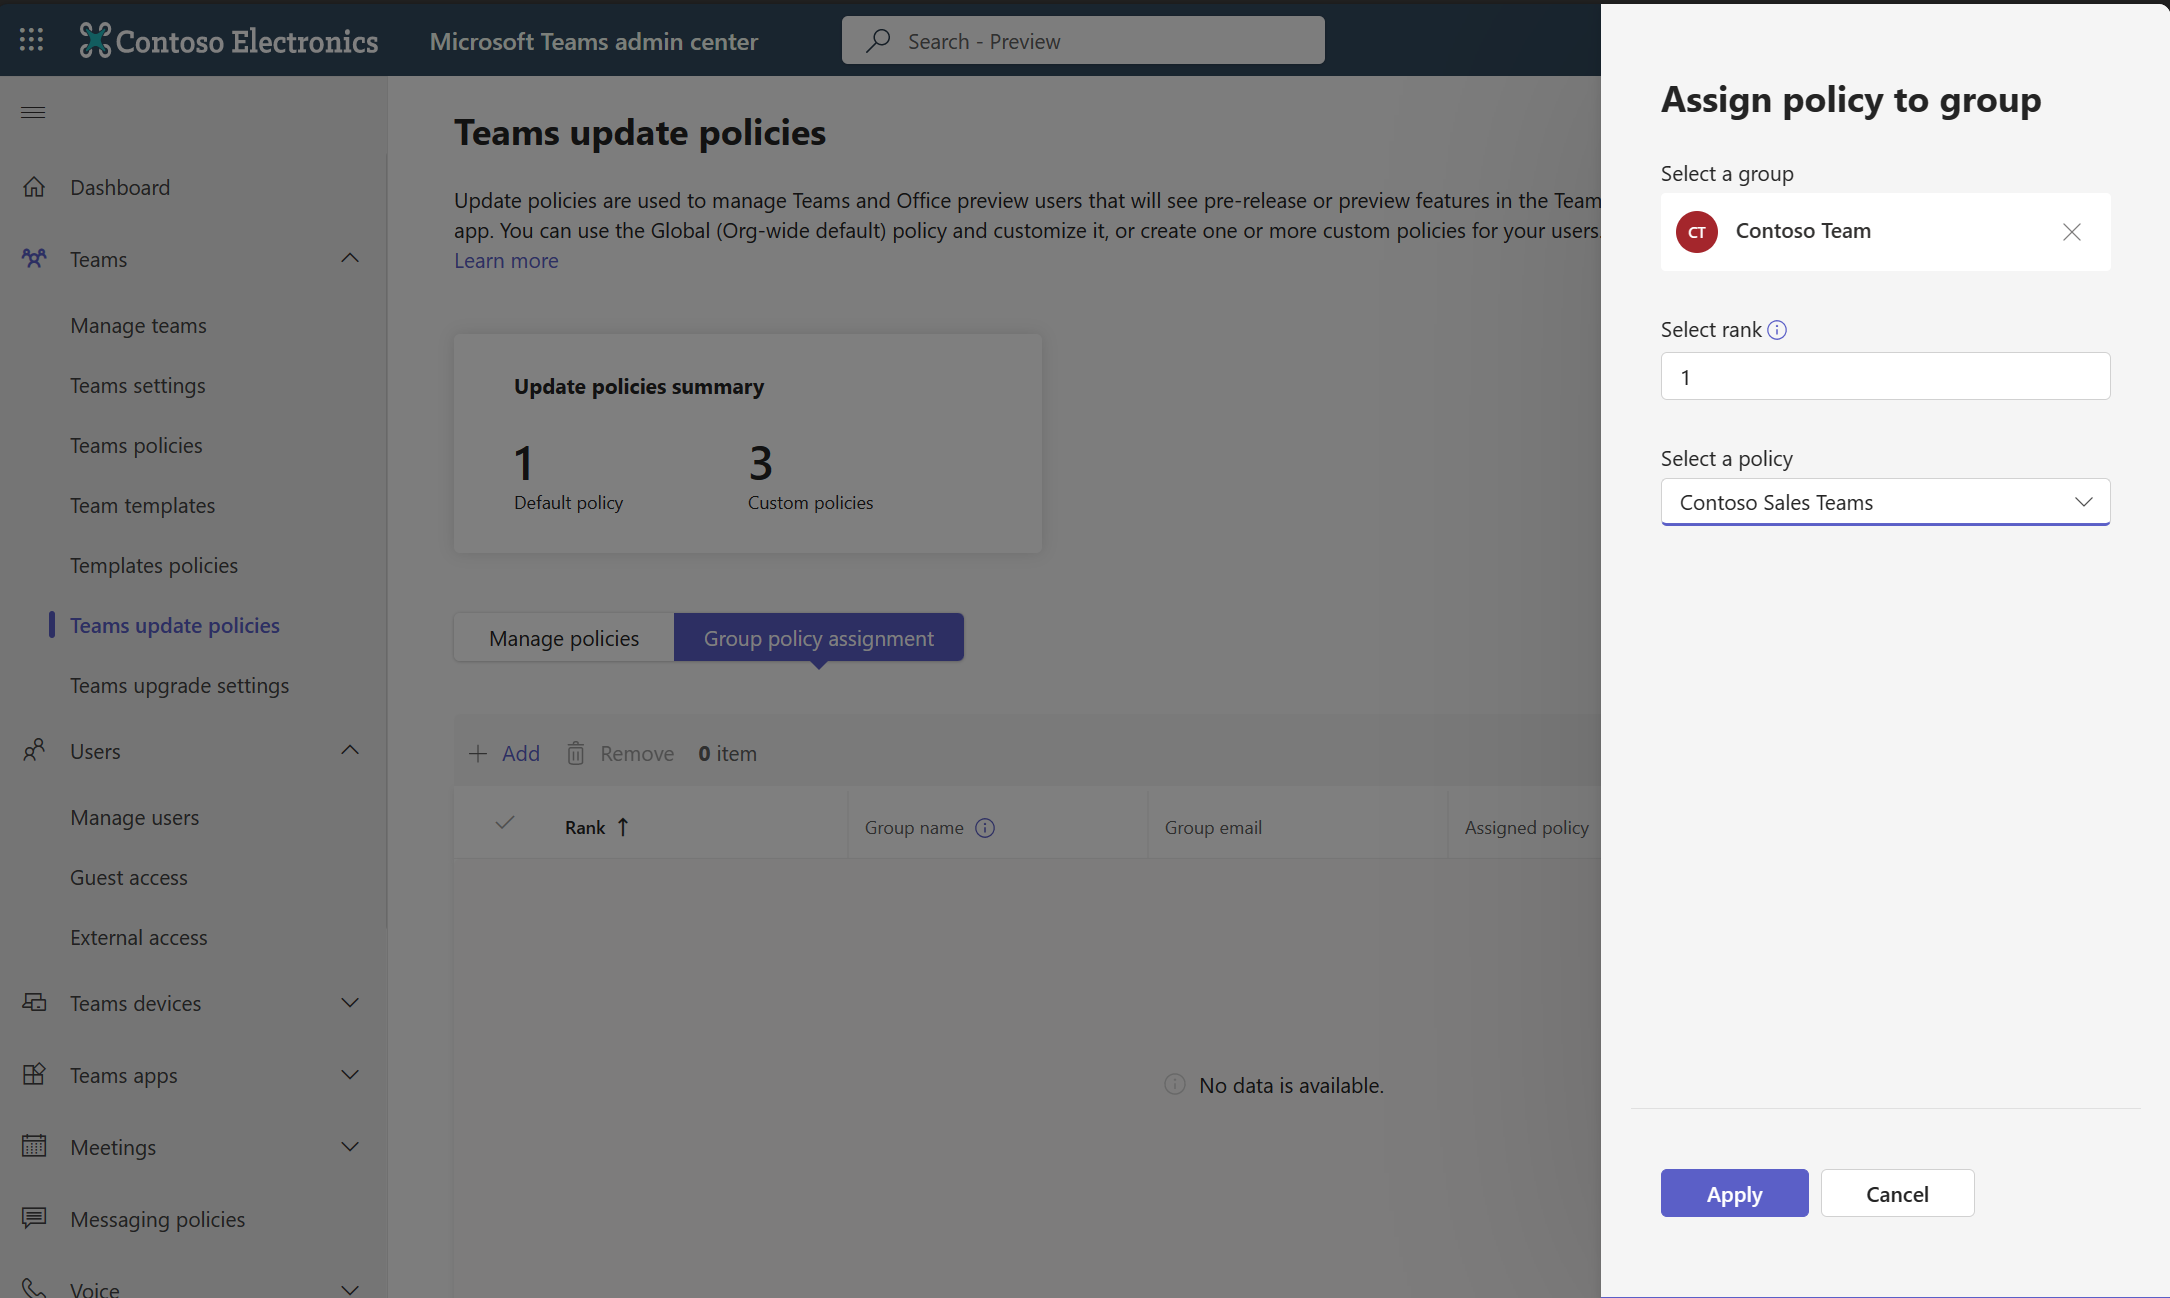
Once the policy is defined, you can assign it to a user or user group with the Group policy assignment. To assign it to a group, select Group policy assignment and then Add, or select one of the groups listed.

Select a policy to assign to the group.

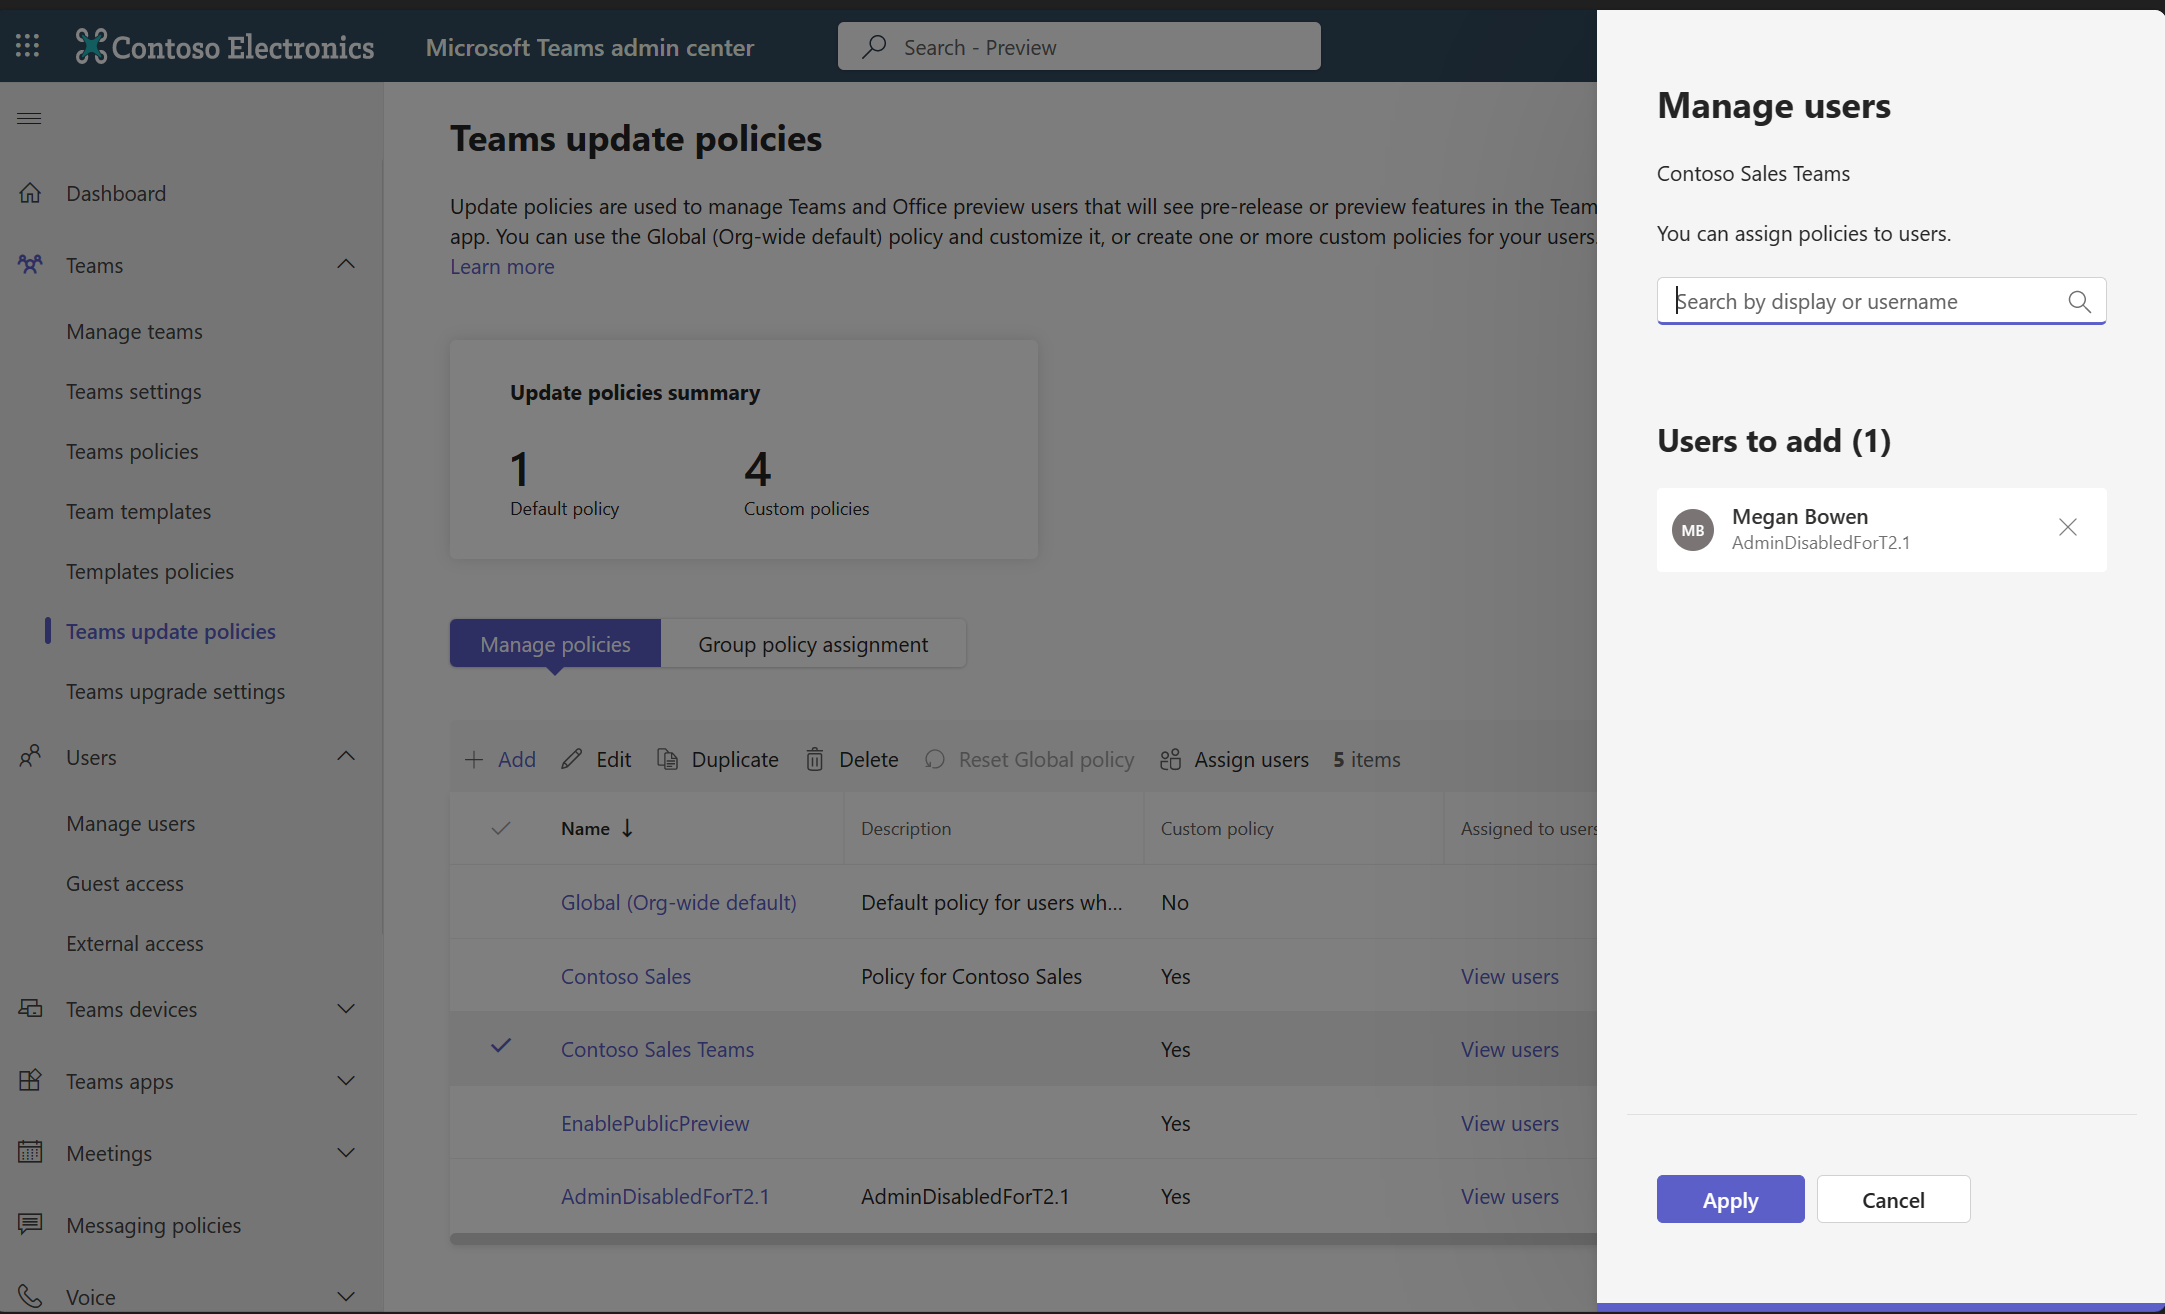
- Once the policy is defined, you can assign it to a specific user under Users> Manage users.

If you update the policy setting in the Teams Admin Center, the new setting can take up to 24 hours to go into effect. The user doesn't have to restart the app.