Note
Access to this page requires authorization. You can try signing in or changing directories.
Access to this page requires authorization. You can try changing directories.
In this quickstart, you'll use command-line developer tools to create a new Teams agent. At the end, you'll be chatting with your agent in Teams as its code runs in your local development environment. You'll be able to use the code and agent registration you create in this quickstart as the foundation for a fully-featured agent.
Prerequisites
This quickstart is divided into two sections. In the first section, you'll need:
- Node.js 24 or later (installer download)
- Visual Studio Code (installer download)
In the second part, you'll also need Teams, with a Microsoft 365 work or school account that has permissions to install custom Teams apps.
If you don't have an account, or you aren't sure about your permissions, you can still begin. The quickstart will address those requirements when they're needed.
Create code for an agent and try it in Microsoft 365 Agents Playground
Install the Teams developer CLI and Microsoft 365 Agents Playground.
npm install -g @microsoft/teams.cli @microsoft/m365agentsplaygroundUse
teams project newto create the code for a new agent from a template and open it in Visual Studio Code.teams project new typescript echo-bot cd echo-bot code .In Visual Studio Code, open
src/index.ts. Find the line that readsconst app = new App();and modify it to read:const app = new App({ skipAuth: true });This is a temporary modification to enable Microsoft 365 Agents Playground to communicate with the agent.
Start the agent. Once it's running, you'll see a confirmation that it's available on port 3978.
npm install
npm run dev
In a new console window, start Microsoft 365 Agents Playground.
agentsplaygroundThis will connect Agents Playground to your agent and open the interface in a new browser tab.
Use the compose box to send your agent a message and see it respond in the chat. Your agent's up and running locally!
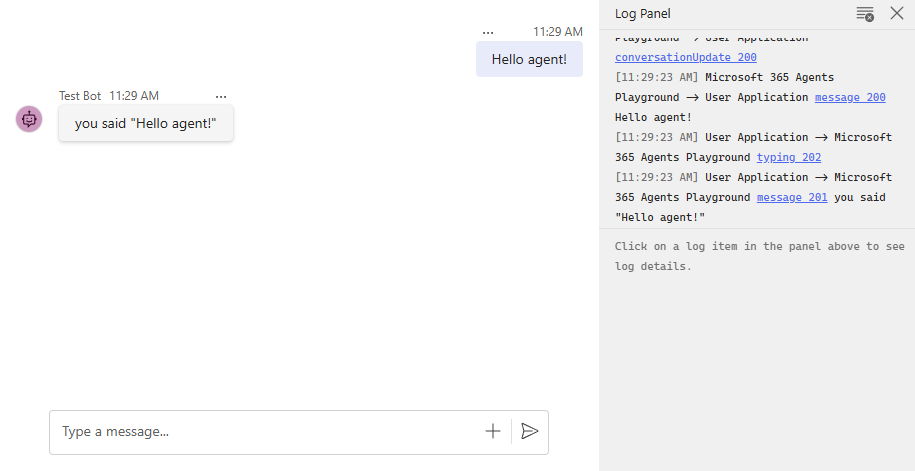
Close the Agents Playground tab in your browser, and use Ctrl+C in both console windows to stop Agents Playground and your agent. Leave open the console window you used to create your agent, you'll need it again soon.
In Visual Studio Code, undo the modification you made in step 3. This will ensure a secure connection with Teams in the next steps.
const app = new App();
Log in and confirm permissions
Note
The next part of this quickstart requires Teams, logged in to a Microsoft 365 work or school account with permissions to install custom Teams apps. This step will check for that permission.
If you don't have a Microsoft 365 account, you can proceed to Next steps to continue working on your agent's code and complete the rest of this quickstart later. See Microsoft 365 Developer Program for information about getting a developer sandbox subscription that you can use to try your app in Teams.
Log in to your Microsoft 365 account from the Teams developer CLI.
teams login
The CLI will confirm your login, your account's permissions to install custom apps ("sideloading"), and check for the presence of an Azure CLI installation (not required for this quickstart).
✔ Logged in as user@contoso.com
✔ Sideloading: enabled

Azure CLI: installed, not logged in
To continue with this quickstart, sideloading must be enabled. If it is disabled, you will need your organization's Microsoft 365 administrator to enable it for your account. See Allow users to upload custom apps for administrator instructions for enabling this permission. In the meantime, you can proceed to Next steps to continue working on your agent's code.
Prerequisites
This quickstart is divided into two sections. In the first section, you'll need:
- Node.js 24 or later (installer download)
- Python 3.12 or later (installer download)
- Visual Studio Code (installer download)
In the second part, you'll also need Teams, with a Microsoft 365 work or school account that has permissions to install custom Teams apps.
If you don't have an account, or you aren't sure about your permissions, you can still begin. The quickstart will address those requirements when they're needed.
Create code for an agent and try it in Microsoft 365 Agents Playground
Install the Teams developer CLI and Microsoft 365 Agents Playground.
npm install -g @microsoft/teams.cli @microsoft/m365agentsplaygroundUse
teams project newto create the code for a new agent from a template and open it in Visual Studio Code.teams project new python echo-bot cd echo-bot code .Open
src/main.py. Find the line that readsapp = App()and modify it to read:app = App(skip_auth=True)This is a temporary modification to enable Microsoft 365 Agents Playground to communicate with the agent.
Start the agent. Once it's running, you'll see a confirmation that it's running on port 3978.
python -m venv .venv source .venv/bin/activate pip install -e . python src/main.pyIn a new console window, start Microsoft 365 Agents Playground.
agentsplaygroundThis will connect Agents Playground to your agent and open the interface in a new browser tab.
Use the compose box to send your agent a message and see it respond in the chat. Your agent's up and running locally!
Close the Agents Playground tab in your browser, and use Ctrl+C in both console windows to stop Agents Playground and your agent. Leave open the console window you used to create your agent, you'll need it again soon.
In your editor, undo the modification you made in step 3. This will ensure a secure connection with Teams in the next steps.
app = App()
Log in and confirm permissions
Note
The next part of this quickstart requires Teams, logged in to a Microsoft 365 work or school account with permissions to install custom Teams apps. This step will check for that permission.
If you don't have a Microsoft 365 account, you can proceed to Next steps to continue working on your agent's code and complete the rest of this quickstart later. See Microsoft 365 Developer Program for information about getting a developer sandbox subscription that you can use to try your app in Teams.
Log in to your Microsoft 365 account from the Teams developer CLI.
teams login
The CLI will confirm your login, your account's permissions to install custom apps ("sideloading"), and check for the presence of an Azure CLI installation (not required for this quickstart).
✔ Logged in as user@contoso.com
✔ Sideloading: enabled

Azure CLI: installed, not logged in
To continue with this quickstart, sideloading must be enabled. If it is disabled, you will need your organization's Microsoft 365 administrator to enable it for your account. See Allow users to upload custom apps for administrator instructions for enabling this permission. In the meantime, you can proceed to Next steps to continue working on your agent's code
Prerequisites
- Node.js 24 or later (installer download)
- .NET 10 or later (installer download)
- Teams, with a Microsoft 365 work or school account that has permissions to install custom Teams apps (you'll confirm these permissions at the very beginning of the quickstart)
If you don't have a Microsoft 365 work or school account, see Microsoft 365 Developer Program for information about getting a developer sandbox subscription that you can use to try your agent in Teams.
Install tools, log in and confirm permissions
Install the Teams developer CLI and Microsoft 365 Agents Playground, then log in to the developer CLI.
npm install -g @microsoft/teams.cli
teams login
The CLI will confirm your login, your account's permissions to install custom apps ("sideloading"), and check for the presence of an Azure CLI installation (not required for this quickstart).
✔ Logged in as user@contoso.com
✔ Sideloading: enabled

Azure CLI: installed, not logged in
To continue with this quickstart, sideloading must be enabled. If it is disabled, you will need your organization's Microsoft 365 administrator to enable it for your account. See Allow users to upload custom apps for administrator instructions for enabling this permission.
Create code for an agent
Use
teams project newto create the code for a new agent from a template.teams project new csharp EchoBot cd EchoBot/EchoBotStart the agent to confirm it runs. Once it's running, you'll see a confirmation that it's running on port 3978.
dotnet runUse Ctrl+C in the console window to stop your agent. Leave the console window open, you'll need it again soon.
Host a dev tunnel
Teams can only communicate with agents that are reachable from the public Internet. In this step, you use the Microsoft dev tunnel utility to create a tunnel that will expose your agent to the Internet.
In a new console window, install dev tunnel.
Log in to
devtunnelwith your Microsoft 365 account and host a new tunnel.devtunnel user login devtunnel create --allow-anonymous devtunnel port create -p 3978 devtunnel hostYou'll see output like the following:
Connection to host tunnel relay restored.
Hosting port: 3978
Connect via browser: https://4r9dd5xj-3978.usw2.devtunnels.ms
Inspect network activity: https://4r9dd5xj-3978-inspect.usw2.devtunnels.ms

Ready to accept connections for tunnel: joyful-dog-xgz66vp.usw2
Leave the tunnel running. Make a note of the
Connect via browserURL for the next step.
Register, install, and chat in Teams
In the console window you used to create your agent project, use
teams app createto register it with the Teams platform. Replace<tunnel-host>with the fullConnect via browserURL from the previous step. This command creates a configuration file that your agent project needs to communicate with Teams, so it's important to run it from your agent's project directory.teams app create --endpoint <tunnel-host>/api/messages --name echo-bot --env .env
In the console window you used to create your agent project, use
teams app createto register it with the Teams platform. Replace<tunnel-host>with the fullConnect via browserURL from the previous step. This command creates a configuration file that your agent project needs to communicate with Teams, so it's important to run it from your agent's project directory.teams app create --endpoint <tunnel-host>/api/messages --name echo-bot --env appsettings.json
When the
createcommand completes, it will display a menu. Select Install in Teams to open Teams and display the agent installer dialog.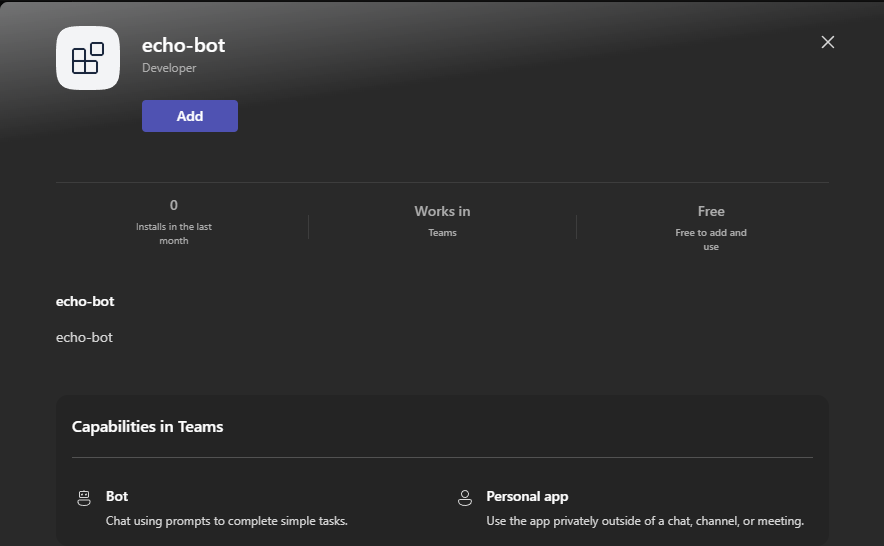
Before proceeding in Teams, return to the console window and select Done in the Teams developer CLI menu to close it. Then, use the command line to start your agent again. Ensure that it is listening on port 3978 before continuing.
npm run dev
Before proceeding in Teams, return to the console window and select Done in the Teams developer CLI menu to close it. Then, use the command line to start your agent again. Ensure that it is listening on port 3978 before continuing.
python src/main.py
Before proceeding in Teams, return to the console window and select Done in the Teams developer CLI menu to close it. Then, use the command line to start your agent again. Ensure that it is listening on port 3978 before continuing.
dotnet run
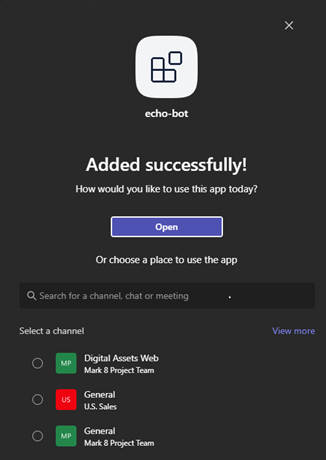
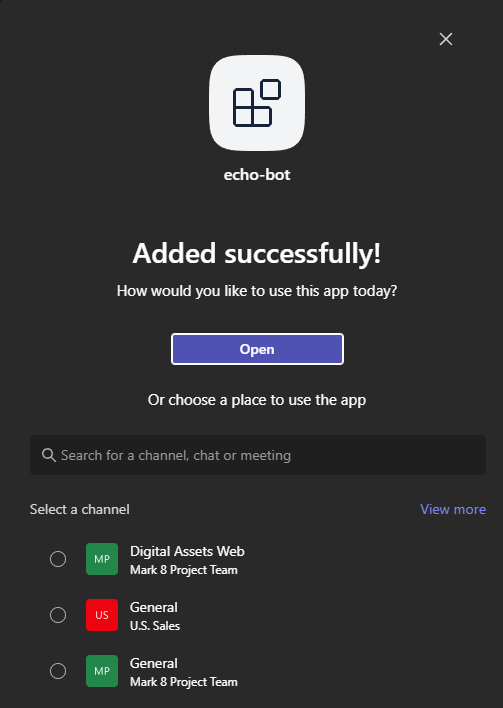
Switch back to Teams and select Add in the installer dialog from step 2 to install the agent. In the How would you like to use this app today? dialog that appears, select Open to open a one-on-one chat with the agent.
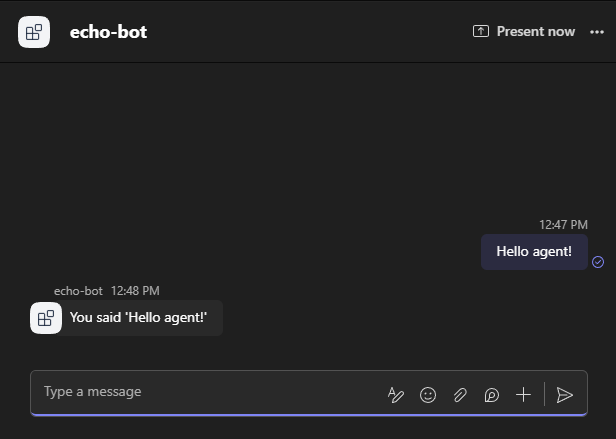
Chat with your agent in Teams!
Next steps
Everything you've created in this quickstart will persist and can be used as the foundation for building an agent. As long as your agent code and dev tunnel are running in your development environment, your agent will be able to send and receive messages in Teams.
All of your agent's behavior is in its code: you can modify and restart it at any time to update its behavior without re-registering or reinstalling it in Teams.
Explore the documentation to learn more about features and best practices for agents in Teams.
Collaborate with us on GitHub
The source for this content can be found on GitHub, where you can also create and review issues and pull requests. For more information, see our contributor guide.
Platform Docs