Note
Access to this page requires authorization. You can try signing in or changing directories.
Access to this page requires authorization. You can try changing directories.
Tabs in chats, channels, or meetings behave more like apps, as you can pin only one tab per app to the left pane for easy access.
Important
We've introduced Microsoft 365 Agents Toolkit (previously known as Teams Toolkit) extension within Visual Studio Code. This version comes to you with many new app development features. We recommend that you use Agents Toolkit v5 for building your Teams app.
Ensure that you've all the prerequisites to build your tab.
Note
This topic reflects version 2.0.x of the Microsoft Teams JavaScript client library (TeamsJS). If you are using an earlier version, refer to the TeamsJS library overview for guidance on the differences between the latest TeamsJS and earlier versions.
Create a tab with JavaScript
Follow the step-by-step guide to build your tab app using JavaScript.
Add a content page to the tab
Create a content page and update the existing files of the tab application:
Create a new personal.html file in your Visual Studio Code with the following markup:
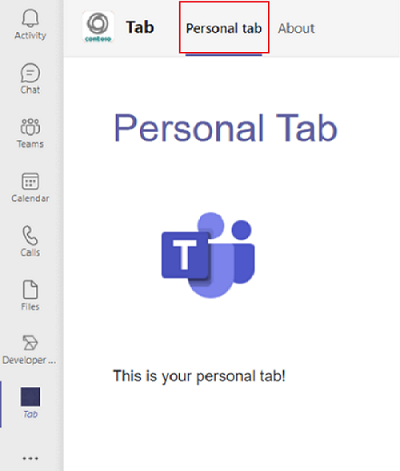
<!DOCTYPE html>
<html>
    <head>
        <meta charset="UTF-8">
        <title>
            <!-- Todo: add your a title here -->
        </title>
        <meta name="viewport" content="width=device-width, initial-scale=1.0">
        <!-- inject:css -->
        <!-- endinject -->
    </head>
        <body>
            <h1>Personal Tab</h1>
            <p><img src="/assets/icon.png"></p>
            <p>This is your personal tab!</p>
        </body>
</html>
Save personal.html in your application's public folder in the following location:
./src/public/<yourDefaultTabNameTab>/personal.htmlOpen
manifest.jsonfrom the following location in your Visual Studio Code:./src/manifest/manifest.jsonAdd the following to the empty
staticTabsarray (staticTabs":[]) and add the following JSON object:{ "entityId": "personalTab", "name": "Personal Tab ", "contentUrl": "https://{{PUBLIC_HOSTNAME}}/<yourDefaultTabNameTab>/personal.html", "websiteUrl": "https://{{PUBLIC_HOSTNAME}}", "scopes": ["personal"] }Important
The path component yourDefaultTabNameTab is the value that you entered in the generator for Default Tab Name plus the word Tab.
For example: DefaultTabName is MyTab then /MyTabTab/
Update the contentURL path component yourDefaultTabNameTab with your actual tab name.
Save the updated
manifest.jsonfile.Open Tab.ts in your Visual Studio Code from the following path to provide your content page in an iFrame:
./src/server/<yourDefaultTabNameTab>/<yourDefaultTabNameTab>.tsAdd the following to the list of iFrame decorators:
@PreventIframe("/<yourDefaultTabName Tab>/personal.html")Save the updated file. Your tab code is complete.
Create your app package
You must have an app package to build and run your application in Teams. The app package is created through a gulp task that validates the manifest.json file and generates the zip folder in the ./package directory. At the command prompt, use the command gulp manifest.
Build and run your application
Build your application
Enter the following command at the command prompt to transpile your solution into the ./dist folder:
gulp build
Run your application
At the command prompt, enter the following command to start a local web server:
gulp serveEnter
http://localhost:3007/<yourDefaultAppNameTab>/in your browser to view your application's home page.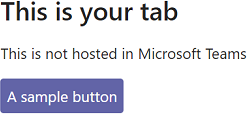
Browse
http://localhost:3007/<yourDefaultAppNameTab>/personal.html, to view your tab.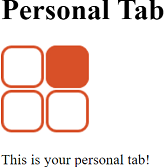
Establish a secure tunnel to your tab
At the command prompt exit the localhost and enter the following command to establish a secure tunnel to your tab:
gulp ngrok-serve
After your tab is uploaded to Microsoft Teams through ngrok and successfully saved, you can view it in Teams until your tunnel session ends.
Upload your application to Teams
Go to Teams and select Apps
 .
.Select Manage your apps > Upload an app > Upload a custom app.
Go to your project directory, browse to the ./package folder, select the zip folder, and choose Open.
Select Add in the dialog. Your tab is uploaded to Teams.
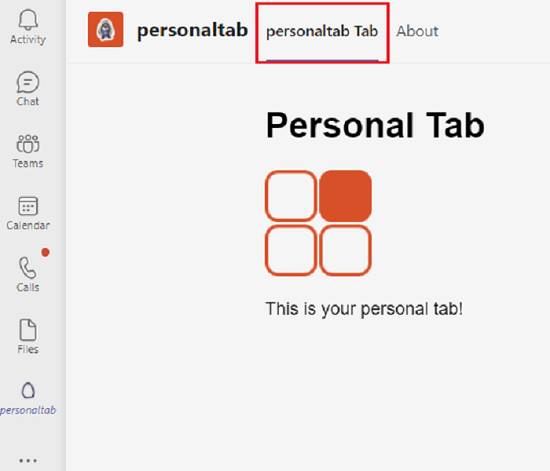
In the left pane of Teams, select ellipses ●●● and then choose your uploaded app to view your tab.
Your tab is successfully created and added in Teams. You can also reorder your tabs in Teams.
Create a tab with ASP.NET Core
At the command prompt, create a new directory for your tab project.
Clone the sample repository into your new directory using the following command or you can download the source code and extract the files:
git clone https://github.com/OfficeDev/Microsoft-Teams-Samples.git
Following are the steps to create a tab:
- Generate your application with a tab
- Update and run your application
- Establish a secure tunnel to your tab
- Update your app package with Developer Portal
- Preview your app in Teams
Generate your application with a tab
Open Visual Studio and select Open a project or solution.
Go to Microsoft-Teams-Samples > samples > tab-personal > razor-csharp folder and open PersonalTab.sln.
In Visual Studio, select F5 or choose Start Debugging from your application's Debug menu to verify if the application is loaded properly. In a browser, go to the following URLs:
<http://localhost:3978/><http://localhost:3978/personalTab><http://localhost:3978/privacy><http://localhost:3978/tou>
Review the source code
Startup.cs
This project was created from an ASP.NET Core 3.1 web application empty template with the Advanced - Configure for HTTPS check box selected at setup. The MVC services are registered by the dependency injection framework's ConfigureServices() method. Additionally, the empty template doesn't enable serving static content by default, so the static files middleware is added to the Configure() method using the following code:
public void ConfigureServices(IServiceCollection services)
  {
      services.AddMvc().SetCompatibilityVersion(CompatibilityVersion.Version_2_2);
  }
public void Configure(IApplicationBuilder app)
  {
    app.UseStaticFiles();
    app.UseMvc();
  }
wwwroot folder
In ASP.NET Core, the web root folder is where the application looks for static files.
Index.cshtml
ASP.NET Core treats files called Index as the default or home page for the site. When your browser URL points to the root of the site, Index.cshtml is displayed as the home page for your application.
AppManifest folder
This folder contains the following required app package files:
- A full color icon measuring 192 x 192 pixels.
- A transparent outline icon measuring 32 x 32 pixels.
- A
manifest.jsonfile that specifies the attributes of your app.
These files must be zipped in an app package for use in uploading your tab to Teams. Teams loads the contentUrl specified in your manifest, embeds it in an <iframe>, and renders it in your tab.
.csproj
In Visual Studio Solution Explorer, right-click on the project and select Edit Project File. At the end of the file, you can see the following code that creates and updates your zip folder when the application builds:
<PropertyGroup>
    <PostBuildEvent>powershell.exe Compress-Archive -Path \"$(ProjectDir)AppManifest\*\" -DestinationPath \"$(TargetDir)tab.zip\" -Force</PostBuildEvent>
  </PropertyGroup>

  <ItemGroup>
    <EmbeddedResource Include="AppManifest\icon-outline.png">
      <CopyToOutputDirectory>Always</CopyToOutputDirectory>
    </EmbeddedResource>
    <EmbeddedResource Include="AppManifest\icon-color.png">
      <CopyToOutputDirectory>Always</CopyToOutputDirectory>
    </EmbeddedResource>
    <EmbeddedResource Include="AppManifest\manifest.json">
      <CopyToOutputDirectory>Always</CopyToOutputDirectory>
    </EmbeddedResource>
  </ItemGroup>
Update and run your application
Open Visual Studio Solution Explorer and go to Pages > Shared folder and open _Layout.cshtml and add the following to the
<head>tags section:<script src="https://ajax.aspnetcdn.com/ajax/jQuery/jquery-3.4.1.min.js"></script> <script src="https://res.cdn.office.net/teams-js/2.0.0/js/MicrosoftTeams.min.js" integrity="sha384-QtTBFeFlfRDZBfwHJHYQp7MdLJ2C3sfAEB1Qpy+YblvjavBye+q87TELpTnvlXw4" crossorigin="anonymous"></script>In Visual Studio Solution Explorer, open PersonalTab.cshtml from Pages folder and add
microsoftTeams.app.initialize()in the<script>tags.Select Save.
In Visual Studio, select F5 or choose Start Debugging from your application's Debug menu.
Establish a secure tunnel to your tab
At the command prompt in the root of your project directory, run the following command to establish a secure tunnel to your tab:
ngrok http 3978 --host-header=localhost
Update your app package with Developer Portal
Go to Developer portal.
Open Apps and select Import app.
The app package file name is
tab.zipand it's available at/bin/Debug/netcoreapp3.1/tab.zippath.Select
tab.zipand open it in the Developer Portal.A default App ID is created and populated in Basic information section.
Add the Short and Long description for your app in Descriptions.
In Developer Information, add the required details and in Website (must be a valid HTTPS URL) give your ngrok HTTPS URL.
In App URLs, update the Privacy policy to
https://<yourngrokurl>/privacyand Terms of use tohttps://<yourngrokurl>/touand select Save.In App features, select Personal app > Create your first personal app tab and enter the name and update the Content URL with
https://<yourngrokurl>/personalTab. Leave the Website URL field blank and select Context as personalTab from the dropdown list and select Confirm.Select Save.
In the Domains section, domains from your tabs must contain your ngrok URL without the HTTPS prefix
<yourngrokurl>.ngrok.io.
Preview your app in Teams
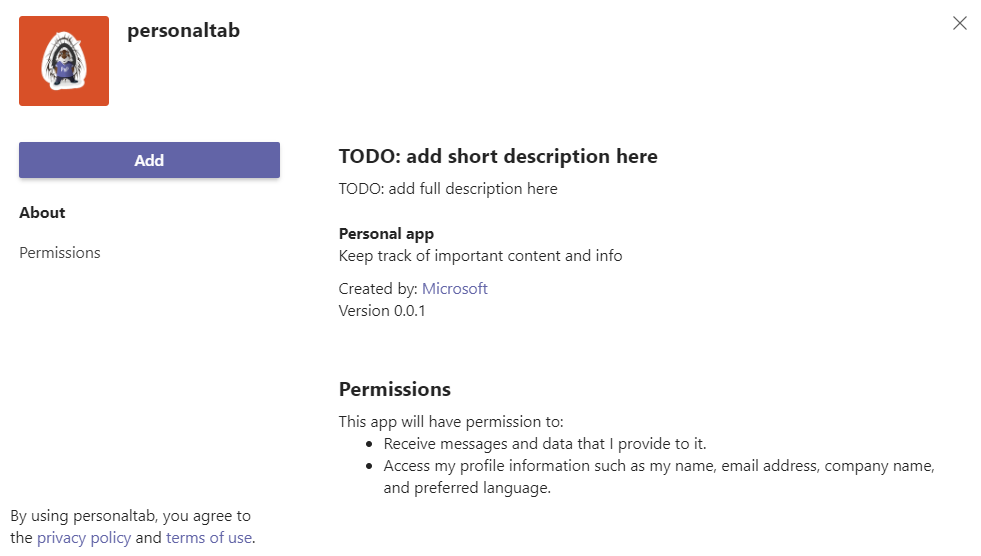
Select Preview in Teams from the Developer Portal toolbar, Developer Portal informs you that your custom app is uploaded successfully. The Add page appears for your app in Teams.
Select Add to load the tab in Teams. Your tab is now available in Teams.
Your tab is successfully created and added in Teams. You can also reorder your tab in Teams.
Create a tab with ASP.NET Core MVC
At the command prompt, create a new directory for your tab project.
Clone the sample repository into your new directory using the following command or you can download the source code and extract the files:
git clone https://github.com/OfficeDev/Microsoft-Teams-Samples.git
Following are the steps to create a tab:
- Generate your application with a tab
- Update and run application
- Establish a secure tunnel to your tab
- Update your app package with Developer Portal
- Preview your app in Teams
Generate your application with a tab
Open Visual Studio and select Open a project or solution.
Go to Microsoft-Teams-Samples > samples > tab-personal > mvc-csharp folder and open PersonalTabMVC.sln in Visual Studio.
In Visual Studio, select F5 or choose Start Debugging from your application's Debug menu to verify if the application is loaded properly. In a browser, go to the following URLs:
<http://localhost:3978><http://localhost:3978/personalTab><http://localhost:3978/privacy><http://localhost:3978/tou>
Review the source code
Startup.cs
This project was created from an ASP.NET Core 3.1 web application empty template with the Advanced - Configure for HTTPS check box selected at setup. The MVC services are registered by the dependency injection framework's ConfigureServices() method. Additionally, the empty template doesn't enable serving static content by default, so the static files middleware is added to the Configure() method using the following code:
public void ConfigureServices(IServiceCollection services)
  {
    services.AddMvc().SetCompatibilityVersion(CompatibilityVersion.Version_2_2);
  }
public void Configure(IApplicationBuilder app)
  {
    app.UseStaticFiles();
    app.UseMvc();
  }
wwwroot folder
In ASP.NET Core, the web root folder is where the application looks for static files.
AppManifest folder
This folder contains the following required app package files:
- A full color icon measuring 192 x 192 pixels.
- A transparent outline icon measuring 32 x 32 pixels.
- A
manifest.jsonfile that specifies the attributes of your app.
These files must be zipped in an app package for use in uploading your tab to Teams. Teams loads the contentUrl specified in your manifest, embeds it in an iFrame, and renders it in your tab.
.csproj
In the Visual Studio Solution Explorer, right-click on the project and select Edit Project File. At the end of the file, you see the following code that creates and updates your zip folder when the application builds:
<PropertyGroup>
    <PostBuildEvent>powershell.exe Compress-Archive -Path \"$(ProjectDir)AppManifest\*\" -DestinationPath \"$(TargetDir)tab.zip\" -Force</PostBuildEvent>
  </PropertyGroup>

  <ItemGroup>
    <EmbeddedResource Include="AppManifest\icon-outline.png">
      <CopyToOutputDirectory>Always</CopyToOutputDirectory>
    </EmbeddedResource>
    <EmbeddedResource Include="AppManifest\icon-color.png">
      <CopyToOutputDirectory>Always</CopyToOutputDirectory>
    </EmbeddedResource>
    <EmbeddedResource Include="AppManifest\manifest.json">
      <CopyToOutputDirectory>Always</CopyToOutputDirectory>
    </EmbeddedResource>
  </ItemGroup>
Models
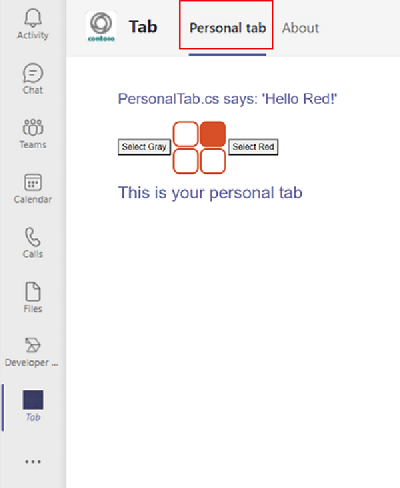
PersonalTab.cs presents a message object and methods that are called from PersonalTabController when a user selects a button in the PersonalTab View.
Views
These views are the different views in ASP.NET Core MVC:
Home: ASP.NET Core treats files called Index as the default or home page for the site. When your browser URL points to the root of the site, Index.cshtml is displayed as the home page for your application.
Shared: The partial view markup _Layout.cshtml contains the application's overall page structure and shared visual elements. It also references the Teams Library.
Controllers
The controllers use the ViewBag property to transfer values dynamically to the Views.
Update and run your application
Open Visual Studio Solution Explorer and go to Views > Shared folder and open _Layout.cshtml, and add the following to the
<head>tags section:<script src="https://ajax.aspnetcdn.com/ajax/jQuery/jquery-3.4.1.min.js"></script> <script src="https://res.cdn.office.net/teams-js/2.0.0/js/MicrosoftTeams.min.js" integrity="sha384-QtTBFeFlfRDZBfwHJHYQp7MdLJ2C3sfAEB1Qpy+YblvjavBye+q87TELpTnvlXw4" crossorigin="anonymous"></script>In Visual Studio Solution Explorer, open PersonalTab.cshtml from Views > PersonalTab folder and add
microsoftTeams.app.initialize()inside the<script>tags.Select Save.
In Visual Studio, select F5 or choose Start Debugging from your application's Debug menu.
Establish a secure tunnel to your tab
At the command prompt in the root of your project directory, run the following command to establish a secure tunnel to your tab:
ngrok http 3978 --host-header=localhost
Update your app package with Developer Portal
Go to Developer portal.
Open Apps and select Import app.
The name of your app package is tab.zip. It's available in the following path:
/bin/Debug/netcoreapp3.1/tab.zipSelect tab.zip and open it in the Developer Portal.
A default App ID is created and populated in Basic information section.
Add the Short and Long description for your app in Descriptions.
In Developer information, add the required details and in Website (must be a valid HTTPS URL) give your ngrok HTTPS URL.
In App URLs, update the Privacy policy to
https://<yourngrokurl>/privacyand Terms of use tohttps://<yourngrokurl>/touand select Save.In App features, select Personal app > Create your first personal app tab and enter the name and update the Content URL with
https://<yourngrokurl>/personalTab. Leave the Website URL field blank and select Context as personalTab from the dropdown list and select Confirm.Select Save.
In the Domains section, Domains from your tabs must contain your ngrok URL without the HTTPS prefix
<yourngrokurl>.ngrok.io.
Preview your app in Teams
Select Preview in Teams from the Developer Portal toolbar, Developer Portal informs you that your custom app is uploaded successfully. The Add page appears for your app in Teams.
Select Add to load the tab on Teams. Your tab is now available in Teams.
Your tab is successfully created and added in Teams. You can also reorder your tab in Teams.
Blazor lets you build interactive web UIs using C#, instead of JavaScript. You can create a tab app and a bot app with Blazor and the latest version of Visual Studio.

Note
Agents Toolkit doesn't support the message extension capability.
Here's a list of tools you require for building and deploying your app.
| Install | For using... | |
|---|---|---|
| Required | ||
| Visual Studio version 17.2.0 preview 2.1 | Select Visual Studio Enterprise 2022 Preview (version 17.2.0 preview 2.1). | |
| Microsoft Teams | Microsoft Teams to collaborate with everyone you work with through apps for chat, meetings, and call-all in one place. | |
| Microsoft Edge (recommended) or Google Chrome | A browser with developer tools. |
Prepare development environment
After you've installed the required tools, set up the development environment.
Install Agents Toolkit
Agents Toolkit helps simplify the development process with tools to provision and deploy cloud resources for your app, publish to the Teams Store, and more. You can use Agents toolkit with Visual Studio, or as Agents Toolkit Command Line Interface.
You can use the latest version of the Visual Studio to develop Teams apps with Blazor Server in .NET.
To install the Agents Toolkit extension:
Download the latest version of the Visual Studio.
Open the Visual Studio installer file (
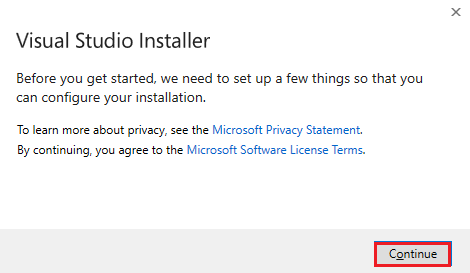
.exe) from your download folder.Select Continue in the Visual Studio Installer page to configure your installation.
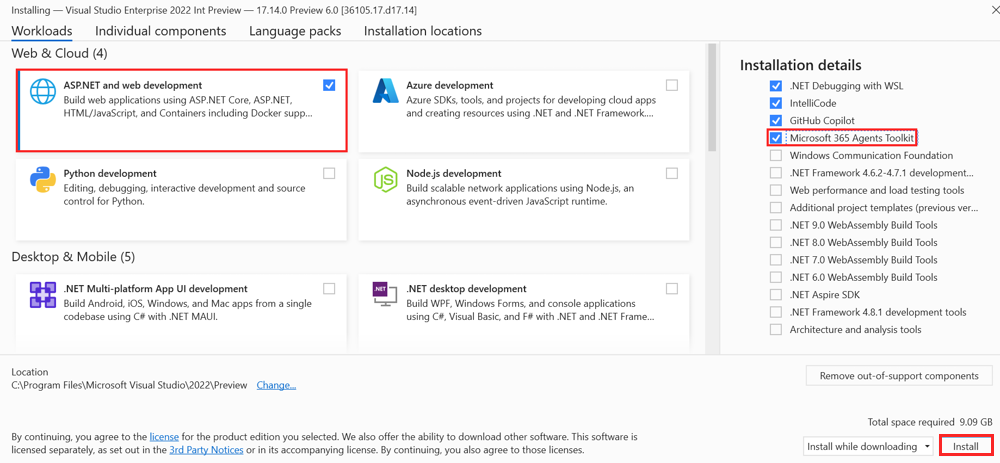
Under Workloads, select ASP.NET and web development.
Under Installation details, select Microsoft 365 Agents Toolkit.
Select Install.
Your Visual Studio is installed in a few minutes.
Set up your Teams development tenant
A tenant is like a space or a container for your organization in Teams, where you chat, share files, and run meetings. This space is also where you upload and test your custom app. Let's verify if you're ready to develop with the tenant.
Enable custom app upload
After creating the app, you must load your app in Teams without distributing it. This process is known as custom app upload. Sign in to your Microsoft 365 account to view this option.
Do you already have a tenant and the admin access? Let's check if you really do!
To verify if you can upload a custom app in Teams:
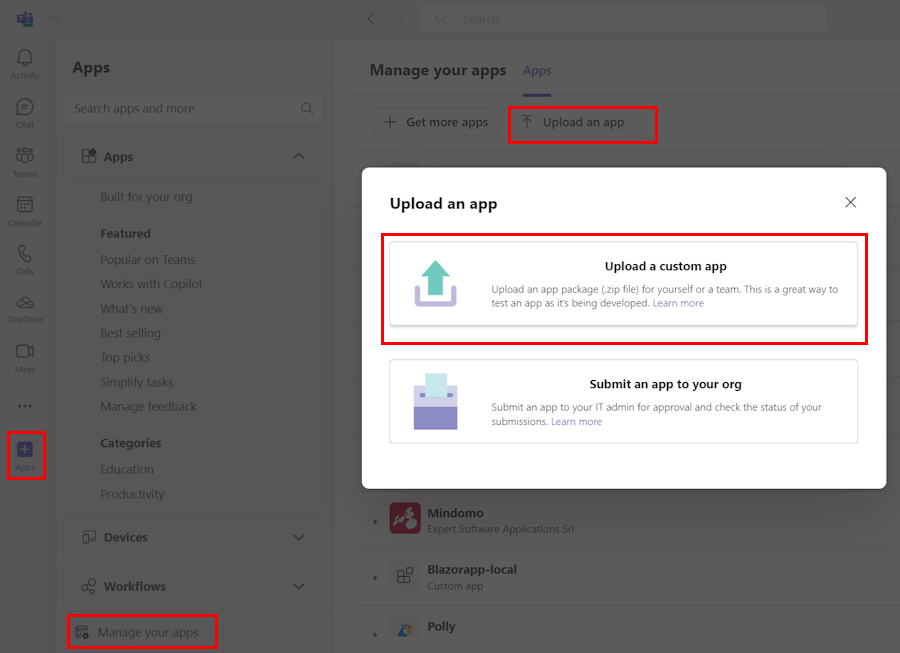
In the Teams client, select Apps.
Select Manage your apps.
Select Upload an app. If you see Upload a custom app option, custom app upload is enabled.
Note
Contact your Teams administrator, if you don't find the option to upload a custom app.
Create a free Teams developer tenant (optional)
If you don't have a Teams developer account, you can get it for free. Join the Microsoft 365 developer program!
Go to the Microsoft 365 developer program.
Select Join Now and follow the onscreen instructions.
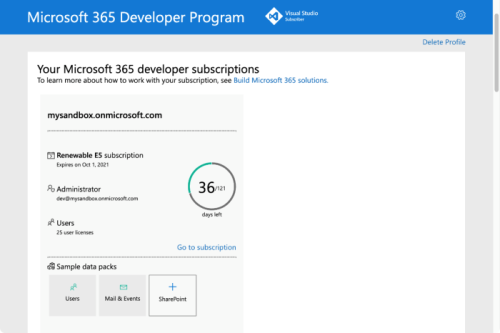
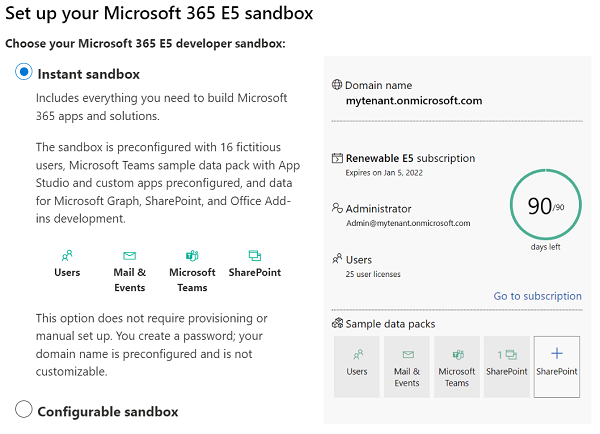
In the welcome screen, select Set up E5 subscription.
Set up your administrator account. After you finish, the following screen appears.
Sign in to Teams using the administrator account you just set up. Verify that you've the Upload a custom app option in Teams.
Get a free Azure account
If you wish to host your app or access resources in Azure, you must have an Azure subscription. Create a free account before you begin.
Now you've got all the tools and set up your accounts. Next, let's set up your development environment and start building!
Create project workspace for your tab app
Start Teams app development by creating your first app. This app uses tab capability.

This tutorial walks you through the steps to create, run, and deploy your first Teams app using .NET/Blazor.
In this page, you'll learn:
Create your tab project
Use Agents Toolkit to create your first tab project. The toolkit takes you through a series of pages to create and configure your Teams app project:
- Create a new project page: You can select the project type.
- Configure your new project page: You can enter the project details.
- Create a new Teams application page: You can select the Teams app capabilities.
To create your tab project workspace
Open the latest version of Visual Studio.
Select Create a new project.
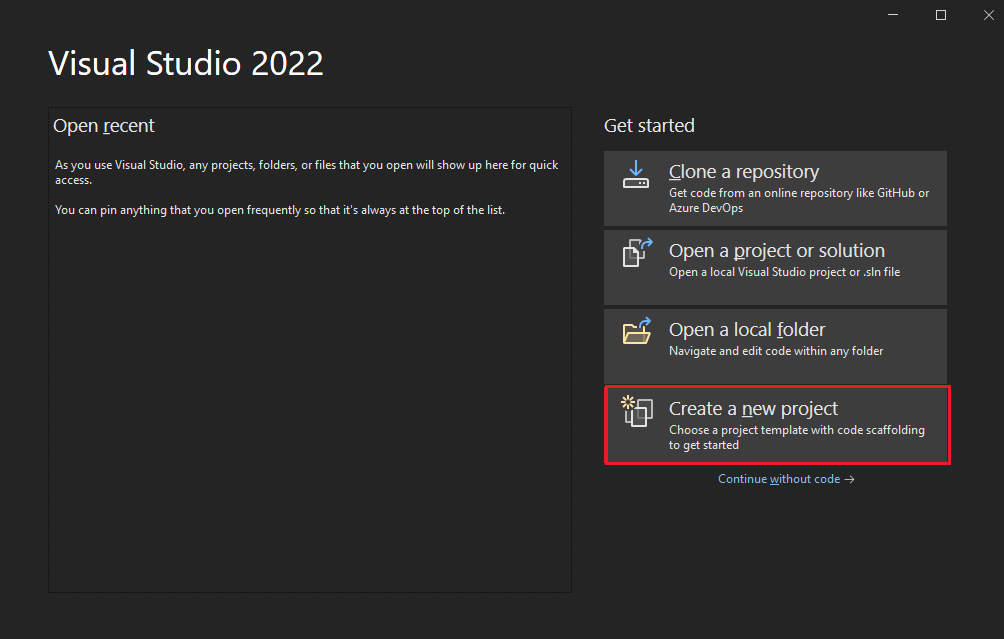
The Create a new project page appears.
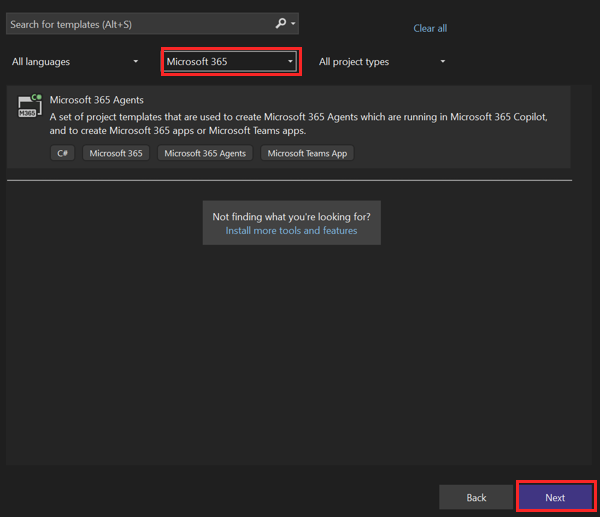
Select the project type and details:
Search for Microsoft 365 from templates dropdown list.
Select Microsoft 365 Agents as the template.
Select Next.
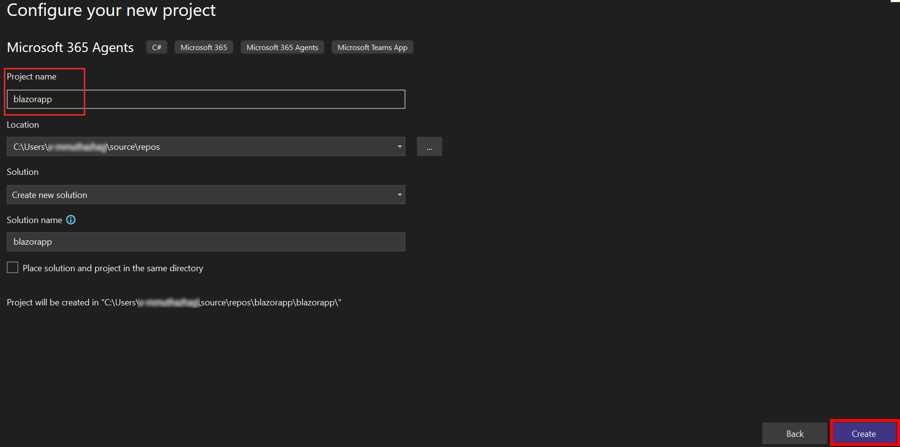
The Configure your new project page appears.
Configure the new project details:
Enter a suitable name for your project.
Note
You can note that the project name you enter is automatically filled in as the Solution name also. If you want, you can change the solution name with no effect on project name.
Select the folder path where you want to create the project workspace.
Enter a different solution name, if you want.
Check the option to save the project and solution in the same folder, if you want. For this tutorial, you don't need this option.
Select Create.
The Create a new Teams application page appears.
Select the Teams app feature:
Select the Tab as the capability for your app.
Select Create.
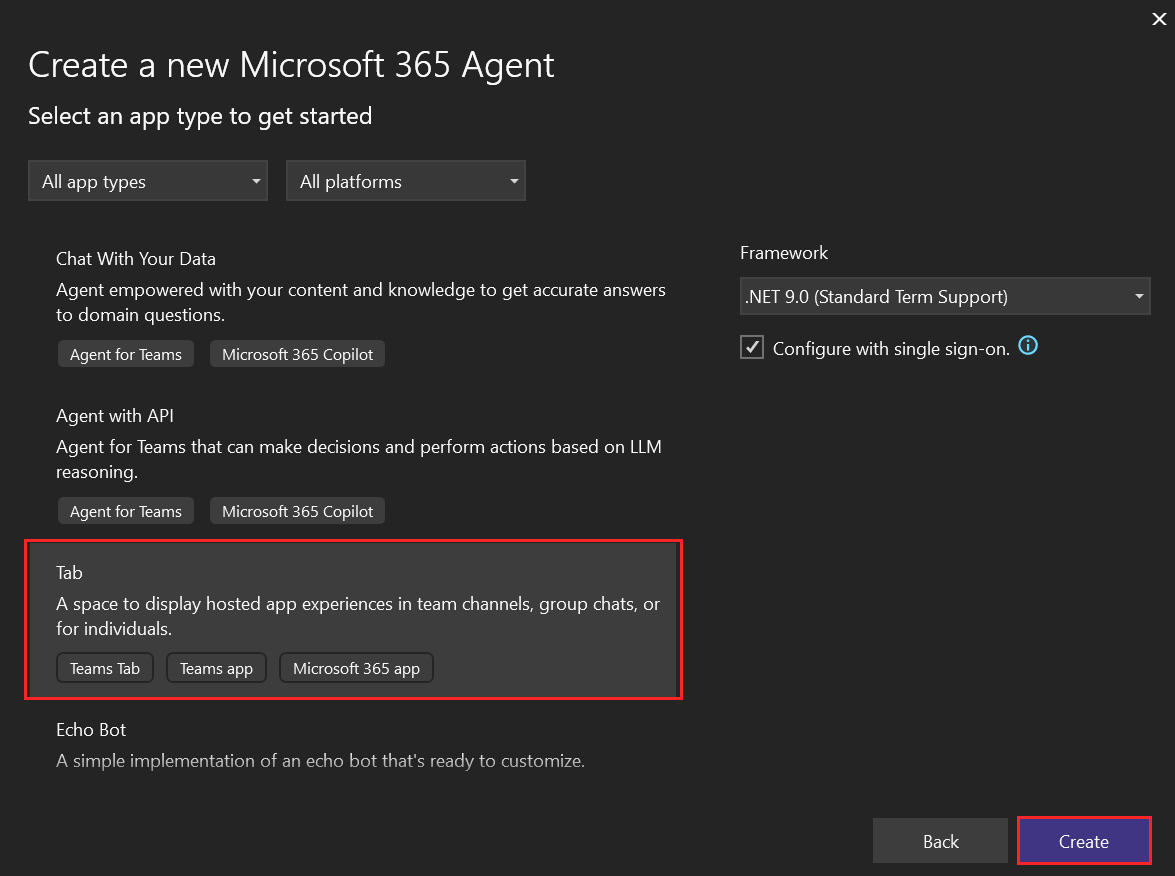
Your Teams tab app is created in few seconds.
A quick recap of creating a Teams tab app.
Watch this short recap for creating a Teams tab app.


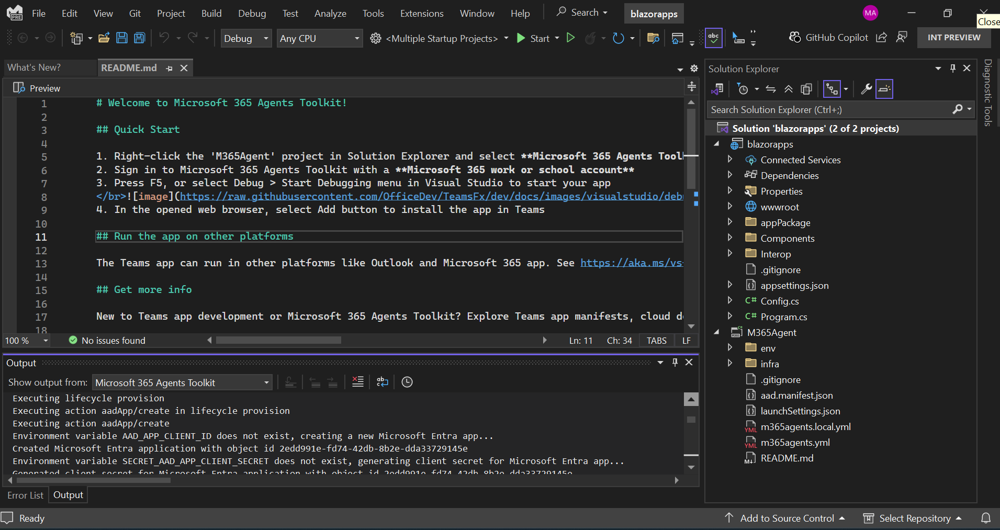
Take a tour of the source code for Teams tab app
After project creation, you've the components to build a basic tab app. You can view the project directory structure in the Solution Explorer pane of the Visual Studio.
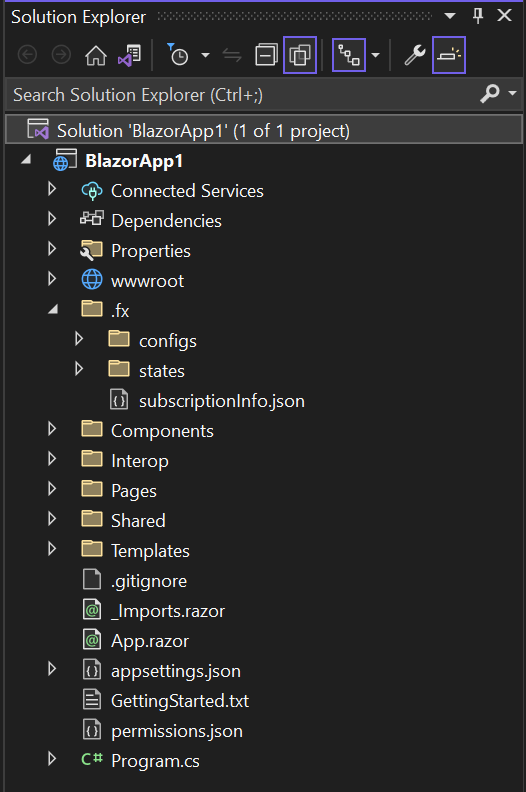
Agents Toolkit creates a scaffolding for your project based on the capabilities you selected. Among other files, Agents Toolkit maintains:
| Folder name | Contents |
|---|---|
| App icons | The app icons are stored as PNG files in color.png and outline.png. |
manifest.json |
The app manifest for publishing through the Developer Portal for Teams is stored in Properties/manifest.json. |
BackendController.cs |
A backend controller is provided in Controllers/BackendController.cs for assisting with authentication. |
Pages/Tab.razor |
The app manifest for publishing through the Developer Portal for Teams is stored in Properties/manifest.json. |
TeamsFx.cs and JS/src/index.js |
The content is used for initializing communications with the Teams host. |
You can add backend functionality by adding other ASP.NET Core controllers to your application.
Build and run your first Teams tab app
After you set up your project workspace with Agents Toolkit, build your tab project.
To build and run your app:
Select Project > Microsoft 365 Agents Toolkit > Select Microsoft 365 Account.
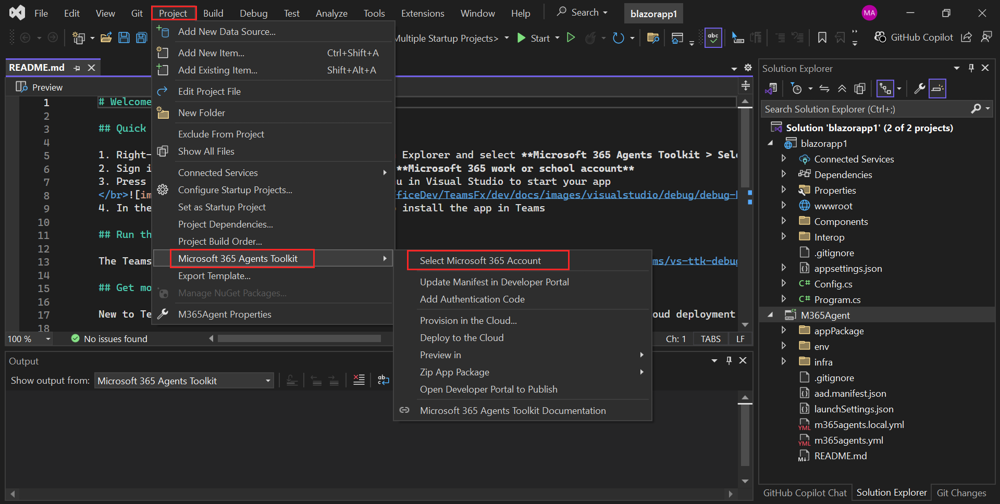
Select your Microsoft 365 account or Add an account to sign in.
Select Debug > Start Debugging or select F5 to run your app in debug mode.
Learn what happens when you run your app locally in the debugger.
When you select F5, Agents Toolkit:
- Registers your application with Microsoft Entra ID.
- Registers your application for uploading in Teams.
- Starts your application backend running locally.
- Starts your application front-end hosted locally.
- Starts Teams in a web browser with a command to instruct Teams to upload a custom app (the URL is registered inside the application manifest).
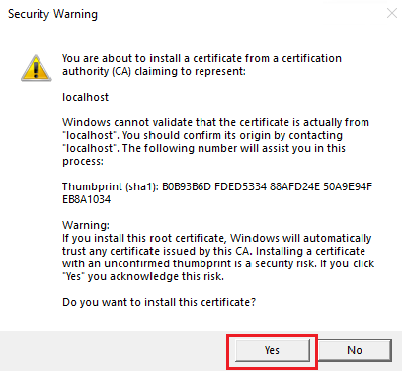
Install the self-signed SSL certificate for local debugging, if requested.
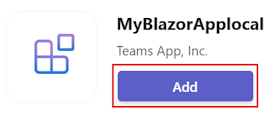
Teams is loaded in a web browser.
Select Add.
Select Open to open the app in personal scope.
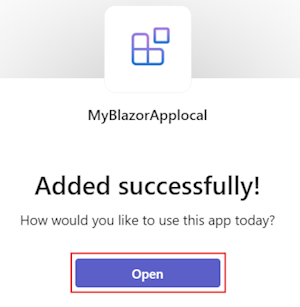
Congratulations, your first tab app is running in your local environment!
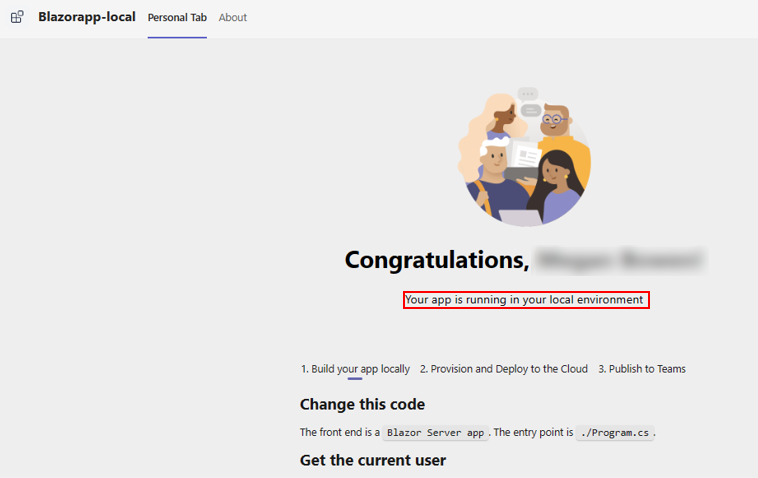
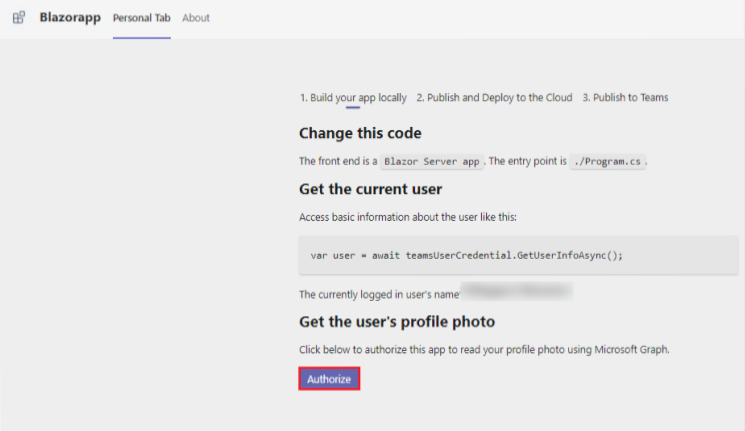
Move through the page to view the user details.
Select Authorize to let your app retrieve user details using Microsoft Graph.
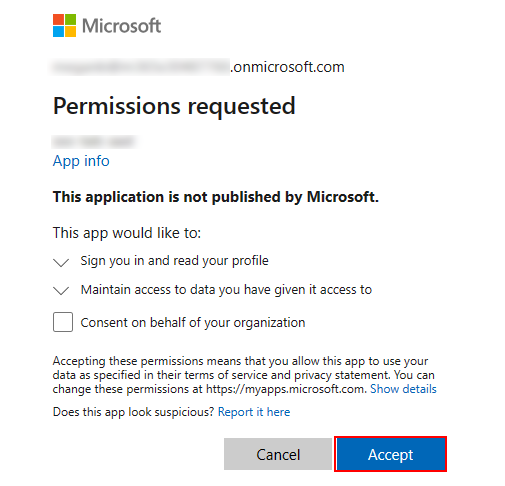
The app requests permission to grant access for displaying user details.
Select Accept to let your app access user details.
Your photograph and details appear in your Personal Tab.

You can do normal debugging activities, such as setting breakpoints, as if it were any other web application. The app supports hot reloading. If you change any file within the project, the page reloads.
Learn how to troubleshoot if your app doesn't run locally.
To run your app in Teams, you need a Microsoft 365 development account that allows custom app upload. You can learn more about it in the Prerequisites section.
Stop debugging in Visual Studio.

Preview your first Teams tab app
You've learned to create, build, and run Teams app with tab capability. The following final steps are to deploy your app on Azure and preview in Teams follow the steps:
Let's deploy the first app with tab capability on Azure using Agents Toolkit.
To provision your tab app in the cloud
Select Project > Microsoft 365 Agents Toolkit > Provision in the Cloud.

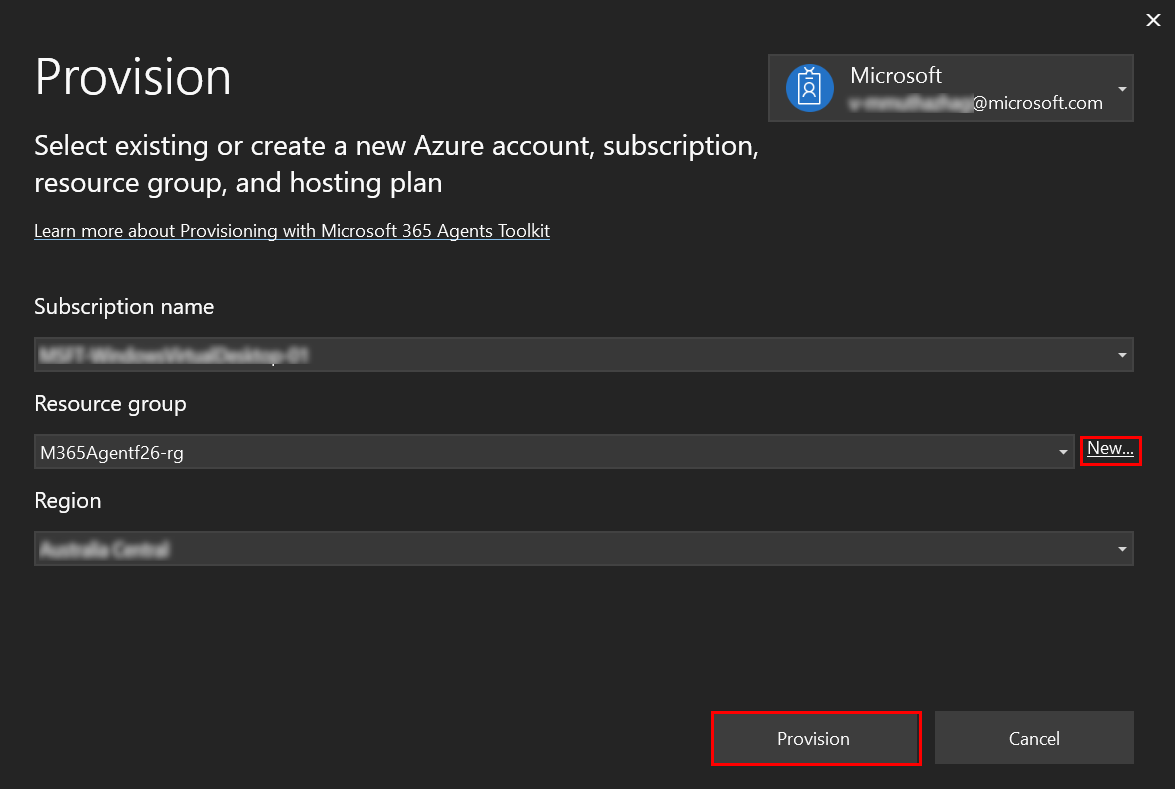
Enter the subscription and resource group details in the Provision dialog:
- Select the subscription name from Subscription name dropdown list.
- Select the resource group from Resource group dropdown list or select New to add the resource group generated for your app.
- Select your Region, if new resource group is created.
- Select Provision.
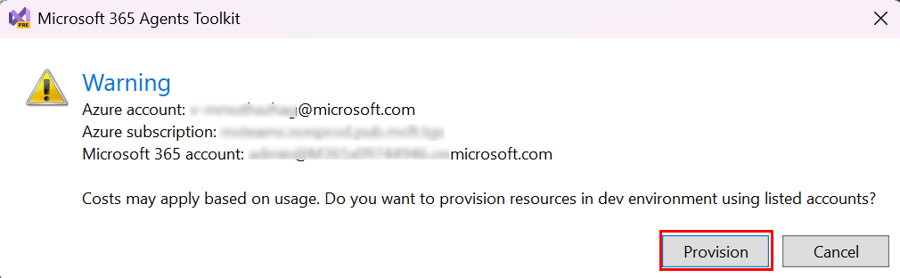
Provision warning displays.
Select Provision.
It takes a few minutes for your resource group to provision in the cloud.
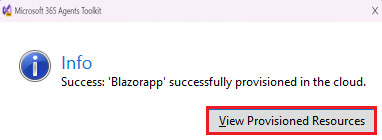
After the provision is complete, select OK.

Select View Provisioned Resources to view on Azure portal.
Sign in to your Azure portal account on the sign-in prompt.
Your app-dev-rg appears.

Your resources are provisioned in the Azure portal!


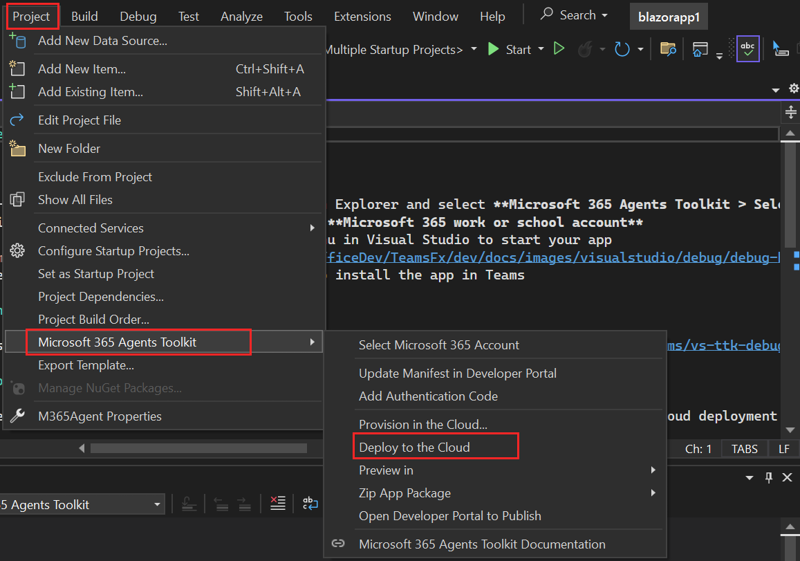
To deploy your tab app to cloud
Select Project > Microsoft 365 Agents Toolkit > Deploy to the Cloud.
Select OK.
Your tab app is successfully deployed to the cloud!

To preview your tab app in Teams
Select Project > Microsoft 365 Agents Toolkit > Preview in Teams.
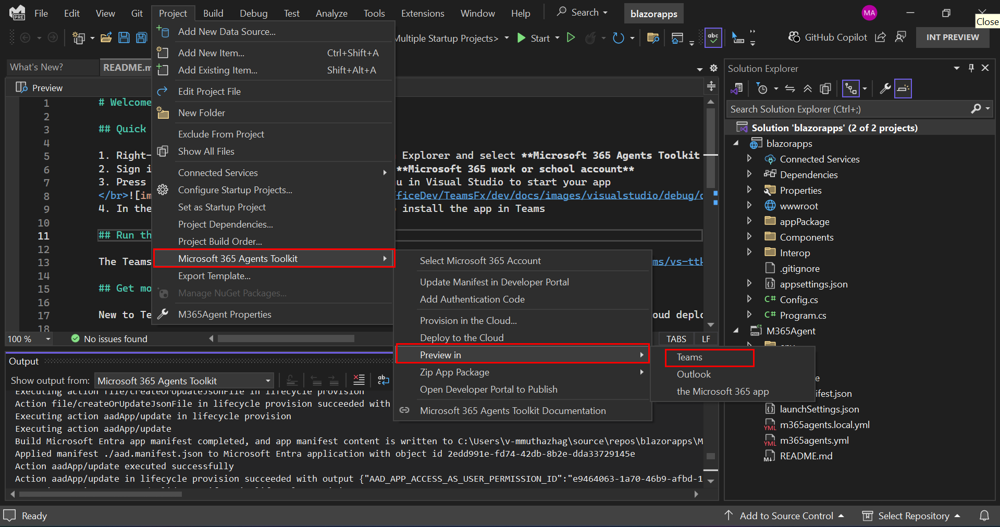
Teams is loaded in a web browser.
Select Add.
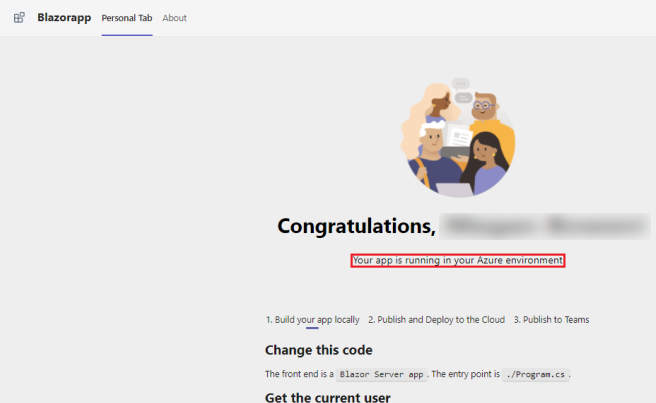
Select Open to open the app in personal scope.
Congratulations, your first tab app is running in your Azure environment!
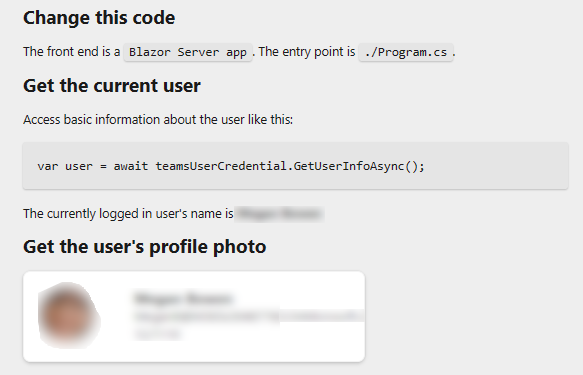
Move through the page to view the user details.
Select Authorize to let your app retrieve user details using Microsoft Graph.
The app requests permission to grant access for displaying user details.
Select Accept to let your app access user details.
Your photograph and details appear in your Personal Tab.

Congratulations
You've completed the tutorial to build a tab app with Blazor.
Reorder tabs
Starting with manifest version 1.7, developers can rearrange all tabs in their personal app. You can move the bot chat tab, which always defaults to the first position, anywhere in the personal app tab header. Two reserved tab entityId keywords are declared, conversations and about.
If you create a bot with a personal scope, it appears in the first tab position in a personal app by default. If you want to move it to another position, you must add a static tab object to your manifest with the reserved keyword, conversations. The conversation tab appears on web and desktop depending on where you add the conversation tab in the staticTabs array.
{
   "staticTabs":[
      {

      },
      {
         "entityId":"conversations",
         "scopes":[
            "personal"
         ]
      }
   ]
}
Note
In mobile, tabs are reordered as defined in staticTabs.
This property also enables you to set the default landing capability for your app. You can configure the app to open as a tab or a bot by default. For more information, see configure default landing capability.
Extend static tabs to group chat, channels, and meetings
Note
To extend your static tab to group chat, channels, and meetings, use the app manifest v1.16 or later.
You can extend static tabs to group chat, channels, and meetings. Instead of pinned app content, you can build tabs that behave more like apps as you can pin only one tab per app, for example, pinning a single YouTube app tab.
To extend your static tabs to group chat, channels, and meetings, update your app manifest with the scopes and context parameters in the staticTabs property. When you declare multiple static tabs in the manifest and add the app in the channel scope, only the first tab listed in the manifest appears.
Following is an example of app manifest where a static tab is defined that works in all scopes and contexts in Teams:
"staticTabs": [
  {
     "entityId": "homeTab",
     "scopes": [
       "personal",
       "groupChat",
       "team"
      ],
     "context": [
       "personalTab",
       "channelTab",
       "privateChatTab",
       "meetingChatTab",
       "meetingDetailsTab",
       "meetingSidePanel",
       "meetingStage"
      ],
      "name": "Contoso",
      "contentUrl": "https://contoso.com/content (displayed in Teams canvas)",
      "websiteUrl": "https://contoso.com/content (displayed in web browser)"
  }
],
If a context isn't defined in the app manifest, by default Teams consider the following context:
"context": [
   "personalTab",
   "channelTab",
   "privateChatTab",
   "meetingChatTab",
   "meetingDetailsTab",
   "meetingStage"
]
Enable personal tab apps for calling extensibility
You can create personal scope apps that integrate with Public Switched Telephone Network (PSTN) and Teams-to-Teams calls. Use the right scope and context to build apps that utilize tab type, static scope, personal context, and meeting side panels.
For more information, see build tabs for calling.
Customizing your static tab in chats or meetings
To customize your static tab experience in chats, channels, or meetings, you can use the setConfig APIs in your tab to update the contentUrl and websiteUrl. Following is an example:
pages.config.setConfig({
  "contentUrl": "https://wwww.contoso.com/teamsapp/thread/" + context.threadId,
   ...}
Only contentUrl and websiteUrl changes are supported for setConfig, other properties can't be changed for static tabs.
Offline tabs
Note
Personal tabs with offline functionality are only supported on Teams in Android devices.
You can create a personal tab that works in Teams without an internet connection. An offline tab benefits users who work in areas with poor or no network coverage, such as field agents or frontline workers. Users can perform the following tasks in an offline tab:
- Record data through forms that can include images and videos.
- View details of previously submitted requests, incidents, or forms.
When the user's device reconnects to the internet, the tab automatically synchronizes the locally stored data with an Azure Blob storage. This action ensures that all offline changes made by the user are updated in a central storage, maintaining data consistency across the organization.
Build an offline tab
Before you get started with building an offline tab, ensure that you meet the prerequisites to build a personal tab.
Create an Azure Blob storage. Ensure that you note down the account and container name for later use.
Clone the Microsoft Teams Samples repository.
In the cloned repository, go to samples > tab-support-offline > nodejs and open the folder in Visual Studio Code.
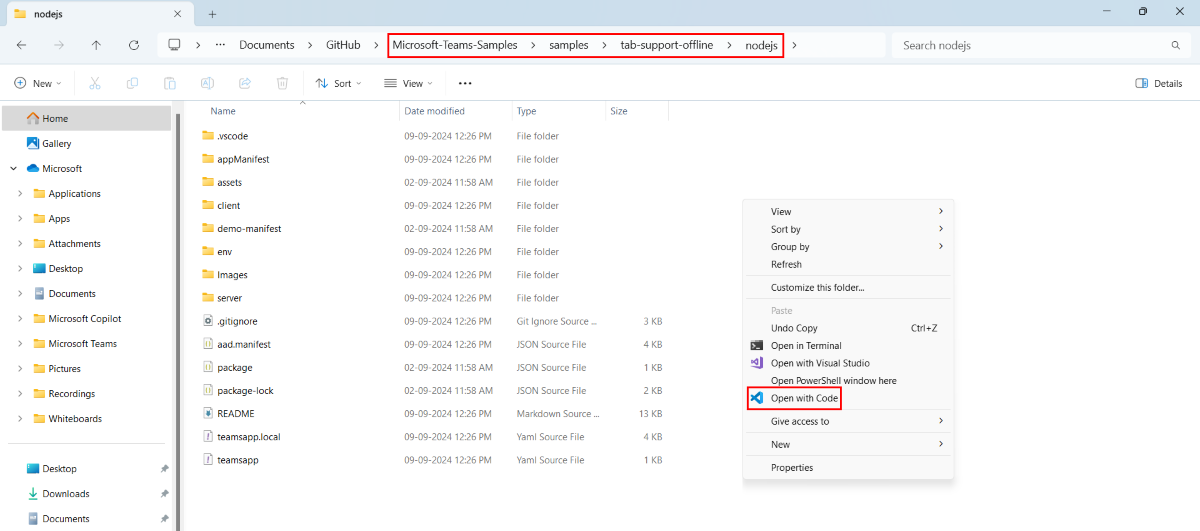
Under EXPLORER, go to server > blobStoreOperations.js and replace
{{ account-Name }}and{{ container-Name }}with your Azure Blob storage account and container's values.Select the F5 key to debug the app. Teams opens in a browser window when the build is complete.
Sign in with your Microsoft 365 account, if prompted.
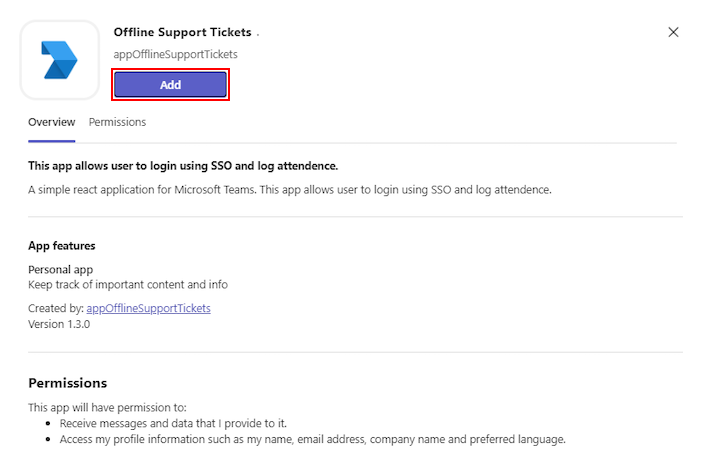
Select Add when a dialog box opens to let you add the tab app to Teams.

Congratulations! You've successfully created a Teams tab with offline functionality.
Best practices for tabs in Teams mobile
To learn how to optimize your tab's performance in the Teams Android and iOS clients, see best practices for Teams mobile.
Code sample
| Sample name | Description | .NET | Node.js | Manifest |
|---|---|---|---|---|
| Tab personal | This sample showcases the development of a custom personal tab for Microsoft Teams, utilizing ASP.NET Core MVC to enhance user interaction. | View | View | View |
| Offline personal tab | This sample app demonstrates a CRUD application that functions offline in Microsoft Teams, allowing users to manage data without an internet connection and automatically sync with blob storage when reconnected. | NA | View | View |
Next step
See also
Collaborate with us on GitHub
The source for this content can be found on GitHub, where you can also create and review issues and pull requests. For more information, see our contributor guide.
Platform Docs