Note
Access to this page requires authorization. You can try signing in or changing directories.
Access to this page requires authorization. You can try changing directories.
The Minecraft Block Wizard, a plugin for Blockbench, lets you add a custom block to Minecraft without any coding experience. It makes it easy as possible to generate the block and add it to your world. After you've created your custom block, you can use Blockbench to customize it. The plugin works similarly to the Minecraft Entity Wizard, which lets you create custom entities.
Demonstration: how to make a custom block
This video shows how to make a custom block with Minecraft Block Wizard.
In this tutorial, you'll learn the following:
- How to add the Minecraft Block Wizard plugin to Blockbench.
- The steps to create a custom block with the Wizard.
- How to export the block for use within Minecraft: Bedrock Edition.
Requirements
To get started, you need the following:
- An installation of Blockbench
- Minecraft Bedrock Edition
- A Windows computer (or an Android device)
Important
Blockbench is provided by external, third-party contributors and is not a Mojang/Microsoft offering.
Getting started
The first step is to install the Block Wizard plugin.
- In Blockbench, go to File > Plugins..., switch to the Available tab, and enter "Minecraft Block Wizard" into the search bar (or scroll until you find it in the list).
- Find the Block Wizard plugin and click Install.
- After it's installed, close the Plugins dialog.
- You'll find the Minecraft Block Wizard in the left sidebar of the start screen, under Loaders. Select it, then click Create a Block!
Next time you want to use it, you can open the Block Wizard from the menu via Tools > Minecraft Block Wizard.
Metadata
On the first page of the Block Wizard, enter the metadata for the block. This includes the name, ID, and creative inventory category. The name and ID fields are required.
- Name: The name of your block will be displayed in the inventory and in other places in the interface.

Identifier: The ID of the block will be used internally, for example in commands. The identifier needs to start with a namespace, a short identifier of your or your project. This is useful to distinguish your own block from blocks with the same purpose, but from another Add-On, if you are using multiple Add-Ons in your world. All blocks that Minecraft comes with by default have the namespace
minecraft:. That namespace is reserved for vanilla blocks. Your ID may look like this:my_Add-On:my_block.Creative Category: Select the tab of the creative inventory that your block will appear in. You can also select a sub-group to add your block to one of the foldable groups within an inventory tab. If you select None, your block will not appear in the creative inventory and you will only be able to get it by using commands.
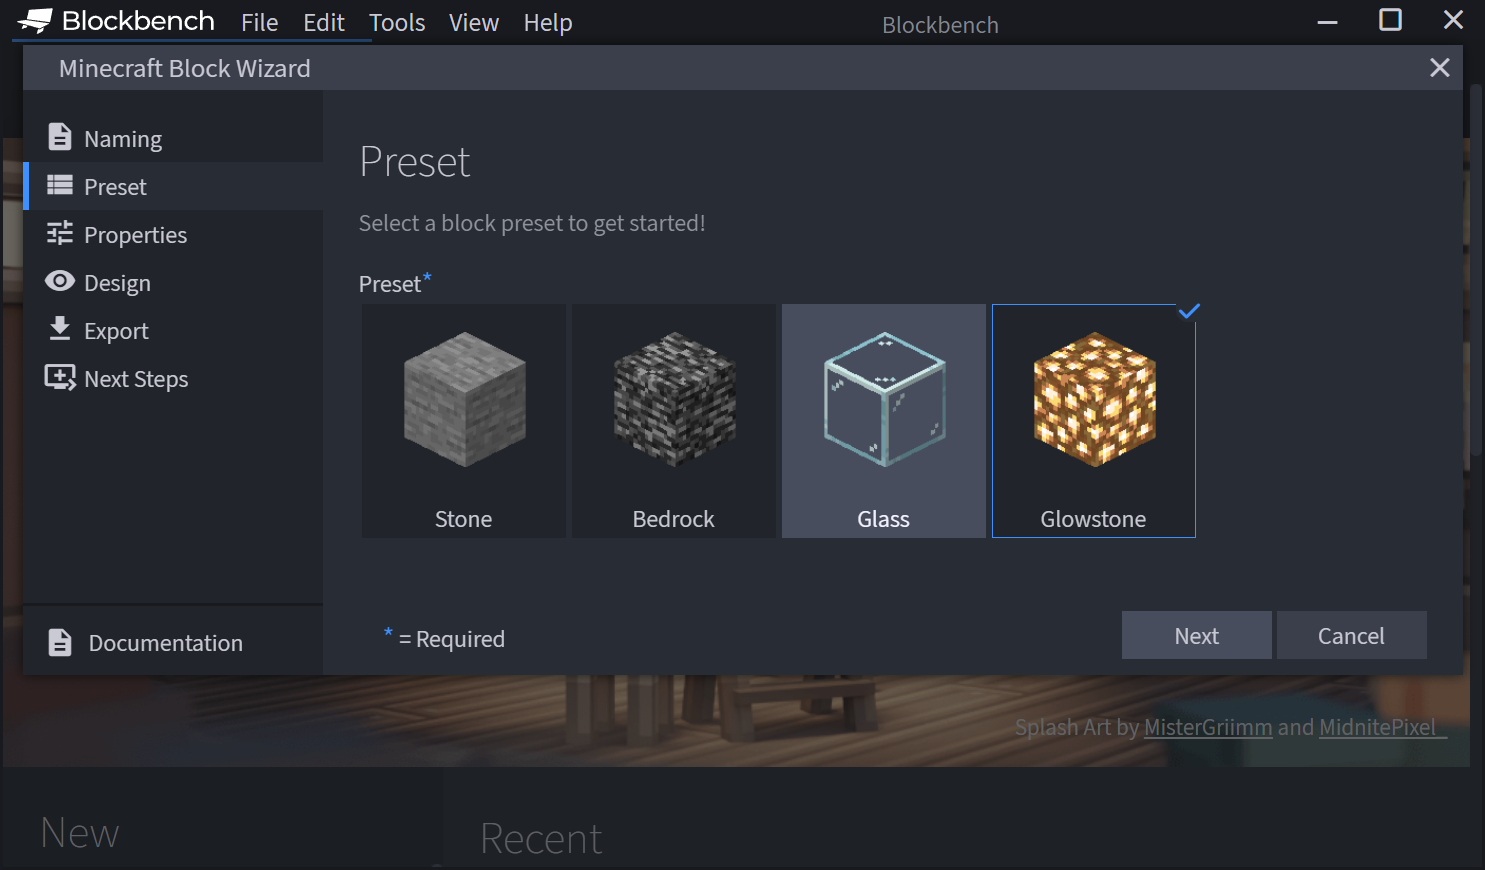
Preset
On this page, you can select a preset to base your block on. The preset will pre-configure all your options to be like a specific Minecraft block, but you can also change all options individually later.
Properties
On this page you can set the basic properties of your block.
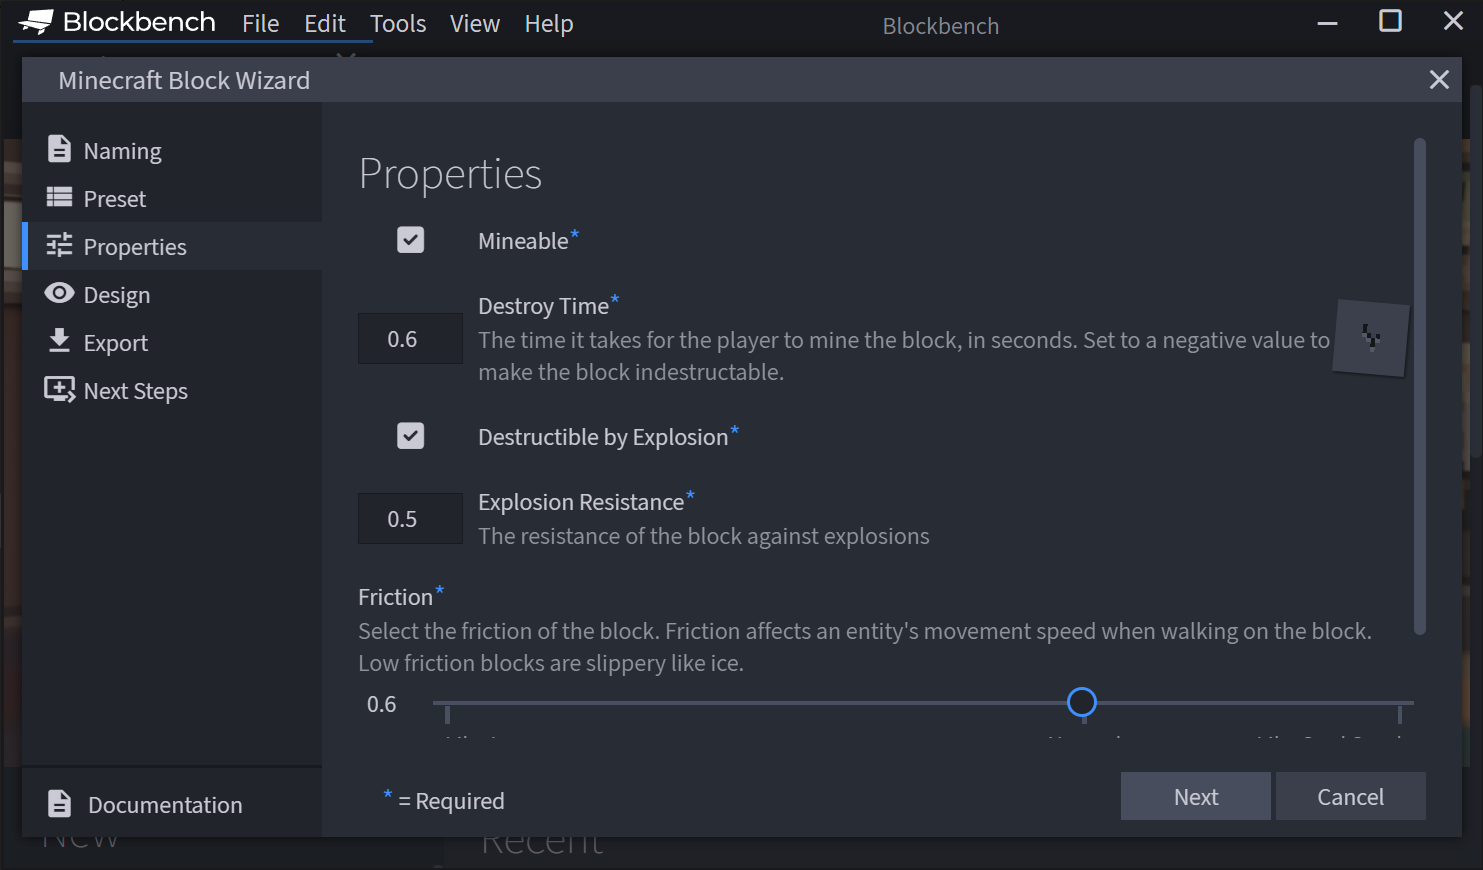
Mineable: Enable this to allow players to mine the block in survival mode. When enabled, you can also set the destroy time, which is the time it takes to destroy the block, in seconds. Right next to that, you can see a little animation that previews how fast the block can be mined. Different mining speeds for different tools such as pick axes are not available at the moment.
Explodable: When enabled, the block can be destroyed by explosions. You can also define the explosion resistance. The higher you set the resistance, the closer the block can be to an explosion without getting destroyed.
Friction: The friction value determines how much the player's feet will stick to the ground when walking on the custom block. Lower friction values will make the block slippery, like ice. The default value of 0.6 will feel normal. Higher friction values will reduce the walk speed on the block.
Flammable: When enabled, the block can catch fire and burn.
Fire Catch Chance: The chance that the block will catch on fire when it's next to an open fire. For reference, the value for normal wood is 5. Higher chances will make the block catch on fire faster.
Fire Destroy Chance: The chance that fire on the block will destroy the block itself. For reference, the value for normal wood is 20. Higher values increase the likelihood of the block being destroyed by fire. If you set the value to 0, the fire on the block will burn forever.
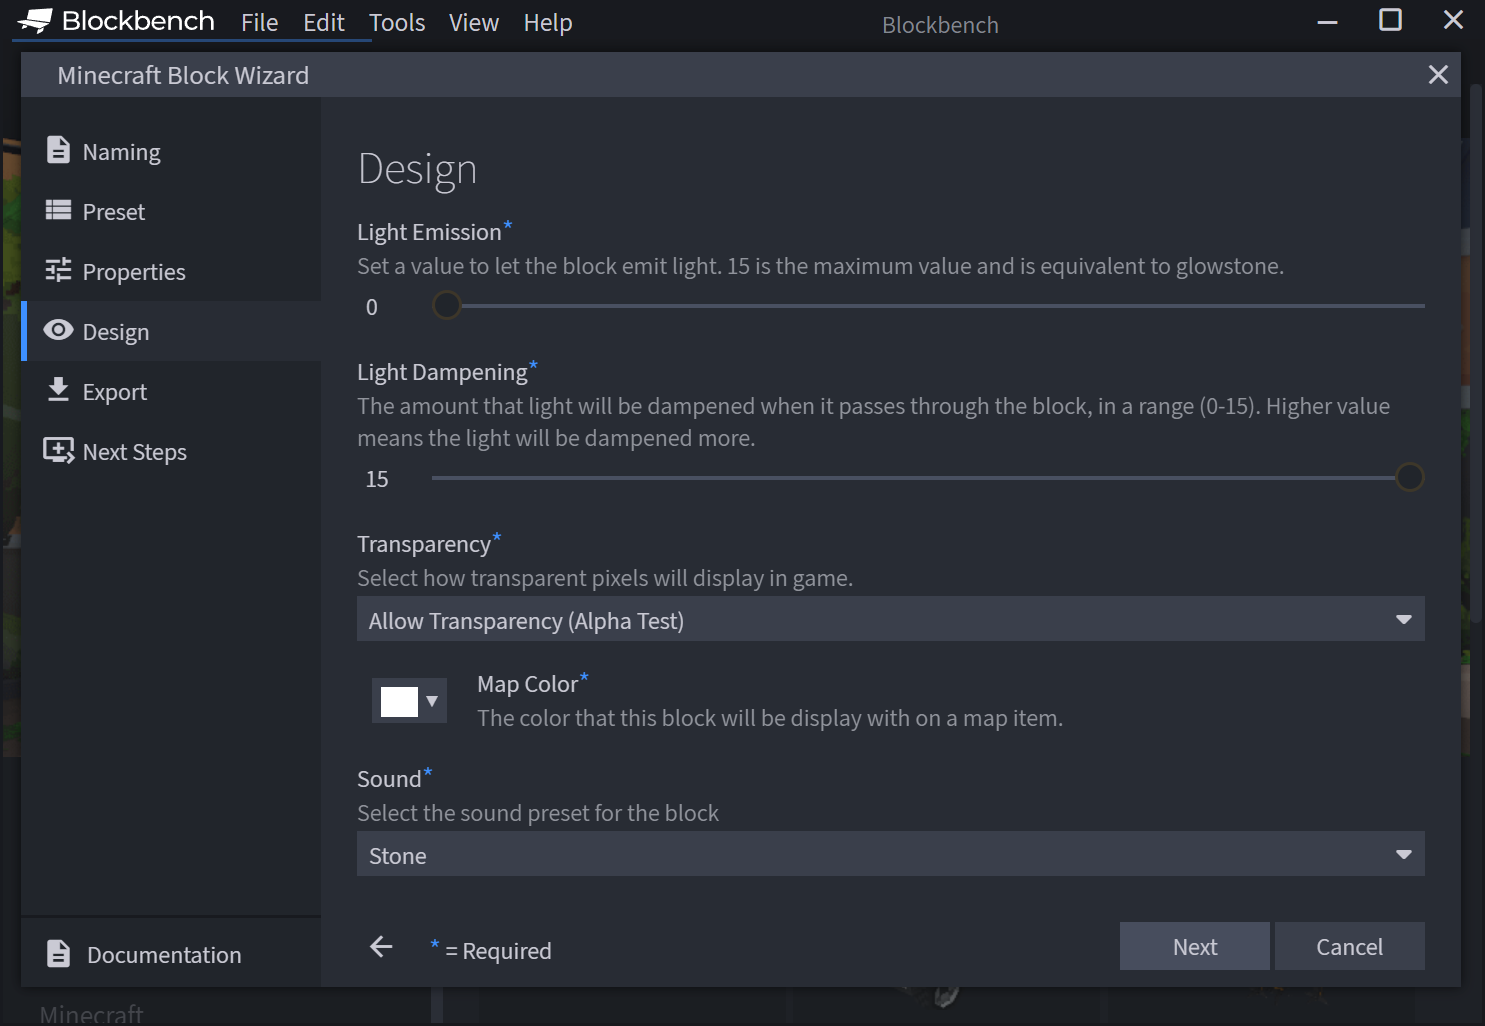
Design
On this page, you can change multiple properties related to the design and sound of the block.
Use current model: This option appears when you already have a bedrock block model currently opened in Blockbench. You can enable the checkbox to export the current model, instead of using the model of the preset block that you selected.
Light Emission: This slider turns your block into a light source. The brightest possible value is 15, which is the equivalent of glow stone.
Light Dampening: Sets how much the block dampens the light that passes through it. A mostly transparent block like a button has a value of 0. A solid block like stone has a value of 15, and blocks all light from coming through. Blocks that let some light through, such as leaves, are somewhere in between.
Transparency: This option determines how transparent textures are rendered:
- Allow Transparency (Alpha Test): This option lets you use either fully opaque or fully transparent pixels. The option is great for models like plants.
- Allow Translucency (Blend): This option lets you use fully transparent, fully opaque, or partially transparent pixels. Partially transparent pixels can be good for see-through materials like water or slime. However, the material has a slightly larger impact on performance and sometimes causes unexpected visual glitches, so only use this option when necessary.
- No Transparency (Opaque): With this option, the texture will be rendered as opaque. Transparent pixels will look black instead. This option is good for models with solid elements, like rocks and chairs.
Map Color: Pick the color that your block will have when displayed on a map in Minecraft. This is the map that can be crafted from paper and a compass.
Sound: Select the sound preset for your block. This will affect all sounds that can be produced when interacting with the block, including the sounds for placing, walking over, or mining the block. For most blocks it should be enough to select a preset of a vanilla block. If you have experience with sound design, you can also implement your own sounds later on.
Export
You have now entered all the information that is necessary to create the block. The Export page allows you to select an export method to create a resource and behavior pack to load the block into your world.
In the Blockbench desktop app, there are three ways to save your pack:
- Export Packs: Create a new pack with your custom block.
- Integrate into Pack: Integrate your new custom block into an existing Add-On.
- Export as MCAddon: Generate a
.mcaddonfile and save it to your computer. You can open this file to load your Add-On into Minecraft, or share this file with friends. If you select this option, you will not be able to directly edit your model in Blockbench after exporting the Add-On.
Tip
In the web app, the only option available to export your pack is MCAddon.
Depending on the export option you selected, you may need to enter some information about the Add-On you're creating.
Pack Name: This name will be used both for the generated file, as well as for the name in the pack menu in Minecraft.
Pack Icon: You can upload an image as an icon to represent your pack in the pack menu. The image should be a PNG file; the recommended resolution is 64 by 64 pixels. The icon is optional.
Installing the pack
To enable your packs for the first time, you need to add the behavior pack to your Minecraft world. Open the world settings and locate the Behavior Packs section. Find your new pack and activate it. Activating the behavior pack automatically activates the connected resource pack. This means that you now have the full Add-On installed into your world.
Tip
You can view a detailed step-by-step walkthrough on how to enable your pack in the Behavior Pack tutorial.
Enter the world and locate the custom block in your creative inventory. Alternatively, if you didn't choose to add your block to a creative inventory tab, you can get it using the /setblock and /give commands.
Note
Alternatively, if you have exported your Add-On as a .mcaddon file, you can open this file in order to automatically add the packs into Minecraft.
Modifying your block
Model editing
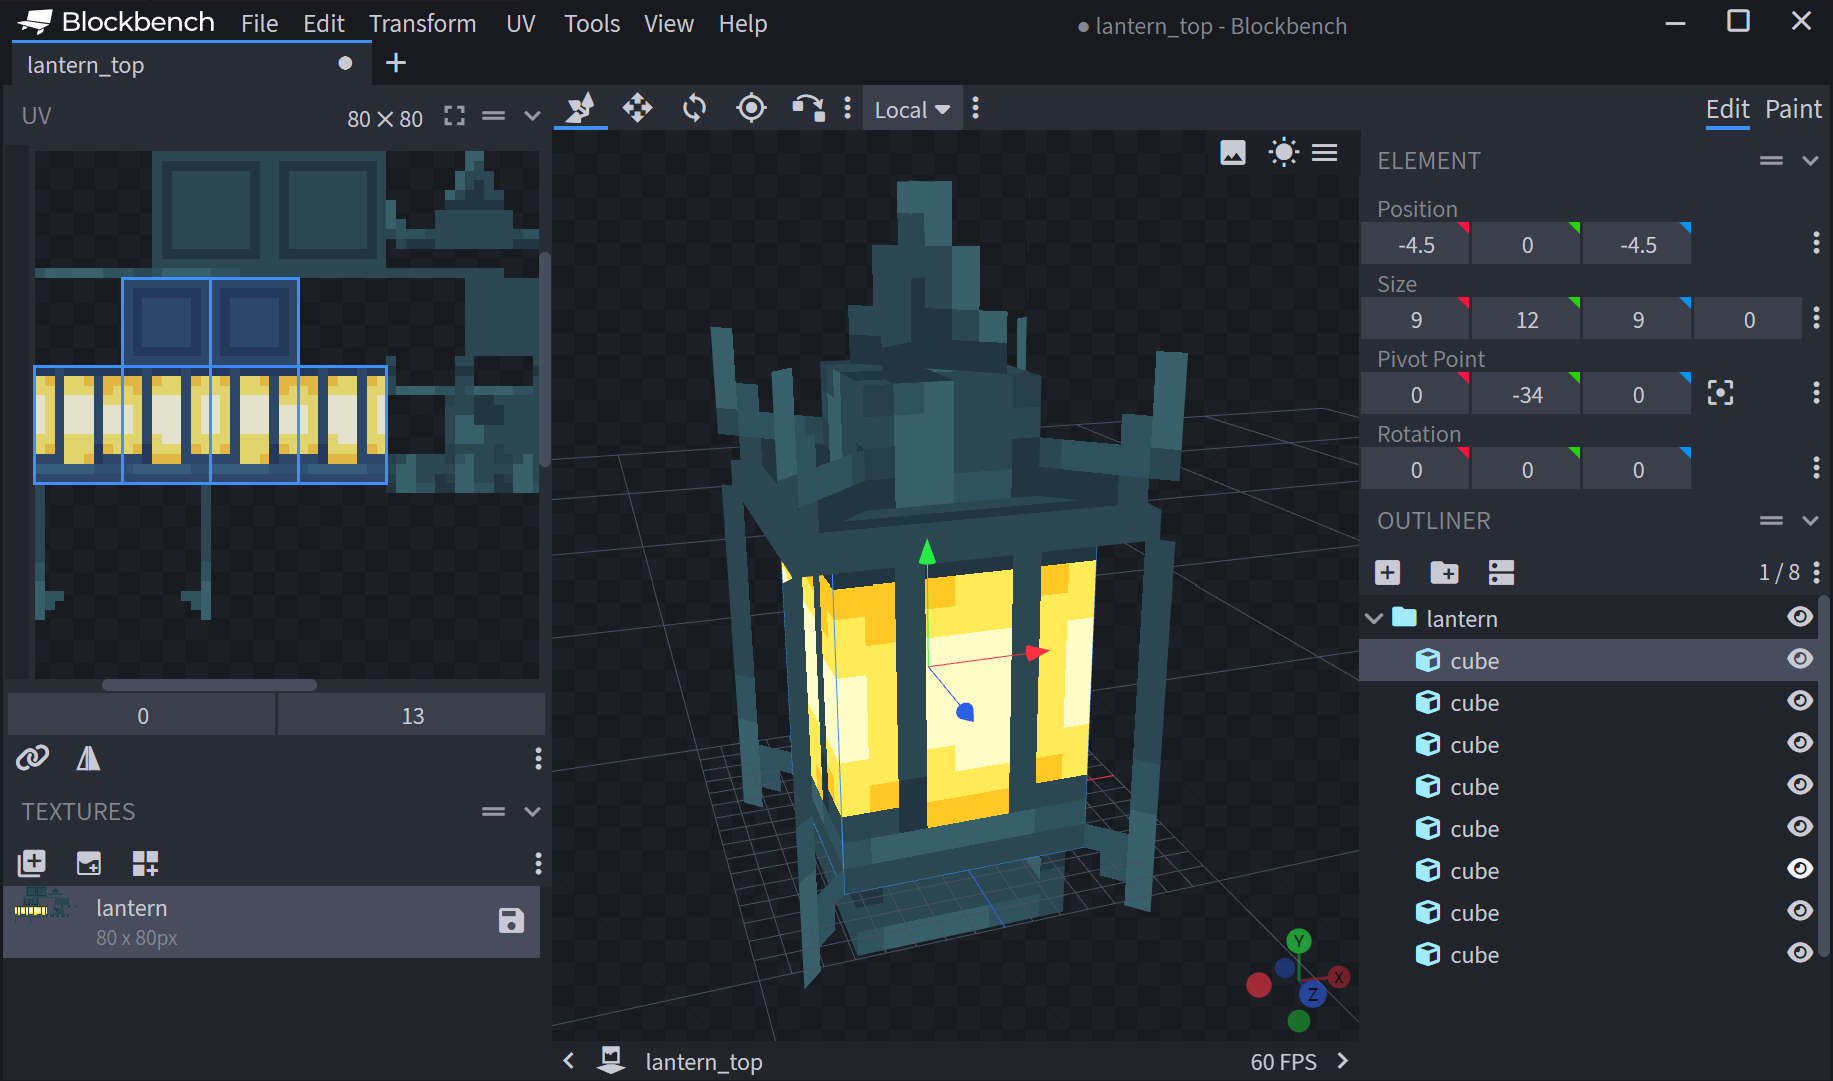
Because you are already in Blockbench, you can continue to use the program to edit the model and texture. To do that, press the Edit Model button in the bottom right.
Caution
This option is not available if you have exported your Add-On as an .mcaddon file.
You can learn how to create a model in this tutorial playlist: ArtsByKev Blockbench Tutorials
More information on Blockbench can be found on the Blockbench Wiki.
Size restrictions
Unlike entity models, block models are restricted to a certain size.
The model can be up to 30 pixels long, wide, and tall. A regular Minecraft block measures 16 by 16 by 16 pixels. From that center block, you can expand by 14 pixels on each of the 3 axes. The 14 pixels can be all towards one side, split evenly between the two sides (7 on each), or anything in between.
Blockbench will automatically restrict you from placing cubes outside of these size restrictions. The restrictions in Blockbench can be disabled in the settings (Deactivate Size Limit) if you prefer to model without them. But make sure to re-enable the restrictions before exporting, otherwise Minecraft won't load the model.
Texture
Block preset models are generated with a simple texture that is applied to all 6 sides of the element. Drawing on one side will also affect the other sides. When you start to design a more complex model, you will quickly find that the texture is no longer enough for the model.
- To solve this, press Ctrl + A to select all elements of your model, then click the Create Texture button at the top of the Textures panel in the left sidebar.
- Confirm the dialog to generate a texture. You can switch to Paint mode by clicking "Paint" in the top right corner of the program, and then use the paint tools to texture your model.
- After you add new elements, you can automatically include them in your texture by clicking Append Elements to Template in the Textures panel.
- When saving your new texture, don't forget to overwrite the old texture file in your resource pack so that Minecraft knows where to look for it.
What's next?
Want to learn more about building with Blockbench? The Blockbench Wiki has step by step guides and reference documentation for modeling, texturing, and animating any custom creation you can imagine.
The Blockbench Quick Start guide can help lead you to the specific document that you're looking for and is a great way to discover relevant external guides and videos.