Note
Access to this page requires authorization. You can try signing in or changing directories.
Access to this page requires authorization. You can try changing directories.
Never miss attaching an important document or photo to your message ever again. With an event-based add-in, your messages are automatically checked for attachments before they're sent, so that you can feel assured that you're always sending a complete version.
The following sections walk you through how to develop an event-based add-in that implements Smart Alerts to handle the OnMessageSend event. By the end of this walkthrough, your add-in will automatically check for an attached document or picture mentioned in the message and alert you if it's missing before the message is sent.
Note
The OnMessageSend and OnAppointmentSend events were introduced in requirement set 1.12. Additional functionality and customization options were also added to subsequent requirement sets. To verify that your Outlook client supports these events and features, see Supported clients and platforms and the specific sections that describe the features you want to implement.
Set up your environment
Before you start the walkthrough, verify that your Outlook client supports the Smart Alerts feature. For guidance, see Supported clients and platforms.
Then, complete the Outlook quick start, which creates an add-in project with the Yeoman generator for Office Add-ins.
Configure the manifest
To configure the manifest, select the tab for the type of manifest you are using.
Open the manifest.json file.
Add the following object to the
"extensions.runtimes"array. Note the following about this markup:- Although the
OnMessageSendevent was introduced in requirement set 1.12, the"minVersion"is set to"1.15". This supports the use of Smart Alerts enhancements that were introduced in later requirement sets. - The
"id"of the runtime is set to the descriptive name"autorun_runtime". - The
"code"property has a child"page"property that is set to an HTML file and a child"script"property that is set to a JavaScript file. You'll create or edit these files in later steps. Office uses one of these values or the other depending on the platform.- Classic Outlook on Windows executes the event handler in a JavaScript-only runtime, which loads a JavaScript file directly.
- Outlook on the web, on Mac, and on new Outlook on Windows execute the handler in a browser runtime, which loads an HTML file. That file, in turn, contains a
<script>tag that loads the JavaScript file. For more information, see Runtimes in Office Add-ins.
- The
"lifetime"property is set to"short", which means that the runtime starts up when the event is triggered and shuts down when the handler completes. (In certain rare cases, the runtime shuts down before the handler completes. See Runtimes in Office Add-ins.) - There is an action to run a handler for the
OnMessageSendevent. You'll create the handler function in a later step.
{ "requirements": { "capabilities": [ { "name": "Mailbox", "minVersion": "1.15" } ] }, "id": "autorun_runtime", "type": "general", "code": { "page": "https://localhost:3000/commands.html", "script": "https://localhost:3000/launchevent.js" }, "lifetime": "short", "actions": [ { "id": "onMessageSendHandler", "type": "executeFunction", "displayName": "onMessageSendHandler" } ] }- Although the
Add the following
"autoRunEvents"array as a property of the object in the"extensions"array."autoRunEvents": [ ]Add the following object to the
"autoRunEvents"array. Note the following about this code:- The event object assigns a handler function to the
OnMessageSendevent (using the event's unified manifest name,"messageSending", as described in the supported events table). The function name provided in"actionId"must match the name used in the"id"property of the object in the"actions"array in an earlier step. - The
"sendMode"option is set to"softBlock". This means that if the message doesn't meet the conditions that the add-in sets for sending, the user must take action before they can send the message. However, if the add-in is unavailable at the time of sending, the item will be sent.
{ "requirements": { "capabilities": [ { "name": "Mailbox", "minVersion": "1.15" } ], "scopes": [ "mail" ] }, "events": [ { "type": "messageSending", "actionId": "onMessageSendHandler", "options": { "sendMode": "softBlock" } } ] }- The event object assigns a handler function to the
Tip
- For a list of send mode options available with the
OnMessageSendandOnAppointmentSendevents, see Available send mode options. - To learn more about manifests for Outlook add-ins, see Office Add-in manifests.
Implement event handling
You have to implement handling for your selected event.
In this scenario, you'll add handling for sending a message. Your add-in will check for certain keywords in the message. If any of those keywords are found, it will then check for any attachments. If there are no attachments, your add-in will recommend to the user to add the possibly missing attachment.
From the same quick start project, create a new folder named launchevent under the ./src directory.
In the ./src/launchevent folder, create a new file named launchevent.js.
Open the file ./src/launchevent/launchevent.js in your code editor and add the following JavaScript code.
/*
* Copyright (c) Microsoft Corporation. All rights reserved. Licensed under the MIT license.
* See LICENSE in the project root for license information.
*/

function onMessageSendHandler(event) {
  Office.context.mailbox.item.body.getAsync(
    "text",
    { asyncContext: event },
    getBodyCallback
  );
}

function getBodyCallback(asyncResult){
  const event = asyncResult.asyncContext;
  let body = "";
  if (asyncResult.status !== Office.AsyncResultStatus.Failed && asyncResult.value !== undefined) {
    body = asyncResult.value;
  } else {
    const message = "Failed to get body text";
    console.error(message);
    event.completed({ allowEvent: false, errorMessage: message });
    return;
  }

  const matches = hasMatches(body);
  if (matches) {
    Office.context.mailbox.item.getAttachmentsAsync(
      { asyncContext: event },
      getAttachmentsCallback);
  } else {
    event.completed({ allowEvent: true });
  }
}

function hasMatches(body) {
  if (body == null || body == "") {
    return false;
  }

  const arrayOfTerms = ["send", "picture", "document", "attachment"];
  for (let index = 0; index < arrayOfTerms.length; index++) {
    const term = arrayOfTerms[index].trim();
    const regex = RegExp(term, 'i');
    if (regex.test(body)) {
      return true;
    }
  }

  return false;
}

function getAttachmentsCallback(asyncResult) {
  const event = asyncResult.asyncContext;
  if (asyncResult.value.length > 0) {
    for (let i = 0; i < asyncResult.value.length; i++) {
      if (asyncResult.value[i].isInline == false) {
        event.completed({ allowEvent: true });
        return;
      }
    }

    event.completed({
      allowEvent: false,
      errorMessage: "Looks like the body of your message includes an image or an inline file. Attach a copy to the message before sending.",
      // TIP: In addition to the formatted message, it's recommended to also set a
      // plain text message in the errorMessage property for compatibility on
      // older versions of Outlook clients.
      errorMessageMarkdown: "Looks like the body of your message includes an image or an inline file. Attach a copy to the message before sending.\n\n**Tip**: For guidance on how to attach a file, see [Attach files in Outlook](https://www.contoso.com/help/attach-files-in-outlook)."
    });
  } else {
    event.completed({
      allowEvent: false,
      errorMessage: "Looks like you're forgetting to include an attachment.",
      // TIP: In addition to the formatted message, it's recommended to also set a
      // plain text message in the errorMessage property for compatibility on
      // older versions of Outlook clients.
      errorMessageMarkdown: "Looks like you're forgetting to include an attachment.\n\n**Tip**: For guidance on how to attach a file, see [Attach files in Outlook](https://www.contoso.com/help/attach-files-in-outlook)."
    });
  }
}

// IMPORTANT: To ensure your add-in is supported in Outlook, remember to map the event handler name specified in the manifest to its JavaScript counterpart.
Office.actions.associate("onMessageSendHandler", onMessageSendHandler);
Important
- In classic Outlook on Windows, imports aren't currently supported in the JavaScript file where you implement the handling for event-based activation.
- To ensure your add-in runs as expected when an
OnMessageSendorOnAppointmentSendevent occurs, callOffice.actions.associatein the JavaScript file where your handlers are implemented. This maps the event handler name specified in the manifest to its JavaScript counterpart. If this call isn't included in your JavaScript file and the send mode property of your manifest is set to soft block or isn't specified, your users will be blocked from sending messages or meetings. The location of the handler name in the manifest differs depending on the type of manifest your add-in uses.- Unified manifest for Microsoft 365: The value specified in the
"actionId"property of the applicable"autoRunEvents.events"object. - Add-in only manifest: The function name specified in the applicable LaunchEvent element.
- Unified manifest for Microsoft 365: The value specified in the
- In classic Outlook on Windows, when the JavaScript function specified in the manifest to handle an event runs, code in
Office.onReady()andOffice.initializeisn't run. We recommend adding any startup logic needed by event handlers, such as checking the user's Outlook version, to the event handlers instead. - The errorMessageMarkdown property was introduced in requirement set 1.15. Learn more about its supported clients and platforms.
Customize the text and functionality of a button in the dialog (optional)
Note
Support to customize a button in the Smart Alerts dialog was introduced in requirement set 1.14. Learn more about its supported clients and platforms.
If a mail item doesn't meet the conditions of a Smart Alerts add-in, a dialog is shown to the user to alert them that additional actions may be needed before an item can be sent. To provide the user with further guidance on how to meet the conditions of your add-in, you can customize the text of a button in the dialog and program it to open a task pane or run a function.
The button you can customize depends on the Outlook client and version on which the add-in is running.
| Client | Customizable dialog button | Specifications |
|---|---|---|
| Windows (classic) Supported Mailbox 1.14 versions prior to Version 2412 (Build 18324.20000) Mac (preview) |
Don't Send | The text and functionality of the Don't Send button can be customized. Customizable functionality includes opening a task pane or running a function. The Don't Send button appears in the dialog no matter what send mode option you select. By default, selecting Don't Send cancels the send operation and closes the dialog. 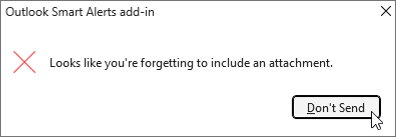 |
| Web browser Windows (new) Windows (classic) Version 2412 (Build 18324.20000) or later |
Take Action | The text and functionality of the Take Action button can be customized. Customizable functionality includes opening a task pane or running a function. The Take Action button only appears in the Smart Alerts dialog when you configure a task pane or function to run from the dialog. When the Take Action button is present, the Don't Send button is used to cancel the mail item being sent. The text and functionality of the Don't Send button can't be customized. 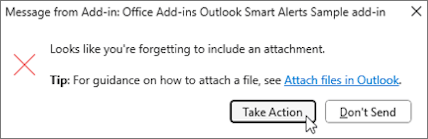 |
Note
In classic Outlook on Windows, if you customized the text and functionality of the Don't Send button in your Smart Alerts add-in prior to Version 2412 (Build 18324.20000), no additional action is needed to implement the Take Action button in the latest supported versions. The default or customized Take Action button will automatically appear the next time a user receives a Smart Alerts dialog. Although no implementation changes are needed, we recommend notifying users of this updated experience.
If you only customized the text of the Don't Send button in earlier supported versions, your custom text won't appear in the latest versions that support the Take Action implementation.
To modify the text of the dialog button or assign it a task pane or function, you must set additional options in the event.completed method of your event handler.
The cancelLabel option customizes the text of the applicable button. Custom text must be a maximum of 20 characters.
The commandId option specifies the ID of the task pane or function that runs when the applicable button is selected. The value must match the task pane or function command ID in the manifest of your add-in. The markup depends on the type of manifest your add-in uses.
- Add-in only manifest: The
idattribute of the <Control> element representing the task pane or function command. - Unified manifest for Microsoft 365: The "id" property of the task pane or function command in the "controls" array.
In supported Outlook clients and versions, when the
commandIdoption is specified, the Take Action button appears in the Smart Alerts dialog.- Add-in only manifest: The
The contextData option specifies any JSON data you want to pass to the add-in when the applicable button is selected. If you include this option, you must also set the
commandIdoption. Otherwise, the JSON data is ignored.Tip
When you configure a button in the Smart Alerts dialog to run a function, a button for the implemented add-in command is also added to the ribbon or action bar of the Outlook client. Use the
contextDataoption to distinguish when a user runs the function from the Smart Alerts dialog.To retrieve the value of the
contextDataoption, you must call Office.context.mailbox.item.getInitializationContextAsync in the JavaScript implementation of your task pane or function command.
In this sample, the dialog button is modified to open a task pane.
Navigate to the ./src/launchevent folder, then open launchevent.js.
Replace the getAttachmentsCallback function with the following code.
function getAttachmentsCallback(asyncResult) {
  const event = asyncResult.asyncContext;
  if (asyncResult.value.length > 0) {
    for (let i = 0; i < asyncResult.value.length; i++) {
      if (asyncResult.value[i].isInline == false) {
        event.completed({ allowEvent: true });
        return;
      }
    }

    event.completed({
      allowEvent: false,
      errorMessage: "Looks like the body of your message includes an image or an inline file. Attach a copy to the message before sending.",
      // TIP: In addition to the formatted message, it's recommended to also set a
      // plain text message in the errorMessage property for compatibility on
      // older versions of Outlook clients.
      errorMessageMarkdown: "Looks like the body of your message includes an image or an inline file. Attach a copy to the message before sending.\n\n**Tip**: For guidance on how to attach a file, see [Attach files in Outlook](https://www.contoso.com/help/attach-files-in-outlook).",
      cancelLabel: "Add an attachment",
      commandId: "msgComposeOpenPaneButton"
    });
  } else {
    event.completed({
      allowEvent: false,
      errorMessage: "Looks like you're forgetting to include an attachment.",
      // TIP: In addition to the formatted message, it's recommended to also set a
      // plain text message in the errorMessage property for compatibility on
      // older versions of Outlook clients.
      errorMessageMarkdown: "Looks like you're forgetting to include an attachment.\n\n**Tip**: For guidance on how to attach a file, see [Attach files in Outlook](https://www.contoso.com/help/attach-files-in-outlook).",
      cancelLabel: "Add an attachment",
      commandId: "msgComposeOpenPaneButton"
    });
  }
}
Save your changes.
Override the send mode option at runtime (optional)
Note
Support to override the send mode option at runtime was introduced in requirement set 1.14. Learn more about its supported clients and platforms.
There may be instances when you want your add-in to implement different send mode options. For example, you may want your add-in to enforce the block option on mail items that don't meet the information protection policies of your organization, but only have it apply the prompt user option to provide a recommendation if a user adds the incorrect recipient.
To override the send mode option at runtime, you must set the sendModeOverride option in the event.completed method of your event handler.
Navigate to the ./src/launchevent folder, then open launchevent.js.
Replace the getAttachmentsCallback function with the following code.
function getAttachmentsCallback(asyncResult) {
  const event = asyncResult.asyncContext;
  if (asyncResult.value.length > 0) {
    for (let i = 0; i < asyncResult.value.length; i++) {
      if (asyncResult.value[i].isInline == false) {
        event.completed({ allowEvent: true });
        return;
      }
    }

    event.completed({
      allowEvent: false,
      errorMessage: "Looks like the body of your message includes an image or an inline file. Would you like to attach a copy of it to the message?",
      // TIP: In addition to the formatted message, it's recommended to also set a
      // plain text message in the errorMessage property for compatibility on
      // older versions of Outlook clients.
      errorMessageMarkdown: "Looks like the body of your message includes an image or an inline file. Would you like to attach a copy of it to the message?\n\n**Tip**: For guidance on how to attach a file, see [Attach files in Outlook](https://www.contoso.com/help/attach-files-in-outlook).",
      cancelLabel: "Attach a copy",
      commandId: "msgComposeOpenPaneButton",
      sendModeOverride: Office.MailboxEnums.SendModeOverride.PromptUser
    });
  } else {
    event.completed({
      allowEvent: false,
      errorMessage: "Looks like you're forgetting to include an attachment.",
      // TIP: In addition to the formatted message, it's recommended to also set a
      // plain text message in the errorMessage property for compatibility on
      // older versions of Outlook clients.
      errorMessageMarkdown: "Looks like you're forgetting to include an attachment.\n\n**Tip**: For guidance on how to attach a file, see [Attach files in Outlook](https://www.contoso.com/help/attach-files-in-outlook).",
      cancelLabel: "Add an attachment",
      commandId: "msgComposeOpenPaneButton"
    });
  }
}
Save your changes.
Configure the task pane (optional)
If you implemented the optional steps to customize a dialog button or override the send mode option in this walkthrough, you also need to configure the task pane.
Note
In Outlook on the web, new Outlook on Windows, supported versions of classic Outlook on Windows prior to Version 2412 (Build 18324.20000), and Outlook on Mac, you can customize the text of the Don't Send button without implementing a task pane or function command. Although the task pane is needed in this sample, it isn't a requirement to be able to customize the button text or override the send mode option in these clients.
In classic Outlook on Windows starting in Version 2412 (Build 18324.20000), you must implement a task pane or function command to customize the Take Action button. This is because the Take Action button only appears in the Smart Alerts dialog when a task pane or function command is implemented in the add-in.
Navigate to the ./src/taskpane folder, then open taskpane.html.
Select the entire <body> node (including its open and close tags) and replace it with the following code.
<body class="ms-welcome ms-Fabric">
    <header class="ms-welcome__header ms-bgColor-neutralLighter">
        <img width="90" height="90" src="../../assets/logo-filled.png" alt="Contoso" title="Contoso" />
        <h1 class="ms-font-su">Try out the Smart Alerts sample</h1>
    </header>
    <section id="sideload-msg" class="ms-welcome__main">
        <h2 class="ms-font-xl">Please <a href="https://learn.microsoft.com/office/dev/add-ins/testing/test-debug-office-add-ins#sideload-an-office-add-in-for-testing">sideload</a> your add-in to see app body.</h2>
    </section>
    <main id="app-body" class="ms-welcome__main" style="display: none;">
        <p>
            This sample implements a Smart Alerts add-in that activates when you forget to attach a document or picture that you mention in your message.
            To learn more, see the <a href="https://learn.microsoft.com/office/dev/add-ins/outlook/smart-alerts-onmessagesend-walkthrough">Smart Alerts walkthrough</a>.
        </p>
        <h3 class="ms-font-l">Add an attachment</h3>
        <p>Add the URL of a file to add it as an attachment.</p>
        <div class="ms-TextField">
            <label class="ms-Label ms-font-l">URL of file:</label>
            <input id="attachment-url" class="ms-TextField-field" type="text" value="https://localhost:3000/assets/icon-128.png" placeholder="">
        </div>
        <br/>
        <button class="ms-Button ms-Button--primary">
            <span id="add-attachment" class="ms-Button-label">Add as attachment</span>
        </button>
        <br/>
        <h3 class="ms-font-l">Override the send mode option at runtime</h3>
        <p>Add an inline image to test overriding the send mode option at runtime.</p>
        <button class="ms-Button ms-Button--primary">
            <span id="add-inline-image" class="ms-Button-label">Add an inline image</span>
        </button>
    </main>
</body>
Save your changes.
In the same ./src/taskpane folder, open taskpane.js.
Replace its contents with the following code.
/*
 * Copyright (c) Microsoft Corporation. All rights reserved. Licensed under the MIT license.
 * See LICENSE in the project root for license information.
 */

Office.onReady((info) => {
  if (info.host === Office.HostType.Outlook) {
    document.getElementById("sideload-msg").style.display = "none";
    document.getElementById("app-body").style.display = "flex";
    document.getElementById("add-attachment").onclick = addAttachment;
    document.getElementById("add-inline-image").onclick = addInlineImage;
  }
});

// Adds the specified URL as an attachment to the message.
export async function addAttachment() {
  const attachmentUrl = document.querySelector("#attachment-url").value;
  Office.context.mailbox.item.addFileAttachmentAsync(attachmentUrl, getFileName(attachmentUrl), (asyncResult) => {
    console.log("Added attachment.");
  });
}

// Gets the file name from a URL.
function getFileName(url) {
  const lastIndex = url.lastIndexOf("/");
  if (lastIndex >= 0) {
    return url.substring(lastIndex + 1);
  }

  return url;
}

// Adds an inline image to the body of the message.
export async function addInlineImage() {
  const mailItem = Office.context.mailbox.item;
  const base64String =
    "iVBORw0KGgoAAAANSUhEUgAAAGAAAABgCAMAAADVRocKAAAAAXNSR0IArs4c6QAAAARnQU1BAACxjwv8YQUAAAAnUExURQAAAAAAAAAAAAAAAAAAAAAAAAAAAAAAAAAAAAAAAAAAAAAAAAAAAN0S+bUAAAAMdFJOUwAQIDBAUI+fr7/P7yEupu8AAAAJcEhZcwAADsMAAA7DAcdvqGQAAAF8SURBVGhD7dfLdoMwDEVR6Cspzf9/b20QYOthS5Zn0Z2kVdY6O2WULrFYLBaLxd5ur4mDZD14b8ogWS/dtxV+dmx9ysA2QUj9TQRWv5D7HyKwuIW9n0vc8tkpHP0W4BOg3wQ8wtlvA+PC1e8Ao8Ld7wFjQtHvAiNC2e8DdqHqKwCrUPc1gE1AfRVgEXBfB+gF0lcCWoH2tYBOYPpqQCNwfT3QF9i+AegJfN8CtAWhbwJagtS3AbIg9o2AJMh9M5C+SVGBvx6zAfmT0r+Bv8JMwP4kyFPir+cswF5KL3WLv14zAFBCLf56Tw9cparFX4upgaJUtPhrOS1QlY5W+vWTXrGgBFB/b72ev3/0igUdQPppP/nfowfKUUEFcP207y/yxKmgAYQ+PywoAFOfCH3A2MdCFzD3kdADBvq10AGG+pXQBgb7pdAEhvuF0AIc/VtoAK7+JciAs38KIuDugyAC/v4hiMCE/i7IwLRBsh68N2WQjMVisVgs9i5bln8LGScNcCrONQAAAABJRU5ErkJggg==";

  // Get the current body of the message.
  mailItem.body.getAsync(Office.CoercionType.Html, (bodyResult) => {
    if (bodyResult.status === Office.AsyncResultStatus.Failed) {
      console.log(bodyResult.error.message);
      return;
    }

    // Insert the Base64-encoded image to the beginning of the body.
    const options = { isInline: true, asyncContext: bodyResult.value };
    mailItem.addFileAttachmentFromBase64Async(base64String, "sample.png", options, (attachResult) => {
      if (attachResult.status === Office.AsyncResultStatus.Failed) {
        console.log(attachResult.error.message);
        return;
      }

      let body = attachResult.asyncContext;
      body += '<img src="cid:sample.png" />';
      mailItem.body.setAsync(body, { coercionType: Office.CoercionType.Html }, (setResult) => {
        if (setResult.status === Office.AsyncResultStatus.Failed) {
          console.log(setResult.error.message);
          return;
        }

        console.log("Inline image added to the body.");
      });
    });
  });
}
Save your changes.
Programmatically send the item from the task pane (optional)
Note
The sendAsync method was introduced in requirement set 1.15. Learn more about its supported clients and platforms.
To further streamline a user's experience when recommending changes to the mail items they're sending, call the sendAsync method in your task pane or function command code.
In taskpane.js, replace the
addAttachmentfunction with the following code.// Adds the specified URL as an attachment to the message. // Then, programmatically sends the message. export async function addAttachment() { const attachmentUrl = document.querySelector("#attachment-url").value; Office.context.mailbox.item.addFileAttachmentAsync(attachmentUrl, getFileName(attachmentUrl), (asyncResult) => { console.log("Added attachment"); // Programmatically send the item. Office.context.mailbox.item.sendAsync((sendResult) => { if (sendResult.status === Office.AsyncResultStatus.Failed) { console.log(`Unable to send the message: ${sendResult.error.message}`); return; } // Don't run additional operations here. Process them before the sendAsync call instead. }); // Don't run additional operations after the sendAsync call. Process them before the sendAsync call instead. }); }Tip
- Any code implemented to run when
asyncResult.statusisOffice.AsyncResultStatus.Successor after thesendAsyncmethod isn't guaranteed to be processed. This is because the item may have already been sent and the add-in has completed processing. We recommend processing other operations before callingsendAsync. - The
sendAsyncimplementation varies between a task pane and function command implementation. For guidance, see the sendAsync reference documentation.
- Any code implemented to run when
Save your changes.
In taskpane.html, update the label of the
add-attachmentbutton.<span id="add-attachment" class="ms-Button-label">Add and send</span>Tip
It's good practice to indicate to the user when your add-in programmatically sends the mail item they're composing. Depending on your implementation, you can indicate this in the label of a button or add a note to the task pane.
Save your changes.
Update the commands HTML file
In the ./src/commands folder, open commands.html.
Immediately before the closing head tag (
</head>), add a script entry for the event-handling JavaScript code.<script type="text/javascript" src="../launchevent/launchevent.js"></script>
Important
The dialog button customization and send mode option override features are currently in preview in Outlook on Mac. If you're testing these features in your add-in project, you must include a reference to the preview version of the Office JavaScript API in your commands.html file.
<script type="text/javascript" src="https://appsforoffice.microsoft.com/lib/beta/hosted/office.js"></script>
<script type="text/javascript" src="../launchevent/launchevent.js"></script>
- Save your changes.
Update webpack config settings
Open the webpack.config.js file found in the root directory of the project and complete the following steps.
Locate the
pluginsarray within theconfigobject and add this new object to the beginning of the array.new CopyWebpackPlugin({ patterns: [ { from: "./src/launchevent/launchevent.js", to: "launchevent.js", }, ], }),Save your changes.
Try it out
Run the following commands in the root directory of your project. When you run
npm start, the local web server will start (if it isn't already running) and your add-in will be sideloaded.npm run buildnpm startNote
- When you first use Yeoman generator to develop an Office Add-in, your default browser opens a window where you'll be prompted to sign in to your Microsoft 365 account. If a sign-in window doesn't appear and you encounter a sideloading or login timeout error, run
atk auth login m365before runningnpm startagain.
If your add-in wasn't automatically sideloaded, follow the instructions in Sideload Outlook add-ins for testing to manually sideload the add-in in Outlook.
- When you first use Yeoman generator to develop an Office Add-in, your default browser opens a window where you'll be prompted to sign in to your Microsoft 365 account. If a sign-in window doesn't appear and you encounter a sideloading or login timeout error, run
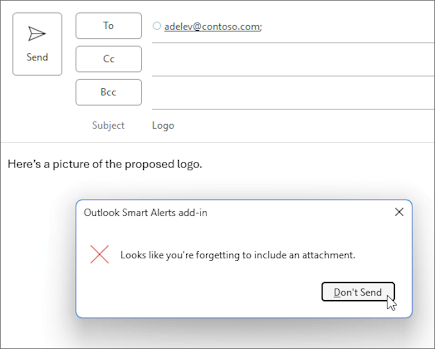
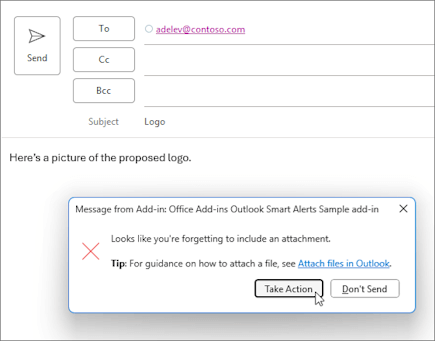
In your preferred Outlook client, create a new message and set the subject. In the body, add some text. For example, "Here's a picture of the proposed logo."
Send the message. A dialog appears requesting you to add an attachment. Select Don't Send, Take Action, or Add an attachment. The options available to you depend on your Outlook client and whether you implemented the optional step to customize the dialog button.
Default Don't Send button.
Default Take Action button.
Customized Add an attachment button. Applies to Outlook on the web, new Outlook on Windows, and classic Outlook on Windows (starting in Version 2412 (Build 18324.20000)).
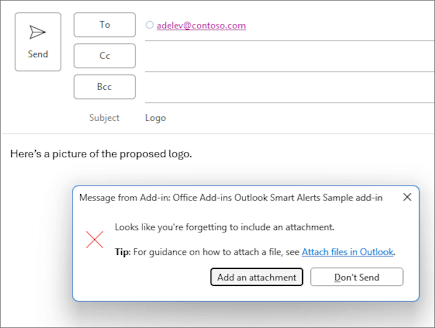
Customized Add an attachment button. Applies to classic Outlook on Windows prior to Version 2412 (Build 18324.20000).

Note
In supported versions of classic Outlook on Windows prior to Version 2410 (Build 18031.15000), if you assign a task pane to the Don't Send button, closing the dialog also opens the specified task pane.
Add an attachment to your message. If you implemented the optional step to customize a dialog button, use the task pane to add an attachment.
Send the message. If you implemented the optional step to programmatically send the message from the task pane, the message will send when you select Add and send. There should be no alert this time.
When you want to stop the local web server and uninstall the add-in, follow the applicable instructions:
To stop the server, run the following command. If you used
npm start, the following command should also uninstall the add-in.npm stopIf you manually sideloaded the add-in, see Remove a sideloaded add-in.
Try out overriding the send mode option at runtime (optional)
If you implemented the optional step to override the send mode option at runtime, perform the following to try it out.
Run
npm startin the root directory of your project. This starts the local web server (if it isn't already running) and sideloads your add-in.Note
- When you first use Yeoman generator to develop an Office Add-in, your default browser opens a window where you'll be prompted to sign in to your Microsoft 365 account. If a sign-in window doesn't appear and you encounter a sideloading or login timeout error, run
atk auth login m365before runningnpm startagain.
If your add-in wasn't automatically sideloaded, follow the instructions in Sideload Outlook add-ins for testing to manually sideload the add-in in Outlook.
- When you first use Yeoman generator to develop an Office Add-in, your default browser opens a window where you'll be prompted to sign in to your Microsoft 365 account. If a sign-in window doesn't appear and you encounter a sideloading or login timeout error, run
In your preferred Outlook client, create a new message and set the subject. In the body, add some text. For example, "Here's a picture of the proposed logo."
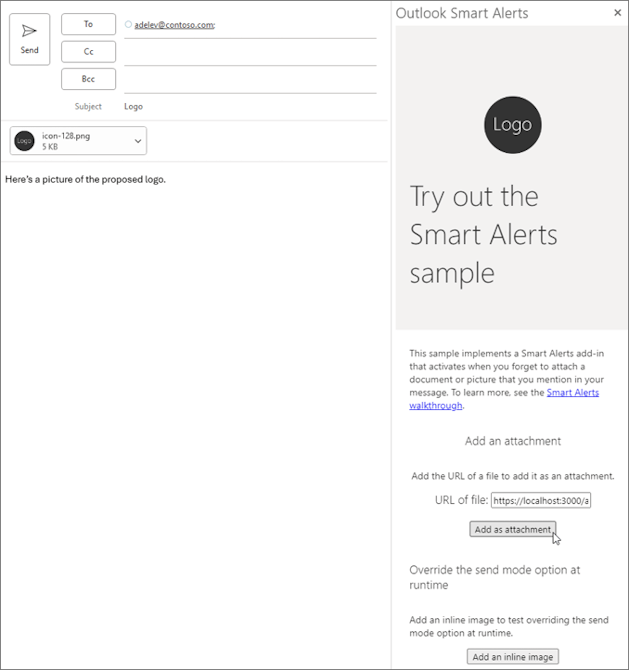
From the ribbon, select Contoso Add-in > Show Taskpane.
In the task pane, select Add an inline image. An image is added to the body of your message.
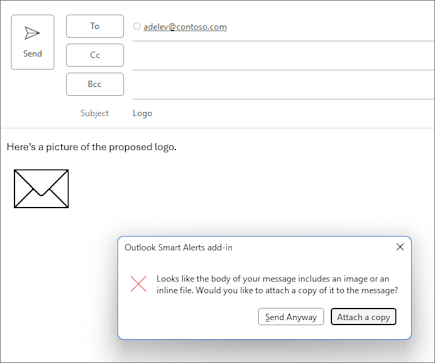
Send the message. A dialog appears recommending to attach a copy of the image to the message.
Select Send Anyway to send the message as is, or select Attach a copy to include a copy before sending the message.
Applies to Outlook on the web, new Outlook on Windows, and classic Outlook on Windows (starting in Version 2412 (Build 18324.20000)).

Applies to classic Outlook on Windows prior to Version 2412 (Build 18324.20000).
Important
If a Smart Alerts add-in that implements the override feature can't complete processing an event due to an error or is unavailable when the event occurs, it uses the send mode option specified in the manifest.
See also
- Handle OnMessageSend and OnAppointmentSend events in your Outlook add-in with Smart Alerts
- Configure your Outlook add-in for event-based activation
- Office Add-in manifests
- Troubleshoot event-based and spam-reporting add-ins
- Debug event-based and spam-reporting add-ins
- AppSource listing options for your event-based Outlook add-in
- Office Add-ins code sample: Verify the color categories of a message or appointment before it's sent using Smart Alerts
- Office Add-ins code sample: Verify the sensitivity label of a message
Collaborate with us on GitHub
The source for this content can be found on GitHub, where you can also create and review issues and pull requests. For more information, see our contributor guide.
Office Add-ins