Add a Chatbot control to a canvas app (preview)
[This article is prerelease documentation and is subject to change.]
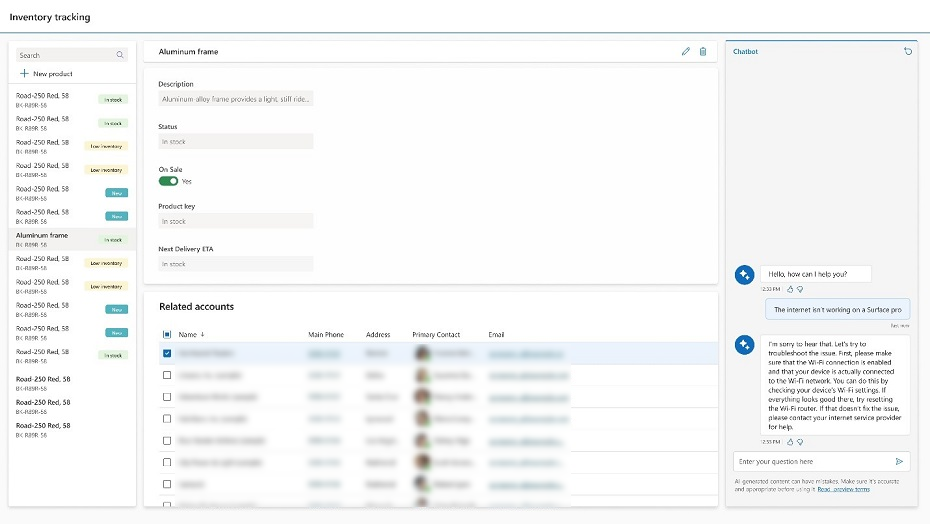
Add a Chatbot control to your canvas apps and embed a published Microsoft Copilot Studio chatbot to assist your end-users with various requests—from providing simple answers to common questions to resolving issues requiring complex conversations.
The Chabot control is also available in custom pages for model-driven apps. The control also supports Teams authenticated Microsoft Copilot Studio bots. A bot picker lists all bots that are in the same environment as your app.
You can use an AI bot or AI-based copilot authoring:
AI chatbots allow you to develop a comprehensive tree of responses to assist your users.. More information: Quickstart: Create and deploy a Copilot Studio copilot
With AI-based copilot authoring can have a higher ability to respond to the user by using a number of prompts or generating a response based on the provided "fallback" website, that you set. The "fallback" website can include internal documents or publicly available websites. For more information, see AI-based copilot authoring overview
You can design the Chabot control by giving it a name, change the size of the control window, and position it anywhere on the screen.
Important
- Preview features aren’t meant for production use and may have restricted functionality. These features are available before an official release so that customers can get early access and provide feedback.
- For more information, go to our preview terms.
- This capability is powered by Azure OpenAI Service.
- This capability may be subject to usage limits or capacity throttling.
Prerequisites
Follow the prerequisites for AI features: Copilot in Power Apps overview (preview)
- To add the Chatbot control, you need to create and publish a bot. For more information, see Microsoft Copilot Studio portal overview. You can create any bot such as an AI bot or a new generative AI enriched Microsoft Copilot Studio bot.
- You can see all your Microsoft Copilot Studio bots (published and unpublished) in the list of Chatbot control when you pick the bot to connect to. However, you can only add a published bot to the control. Unpublished bots are grayed out.
Add a control with a bot
With your canvas app open for editing:
On the app authoring menu, select Insert.
Expand the Input menu and then select Chatbot (preview)). Place the Chatbot control where you want to add it on the screen.
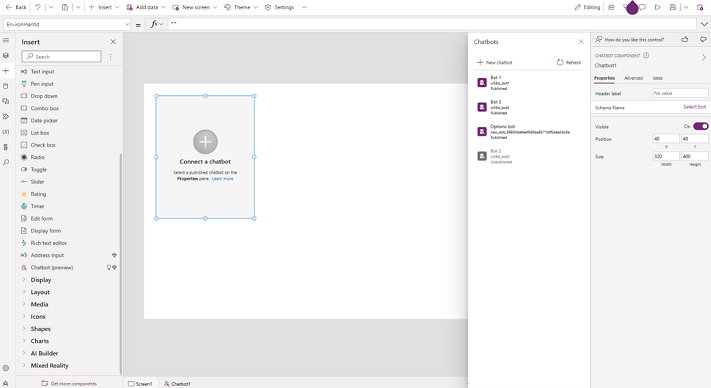
Choose the bot you want to connect from one of your published Microsoft Copilot Studio bots, or select New chatbot to create a new one.
You can change the name, the position, and size of the control.
Key properties
The following are the main properties for Chatbot control:
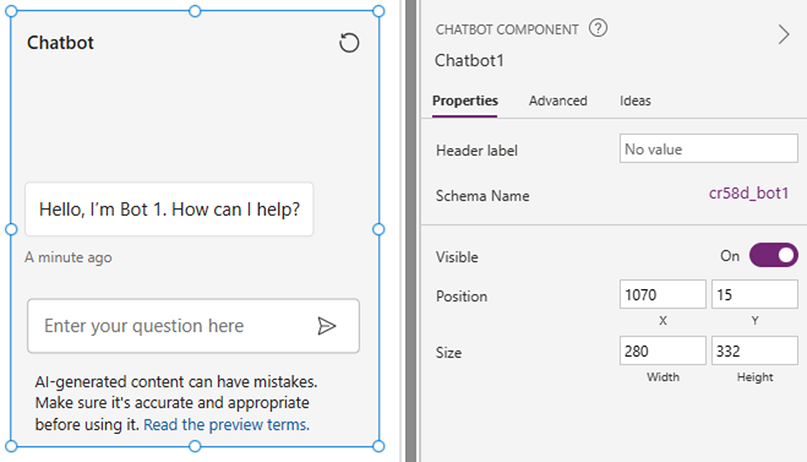
Header label: This is the name of the bot that your end-user sees. If you don't enter a header label, then the name is Chatbot.
Schema name: This property refers to the Microsoft Copilot Studio bot that you connect to. The property automatically populates once a bot is selected. To choose a bot, for Schema name property select, Select bot.
Visible: Choose if you want the bot to be visible or not.
Position and Size: Determines how your bot looks on the screen. Use the other properties or move the control on the screen to set position and size of the control on the screen.
Once you select the bot and set the properties, the properties pane looks like this:
Limitations
- Chatbot control isn't supported on the Power Apps mobile app.
- Chatbot control isn't available in Power Apps US Government or Mooncake.
- Chatbot control doesn't support bots created using Microsoft Copilot Studio in nondefault locations of your tenant.
See also
Copilot in Power Apps overview (preview)
Microsoft Copilot Studio preview quickstart (preview)
Feedback
Coming soon: Throughout 2024 we will be phasing out GitHub Issues as the feedback mechanism for content and replacing it with a new feedback system. For more information see: https://aka.ms/ContentUserFeedback.
Submit and view feedback for