Note
Access to this page requires authorization. You can try signing in or changing directories.
Access to this page requires authorization. You can try changing directories.
The calendar control displays scheduled activities and their associated details in a calendar layout. Activities can be viewed, created, and deleted in a day, week, or month view.

System customizer or system administrator privileges are needed to add the calendar control to a table.
Add the control using the modern app designer
When you add the calendar control to a table, you can specify the columns that are used for the start date, end date, description, and duration. The calendar control is available in the modern app designer.
Note
When you add the control to a table view, it replaces the standard view for all views for that table.
- While working in the app designer on the Pages tab, hover over the table view and then select Edit view (pencil icon).
- Open the view where you want to replace the standard view with the calendar control. The view designer opens.
- On the command bar select Components, and then select Add a component.
- On the Add a control page, select Calendar.
- On the Add a calendar properties page, select the table columns and clients to display the control. For example, with appointment table, you specify these columns.
- Start date. Select the column that is used for the start date on the calendar, such as Start Time (Date and Time).
- Description. Select the column that is used for the description, such as Subject (Text).
- End date. Select the column that is used for the end date on the calendar, such as End Time (Date and Time).
- Duration: Select the column that is used for the duration on the calendar, such as Duration (Duration).
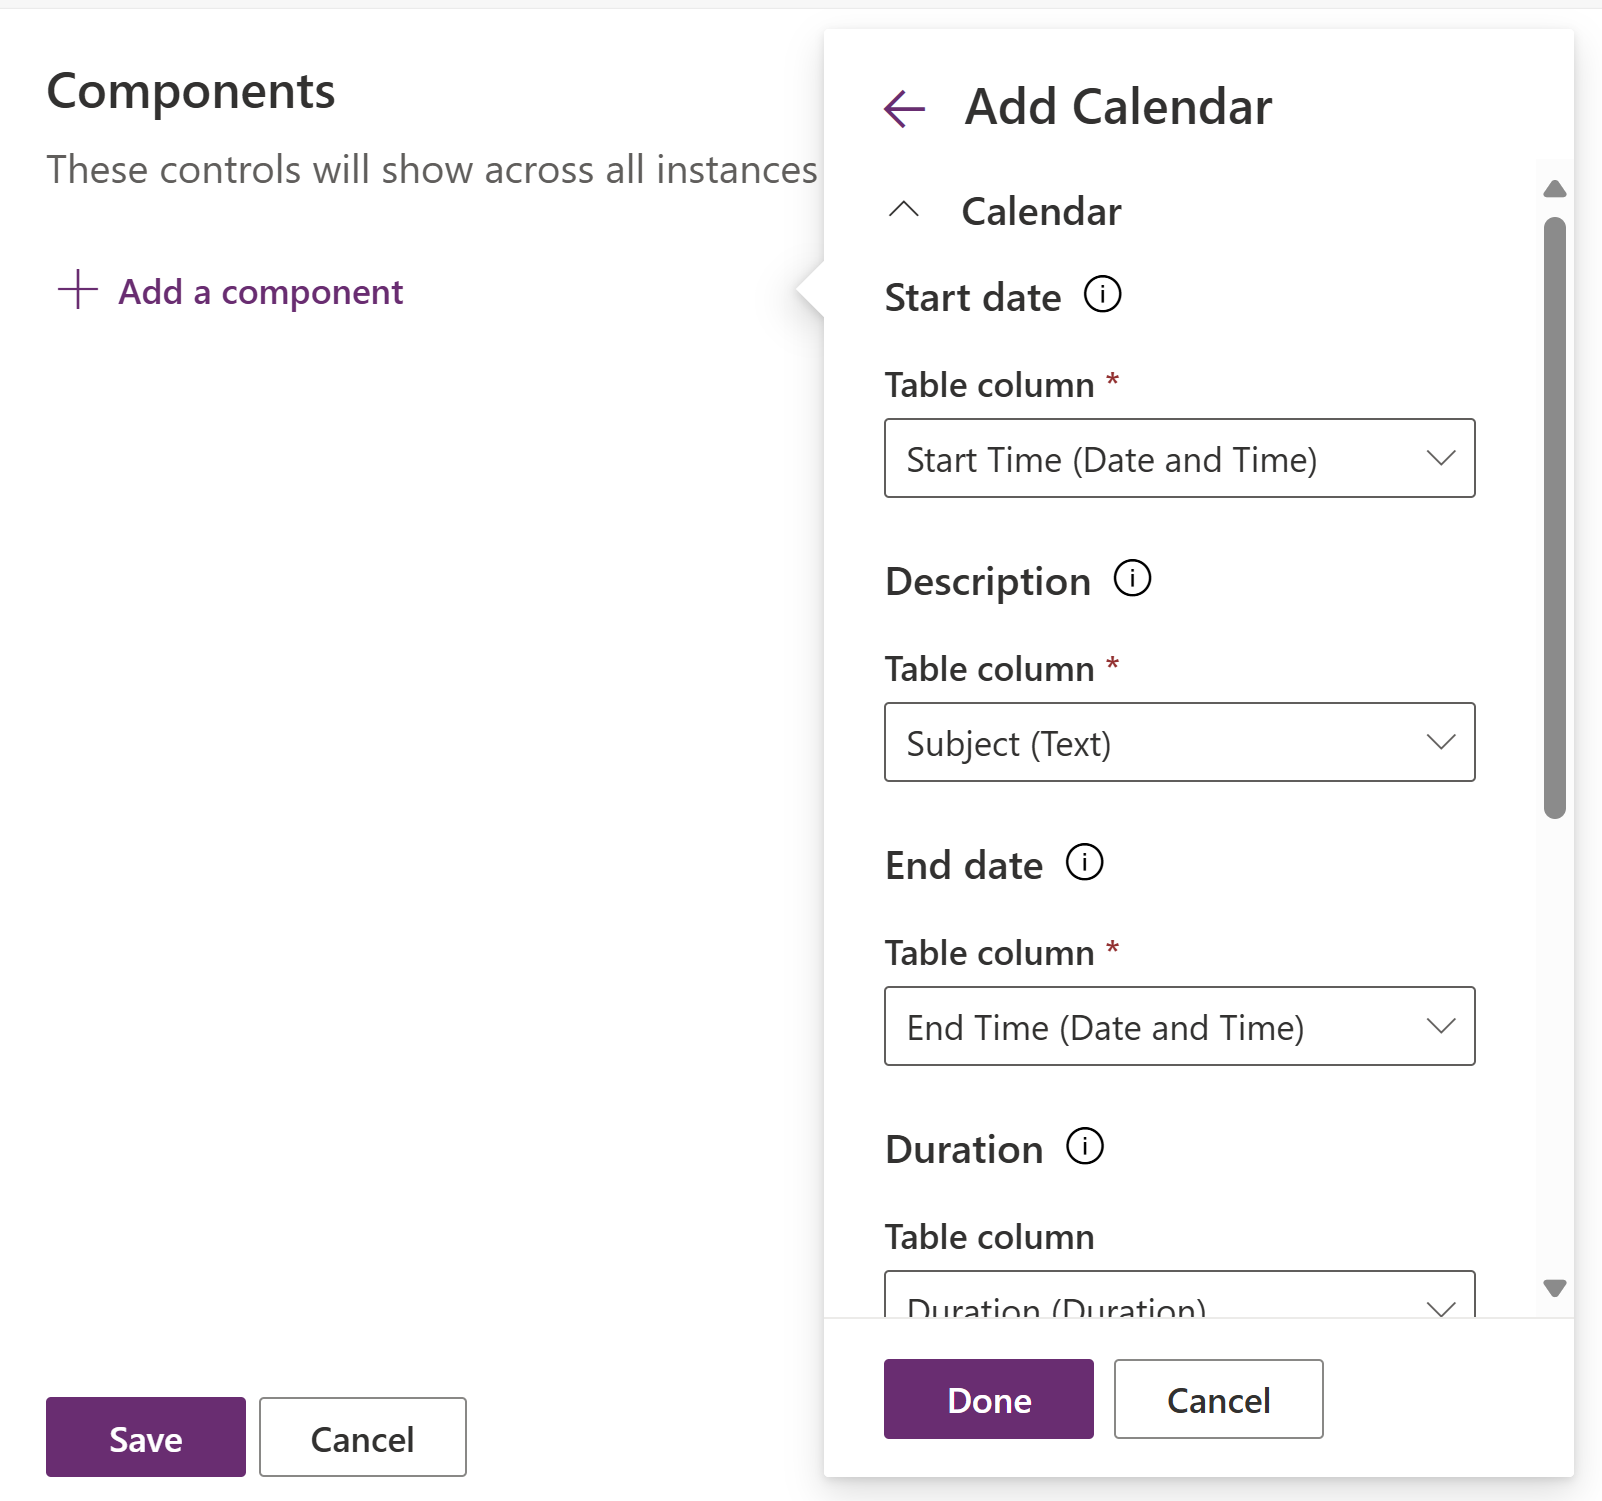
- Select Done, and then select Save.
- To make the updated view available in model-driven apps, select Save and publish.
Add the control using the classic solution explorer
In the app, select the Settings icon, and then select Advanced Settings.

The Business Management page opens in a new browser tab.
On the navigation bar, select Settings, and then under Customization, select Customizations.
Select Customize the System.
Under Components in the solution explorer, expand Tables, and then select a table. For example, Activity.
Important
For Description and Regarding columns to be displayed in the Calendar Control, the table where the Calendar Control is configured must be created as an activity table. More information: Activity tables
On the Controls tab, select Add Control.

In the Add Control dialog box, select Calendar, and then select Add.
The calendar control is added to the list of controls.
Read-only grid is the default option, so when users select a table from the site map, they see a read-only grid of opportunities. To make the calendar view the default view instead, select the corresponding Calendar option buttons.
Select the edit icon for each of the mandatory columns indicated by a red asterisk, and then select the binding values.

Select Save to save changes.
To publish the changes, select Publish.
Mobile experience
The calendar* control is available when working on mobile devices with a different user experience that is optimized for mobile form factors. There's a scrollable day bar for selecting which date to view. The Day/Week/Month selection dropdown isn't available on mobile devices.