Note
Access to this page requires authorization. You can try signing in or changing directories.
Access to this page requires authorization. You can try changing directories.
Add or remove one or more forms, views, or charts for a model-driven app.
Add or remove forms from an app
To add or remove forms for a model-driven app, follow these steps:
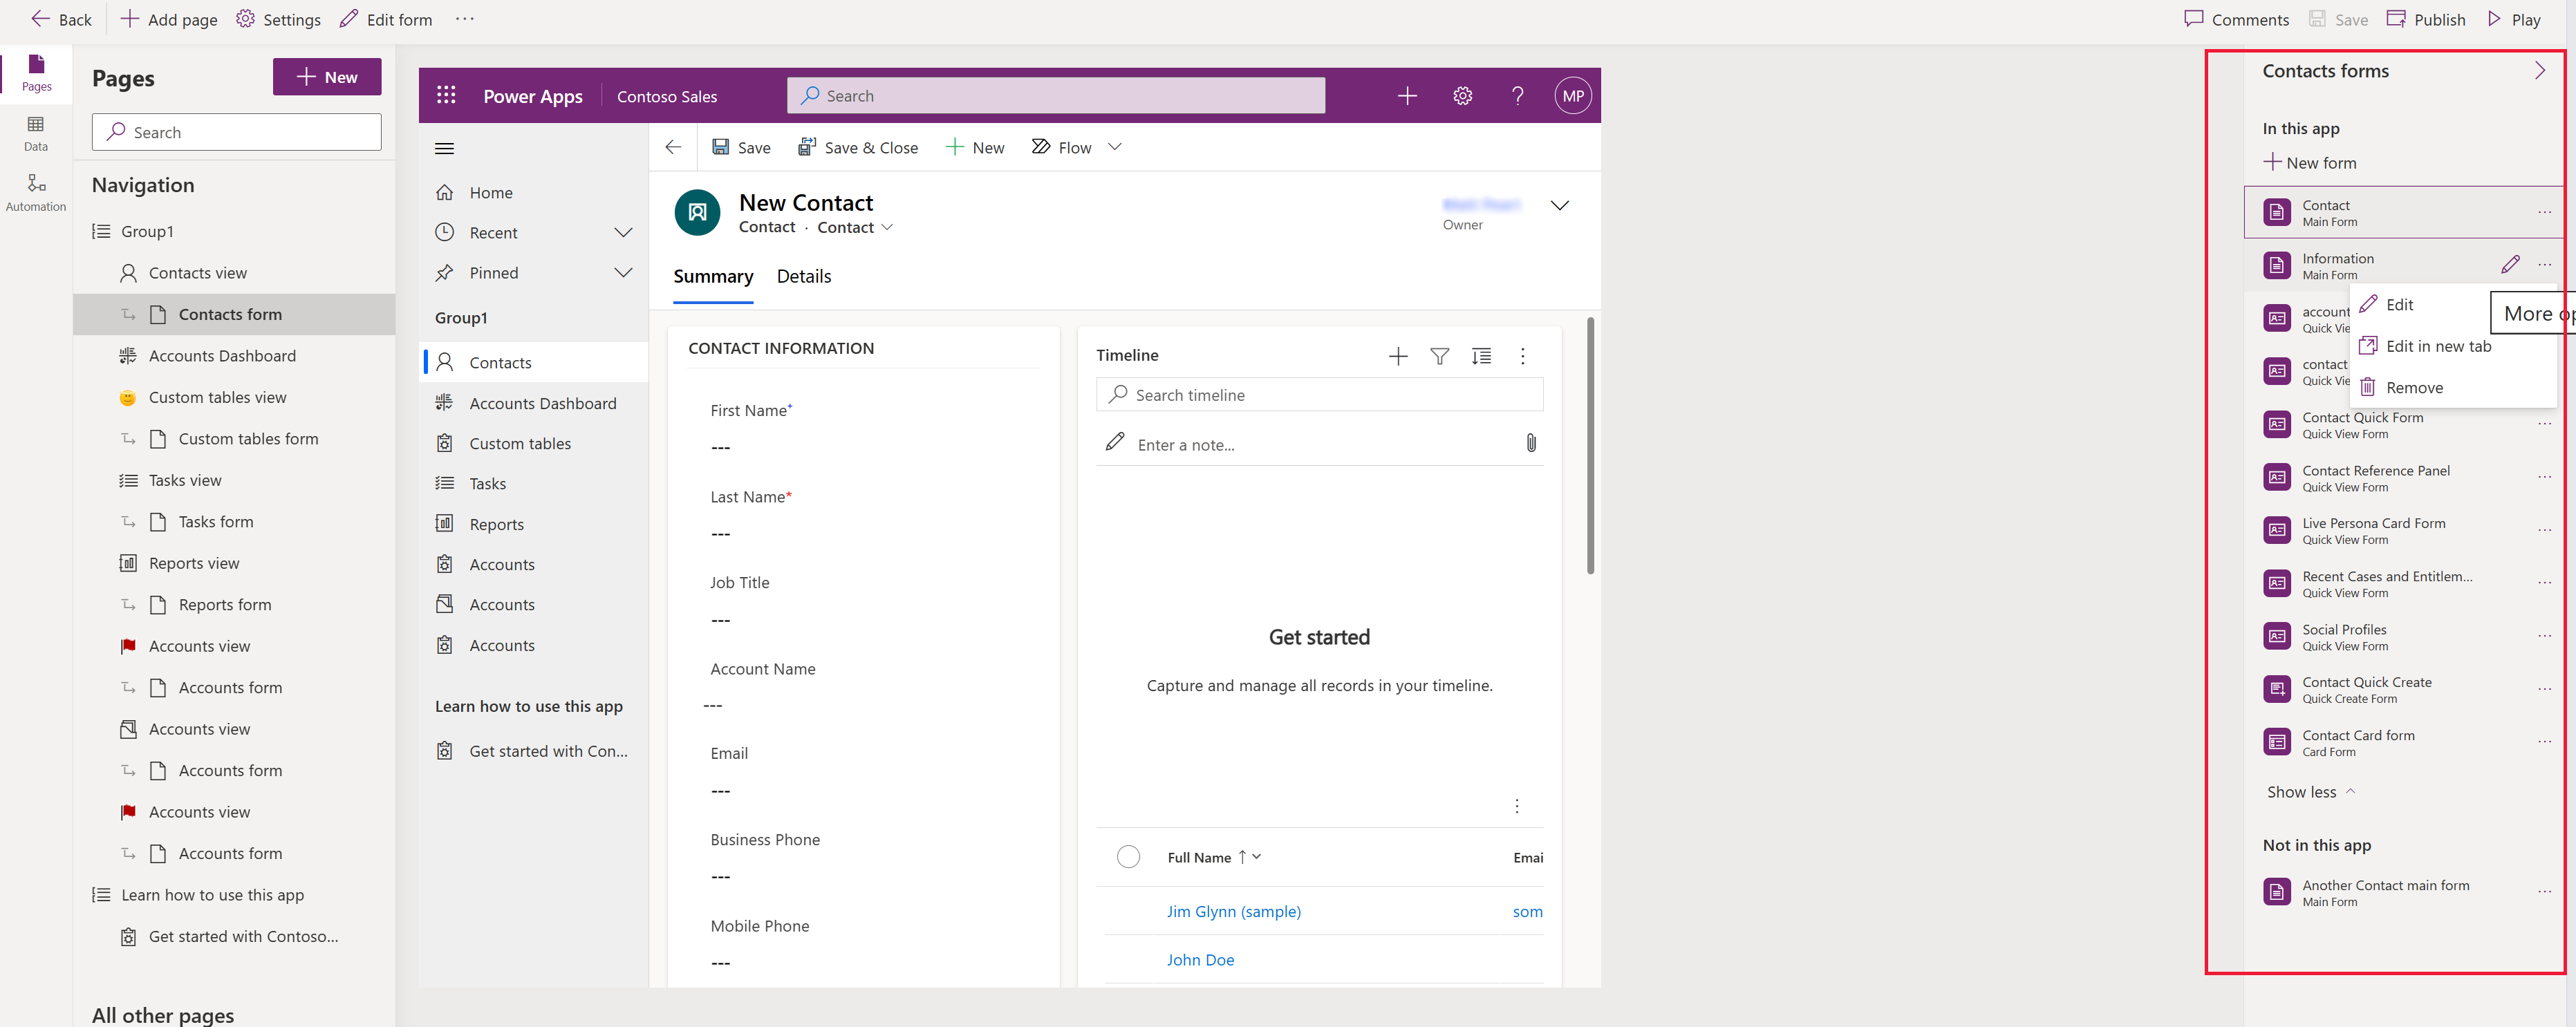
In the app designer, on the left navigation pane select Pages and then select a table form, such as the Contact form.
On the right forms pane, the list of available forms is displayed. Forms that are available in the app appear under In this app. Forms available to add but not displayed in the app appear under Not in this app. To remove a form that's displayed, select ... > Remove. To add a form that isn't displayed, select ... > Add.
Note
By default, all forms are selected and made available in the app. Select specific forms to enable only those forms you want available in the app.
Select Publish to make the changes available to other users.

Manage views and charts
To add or remove one or more views or charts for a model-driven app, follow these steps:
- In the app designer, on the left navigation pane select Pages and then select the table you want to update, such as the Accounts view.
- On the right properties pane, select the Views or Charts tab.
- Next to the views or charts you want to add or remove, select ..., and then select Remove, or if the item is under Not in this app, select Add.
- Select Save.
- Select Publish to make the changes available to app users.
Note
By default, all views and charts are selected and made available in the app. Select specific views or charts to enable only those components you want available in the app.
See also
Create and design model-driven app forms