Note
Access to this page requires authorization. You can try signing in or changing directories.
Access to this page requires authorization. You can try changing directories.
This article describes the basics of creating and editing a model-driven app that can be shared and distributed to other environments.
Important
Starting in October 2023, the classic app, form, and view designers are deprecated and all model-driven apps, forms, and views will only open in the modern designers. By default, the Switch to classic command to revert back to the classic designer from the modern designer will no longer be available. More information: Classic app, form, and view designers are deprecated
Prerequisites to creating model-driven apps
Verify the following prerequisites before creating an app:
- A Power Apps environment used for app development must exist within the tenant. More information Create an environment and Environment strategy for ALM.
- The environment used will need to have a Dataverse database associated with it. Dataverse environments can exist with or without a database and generally these are provisioned on creation of the environment. The database holds the tables and other components that will be used by the model-driven app. Create and manage environments in Dataverse
- Within the environment the app developer needs to have an environment maker, system administrator, or system customizer security role. More information: About predefined security roles
Create a model-driven app
Sign in to Power Apps.
Choose the environment by selecting the environment icon

Select Solutions from the left navigation pane. If the item isn’t in the side panel pane, select …More and then select the item you want.
Open an unmanaged solution or create a new one. More information: Create a solution
Select New > App > Model-driven app.
There a two options. Modern app designer and Classic App designer. Select Classic App Designer.
On the Create a New App page, enter the following details:
Name: Enter a name for the app.
Unique Name: The unique name is automatically populated based on the app name that is specified. It's prefixed with a publisher prefix. It's possible to change the part of the unique name that's editable. The unique name can only contain English characters and numbers.
Note
The publisher prefix is the text that's added to any table or column created for a solution that has this publisher.
Description: Type a short description of what the app is or does.

Icon: By default, the Use Default Image check box is checked. To select a different web resource as an icon for the app, clear the check box, and then select an icon from the drop-down list. This icon is displayed on the preview tile of the app. For more information about how to create a web resource, go to Create or edit model-driven app web resources to extend an app.
Use existing solution to create the App (Optional): Select this option to create the app from a list of installed solutions. When this option is selected, Done switches to Next on the header. If Next is selected, the Create app from existing solution page opens. From the Select Solution drop-down list, select a solution. If any site map is available for the selected solution, the Select Sitemap drop-down list will appear. Select the site map, and then select Done.
Note
By selecting Default Solution when the site map is added, the components that are associated with that site map are automatically added to the app.

Choose a welcome page (Optional): This option allows a designer to select from the web resources available in your organization. The welcome pages created can contain information that's useful to users, such as links to videos, upgrade instructions, or getting started information. The welcome page is displayed when an app is opened. Users can select Do not show this Welcome Screen next time on the welcome page to disable the page so it doesn't appear the next time the app starts. Notice that the Do not show this Welcome Screen next time option is a user-level setting and can't be controlled by administrators or app makers. More information about how to create a web resource, such as an HTML file that can be used as a welcome page: Create and edit web resources to extend the web application
To edit app properties later, go to the Properties tab in the app designer. More information: Manage app properties
Note
It is not possible to change the unique name and app URL suffix on the Properties tab.
Select Done or if Use an existing solution to create the App is selected, select Next to choose from the available solutions that were imported in the environment, then select Done.
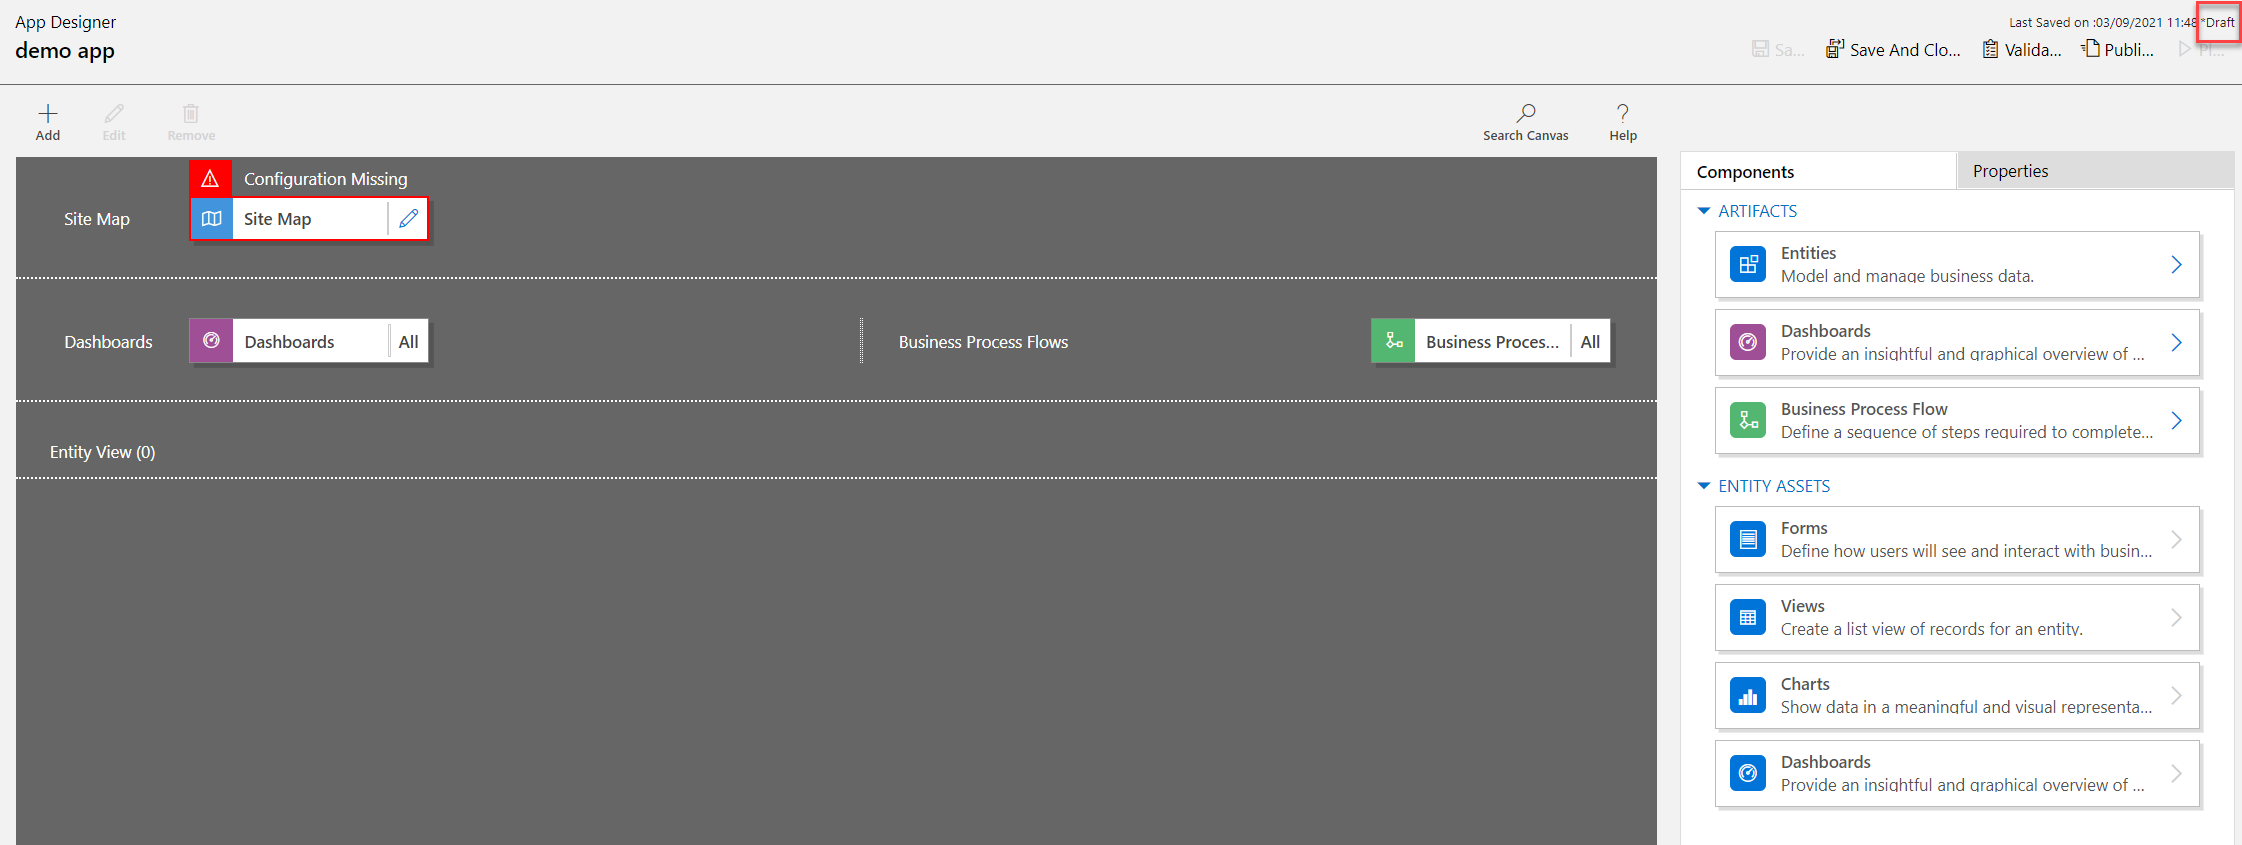
A new app is created and is shown in Draft status. This is shown in the App designer.
Note
When opening the classic app designer, an error might appear similar to the image here. When this occurs, it doesn't impact the classic app designer functionality and you can close the error and continue editing the app. However, to avoid this issue, use the Modern app designer.

Configure the site map
The site map describes the components that make up a model driven app.
Select the Open the Site Map Designer edit button (pencil icon) to open the sitemap designer.

Notice that when an app is first created a site map must be configured for it.
On the sitemap designer, select New Subarea.
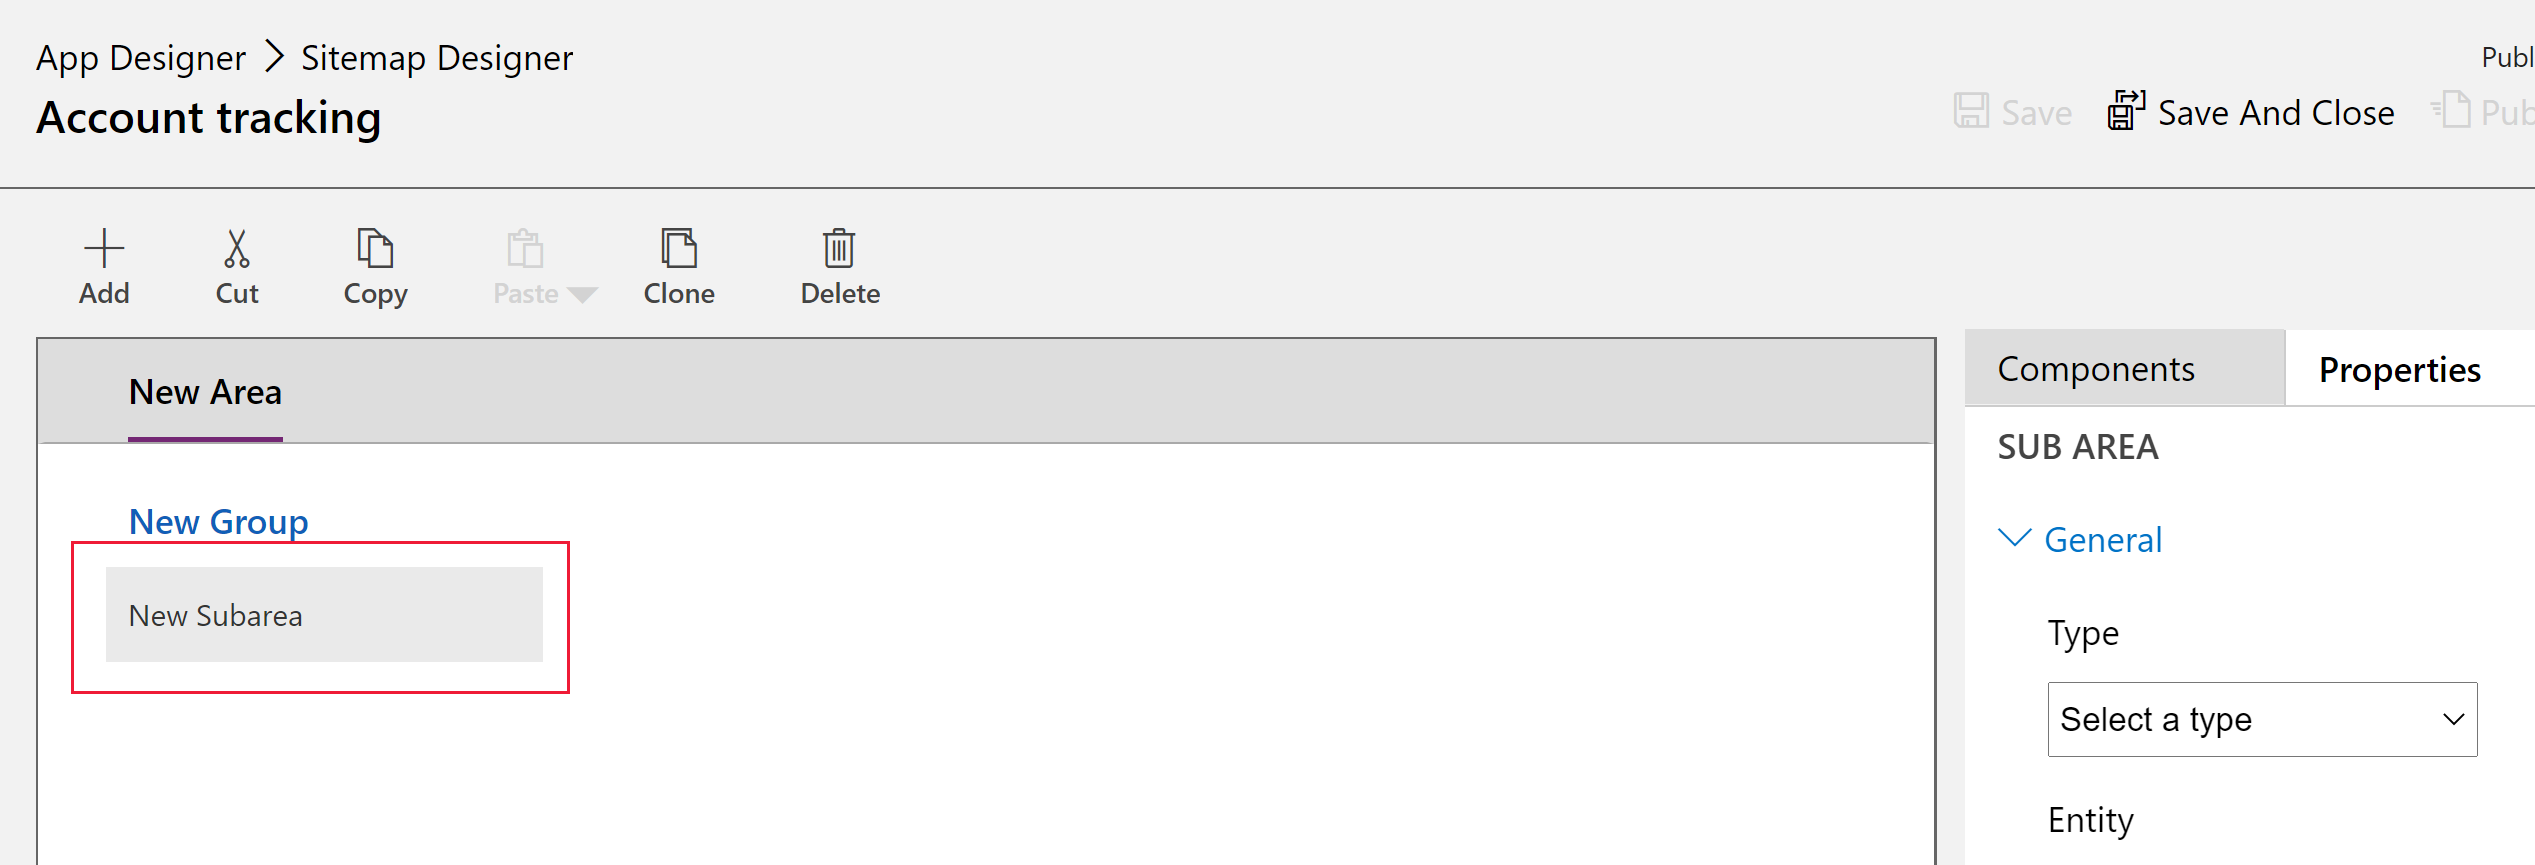
In the right pane, select the Properties tab, and then select the following properties.
Type: Entity
Entity: Account

When the Title property is left blank, the app uses the table name in the app's left navigation pane. For this app, Accounts will be displayed in the app at runtime.
- Select Save And Close to close the sitemap designer.
Finalizing the app
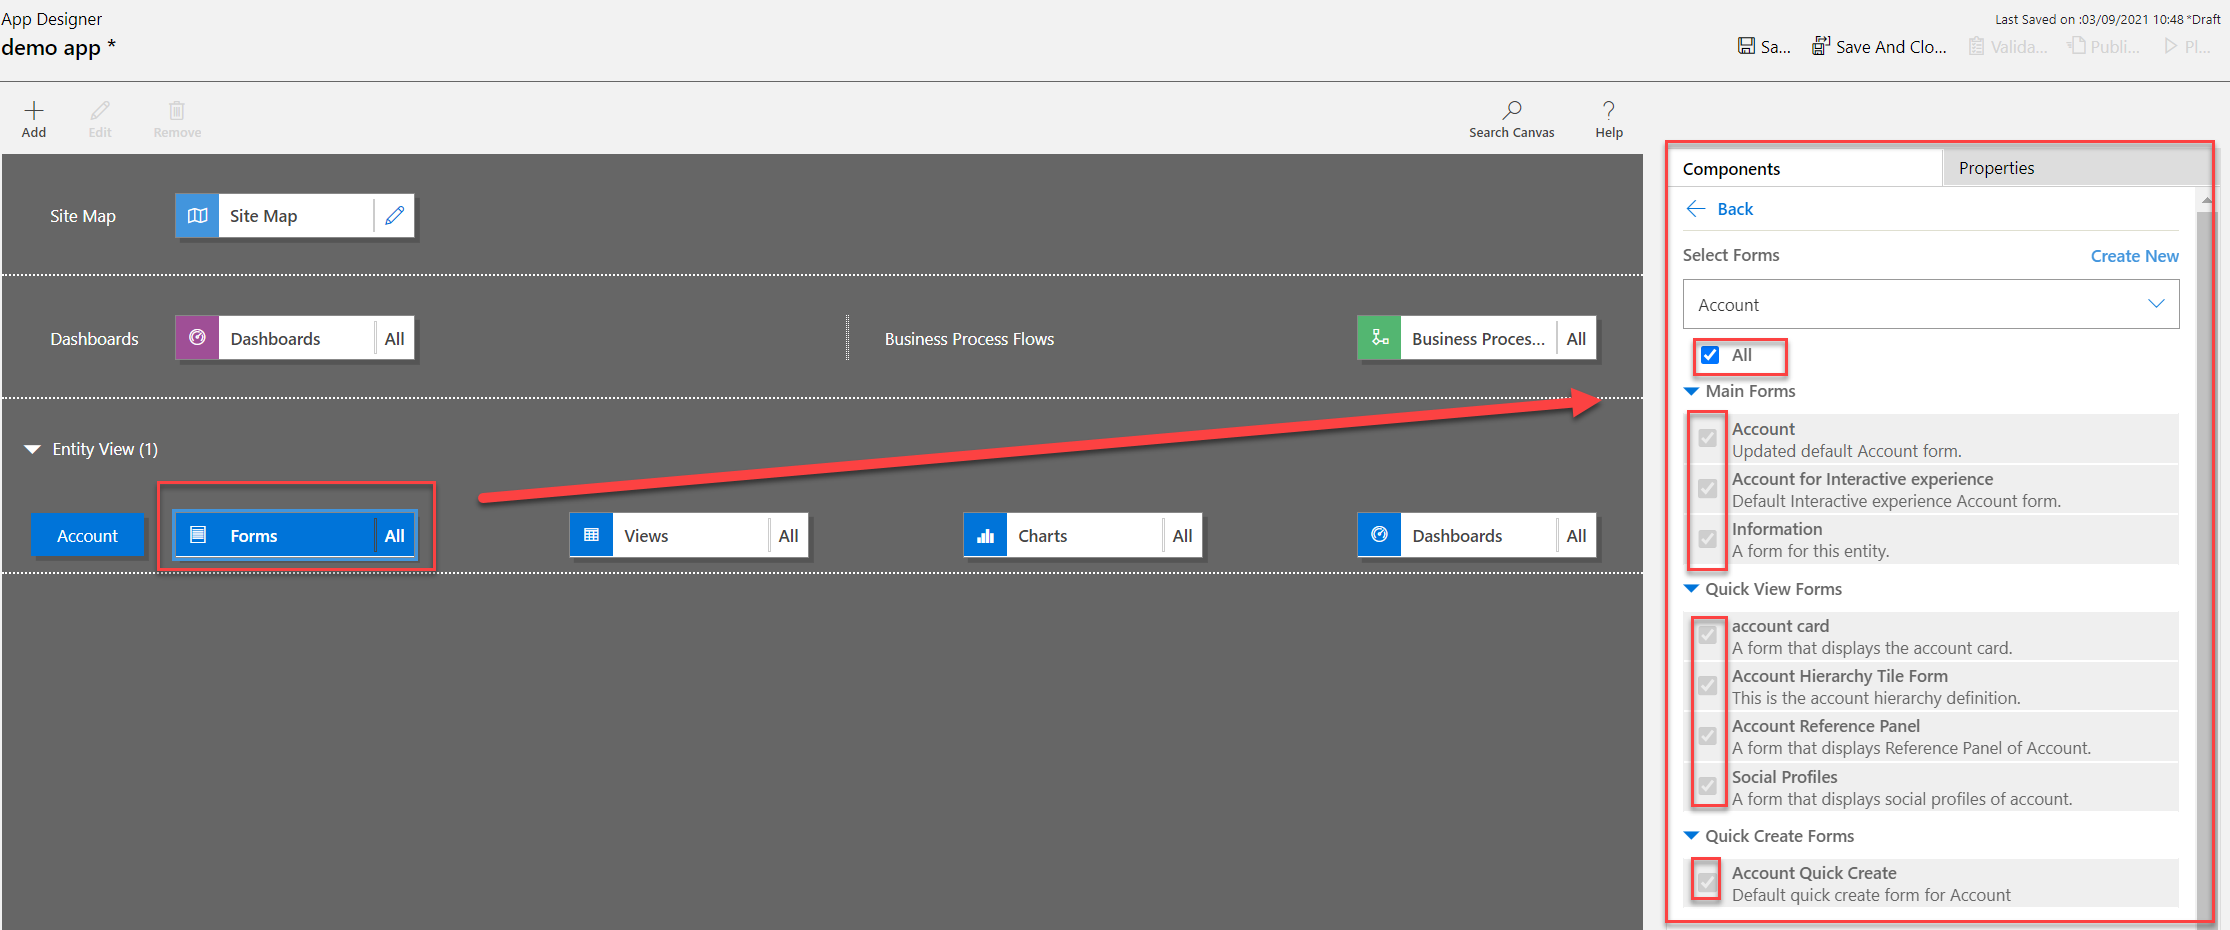
By default, all the account table's forms, views, charts, and dashboards are enabled for the app. From the app designer Components tab on the right pane, components can be cleared so that they aren't available in the app at runtime. It's also possible to create new components, such as a custom form. For this app, leave all components enabled.
On the app designer toolbar, select Save.
After your app is saved, on the app designer toolbar, select Publish to make it available to run and share.
The rest of the design experience revolves around further developing the site map in addition to configuring the app through the app designer. More information: Add or edit app components
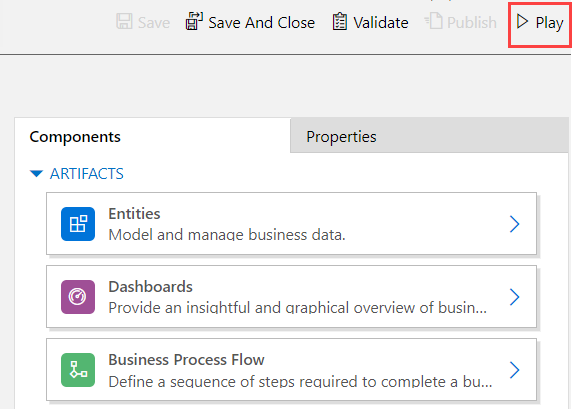
Play your app
On the app designer toolbar, select Play. This will only be available once the app is published.
To create a record, select + New.
To view a chart, on the app command bar select Show Chart.
To change the view, select the My Active Accounts view, and then select the view required.

To learn more about how to use your app, see Basic navigation in a model-driven app.
Edit an app
- Sign in to Power Apps.
- Choose the environment by selecting the environment icon
- Select Solutions.
- Choose the solution that contains the model-driven app where editing is required.
- On the left navigation pane select Apps, select a model-driven app, and then on the toolbar select Edit.
- As with creating an app editing experience will center around creating a strong site map
- In the app designer, add or edit components to the app, as required. More information: Add or edit app components