Note
Access to this page requires authorization. You can try signing in or changing directories.
Access to this page requires authorization. You can try changing directories.
Model-driven apps are distributed as solution objects. After a model-driven is created, it can be made available for other environments to use by adding the app to a solution and then exporting it.
After the exported solution (a .zip file) is successfully imported in the target environment, the app is available for use provided users have the security roles relevant to the tables or other objects in the app.
Moving solutions between environments is the basis for how you apply application lifecycle management to the products created.
This article describes how to work with solutions in a basic fashion. Go to this article for detailed guidance on working with solutions.
Add an app to a solution
To distribute an app, you create a solution so that the app can be packaged for export.
Sign in to Power Apps.
Select Solutions on the left navigation pane, and then select New solution. If the item isn’t in the side panel pane, select …More and then select the item you want.
Enter the properties on the New Solution page, and then select Save. More information: Create a solution
The Solution page appears. Select Add Existing, select App, select Model-driven app, select the app that is to be added to the solution, and then select Add.
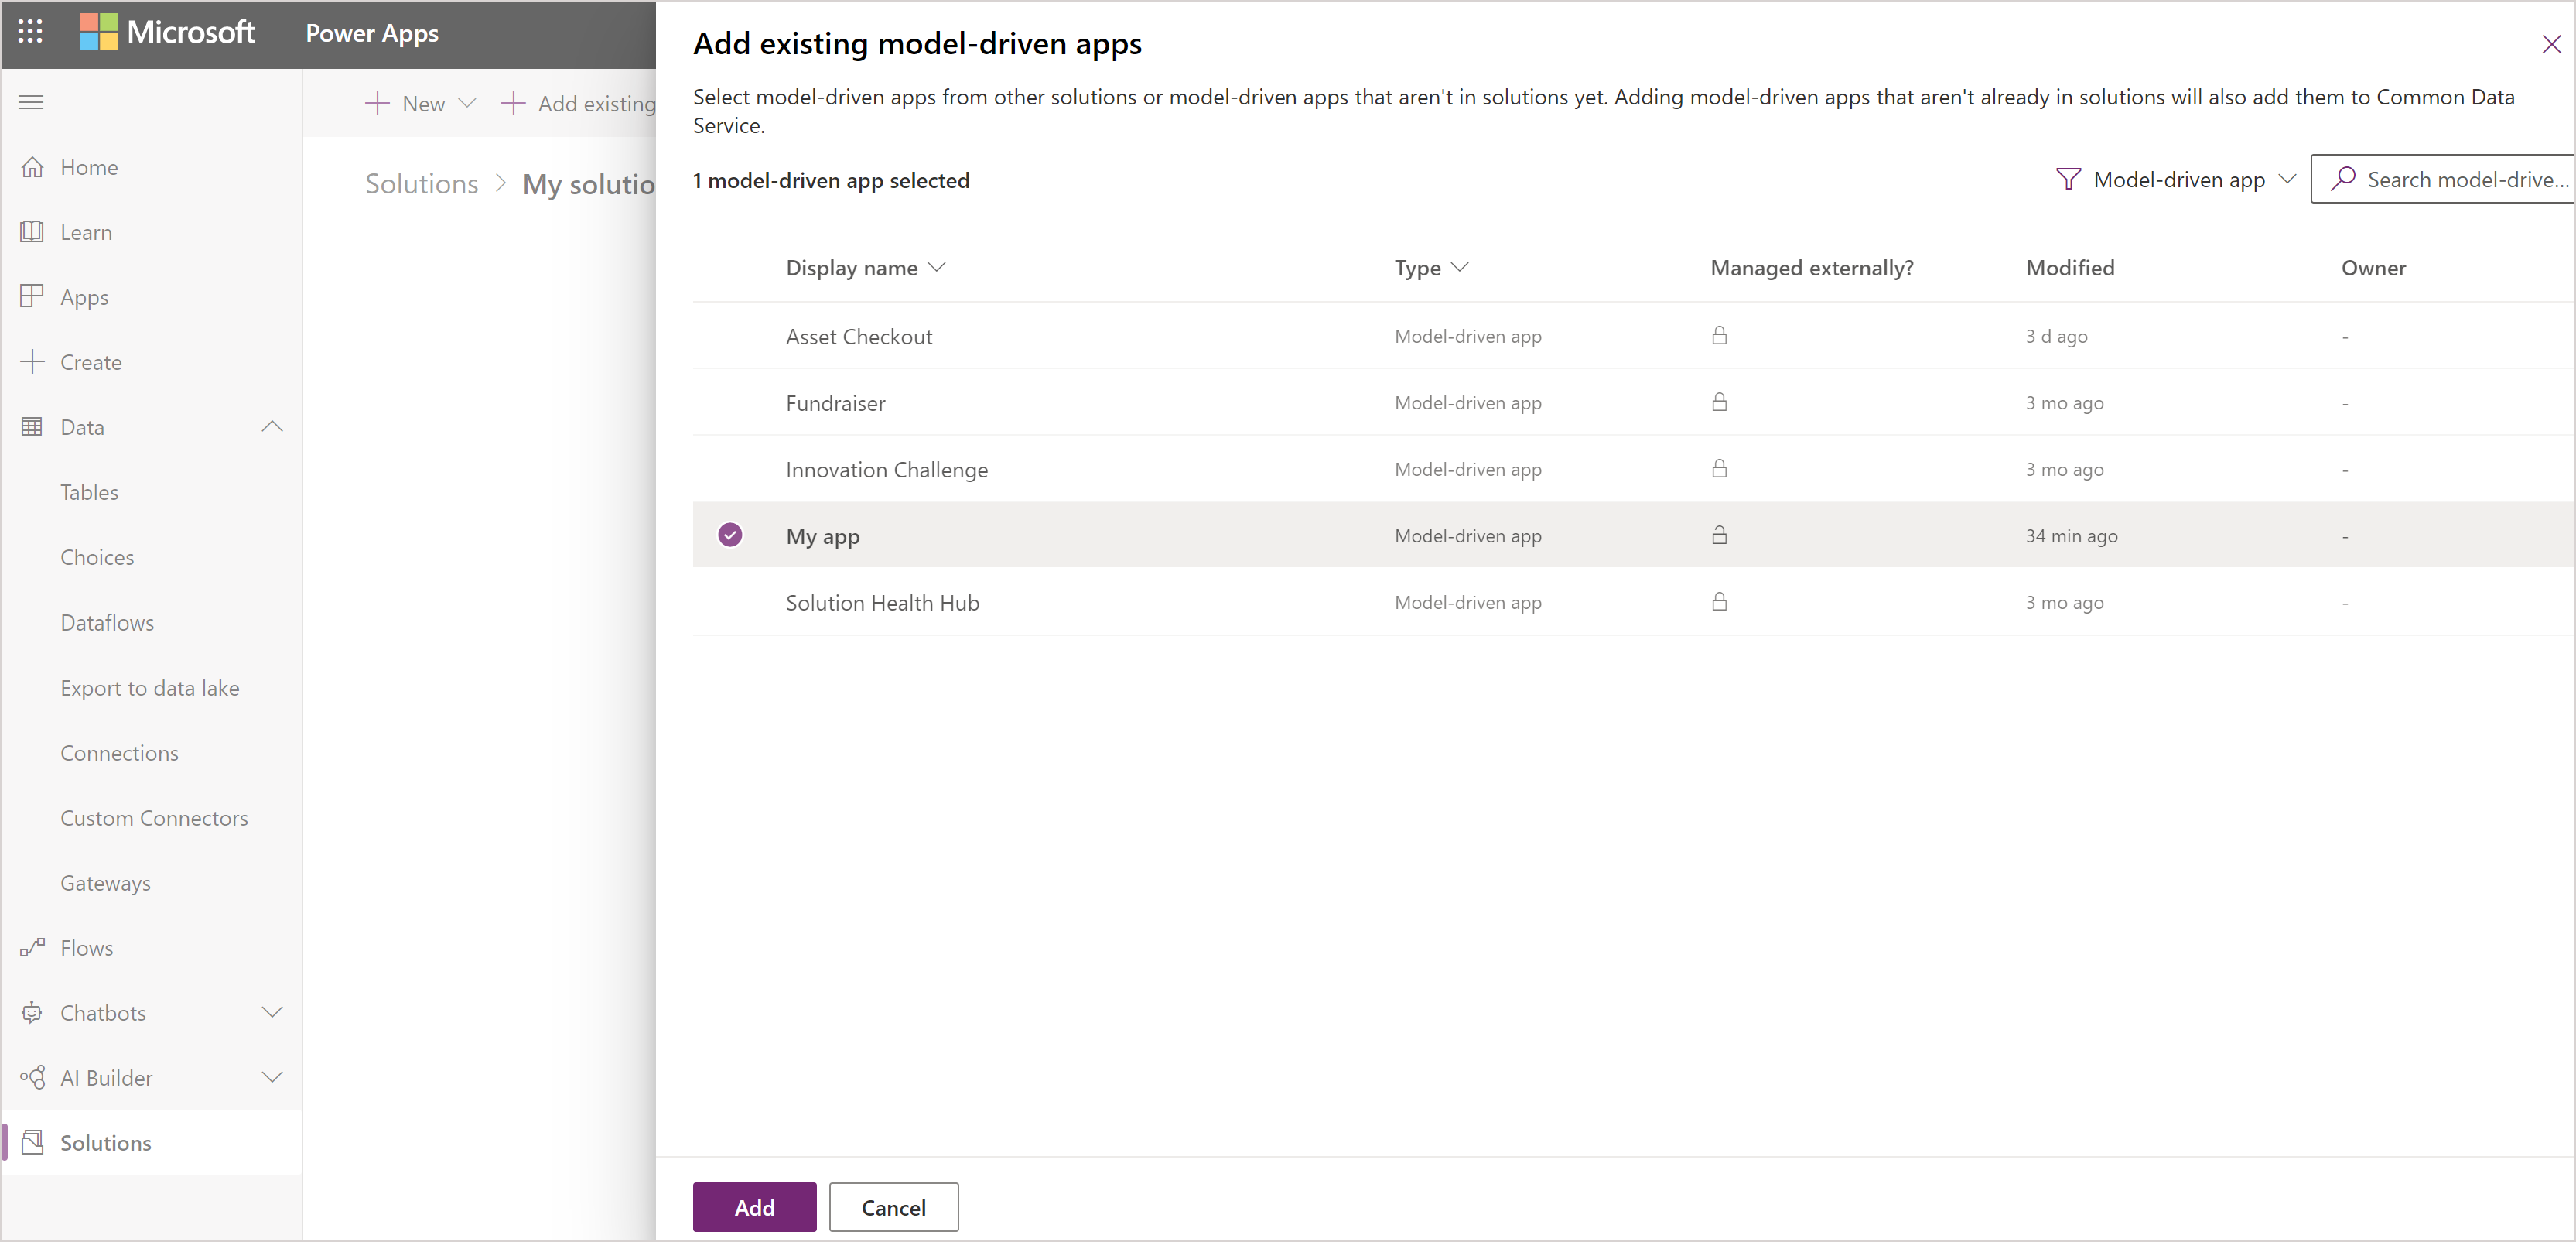
If a Missing Required Components page appears we recommend selecting Yes, include required components to add necessary components such as tables, views, forms, charts, and site map that are part of the app. Select OK.
Export a solution
To distribute an app so it can be imported into other environments or made available on Microsoft Marketplace, export the solution to a zip file. Then, the zip file that contains the app and components can be imported into other environments.
Select Solutions on the left navigation pane of Power Apps. If the item isn’t in the side panel pane, select …More and then select the item you want.
Select the solution, and then on the toolbar select Export solution.
On the Before you export pane, we recommend that you Publish, before selecting Next.
If there a are missing dependencies, the Manage solution dependencies pane appears. Select Next to add the missing dependencies.
On the Export this solution pane, accept the incremented version number already provided or enter a different one, select Unmanaged or Managed, and then select Export. For more information about solution package types, go to Solutions overview.
Note
- Typically you export a solution as Managed because you want to continue to work on the project in the current environment. Unmanaged versions of your solutions should be considered your source for Microsoft Power Platform assets and checked into your source control system. We don't recommend that you import unmanaged solutions into non-development environments.
- By default, Run solution checker on export is selected. We recommend that you allow solution checker to run to identify issues that might occur with the export.
Depending on the browser and settings, a .zip package file is built and copied to the default downloads folder. The file name of the package is based on the unique name of the solution appended with underscores and the solution version number.
Note
When you export an app by using a solution, the app URL isn't exported.
Import a solution
When you receive a solution zip file that contains the app that you want to import, open the solutions component page and import the solution. When the solution has been successfully imported, the app is available in the environment.
- Sign in to Power Apps.
- Select Solutions on the left navigation pane, and then on the toolbar select Import solution. If the item isn’t in the side panel pane, select …More and then select the item you want.
- Select from these options for where to import the solution from:
- This device. Select Browse and locate the zip file, and then choose Next.
- Pipelines. If the solution is part of a pipeline in Power Platform select this option. More information: Use pipelines in Power Platform to deploy solutions
- Select Import and wait for the solution to be imported. This can take a varying amount of time based on the complexity of the solution.