Note
Access to this page requires authorization. You can try signing in or changing directories.
Access to this page requires authorization. You can try changing directories.
There's a lot to keep in mind when you create or update an offline profile for model-driven apps. An offline profile should include all the data that app users need to complete tasks in the field. If it includes too much data, however, app users might get stuck waiting for their data to download. They might even run out of space on their device. You need to consider the devices and data plans your app users have to make sure they have a great experience.
The following guidelines help you create an offline profile that meets the exact needs of your organization.
Don't make your users download too much data
Each user might have access to a different set of data. It's important to think about and test how much data different groups of users see. For example, a group sales manager might have access to many more sales opportunities than a local sales manager.
As you develop your offline profile and test with real or representative data, keep these best practices in mind:
- Limit the number of records to less than 200,000 for better performance. Exceeding 3,000,000 records isn't supported by the offline sync.
- Limit the number of tables to fewer than 100.
- Limit the total data size to less than 1 GB.
- Limit the total files and images size to less than 4 GB. Apply filters to reduce the total download size.
- Reduce the number of records downloaded in tables that change frequently by filtering on fields like status, group, region, owner, or assigned to.
If your app's offline data exceeds these recommendations, users see slower syncs, higher data usage, higher battery usage, and slower app performance.
Optimize your offline profile
Apply the following best practices to make sure that users download only the data they need. Optimizing the data that's downloaded makes it easier to stay within the recommended limits.
Don't reinvent the wheel
If you're customizing Field Service or Sales, start from their default offline profiles. You know core features work, and you won't miss tables that are used in standard forms.
The default offline profiles include everything you need for an out-of-the-box solution. You can add more tables that are important for your business.
However, don't remove tables from the default profile. Without those tables, forms or views might fail at runtime. If the default profile includes too many or too few rows of data, adjust the filters on the largest tables to optimize data sizes for your users.
Add all tables that are referred to in each form and view in your app
When you add a form or view to your model-driven app, look for references to other tables, including lookups. Make sure each of these tables is included in your offline profile with a corresponding related table or filters. Be sure to add all tables used in web resource scripts as well.
When you add a table to the offline profile, you can choose one of four options to determine which rows are downloaded:
- Organization rows
- All rows
- Related rows only
- Custom
To choose the best option for each table, consider which of the following categories your table belongs to:
Standalone tables: Tables that are visible as grids in the app, like Contact.
Related tables: Tables that are referred to in the form or grid view of a different table, like Unit.
Resource tables: Tables that contain resource data, like Currency or Territory.
Choose a row option based on the category of table you add:
| Table type | Organization rows | All rows | Related rows only | Custom |
|---|---|---|---|---|
| Standalone | ✓ | ✓ | ||
| Related | ✓ | ✓ | ||
| Resources | ✓ | ✓ |
Use filters to reduce the data download size
If users have access to a large set of data when they're online, apply filters to restrict the data that they download when they're offline.
Important
If you add a custom filter to a table that's set to download related rows, the filter is treated as an OR. That means that all related rows are downloaded, in addition to the rows specified by the filter. Users might download more data than you intend. If you want to download related rows and apply an additional filter, clear Related rows only and specify the relationship and the additional restrictions in a custom filter using AND.
Standalone tables: Use a custom filter that includes the records that are required for the grid views in your app. By default, all views are included when you add a table in the app designer. To make sure that users have the same data online and offline, explicitly select the views that filter the data that you include in the offline profile.
Related tables: Use a custom filter if you want users to download rows that are related AND that match your other filter criteria.
Resources tables: Use a custom filter if you want users to download only rows that match your criteria, like rows with an Active status.

Common custom filters
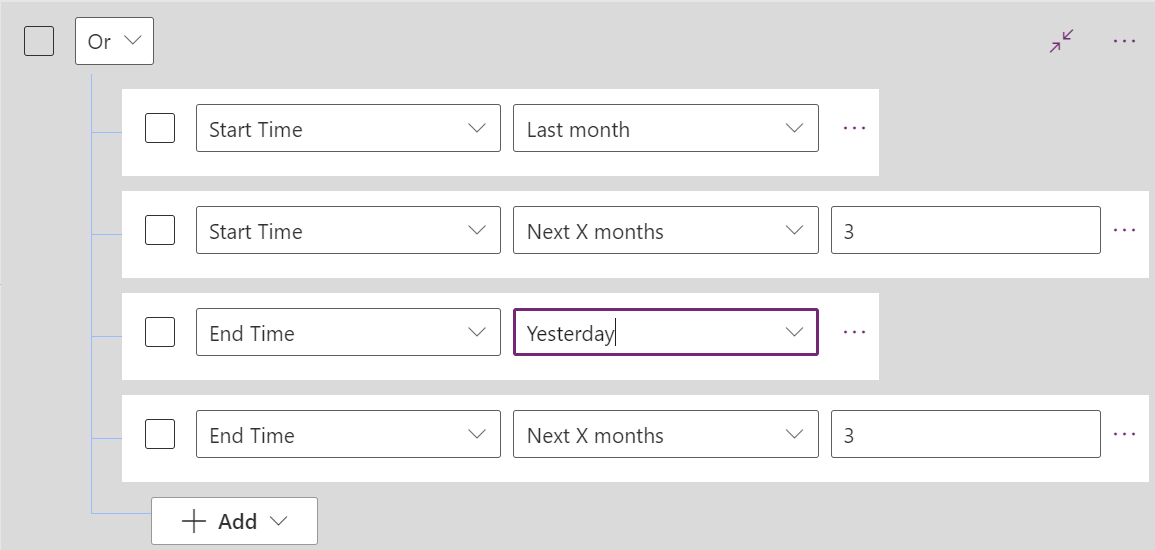
Filter by time and date fields for time-centric data like bookings and timeline items. Consider both future and past dates. For example, a common filter might include appointments from the past month and the next three months.
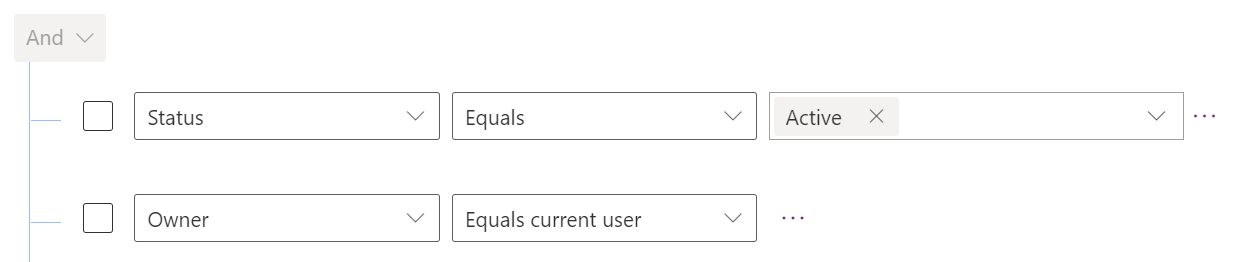
Filter by status to limit downloads to rows with a certain status.

Filter by custom category or role fields to scope large tables down to the data needed for your app. For example, you could filter Contacts by Role to limit data to stakeholders.

Avoid these filter pitfalls that can slow down your downloads
If a custom filter results in a slow Dataverse query, downloads take longer. Follow these best practices to avoid common performance bottlenecks:
Don't use partial string matches or Contains, Begins with, or Ends with.
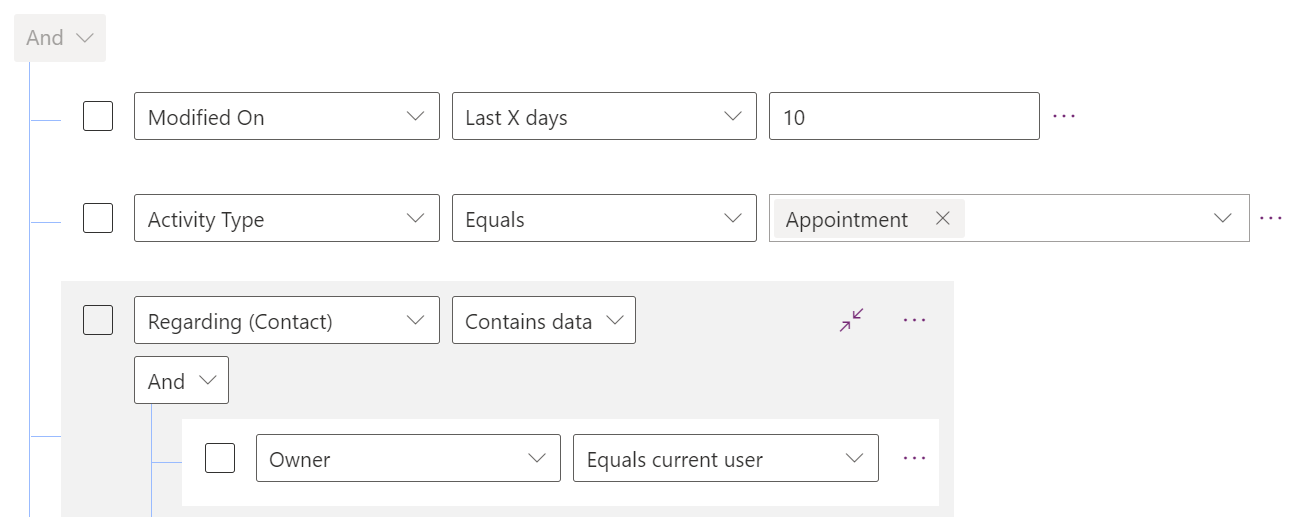
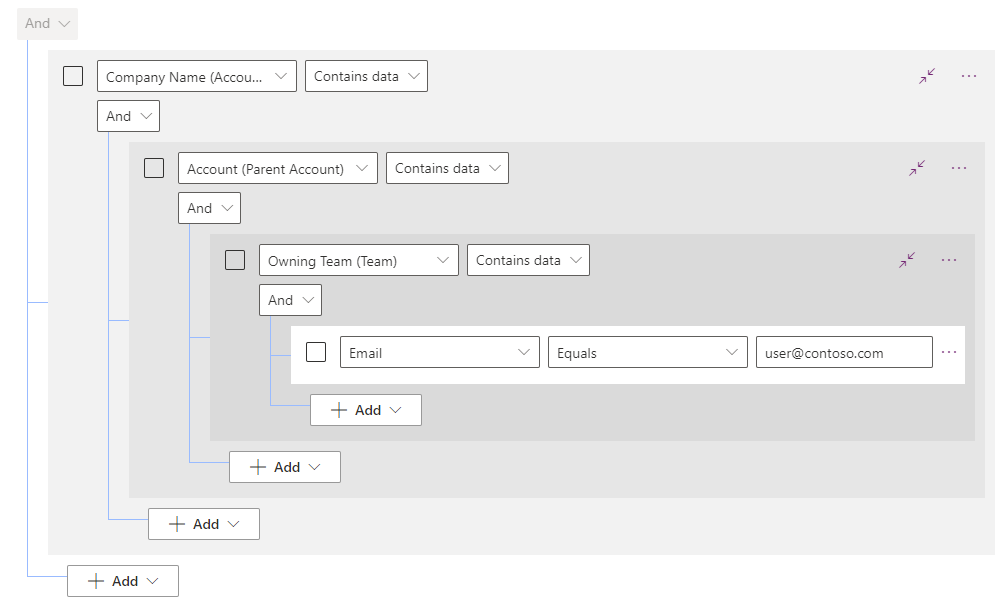
Avoid multiple levels of relationships in custom filters. Filters like this can lead to slow downloads:
Avoid using many OR conditions.
Avoid using small time windows to reduce data downloads on tables that change frequently. If a table in your offline profile is large and changes frequently, reduce the number of records downloaded by filtering on fields like status, group, region, owner, or assigned to.
Use column selection to reduce data download and sync time
The first sync can take time for organizations with large datasets, especially in remote areas. Optimize this by explicitly selecting only the required columns to download on the device and avoid downloading columns that are never used in the app. This saves both network and disk usage and results in faster sync time. While this impacts both the first sync and delta syncs, the first sync sees a greater impact as there are more records to download.
In Power Apps Studio, in the left side panel, select Apps.
Select your model-driven app, and then select Edit.
Select Settings.
Select General.
In the Select offline mode and profile section, select Edit selected profile from the More actions (...) icon for the selected profile.
In the Edit Profile pane, under the Data for offline use section, identify the table to optimize. Select the More actions (...) icon, and then select Edit.
The Edit Table Name page appears. Under the Selected columns section, select the Manage columns option.
In this Managed selected columns pane, select the Select only required columns option.
Columns used in the app are automatically selected. For all other columns, optimize by selecting only those that are necessary.
Important
- If you have custom JavaScript code in the app, ensure the columns used in the custom code are selected in the offline profile.
- If you add additional columns after optimizing the offline profile, go back and select that new column as Required Column, in the Managed selected columns pane.
Select Back.
Select Save.
Select Save + close.
Close the Settings and select Publish.
Note
- We recommend always selecting required columns for tables with a high number of unused columns.
- The Manage columns and Managed selected columns option isn't available in the mobile Offline Profile configuration on Power Platform admin center.
Optimize for canvas apps
Important
The optimization isn't supported on canvas apps using a selected offline profile.
For canvas apps using an autogenerated offline profile, the system automatically optimizes the columns downloaded on the device. With the optimization activated, the app only downloads the required columns.
- In Power Apps Studio, in the left side panel, select Apps.
- Select your canvas app, and then select Edit.
- Select Settings.
- Select Updates and Experimental.
- Turn on the Faster offline synchronization option.
- Close the settings and select Publish.