Note
Access to this page requires authorization. You can try signing in or changing directories.
Access to this page requires authorization. You can try changing directories.
Data operations allow you to manipulate data as you build your cloud flows. You can use them to create, sort, and rearrange data using shortcuts to help you achieve your results easier and faster, which can save you time and effort. When you use data operations, you can increase the efficiency of your flows, reduce the number of errors, and make it easier to analyze data.
This article explains how you can use data operations such as compose to create a single output from multiple inputs, including expressions. You can also use data operations to join or select data, filter arrays, create tables, and parse JSON. In this article, each section provides a brief description of the data operation, followed by a step-by-step procedure to help you use it in your cloud flow.
Prerequisites
- Access to Power Automate.
- A tool to send HTTP POST requests with a JSON array to your flow.
- A new or existing cloud flow to which you can add data operations.
Display a cloud flow in the designer
To use the data operations described in this article, you need to have the designer open with your new or existing cloud flow.
Power Automate allows you to use either the new designer or the classic designer to configure your cloud flow. The screenshots in this article use the new designer, but the steps are similar in both designers. Learn more (with examples) in Identify differences between the new designer and the classic designer.
Create a new cloud flow
To create a new cloud flow, follow these steps.
Sign in to Power Automate.
On the navigation pane to the left, select Create.
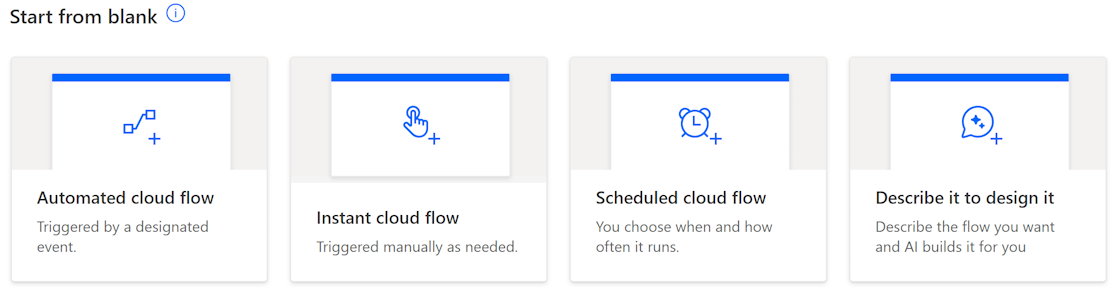
Select one of the types of cloud flows in Start from Blank: Automated cloud flow, Instant cloud flow, Scheduled cloud flow, or Describe it to design it.
For Automated cloud flow, Instant cloud flow, and Scheduled cloud flow, follow the instructions and select Create.
For Describe it to design it:
Enter a description of the flow you want to create and select Submit, or select from the AI-generated suggested flow descriptions.
If you're satisfied with the suggested flow, select Keep it and continue.
Review your connected apps and services, and then select Create flow.
The flow opens in the designer.
Select an existing cloud flow
To select an existing cloud flow, follow these steps.
Sign in to Power Automate.
On the navigation pane to the left, select My flows.
In the Cloud flows tab, select the flow you want to open.
On the command bar at the top, select Edit.
The flow opens in the designer.
Use the compose action
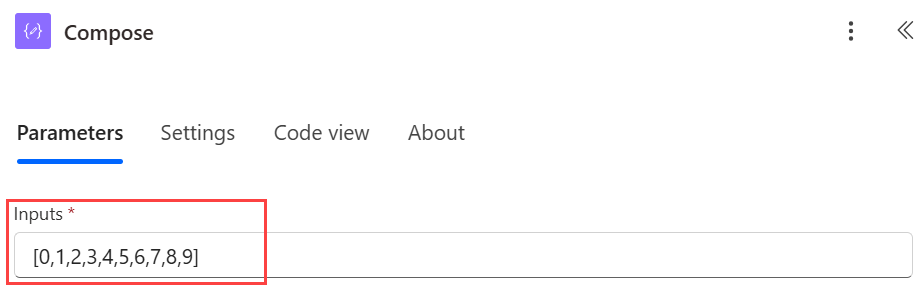
Use the Data Operation - Compose action to save yourself from having to enter the same data multiple times as you're designing a cloud flow. In this example, you need to enter an array of digits—[0,1,2,3,4,5,6,7,8,9]—several times while you design your flow. You can use the compose action to save the array, as described in the following procedure.
Add the compose action
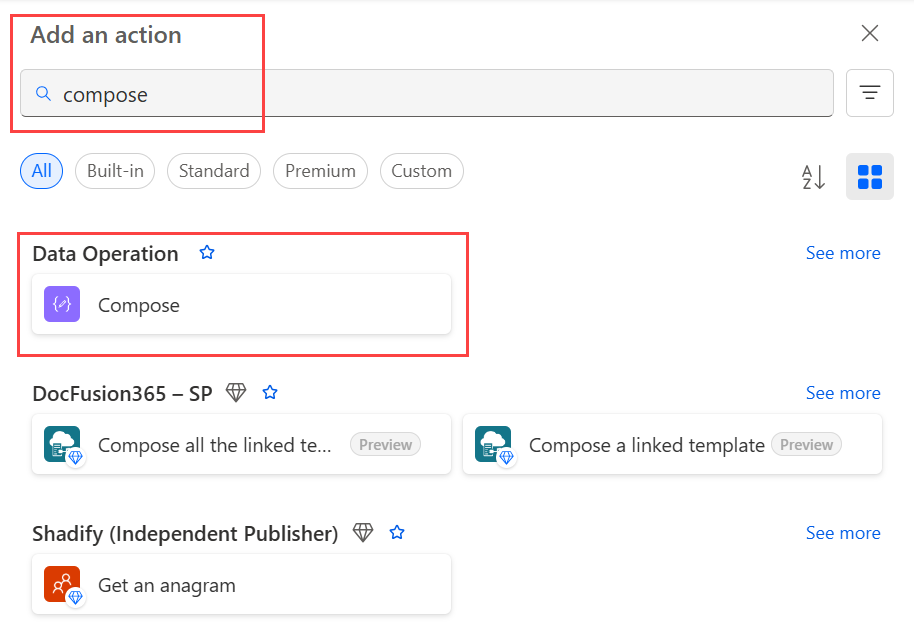
In your flow, add an action be selecting the plus sign (+).
In the Add an action search field, typ compose.
Under Data Operation, select Compose.
In the Inputs field, enter the array that you want to reference later.
Close the configuration pane by selecting the left arrows (<<) at the top right corner.
Tip
To make the Compose card easier to find later, rename it by selecting the text Compose on the title bar of the card and entering a name that's easy to remember.
Use the outputs from the compose action
Use the contents of the compose action you created in this section in a new action. In this example, you use the outputs from the compose action in a Data Operation - Join action. The join action takes an array and joins it into a single string with a separator of your choice.
In your flow, add an action be selecting the plus sign (+).
In the Add an action search field, type join.
Under Data Operation, select Join.
In the From field, select the lightning bolt, and then select the Outputs dynamic value.
Outputsappears in the From field.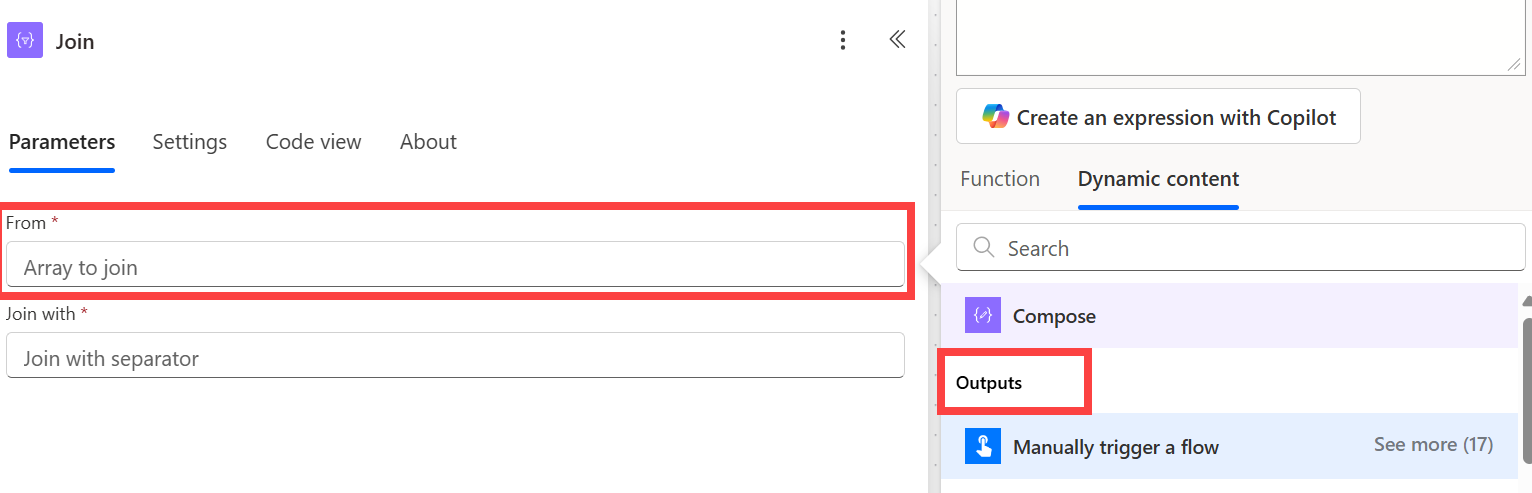
in the Join with field, enter a comma (
,) or the desired separator.Close the configuration pane by selecting the left arrows (<<) at the top right corner.
Use the join action
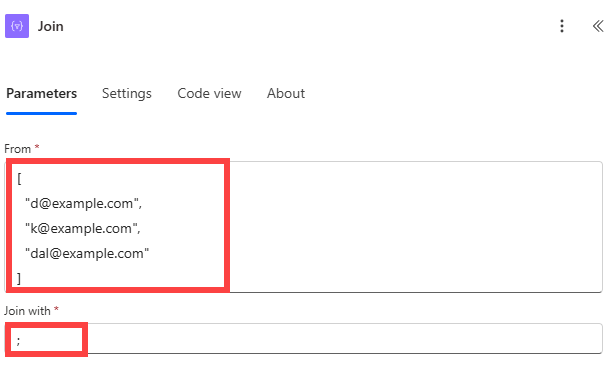
Use the Data Operation - Join action to delimit an array with the separator of your choice. For example, your flow receives a web request that includes the following array of email addresses: ["d@example.com", "k@example.com", "dal@example.com"]. However, your email program requires addresses to be formatted in a single string, separated with semicolons. You use the Data Operation - Join action to change the comma delimiter (,) to a semicolon (;) by following these steps:
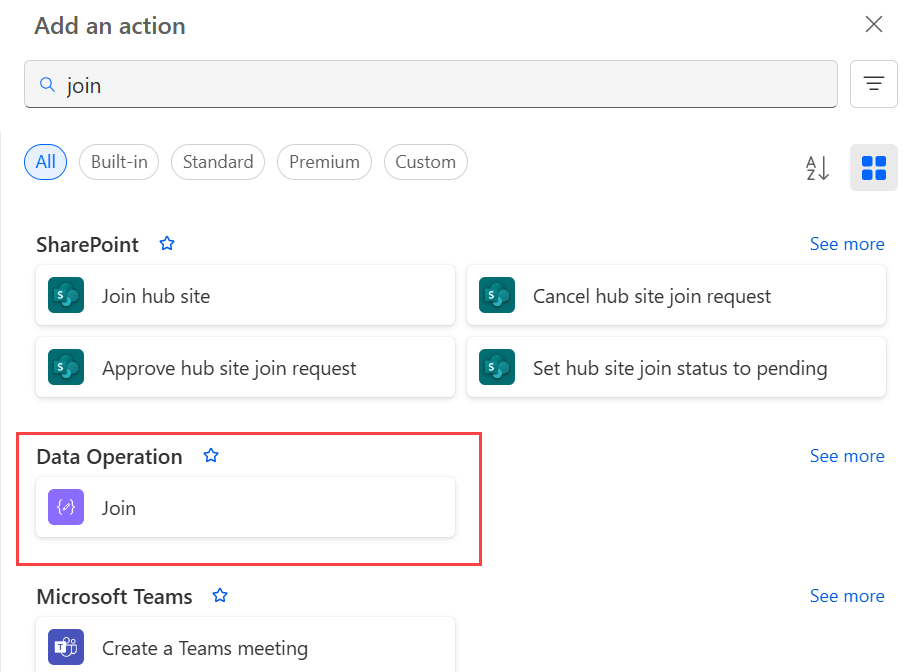
Add a new action, search for Join, and then select Data Operation - Join.
In the From field, enter the array, and in the Join with box, enter a semicolon (;).
Save your flow, and then run it.
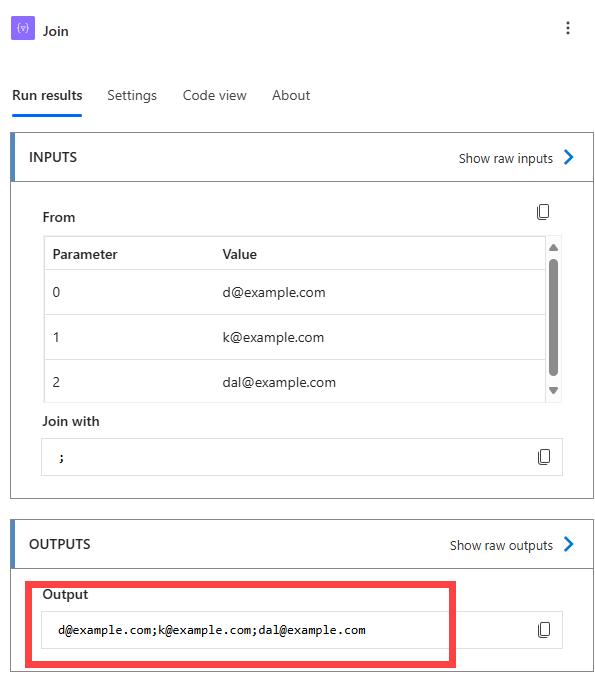
After your flow runs, the output of the Data Operation – Join action is a string with the addresses joined by semicolons, as shown in the following screenshot.
Use the select action
Use the Data Operation – Select action to transform the shape of objects in an array. For example, you can add, remove, or rename elements in each object in an array.
Note
Although you can add or remove elements by using the select action, you can't change the number of objects in the array.
In this example, data enters your flow via a web request in this format:
[ { "first": "Eugenia", "last": "Lopez" }, { "first": "Elizabeth", "last": "Moore" } ]
You want to reshape the incoming data by renaming first to FirstName and last to FamilyName, and adding a new member named FullName that combines first and last (separated with a space).
[ { "FirstName": "Eugenia", "FamilyName": "Lopez", "FullName": "Eugenia Lopez" }, { "FirstName": "Elizabeth", "FamilyName": "Moore", "FullName": "Elizabeth Moore" } ]
To do this:
Delete the existing trigger by either right-clicking the trigger and selecting Delete, or by selecting the vertical ellipsis (⋮) in the configuration pane, and then selecting Delete.
-
- Add the When an HTTP request is received trigger to your flow.
Select Use sample payload to generate schema.
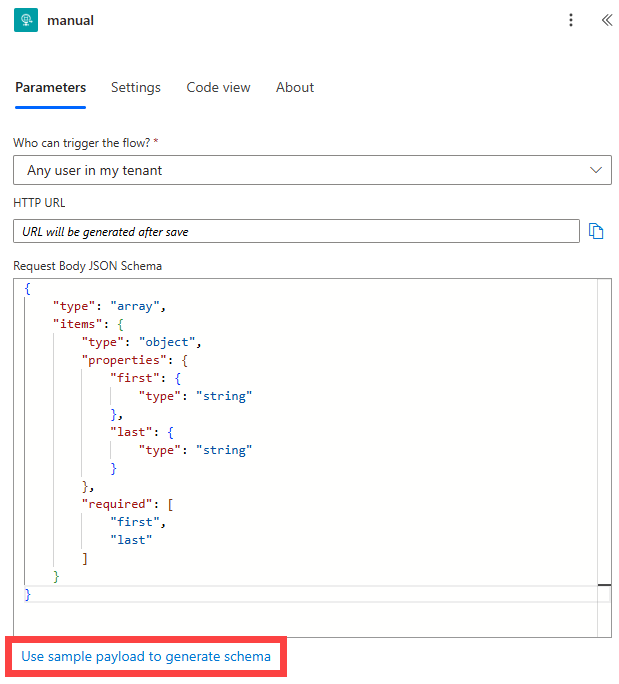
In the box that appears, paste a sample of your source data array, and then select Done.
Add the Data Operation – Select action, and then configure it as shown in the following screenshot.
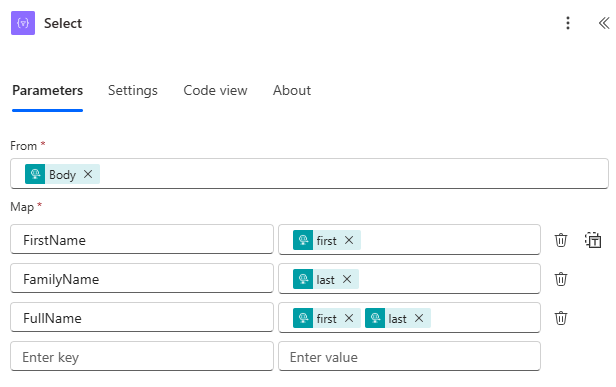
> The output from the select action is an array that contains the newly shaped objects. You can then use this array in any other action, such as the compose action discussed previously.
Use the filter array action
Use the Data Operation - Filter array action to reduce the number of objects in an array to a subset that matches the criteria you provide.
Note
- You can't use the filter array action to change the shape of objects in the array.
- The text on which you filter is case-sensitive.
In this example, you use the filter array action on this array:
[ { "first": "Eugenia", "last": "Lopez" }, { "first": "Elizabeth", "last": "Moore" } ]
This example creates a new array containing only objects where first is set to Eugenia.
Find, and then add, the Filter array action to your flow.
In the Filter Query section, configure the filter array action. Following the example in this section, select
first> is equal to > Eugenia.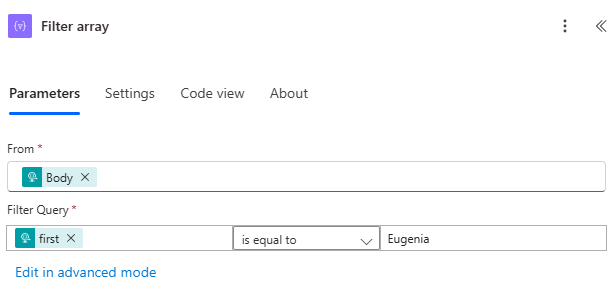
Save, and then run your flow.
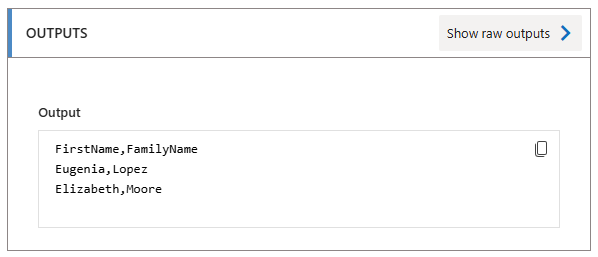
Use the create CSV table action
Use the Data Operation - Create CSV table action to change a JSON array input into a comma-separated value (CSV) table. You can keep the headers visible in the CSV output. In this example, you convert the following array into a CSV table:
[ { "first": "Eugenia", "last": "Lopez" }, { "first": "Elizabeth", "last": "Moore" } ]
Find, add, and then configure the Data Operation - Create CSV table action to resemble the following image.

The Body token in this image comes from a When an HTTP request is received action; however, you can get the input for the Create CSV table action from the output of any previous action in your flow, or you can enter it directly in the From box.
Save, and then run your flow.
When your flow runs, the Create CSV table action displays the output shown in the following screenshot.
Use the create HTML table action
Use the Data Operation - Create HTML table action to change a JSON array input into an HTML table. You can keep the headers visible in the HTML output.
To do this, follow the steps in the previous Use the create CSV table action section, but use the Data Operation - Create HTML table action instead of Create CSV table.
Tip
If you plan to send the HTML table via email, remember to select IsHtml in the email action.