Note
Access to this page requires authorization. You can try signing in or changing directories.
Access to this page requires authorization. You can try changing directories.
Microsoft Dataverse supports custom retention policies to securely retain unlimited data long term in a cost-efficient way. While Dataverse can support your business growth with no limit on active data, you might want to consider moving inactive data to the Dataverse long term retention store. After doing so, you can create a cloud flow to view read-only rows in long term data retention in Microsoft Dataverse.
The cloud flow described here creates and sends an email that includes an Excel file containing the retained data. If there are retained attachments associated with rows from Dataverse, they're also included as links in the Excel file. For more about the privileges required to run this flow, go to View long term retained data in Microsoft Dataverse
Creating the flow requires the following high level steps:
- Pass query parameters in FetchXML to create an Excel file with retained data, using a Dataverse action named Create Excel from RetainedData.
- Set a condition to determine if the Excel file has been created. Download the Excel file. Pass the required retrieval criteria parameters (table and FetchXML).
- When the Excel file has been created:
- Set an action to download the Excel file.
- Set an action to send an email to recipients with the Excel file attached.
- Set an action to delete the Excel file from the Dataverse system table. This step is recommended to avoid Excel documents consuming database storage.
Tip
If you don’t see an email after running a flow successfully, check your junk mail folder.
Create the query and download FetchXML
- Sign into Power Apps, and then select Settings > Advanced settings.
- On the Dynamics 365 Settings page, select Advanced Find (filter icon) on the command bar.
- At the top of the Advanced Find pane, select Change to retained data.
- Create the query you want to retrieve the retained data. More information: Advanced find in model-driven apps
- In Advanced Find on the Advanced Find tab, select Download Fetch XML.
Create the flow
The following steps show you how to use an instant flow to create the Excel file and send it as an attachment to someone in email. You can also use similar steps to create a scheduled cloud flow.
On the Power Apps home page, select Flows on the left navigation pane.
Select New flow, and then select Instant cloud flow.
Enter a name for the flow, and then select Manually trigger a flow.
Select Create.
Select New step, and then on the Choose an operation step, select Microsoft Dataverse.
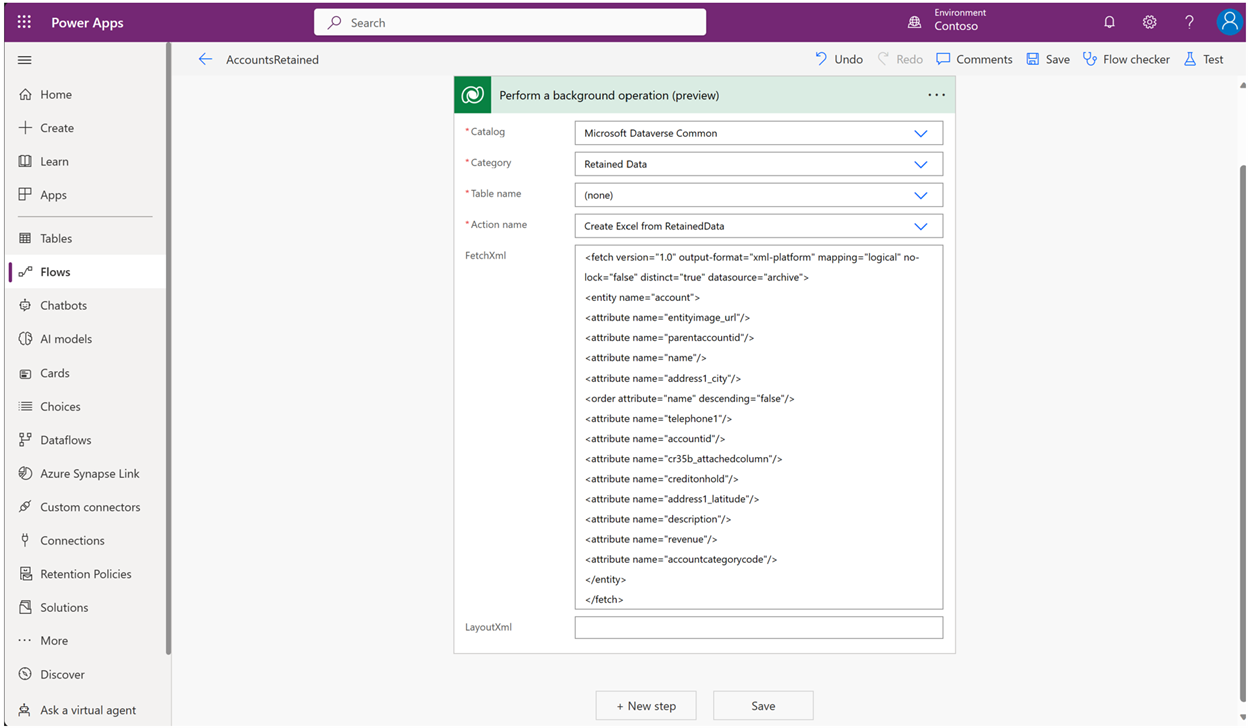
For the action, select Perform a background operation.

Enter the following information:
- Catalog: Microsoft Dataverse Common
- Category: Retained Data
- Table name: (none)
- Action name: Select Enter custom value and then enter
Create Excel from RetainedData - FetchXml: Paste in the FetchXML created earlier from the advanced find query.
- LayoutXML: Leave blank
Select New step.
For Choose an operation, select Condition, and then select the Expression tab.
Add the following expression:
outputs('Perform_a_background_operation_(preview)')?['body/backgroundOperationStatusCode’]- is equal to: 30
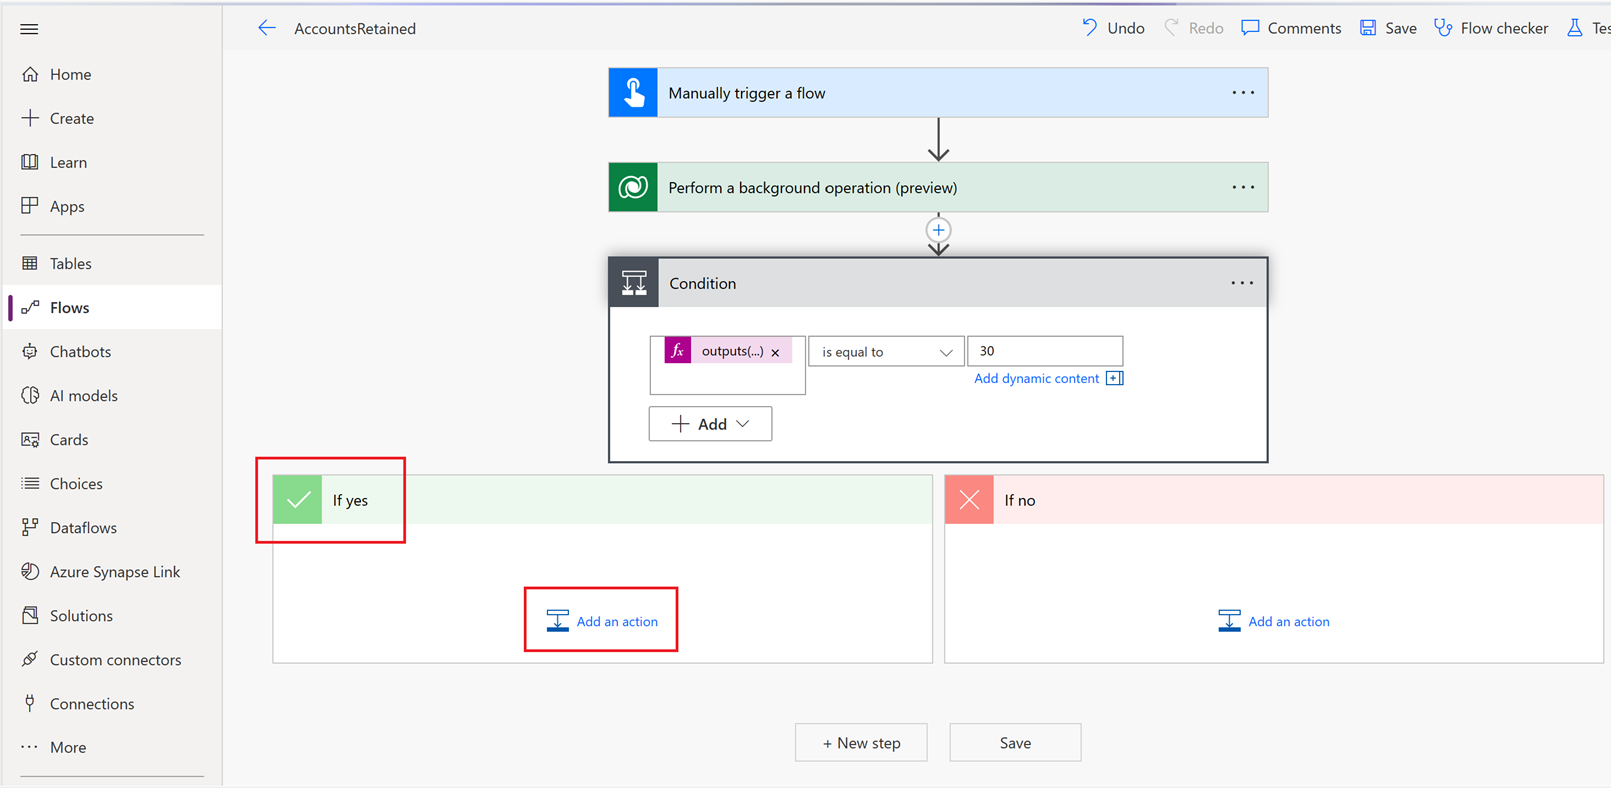
In the If yes box, select Add an action.
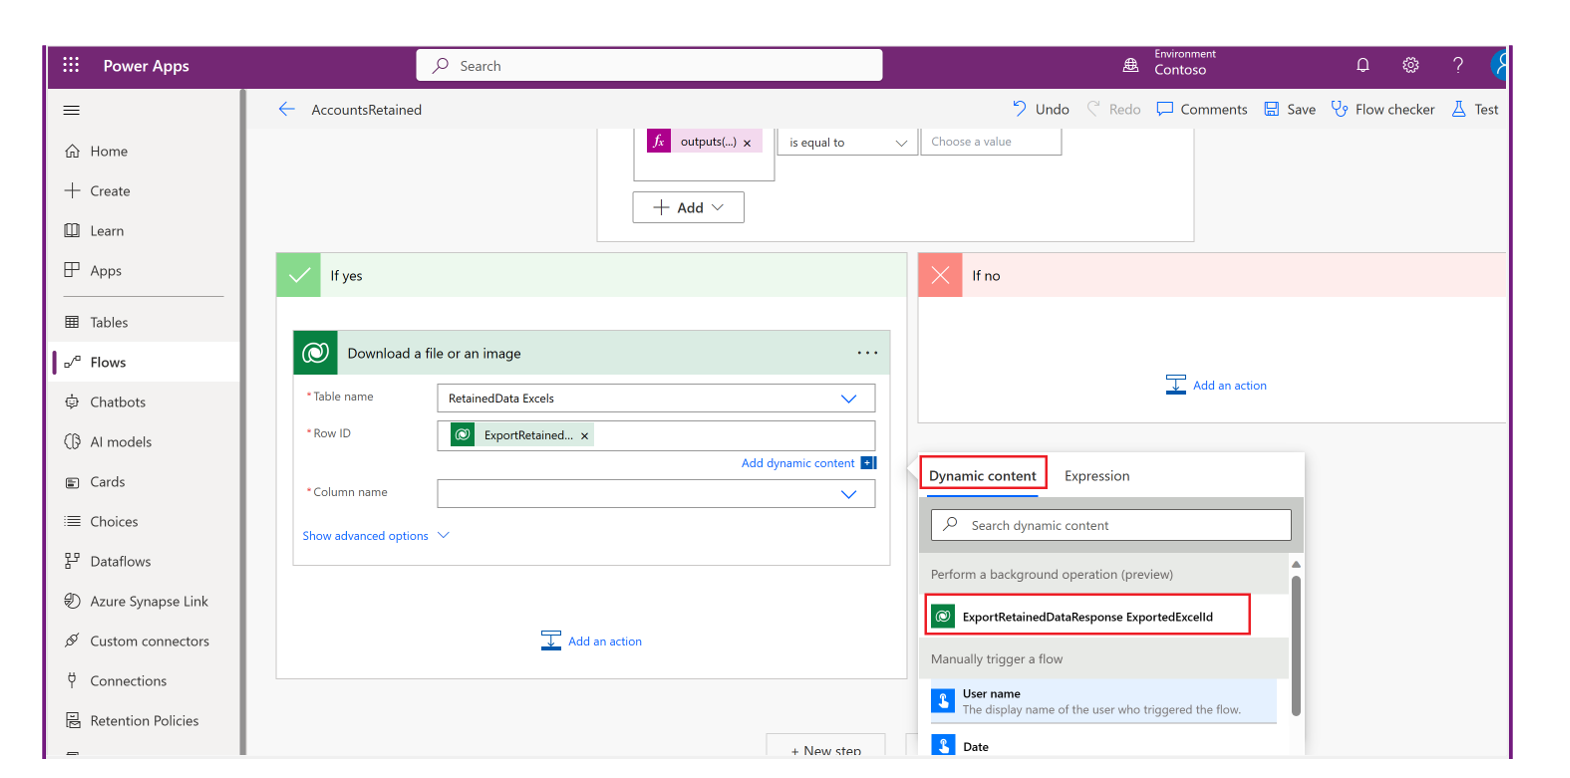
On the Actions tab, select Download a file or an image.
Select the following values:
- Table name: RetainedData Excels
- Row ID: Select Add dynamic content, and then select ExportRetainedDataResponse ExportedExcelID
- Column name: ExcelContent

Select Add action to add another action that sends an email with the Excel file attachment.
For Choose an operation, select Office 365 Outlook, and the for the action select Send an email (V2).
Enter the following required values for the email.
- To: Enter a valid email address for the email recipient.
- Subject: Enter the email subject, such as Retained Accounts from 2020.
- Body: Enter text for the email body, such as Attached are the retained accounts from 2020.
- Attachments Name -1: Enter a name for the attachment, such as accountsretained2020.xls.
- Attachments content: On the Add dynamic content tab, select File or image content.
Select add an action to delete the Excel file created and saved in the Dataverse table RetainedData excels:
- Select an operation> Microsoft Dataverse.
- Under Actions, select Delete a row.
- Choose the following values:
- Table name: RetainedData Excels
- Row ID: Select Add dynamic content, and then select ExportRetainedDataResponse ExportedExcelID.
Select Save
Run the flow.
The email recipients receive an email with the attached Excel worksheet containing the retained data rows.