Note
Access to this page requires authorization. You can try signing in or changing directories.
Access to this page requires authorization. You can try changing directories.
Effective management of historical data generated by Microsoft Power Automate can be important to ensure that your Microsoft Dataverse environments remain efficient and cost-effective. By implementing data retention policies and utilizing features like Bulk Record Deletion of Microsoft Dataverse and the Power Platform admin center, you can proactively manage the accumulation of historical data.
In the following sections, we'll walk you through the steps on how to purge historical desktop flow data from your environment using Dataverse's built-in bulk-delete feature. This feature allows you to quickly and easily remove large amounts of data from your environment in compliance with your specific data retention policies, ensuring efficient data storage and performance management. In addition to ad-hoc bulk-delete jobs, you could also schedule recurrent bulk-delete jobs that will find and delete records in a table that are, for example, OlderThanXDays.
We'll cover how to identify the desktop flow data that could be purged, how to create a bulk delete job to delete the data, and how to monitor the progress of the job.
Caution
Before deleting Dataverse data, it is important to understand that the data is permanently deleted from your environment, and there's no way to recover individual records once they've been deleted.
Note
To create bulk-delete jobs in Dataverse, you need to have the Bulk Delete privilege in at least one of the roles that have been assigned to you.
Desktop flow tables with potentially large data volumes
| Display name | System name | Details |
|---|---|---|
| Flow Session | flowsession | The Flow Session table stores metadata about desktop flow runs, such as the start time, completion time, context, detailed action logs and status of the run. The Regarding field in this table is referencing a desktop flow ID (workflowid) for which the flow session record has been created for. |
| Workflow Binary | workflowbinary | The Workflow Binary table stores binary data for all types of workflow runs, such as the input and output data and exceptions screenshots if there's desktop flow runs. |
Important
The Flow Session and Workflow Binary tables in Dataverse have a cascade relationship. The cascade relationship between these two tables ensures that when a desktop flow run is deleted from the Flow Session table, all associated Workflow Binary records are also deleted. This helps to keep the Dataverse database clean and avoids orphaned records.
Creating a bulk-delete job to delete desktop flow runs
To bulk-delete data in Dataverse, follow the detailed steps below.
Important
Before performing any bulk delete operations, it is important to thoroughly test and review your filter results since bulk-delete operations are irreversible.
Sign in to the Power Platform admin center.
Select Environments in the left navigation pane, select your environment, and then select Settings on the top menu bar.
Select Data management > Bulk deletion.
From the Bulk Record Deletion grid, select New on the command bar. This will open the Bulk Deletion wizard that allows you to define a query for the records you want deleted.
In the Look for list, select the Flow Sessions table from the list.
In the search criteria area, add desired filter that should return the records that you want to be deleted. Here’s an example that will find all desktop flow runs that are older than 6 months (format: Field | Filter Type | Value):
Completed On | Older Than X Months | 6Select Next.
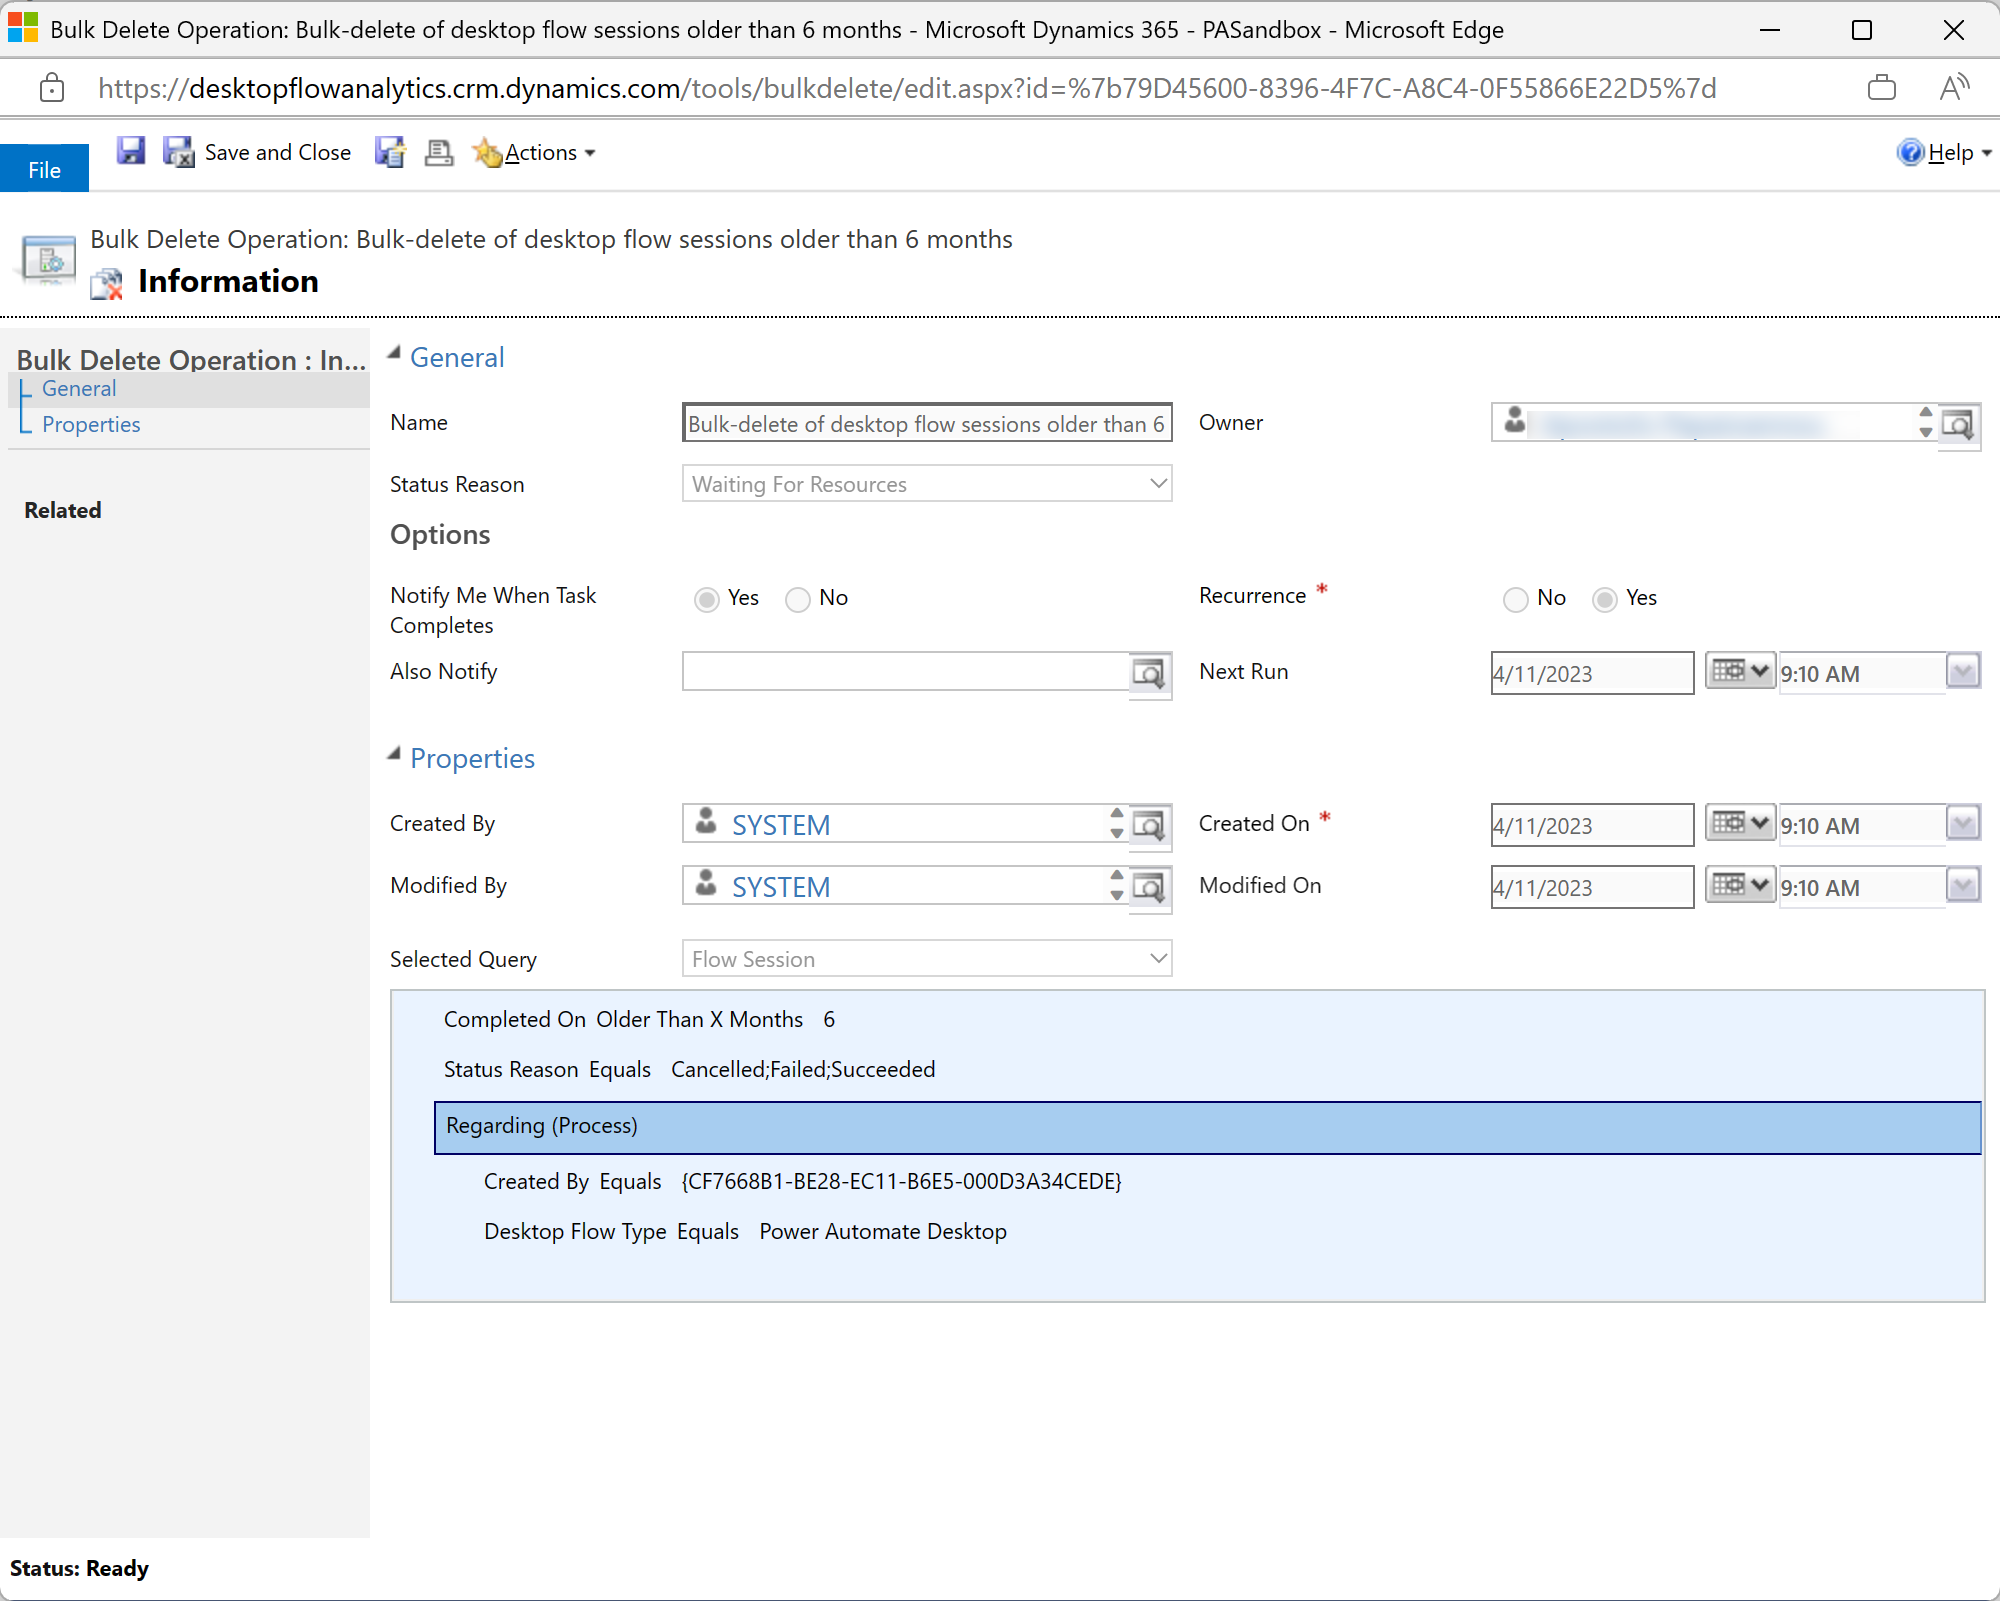
In the Name text box, type a name for the bulk deletion job for example “Bulk-delete of desktop flow sessions older than 6 months”.
Select a date and time for the job start time (preferably a time when users are typically not online).
Select the Run this job after every check box, and then in the days list, select the frequency you want the job to run.
If you want a notification e-mail sent, select the Send an email to me (email@domain.com) when this job is finished check box.
Select Next, review the bulk deletion job, and then select Submit to create the recurring job.
Advanced record filtering
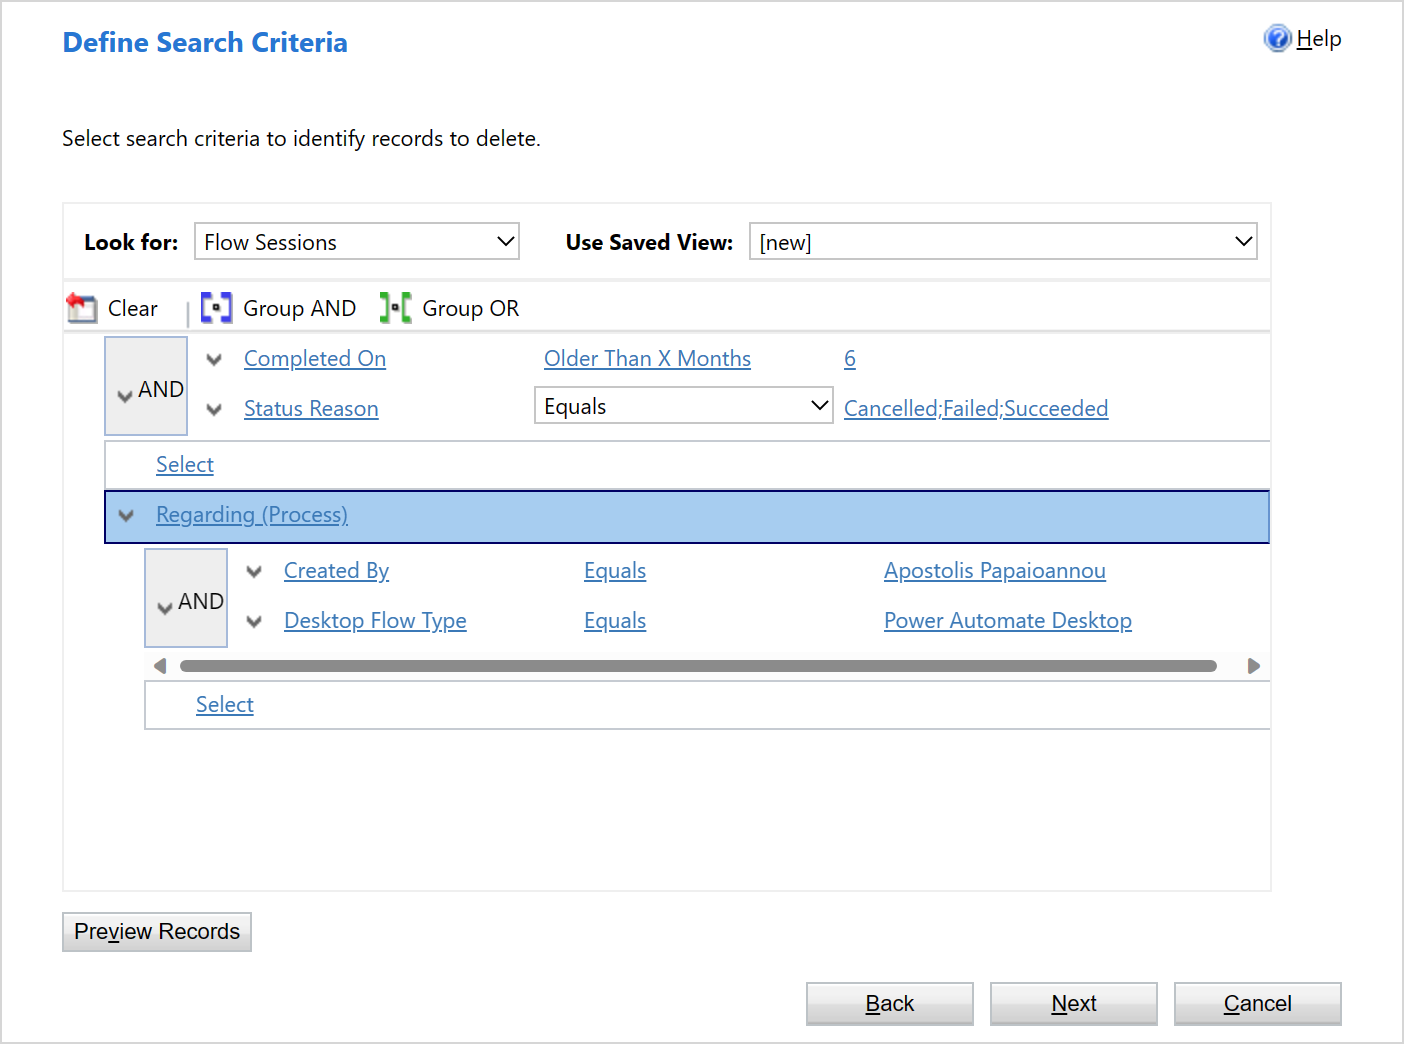
Using Dataverse's Bulk Deletion Wizard, you can create more advanced queries to filter your records using more complex filter criteria options. For instance, you could use grouping features such as AND and OR and even search for data in related tables to combine multiple conditions into a single query.
In the following filter example screen we're searching for all Flow Session records that are older than six months, with a status of Canceled, Failed or Succeeded, and associated with a specific flow type and user who initially created the flow. To achieve this, we've applied multiple Group AND options and used the Regarding (Process) fields of the related Process table to filter based on Desktop Flow Type and Created By a specific user.
Monitoring bulk-delete jobs
To monitor Dataverse bulk-delete jobs, please follow these steps:
Sign in to the Power Platform admin center.
Select Environments in the left navigation pane, select your environment, and then select Settings on the top menu bar.
Select Data management > Bulk deletion.
From the Bulk Record Deletion grid, you can use the view selector to view the completed, in-progress, pending, and recurring bulk deletion system jobs.
The Recurring Bulk Deletion System Jobs view shows the job definitions for the bulk deletion system jobs that you've created together with the ones that are included out of the box. If you open one of these recurring bulk deletion system job records, you can see the query the job uses to identify which records to delete and the schedule the job runs on. For these out-of-the-box system jobs, you can't modify the query used by the system job, but you can modify the schedule the job runs on.
If you update the view selector to show jobs that have already been scheduled, are in progress, or executed, you can cancel, resume, or postpone the job. You can find these options in the Actions menu when you open the record.