Note
Access to this page requires authorization. You can try signing in or changing directories.
Access to this page requires authorization. You can try changing directories.
The inspect UI element tool is a powerful feature in Power Automate for desktop that allows you to explore the hierarchy tree of all UI elements on your screen, check their attributes and values, and capture them for use in your desktop flow through the UI and browser automation actions.
Open the inspect UI elements tool
To open the inspect UI element tool, there are three approaches:
- Locate the designer component of Power Automate for desktop, and then go to the UI element repository. Select the Add UI element from the dropdown list and launch the UI element picker. Then, in the UI element picker window, select the Inspect UI elements arrow.
- Locate the designer component of Power Automate for desktop, and then go to the UI element repository. Select the dropdown list and then select the Inspect UI elements option.
- In the designer window, navigate to the Tools option in the menu bar and select the Inspect UI elements option.
Description of inspect UI elements tool
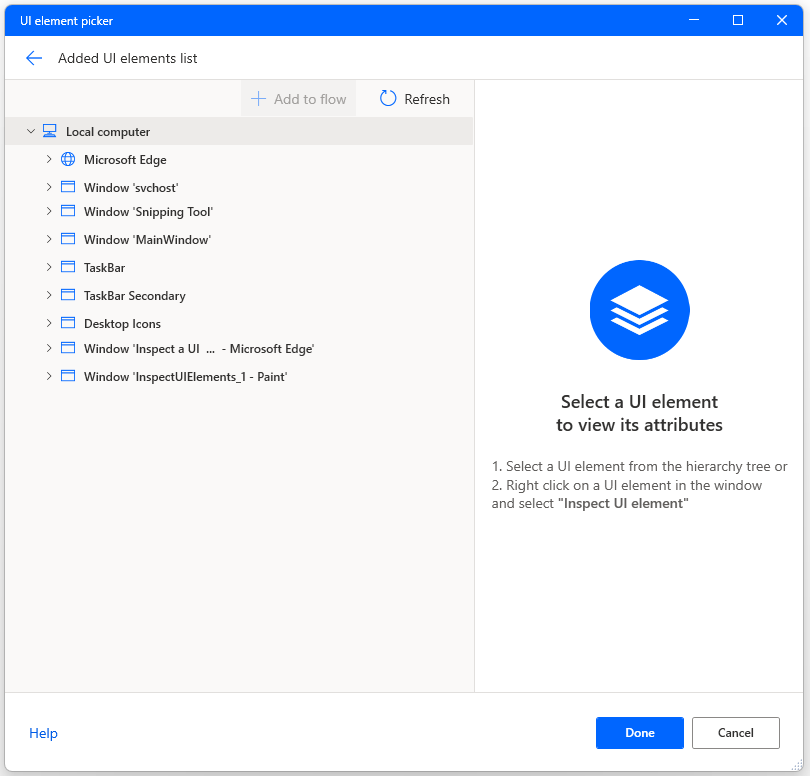
When you open the inspect UI elements tool, a hierarchy tree with all available UI elements on your machine is displayed. This includes both web and desktop UI elements, which are separated by their respective icons. Moreover, the web UI elements are split into each browser for easier navigation, displaying each tab that is opened in your browser as a parent UI element. Note that the tabs aren't actual UI elements. You can expand the tree by selecting the expand icon next to a UI element, which loads and displays all of its children UI elements.
Note
You see the desktop UI elements of a virtual desktop when a connection is opened between your machine and the Citrix virtual desktop or the virtual machine through Remote Desktop Services (RDS) and Power Automate agent for virtual desktops is installed and running in the virtual desktop or machine. More information: Automate on virtual desktops
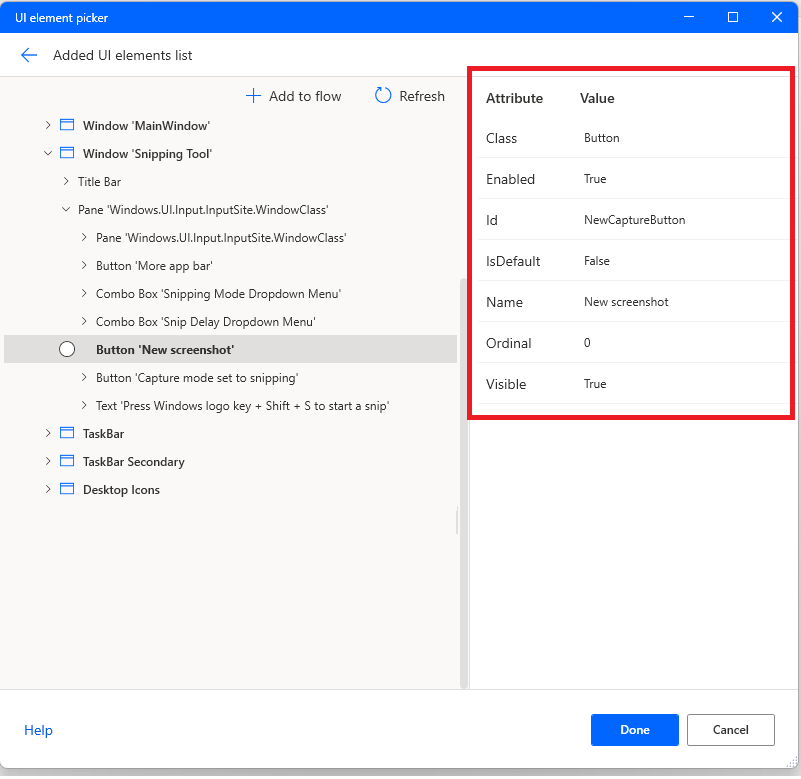
Selecting a UI element in the hierarchy tree displays its attributes and values on the right pane of the tool. These attributes and values can be used to create a custom selector in the UI element builder of the designer for the specific UI element. In order to edit the selector of a UI element, you have to capture it and open it in the UI element selector builder window.
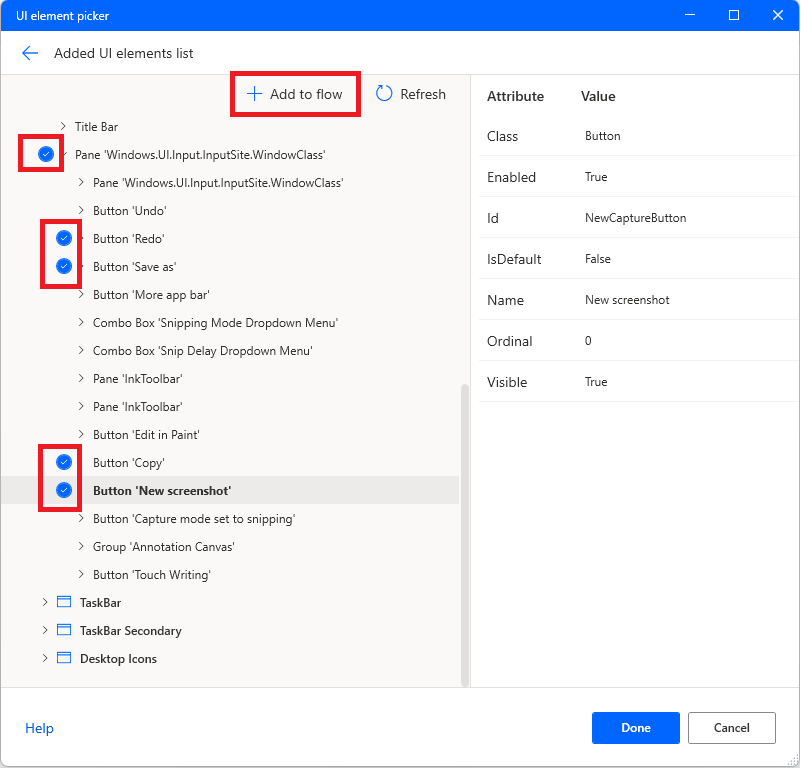
You can capture one or more UI elements and store them in the UI element repository of the desktop flow by hovering to the left of a UI element in the hierarchy tree and checking those you desire. Then, you can select the Add UI element on the top of the tool. The captured UI elements can then be used in a UI automation or browser automation action respectively, depending on its type (desktop or web UI element).
The hierarchy tree is refreshed every time you expand a UI element. You can refresh the whole tree by selecting Refresh on the top of the tool.
Navigate in hierarchy tree to a specific UI element in the screen
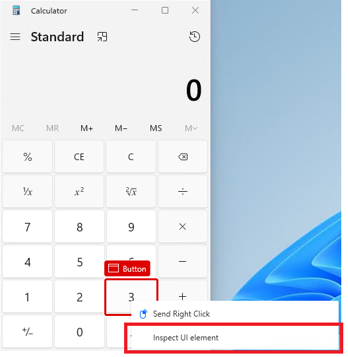
While the inspect UI elements tool is opened, the Power Automate for desktop highlighter is visible. Go directly to a specific UI element by hovering with your mouse over the desired UI element and then right-click. This opens the context menu. Select the Inspect UI element option that takes you to the specific UI element in the hierarchy tree of the tool. Select the UI element to display the attributes and the respective values.
Known issues and limitations
Issue: Hierarchy tree of specific web browser pages can't be displayed in the tool when the browser window containing them is minimized.
Workaround: Ensure the web browser window that you want to inspect isn't minimized on your machine.
Issue: Specific web browser's tree of UI elements can't be displayed in the tool if the Microsoft Power Automate web extension isn't installed and enabled.
Workaround: Ensure that the Microsoft Power Automate web extension is installed and enabled in the respective web browser.
Issue: A specific desktop application isn't displayed in the hierarchy tree in the tool.
Workaround: Check whether the desktop app is running with elevated rights. If yes, restart Power Automate for desktop and run it with elevated rights. And then try again.
Issue: A virtual desktop connected through Citrix or RDS, or as a Citrix virtual app or as a remote app isn't displayed in the tool.
Workaround: Ensure that Power Automate agent for virtual desktops component is installed, up and running in the respective virtual machine.