Note
Access to this page requires authorization. You can try signing in or changing directories.
Access to this page requires authorization. You can try changing directories.
Desktop flows utilize UI elements to interact with applications and webpages without resorting to image recognition and absolute coordinates. UI elements are used as input in most UI automation and browser automation actions and identify specific elements on windows and webpages.
UI elements
When deploying a UI automation or browser automation action, you might be required to provide a UI element as input. To add a new UI element, you can do it directly from the action properties or through the UI elements pane of the flow designer.
Each one of these action groups accepts a different type of UI elements. UI automation actions accept desktop UI elements, while browser automation actions accept web UI elements.
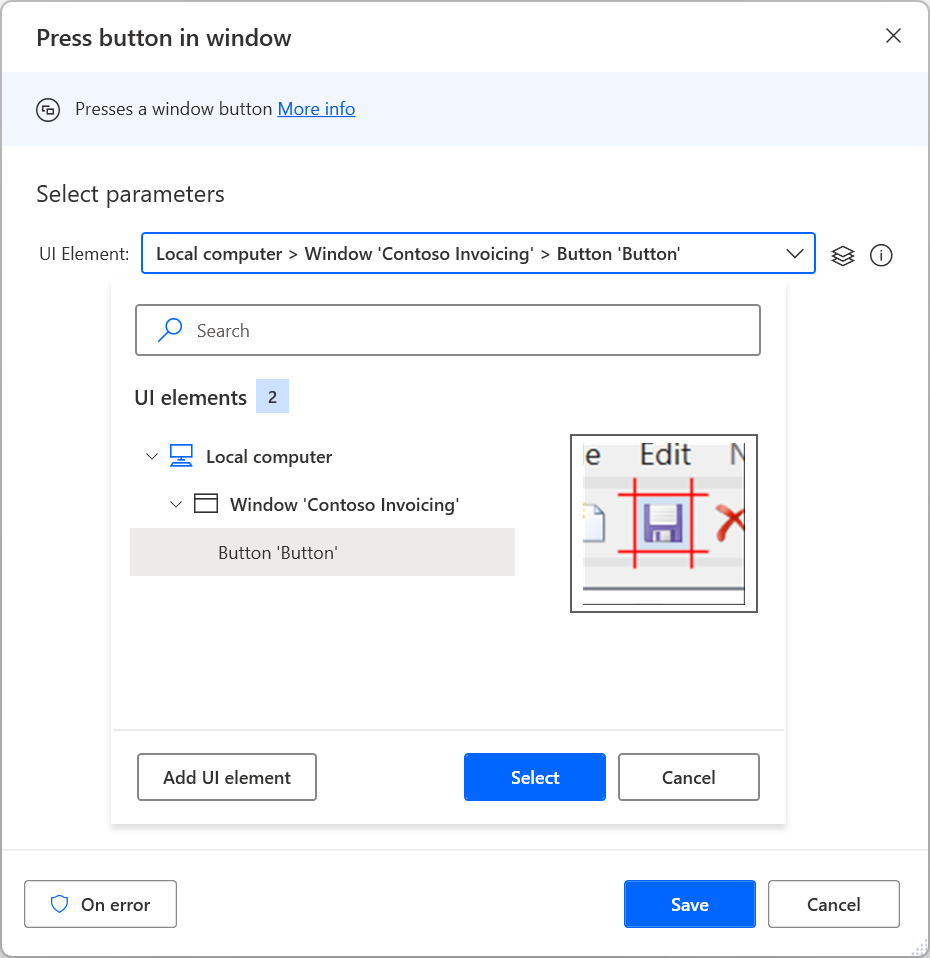
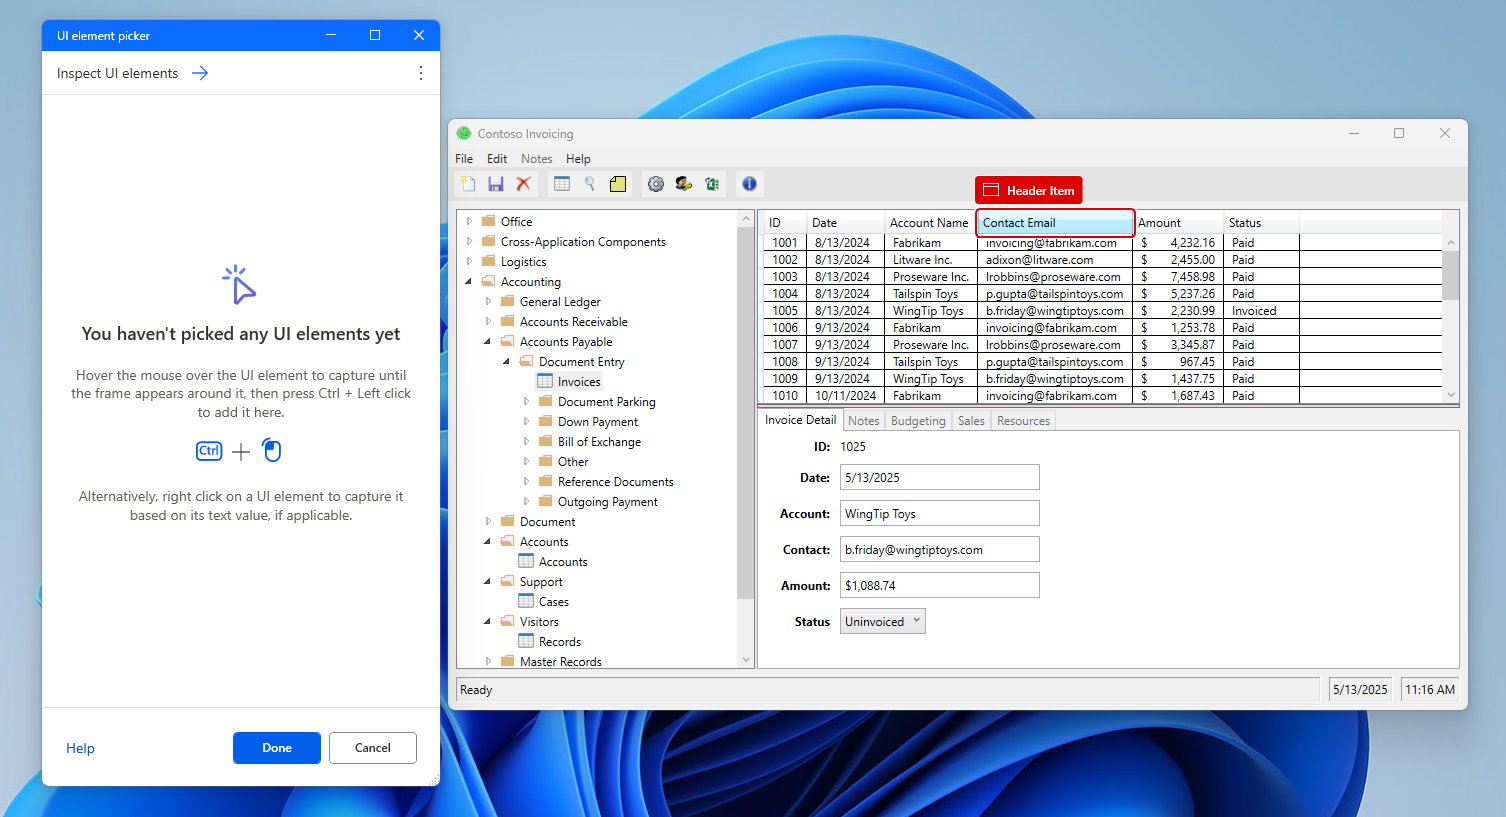
To add a new UI element to your flow, add a new UI element through an action or the UI elements pane, highlight the respective element, and press Ctrl + Left click. When the selection is finished, select Done.
Note
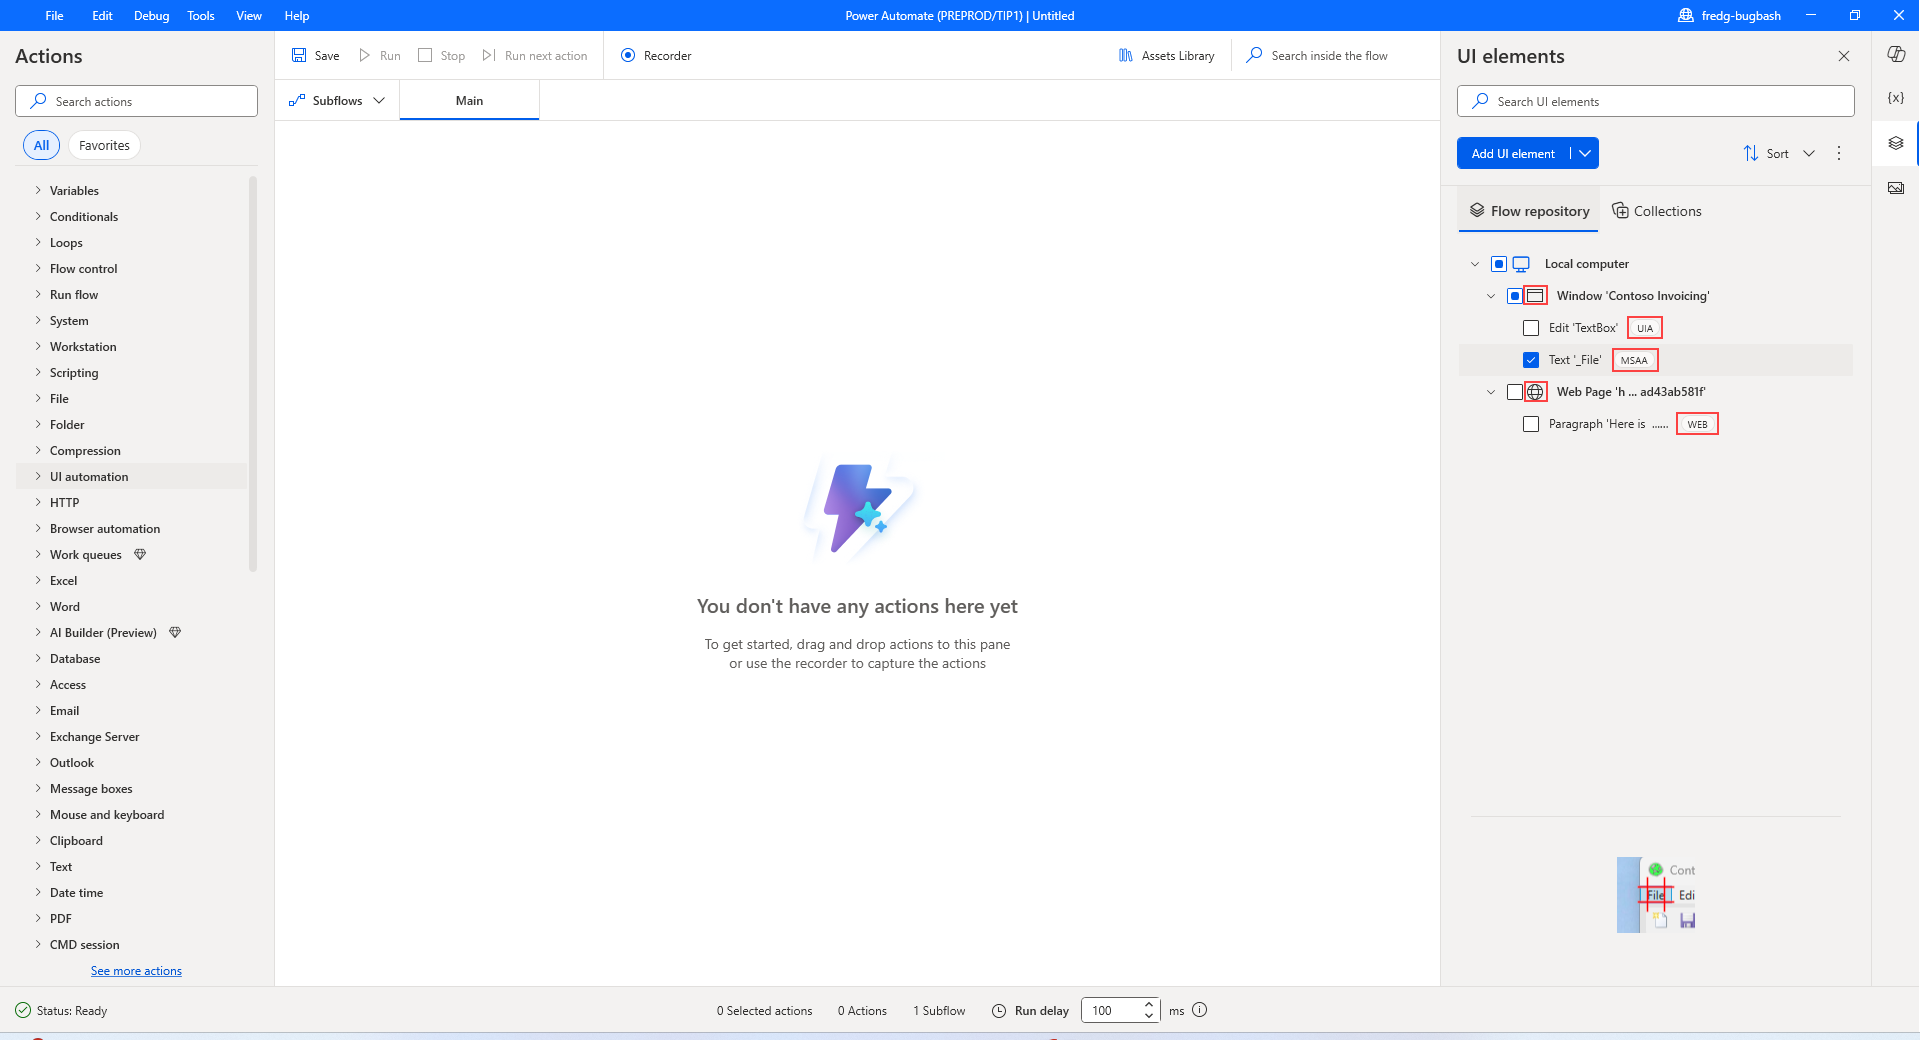
The UI element picker now supports capturing both UI Automation (UIA) and Microsoft Active Accessibility (MSAA) selectors when working with desktop UI elements. By default, the picker operates in UIA mode. You can change the capturing mode using the menu located in the top-right corner of the UI element picker. Select MSAA to target legacy applications that don't expose UIA selectors. When MSAA mode is enabled, a banner appears in the UI element picker to indicate that you're capturing MSAA selectors. Learn more about the difference between UIA and MSAA selectors in UI elements types.
Any captured UI elements will be added to the UI elements pane. To access the UI elements pane, select the UI elements tab on the right-hand side of the flow designer.
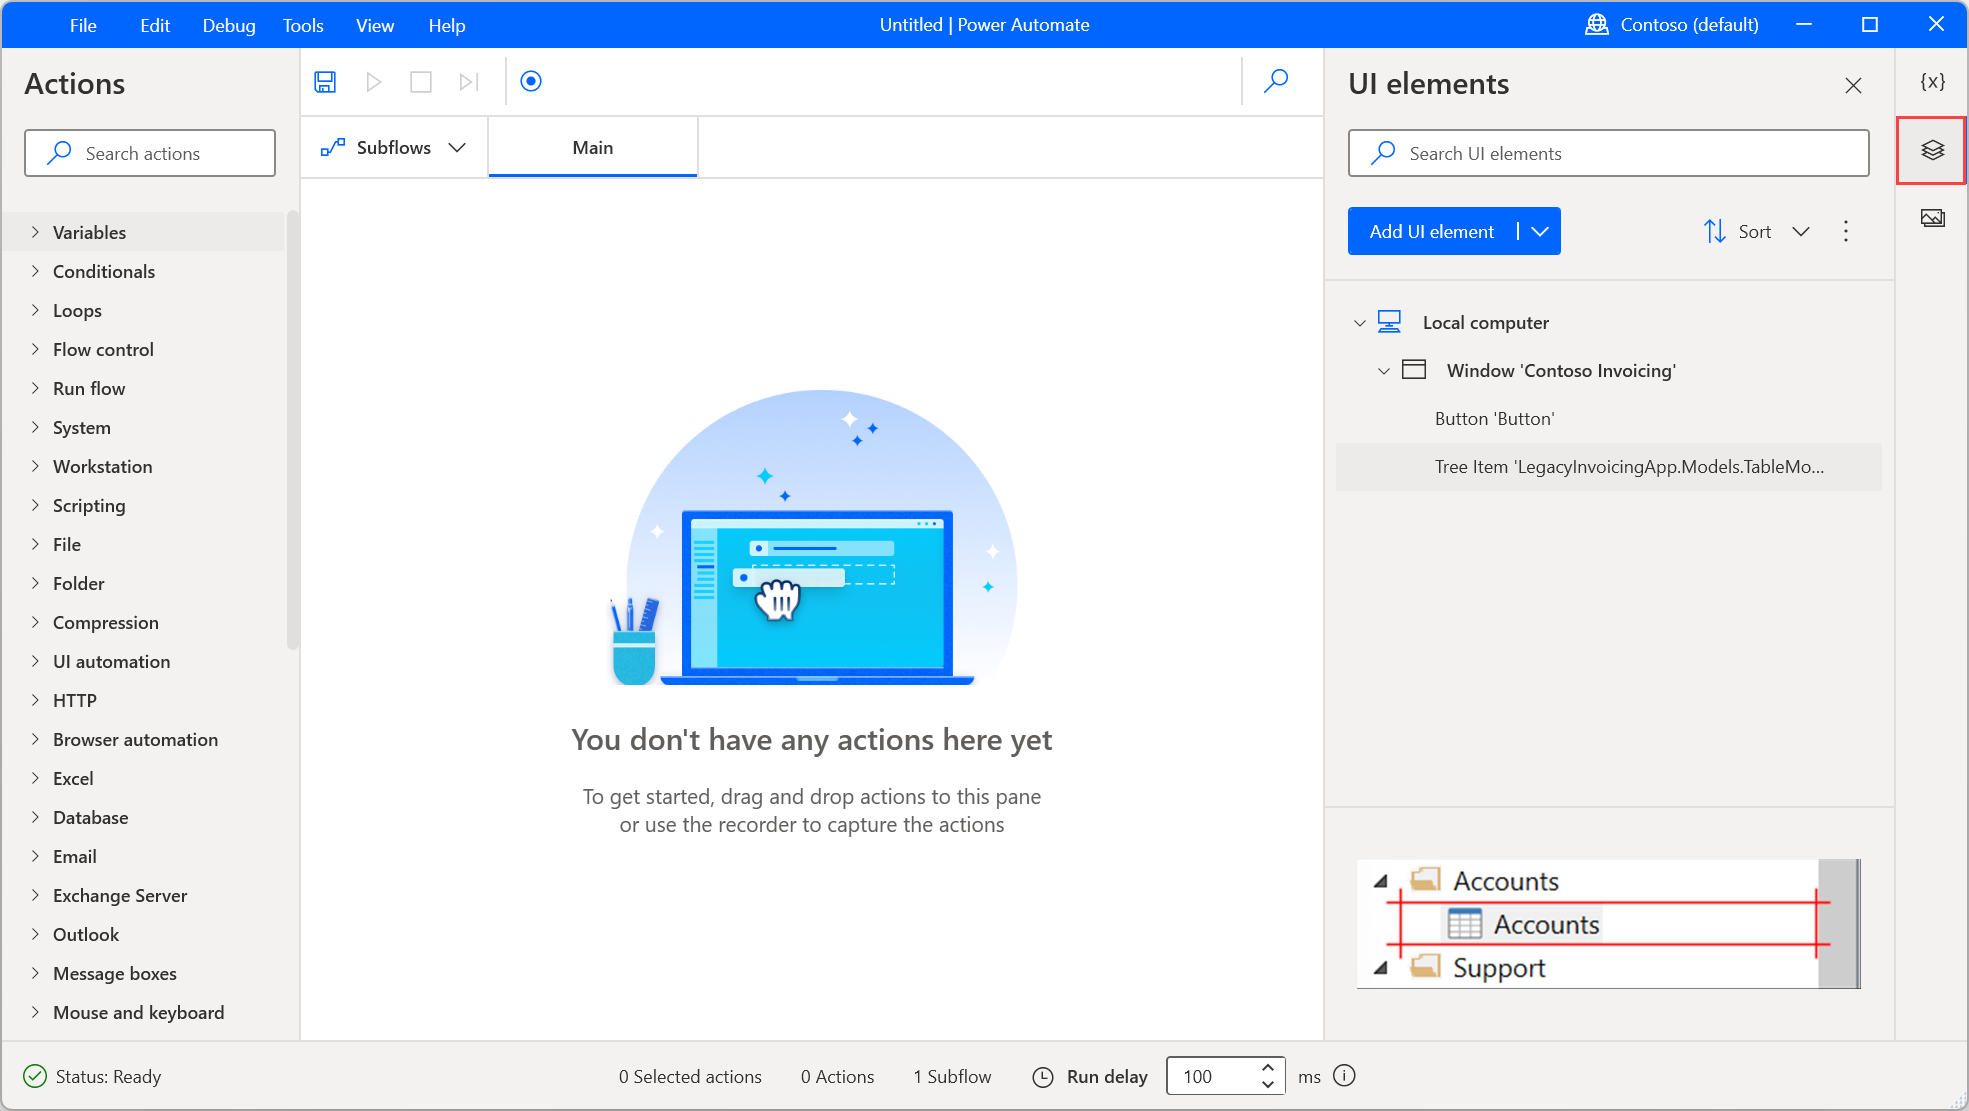
Elements can be sorted alphabetically through the Sort option of the UI elements tab. To remove all the UI elements that aren't used in any action, select the dots icon next to the Sort option and then Remove unused UI elements.
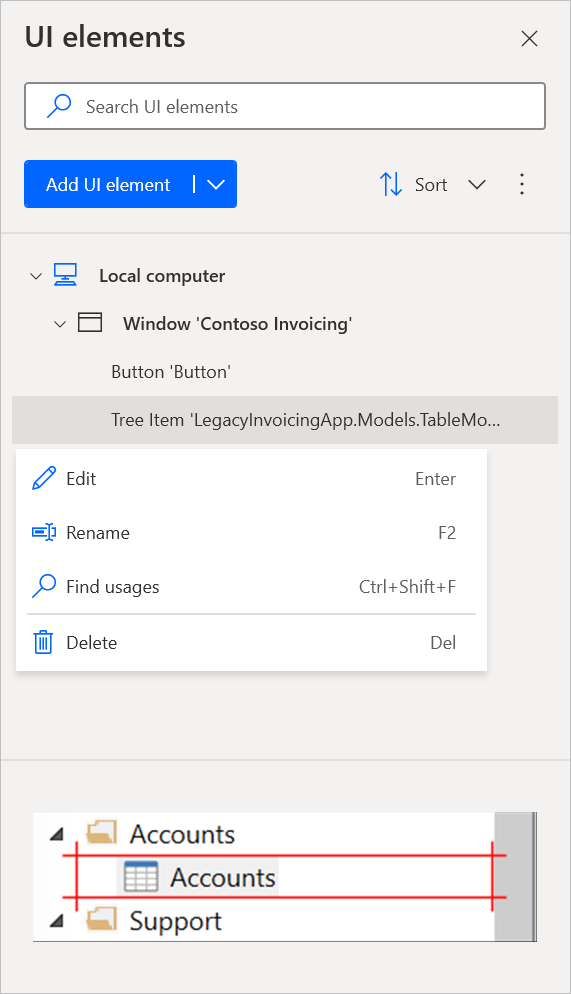
To rename or delete a UI element, right-click on the respective item and select the appropriate function.
To find where a specific UI element is being used in the flow, right-click on it and select Find usages. The results will display all the actions that use this UI element. Double-click on a result to highlight the action on the workspace.
UI elements types
Desktop flows support two types of UI elements based on their source: desktop UI elements and web UI elements.
Desktop UI elements can be captured from any Windows application, including non-webpage components of browsers, such as the address bar. Within desktop UI elements, two types of selectors are now supported:
UI Automation (UIA) selectors
UIA is the modern accessibility framework introduced by Microsoft to replace MSAA. It's the recommended technology for automating most Windows applications, especially those built with newer UI frameworks such as WPF, WinForms, and Universal Windows Platform (UWP). UIA offers more robust and detailed element information, improved hierarchy structures, and greater reliability in automation scenarios.
Use UIA selectors whenever possible for better performance, maintainability, and support across modern desktop applications.
Microsoft Active Accessibility (MSAA) selectors
MSAA is an older accessibility technology that predates UIA. It's primarily used for legacy applications that don't expose UIA elements, such as older Windows applications built with technologies like VB6 or classic Win32. While MSAA provides less detail and structure than UIA, it's essential for enabling automation in environments where UIA isn't available.
Use MSAA selectors when targeting legacy or custom-built applications that don't expose their UI components through UIA.
The UI element picker in UI automation actions allows you to capture only desktop UI elements. A new capturing mode menu in the top-right corner of the picker lets you select between UIA and MSAA modes. By default, the picker uses UIA, but you can switch to MSAA when automating legacy applications. A visible message in the picker indicates when MSAA mode is active.
Captured elements are displayed in the UI elements pane, with an indicator showing whether they were captured using UIA or MSAA, helping you identify the selector type used for each element in your flow.
Important
Users can capture elements from webpages through the UI element picker of UI automation actions. However, their selectors will represent desktop elements, not web elements.
Web UI elements can be captured from webpages and used only in browser automation actions.
Browser automation actions accept exclusively UI elements captured from webpages. Therefore, existing UI elements captured from desktop applications aren't displayed in the UI elements picker of these actions.
To find more information regarding desktop and web automation, refer to Automate desktop flows and Automate web flows.
UI elements for webpages
To capture a UI element from a webpage, you need to install the appropriate browser extension. You can find more information about the supported browsers and the required extension in Use browsers and manage extensions.
Distinguish desktop from web UI elements
The UI elements pane shows distinctive visual indications to help users quickly recognize between desktop and web UI elements.
When you capture a desktop element, the desktop icon appears. When you capture a web element, the web icon appears. This way, you confirm the element type before saving it.

Another method to check the type of a UI element is to review its selectors. Desktop UI elements usually have the desktop as their parent element, while web UI elements have a webpage as their root element.
UI elements in browser windows
The application part of a browser (1) should be automated using desktop UI elements. For example, you can use UI automation actions to interact with the address bar or the tabs.
On the other hand, the loaded webpages inside the browser (2) should be automated using web UI elements and browser automation actions.
During recording, the recorder will automatically distinguish the browser application area from the webpages and generate the appropriate UI elements and actions.
Interactions with drag and drop web UI elements might not function as expected due to their inherent limitations. As a workaround, capture desktop UI elements in a web page by opening the UI element picker through an action of the UI automation group by selecting Add UI element within the UI element parameter. The captured UI element is of desktop type and can be used in the Drag and drop UI element in window action. Keep in mind that desktop UI elements can be used only in actions of the UI automation action group of Power Automate for desktop. It's important to note that desktop UI elements in web pages aren't as reliable as their web counterparts and are subject to browser application details, such as the browser's version.
UI elements properties
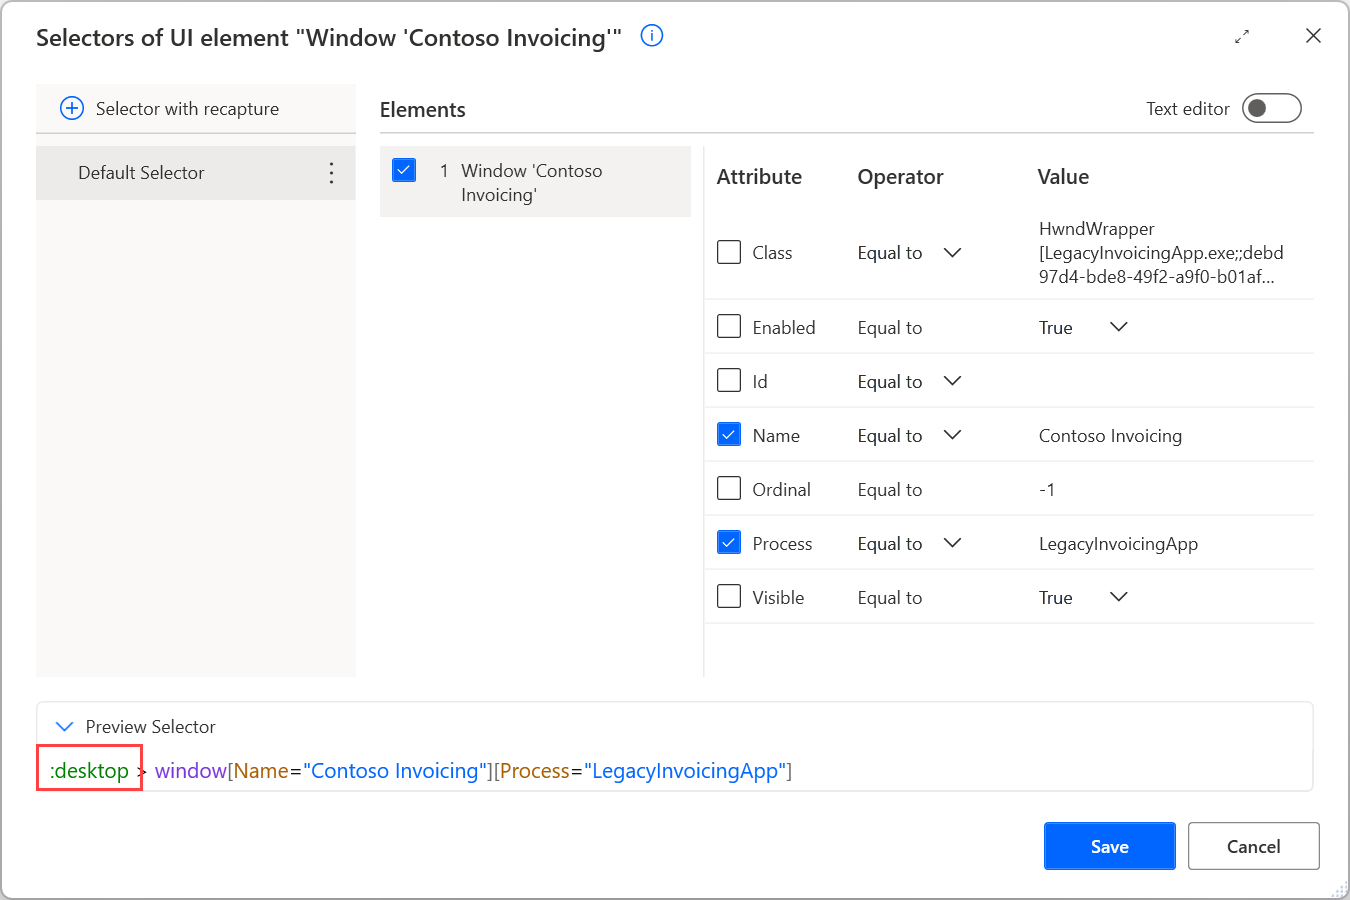
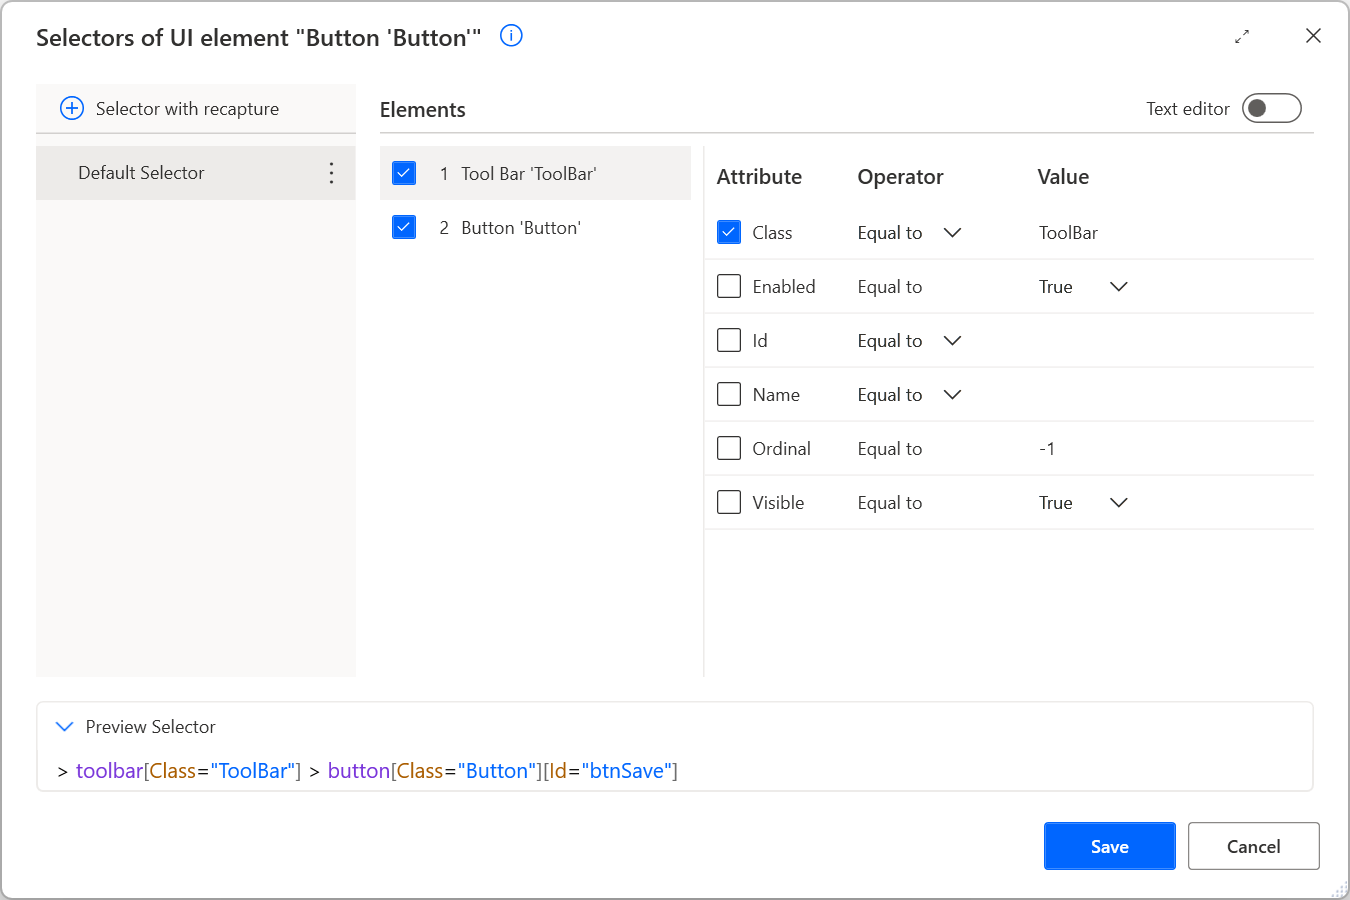
All UI elements consist of one or more selectors that pinpoint the UI or web component that Power Automate interacts with.
Note
Users can create multiple selectors for a UI element. Whenever a selector fails, Power Automate uses the following selector in the defined order.
To manage the selectors of a UI element, right-click on it and select Edit. This option brings up the selector builder, where you can edit the selectors with a visual or a text editor.
Each selector consists of multiple elements representing the hierarchical structure of the UI element in the application or webpage. The attributes describe each element uniquely and distinguish it from other elements.
All selectors are displayed with a default friendly name that makes them easily accessible. To rename a selector, right-click on its name and select Rename.
When you edit a UI element with multiple selectors, you're able to disable a selector by right-clicking on it and selecting Disable. This functionality can be helpful during testing.
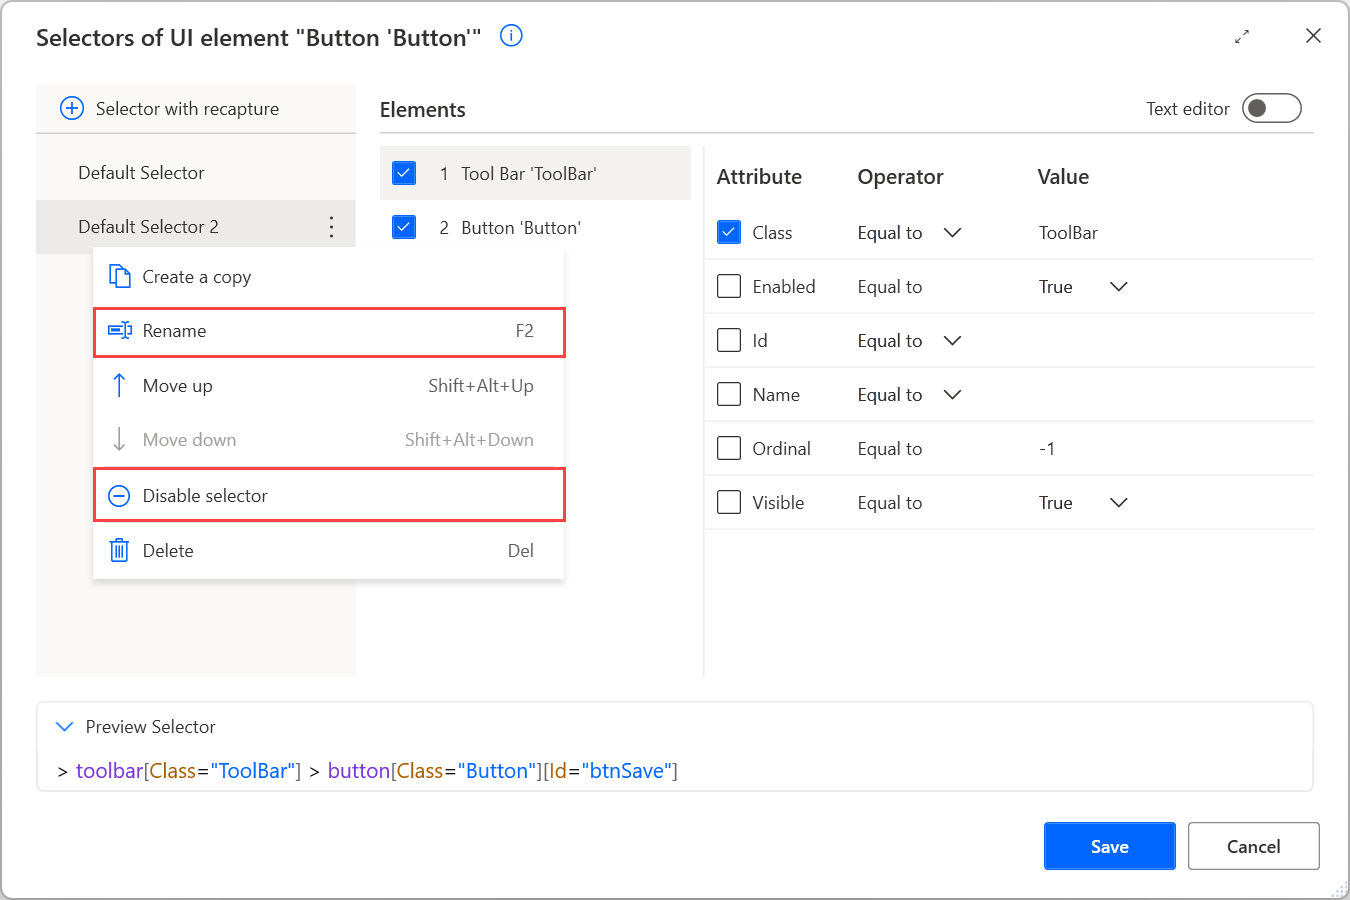
After editing the selectors, press Save to apply the implemented changes. Saving applies the changes in all the selectors in a single step.
You can find more information regarding selectors and how to build them manually in Build a custom selector.
UI elements with text-based selectors
Apart from the default way to generate selectors of UI elements, Power Automate supports the creation of selectors based on an element's text value.
This feature is helpful for automation scenarios that handle elements in desktop applications or webpages that always come with specific texts. Selectors based on these texts are more reliable and resilient to possible future changes in the application or webpage structure.
Generating text-based selectors is available only when capturing UI elements using the UI element picker (UI elements pane or browser/UI automation actions). It's not available during recording.
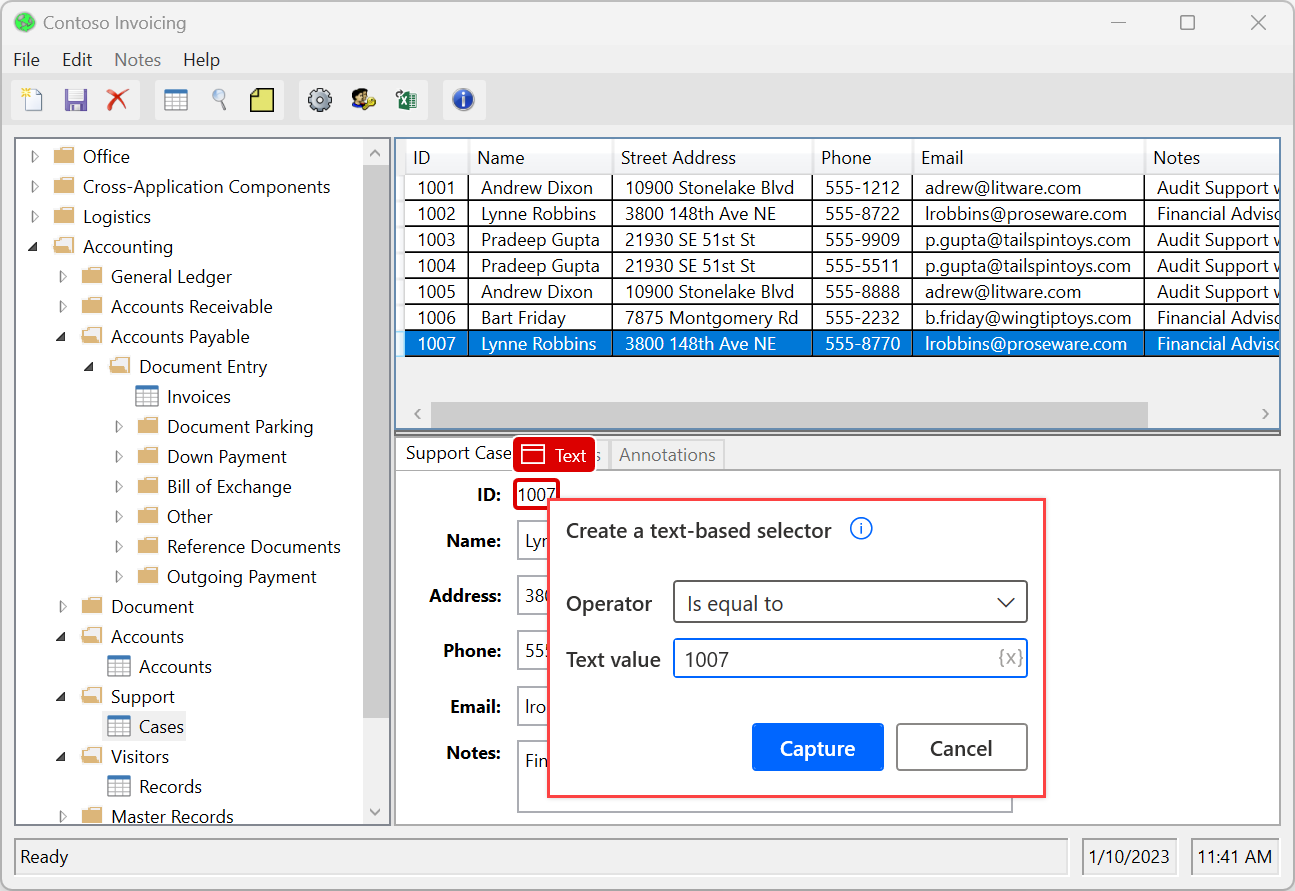
To capture a UI element with a text-based selector, open the UI element picker, right-click on the desired element, and select Capture based on text.
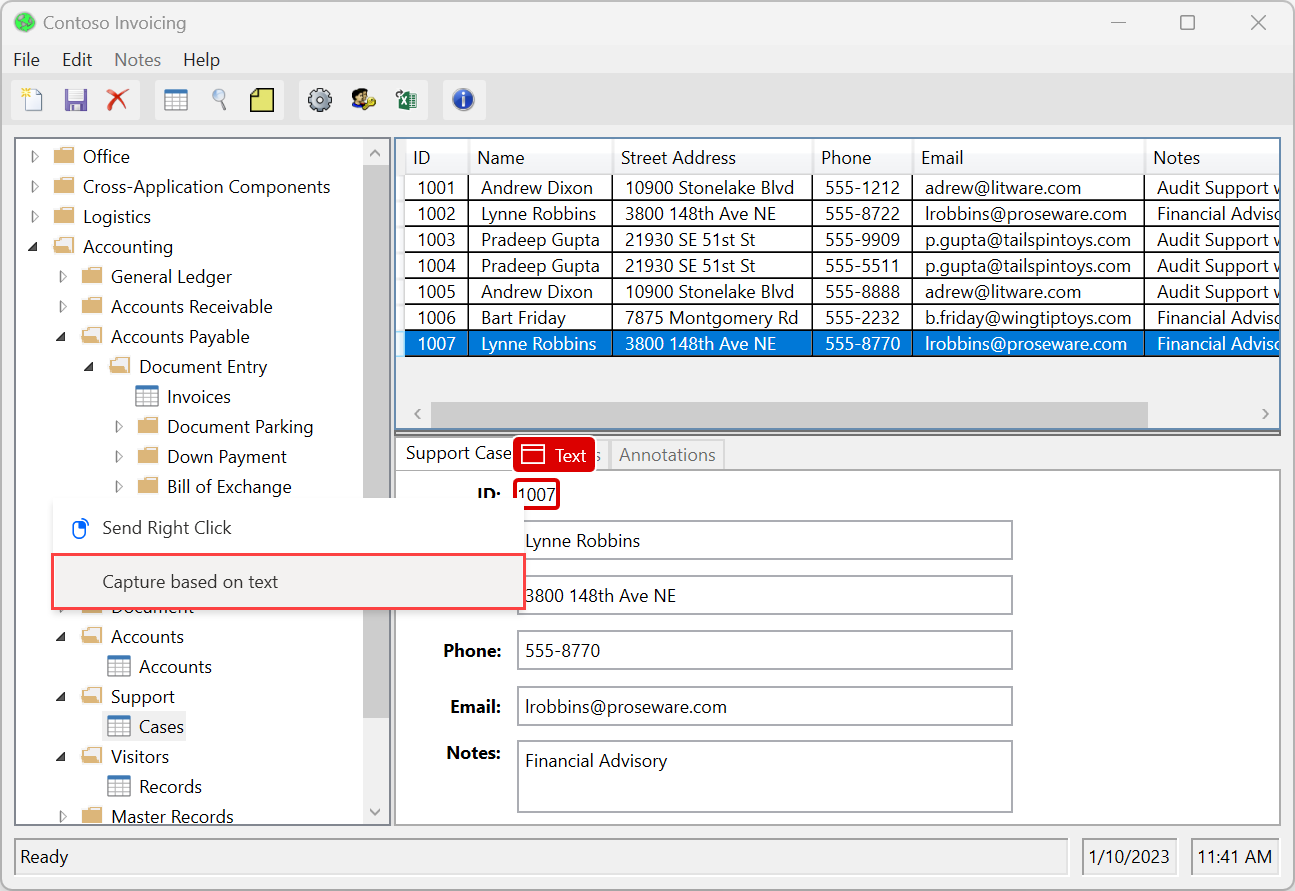
Then, a new window with two fields will appear on your screen:
- The Text value field holds the element's text as a proposed value. You can change this value to a hardcoded value or a variable.
- You can set the Operator field to various operators to adjust the functionality of the selector.
Selecting Capture will add the UI element with the proper text-based selector in the UI elements repository.
Text-based selectors use the Name attribute of the captured element for desktop automation and the Text attribute for browser automation. They're available only for UI elements that contain a text value themselves.
In other words, they're available for UI elements with a Name or Text attribute that includes a value. They aren't available for elements that don't hold such a text value, even if they have child element(s) with text in their structure.
Note
For the SAP application, text-based selectors use the Text attribute instead of the Name attribute that they generally use on desktop automation. SAP automation works more efficiently with default selectors based on the ID attribute.
Known issues and limitations
If you select Add UI element, hover the mouse over a whole window, and choose to capture a UI element based on text, a default selector will get generated. This selector includes the Process attribute apart from Name.
The combination of a variable and an operator other than Equal to generates a selector displayed in the custom text editor instead of the visual builder. This functionality avoids an existing limitation that makes the above combination nonfunctional in the visual builder.